The current processors have been developed with a system of internal cores, this has been integrated by the manufacturers and these internal cores allow the Windows 10 processor or CPU to have a higher performance than expected since the use of these internal cores allows there to be less latency when executing the required tasks..
By default Windows 10 does not take full advantage of all the processor cores and is limited to the main CPU , so if we require extra tasks in the system we can activate two or more cores (based on stories we have) in the system to improve the overall performance of this.
Processor cores what does it mean
Cores within a processor can be defined as central processing units that have autonomous functions. Among the tasks that a kernel can perform are: decoding, writing, executing and reading.
The number of cores helps to perform tasks simultaneously within a processor as if we had several. Of course, although we can execute instructions simultaneously, we must bear in mind that the speed does not depend on the number of cores as it is defined in the processor. Thus, a dual core processor can be faster than an octacore. So when buying a processor you have to take into account both the number of cores and the clock frequency or speed.
We also leave you the video tutorial to be able to activate all the Windows 10 processor cores..
To stay up to date, remember to subscribe to our YouTube channel! SUBSCRIBE
How to activate all processor cores in Windows 10
Step 1
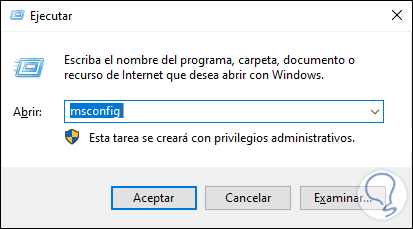
For this we will combine the following keys and in the pop-up window we execute the following command:
+ R
msconfig
Step 2
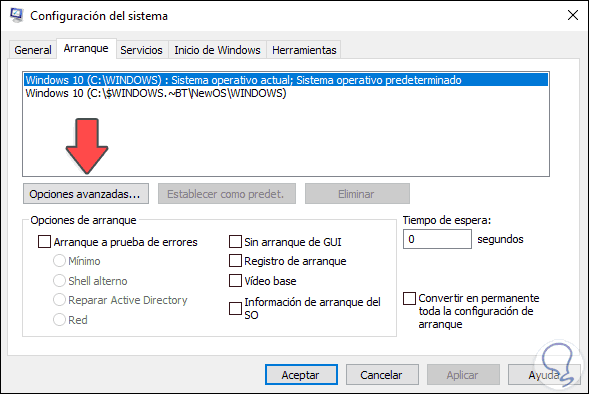
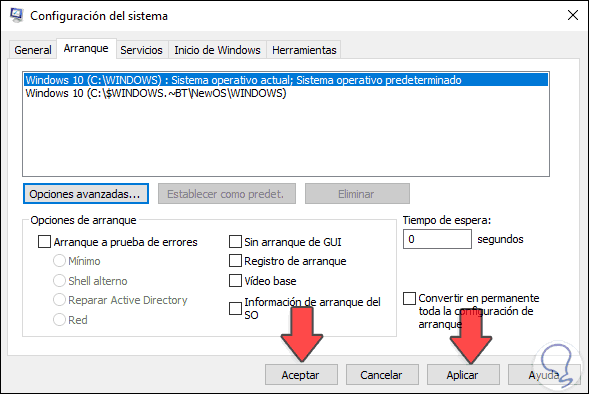
We click OK or press the Enter key and in the displayed window we go to the "Start" tab, we will see the following:
Step 3
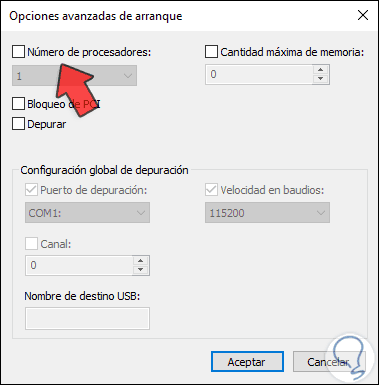
We click on the button "Advanced Options" and we will see the following:
Step 4
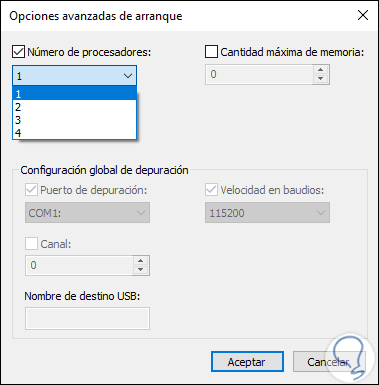
There we activate the “Number of processors” box and select the number of cores that we want to use extra in Windows 10:
Step 5
We click OK and in the main window we click Apply and OK to save the changes. After this you will be asked to reboot the system to complete the changes.
From now on, we will use more processor cores to allow us to notice speed and performance improvements when starting Windows 10 by activating all Windows 10 processor cores.