There is no doubt that today we use computers for many things, and one of them is document management. One of the most used office suite for this is Office , which integrates different applications among which we find Word , Excel or PowerPoint..
One of the most complete programs to perform hundreds of visually striking tasks is PowerPoint, which is made up of numerous graphics, media, charts, texts and other elements that will help to make the slide creation tasks as complete as possible. Thanks to this tool, we have the possibility of creating different visual benefits, with a number of elements.
Perhaps one of the many functions that we do not know about PowerPoint is the ability to create a timeline on the slide, if you did not know that this was possible, in TechnoWikis we will explain how to do it in a functional way..
How to create a timeline in PowerPoint
Step 1
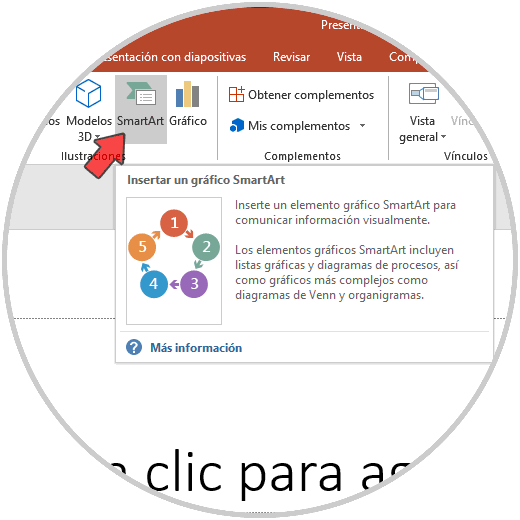
To make the timeline in PowerPoint, we open the slide and go to the "Insert" menu and in the "Illustrations" group we select "SmartArt":
Step 2
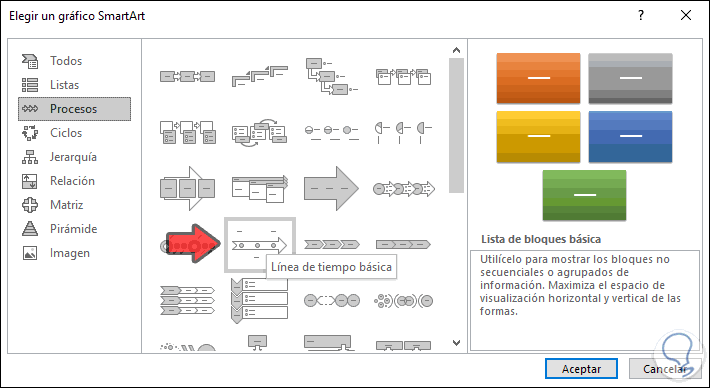
In the pop-up window we go to the “Processes” section and there we select the option “Basic timeline”:
Step 3
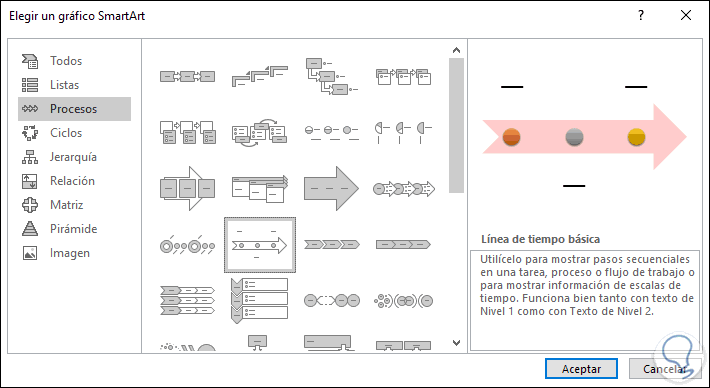
When we select it, we can see more detailed information about it:
Step 4
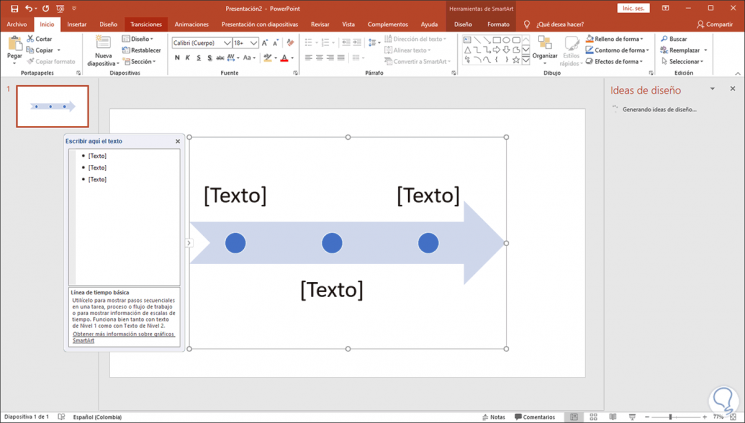
We click OK and the line will be integrated to the slide with which we are working at the moment:
Step 5
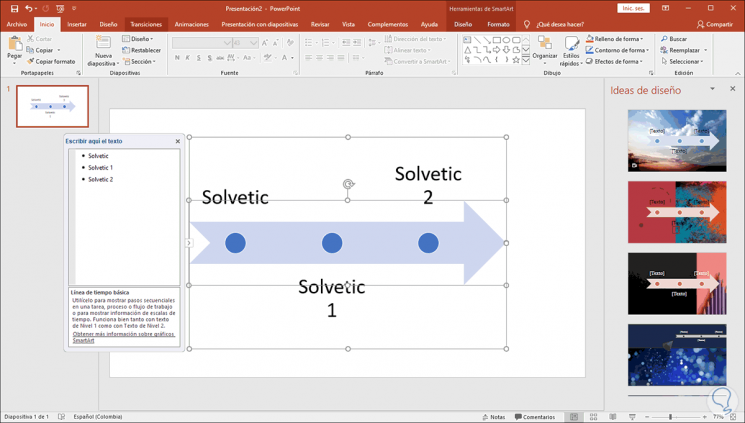
In the lateral pop-up window we can enter the text that we consider necessary:
Step 5
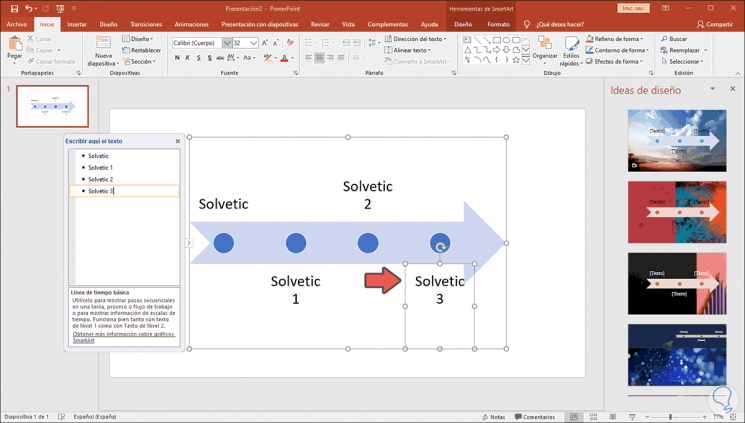
All the text we enter will be reflected in the timeline. By default, the basic timeline only has three bullets to use, if it is necessary to add any more, we place the cursor at the end of the last item in the list, press Enter and then we will enter the respective text:
Step 6
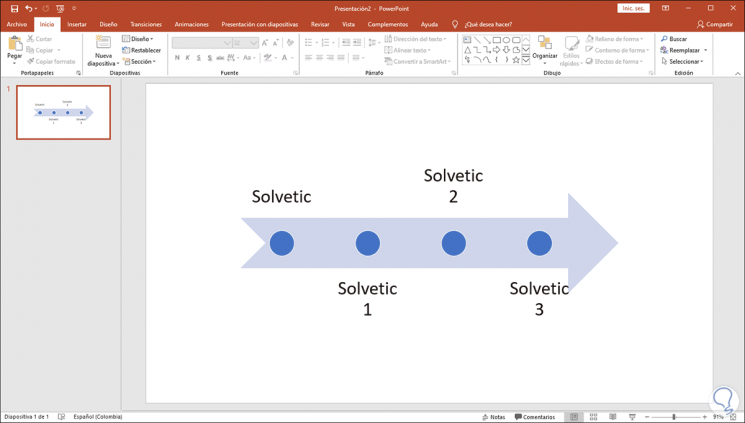
Automatically the line will adjust to the points we enter, when we finish editing the timeline we click on the X sign in the pop-up window to close the wizard.
Step 7
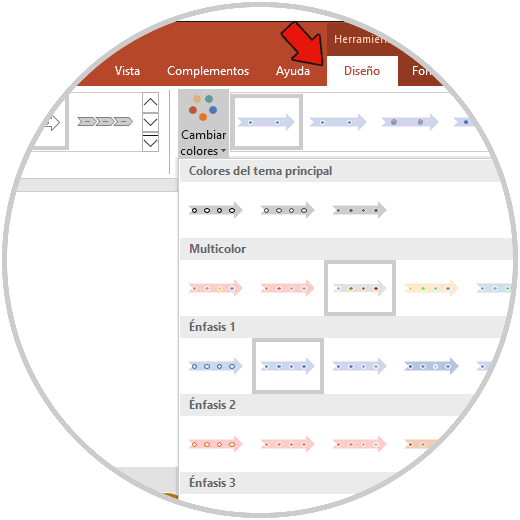
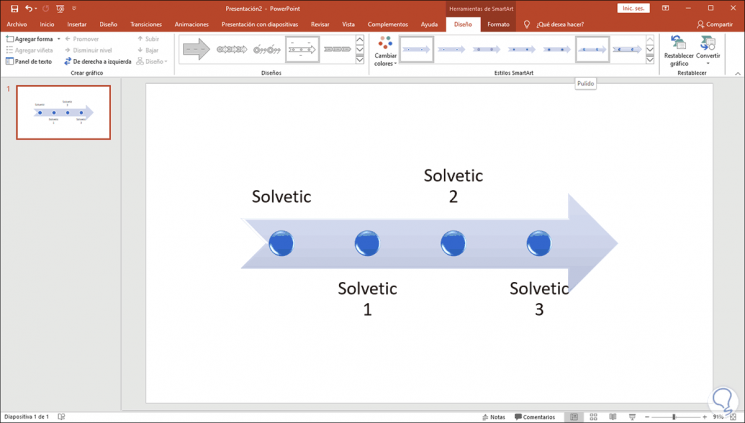
In case it is necessary to adjust the colors of the timeline with the presentation, we select the timeline and click on "Change colors" located in the "SmartArt Styles" group of the "Design" tab:
Step 8
In the same way we can edit the current style on the SmartArt Styles section:
Step 9
In Change colors we can select one of the options that best suits current needs:
Step 10
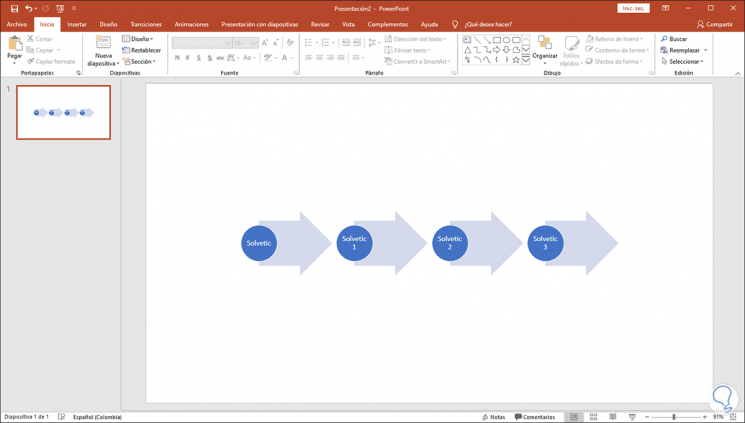
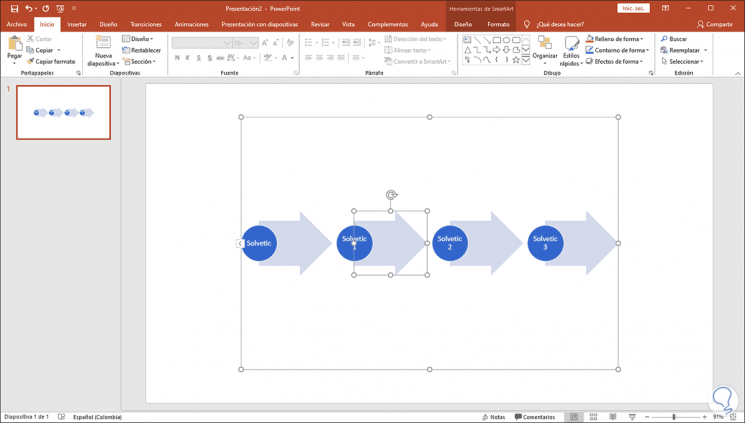
To adjust the alignment of the bullets we can do them manually by selecting the bullet and making the respective adjustments:
Step 11
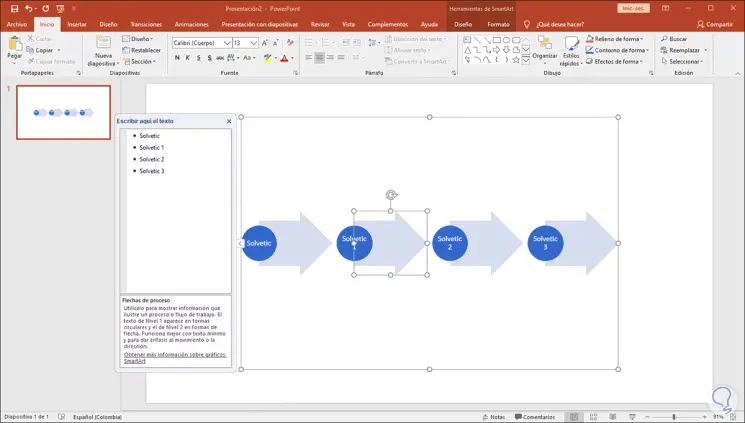
When it is necessary to edit text or add one more bullet, we must click on the "Left Arrow" icon located on the left side of the timeline and the pop-up window will be activated:
With these simple steps, it is possible to create a timeline in PowerPoint and use the data in a much more complete way.