Windows 10 is a versatile system with which we have different options so that users not only have different functions, but are also able to deliver other alternatives for use. One of these is the ability to share our Internet with other users turning our equipment into an access point or hotspot which simply allows other devices to connect to the Internet through our equipment..
Having the Internet on our devices is less and less a privilege since it is something really widespread. The truth is that, although we have unlimited data in many cases on our devices, WiFi connections are still a great option to connect thanks to their high speeds. Thanks to the Internet sharing option, we will be able to supply Windows 10 Internet to someone who does not have it at the time or even ourselves.
We also leave you the video tutorial to share WiFi internet without programs..
To stay up to date, remember to subscribe to our YouTube channel! SUBSCRIBE
1. How to activate internet sharing in Windows 10
Step 1
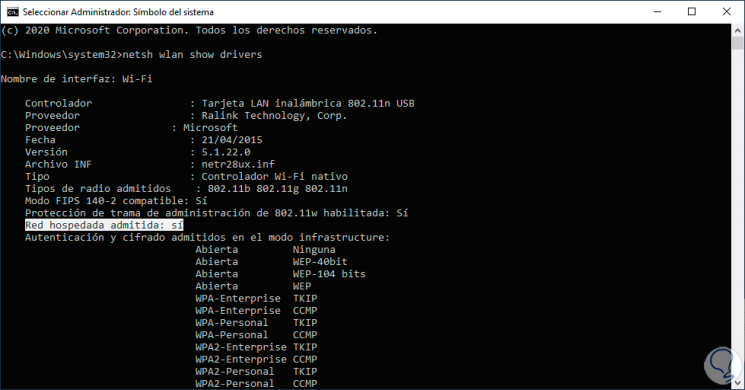
The most essential thing for this is that the Wi-Fi network card supports the legacy mode, we check this by accessing the command prompt as administrators and executing the following:
netsh wlan show drivers
Step 2
In the result we must go to the section "Supported Hosted Network" and if its value is "yes" we can go ahead:
By activating this function and creating our network, we can connect from any device as we will see later.
2. Share Internet or WiFi Windows 10
Once we define that the network card is compatible with the access point, we are going to create the SSID (network name) and assign the access password to it.
Step 1
For this we execute the following:
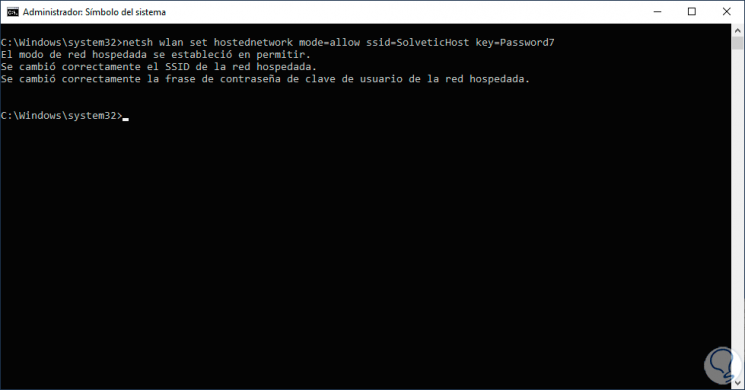
netsh wlan set hostednetwork mode = allow ssid = TechnoWikisHost key = Password7
Step 2
In this case the Wi-Fi network will be called "TechnoWikisHost" and the password will be "Password7", we press Enter and we see that such network is created in Windows 10:
Step 3
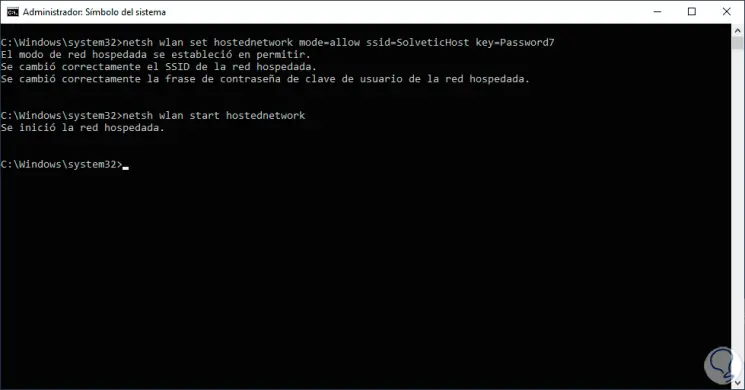
Now it is time to enable and start this network, for this we execute the following in the terminal. As we can see, the hosted network has been started correctly.
netsh wlan start hostednetwork
Step 4
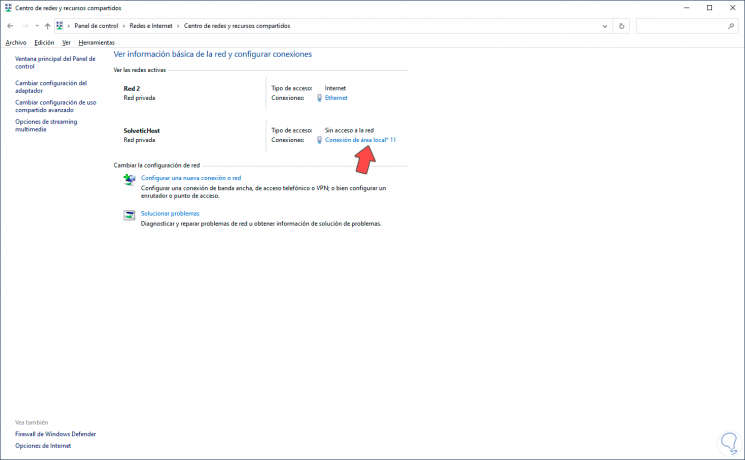
To validate all this, we will go to the following route:
- Center network and sharing
Step 5
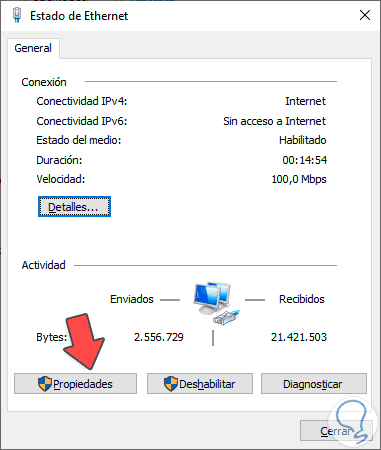
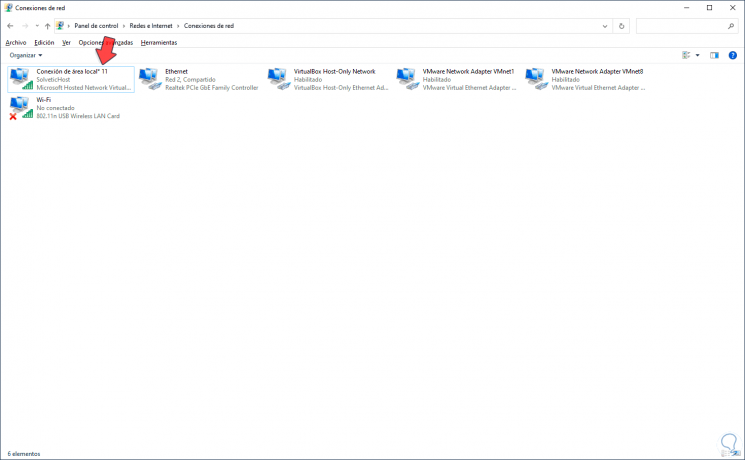
There we can see that Windows has assigned the name "Local Area Connection 11" to the created network, but it does not have access to the network yet, this is because, being a hosted network, it must be linked to the current and active connection, for this, we click on the name of the active network and we will see the following:
Step 6
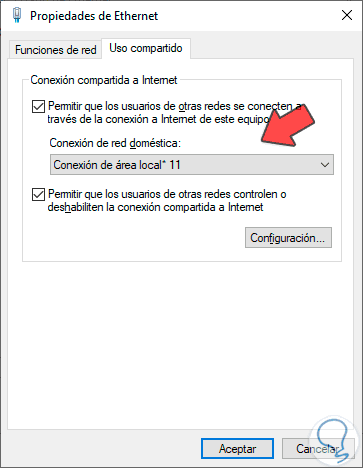
We click on "Properties" and in the next window we go to the "Sharing" tab and there we activate the box "Allow users from other networks to connect through the Internet connection of this computer" and in the field " Home network connection ”we select the network that has been created, in this case“ Local area connection 11 ”:
Step 7
We click OK and we can see that this adapter already has connectivity to the network:
Step 8
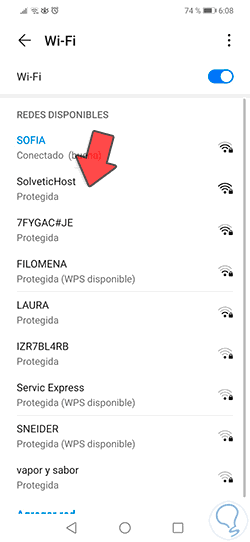
To check that everything works we can go to any Wi-Fi device and check that the created network is available for connectivity:
With these steps and with the legacy network configuration, we will be able to offer the Internet to other users with our equipment..