When we work with our computer, we generally create and receive different files for the management of our data. Microsoft Excel is undoubtedly one of the best options for working large data files and representing them in an orderly and complete way thanks to its functions, formulas and integrated utilities. There is no doubt that Excel offers great possibilities when it comes to managing this type of content..
That is why perhaps on certain occasions we want some other user to lend us a hand in data management or because some files require that they be worked by different users either simultaneously or at different times, such as created and administrators of the archive. In these cases it is ideal to know which person has made a change in order to have precise control over it.
That is why we will now explain how to use an Excel file so that it can be used simultaneously by different users..
To stay up to date, remember to subscribe to our YouTube channel! SUBSCRIBE
How to create a shared file in Excel 2016/2019
Step 1
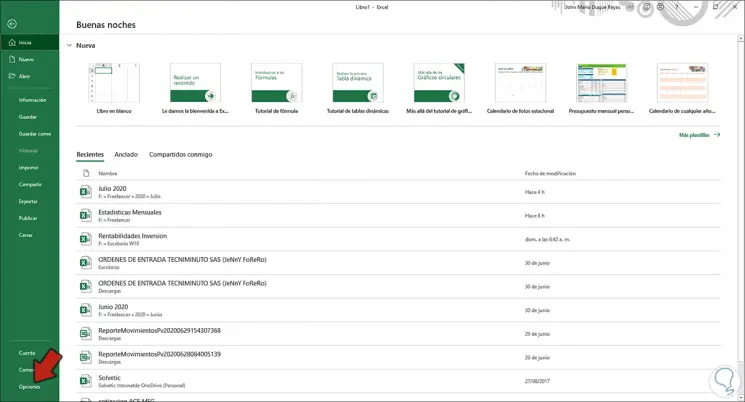
The first thing will be to enter some data in the spreadsheet and then we go to the File menu. We click on "Options"
Step 2
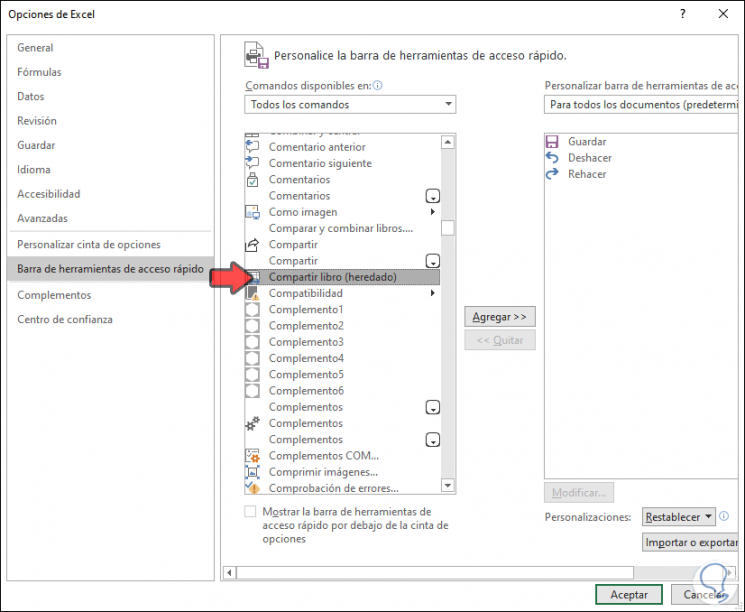
In the displayed window we go to the section "Quick access toolbar" and at the top we select "All commands", in the central panel we locate the command called "Share book (inherited)":
Step 3
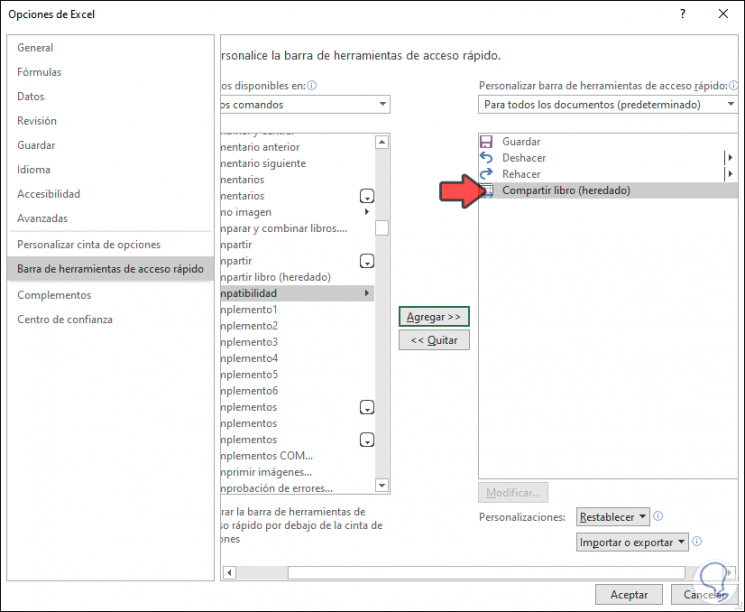
We click "Add" and we will see that this command is added to the quick access. We click OK to save the changes.
Step 4
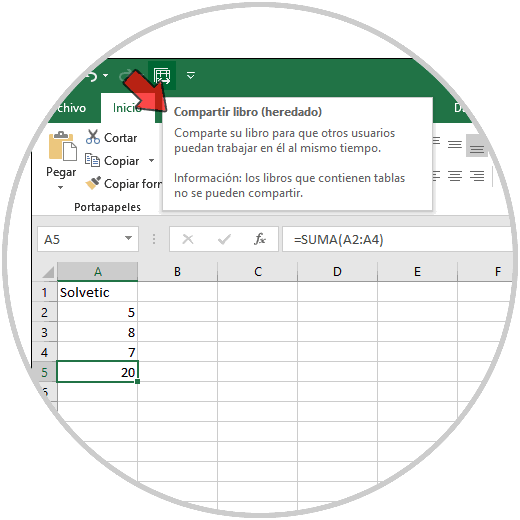
Now in the spreadsheet we can see the option to Share book (inherited) at the top:
Step 5
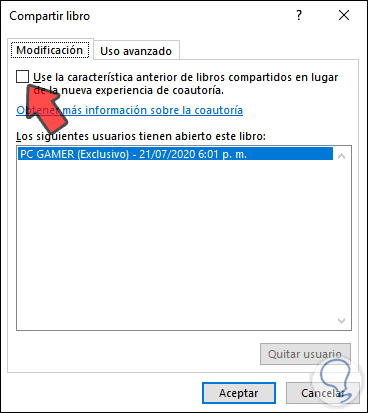
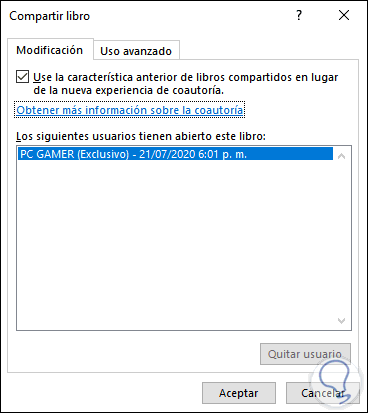
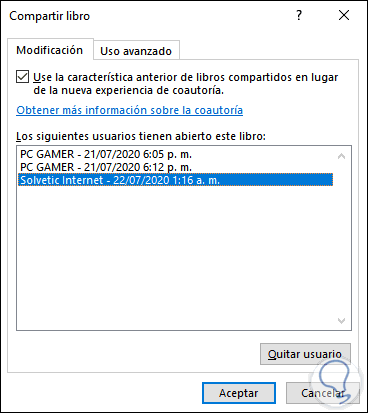
We click there and we will see the following. There are the changes that have been made, in this case by the current user with date and time, we activate the box "Use the new shared books feature instead of the new co-authoring experience"
Step 6
Co-authoring in Excel allows other users to have power over the current file:
Step 7
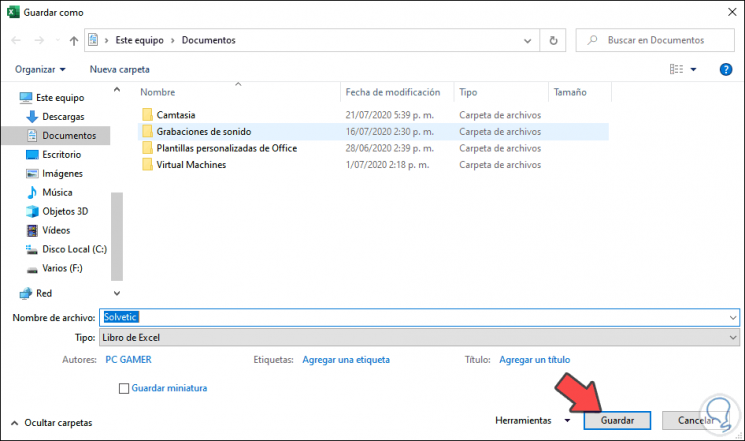
Once activated we click OK and proceed to save the book:
Step 8
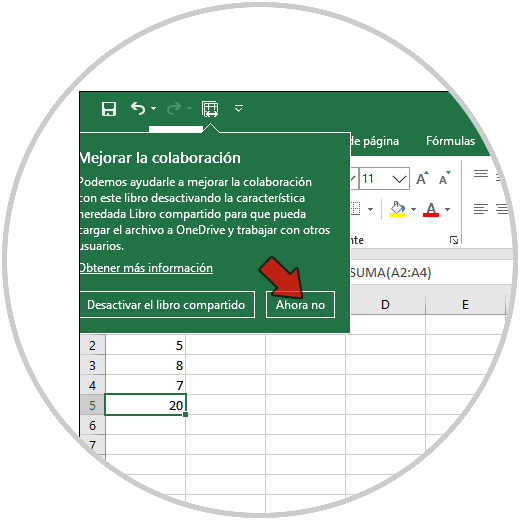
Once saved we will see the following. We click on “Not now”.
Step 9
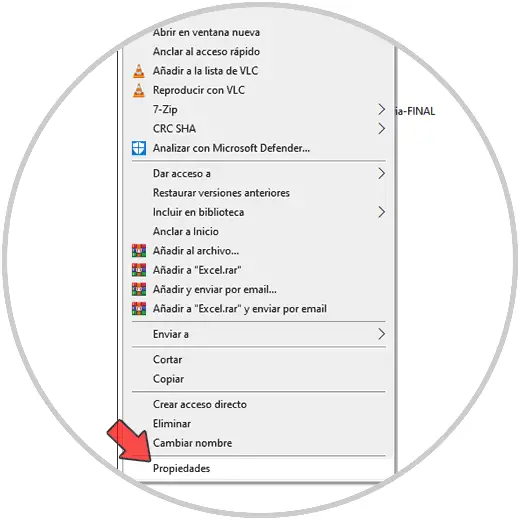
Now we go to the folder where we have saved the Excel workbook, we right click on it and select "Properties":
Step 10
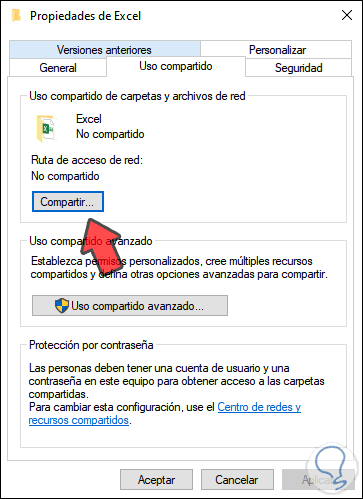
In the displayed window we will go to the "Sharing" tab where we will see the following. We click on “Share”
Step 11
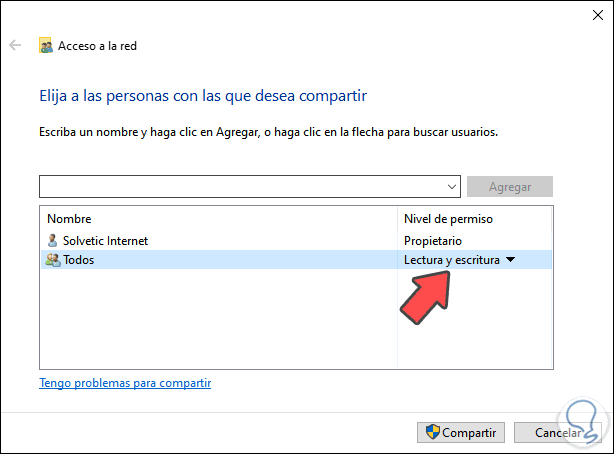
In the pop-up window we select "Everyone", add it and give it read and write permissions:
Step 12
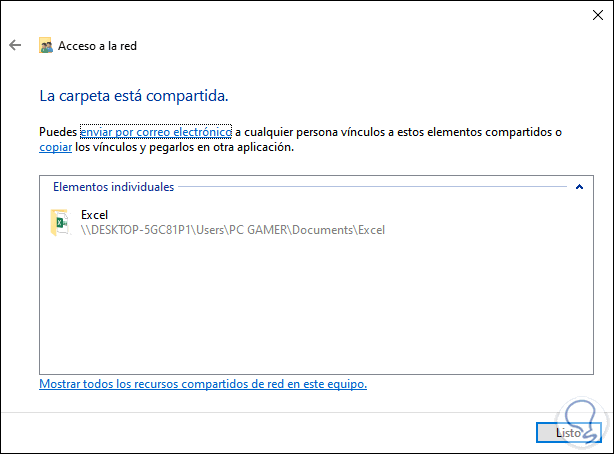
We click on the "Share" button and we will see the route assigned for this purpose. We click Done and close the previous window.
Step 13
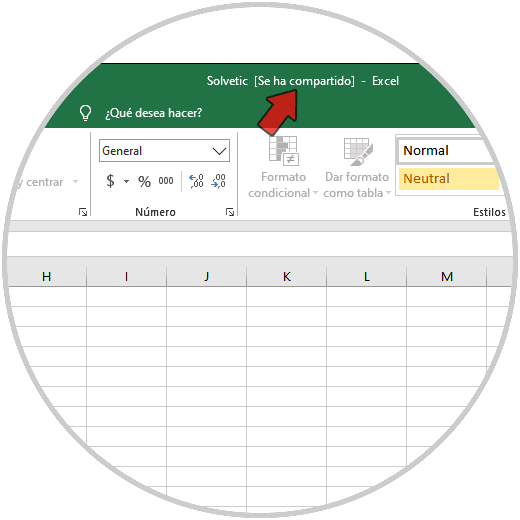
We access the folder and open the Excel file that we have configured again, at the top we can see that the legend “It has been shared”:
Step 14
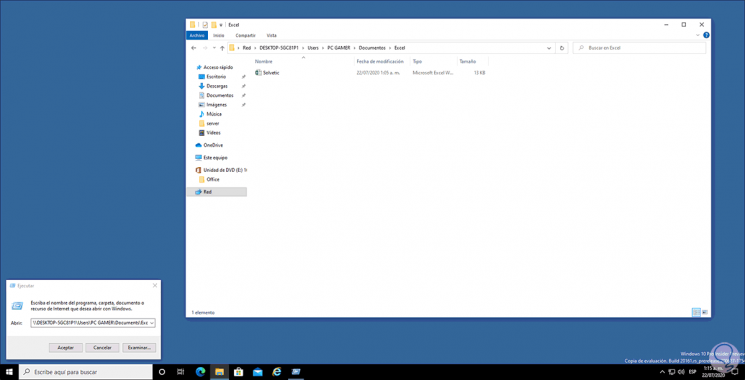
Now we access another computer and we can go to the Excel file using two methods:
- From Run enter the path of the shared folder
- From Network in File Explorer
Step 15
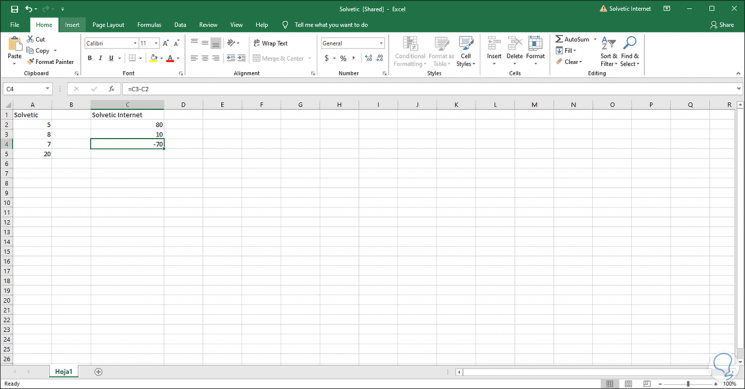
On the destination computer we open the Excel file and edit what we want in:
Step 16
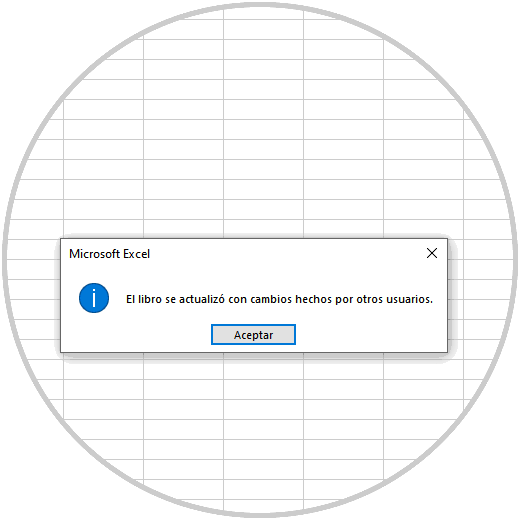
We save the changes in the file, go to the source Excel file and click Save and we can see that the remote changes are applied and a message is displayed with the warning:
Step 17
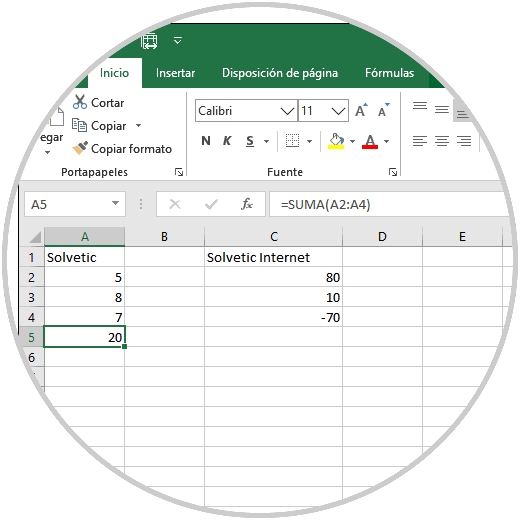
We accept the message and we will see the new edition:
Step 18
It is possible to click on the “Share book (inherited)” command to review the change history:
In this way we have learned to share a book in Excel and manage who makes changes to it.