Windows 10 integrates security mechanisms that protect data and files from various attacks, one of these mechanisms is EFS. EFS (Encrypting File System) has been developed as an encryption service available in Windows 10 Pro, Enterprise and Education editions. With this Windows 10 encryption system we can easily protect our information and thus avoid unwanted alterations. If we want, we can both know the EFS activation and deactivation process..
EFS gives us the possibility to encrypt files and folders individually and its advantage is that this encryption is directly linked to the user of the computer, that is, if a different user logs in to the user who performed the encryption process for the files, the files will be inaccessible to this user.
We will learn how to enable or disable EFS in Windows 10 through different methods..
To stay up to date, remember to subscribe to our YouTube channel! SUBSCRIBE
1. Enable or disable EFS Windows 10 from GPO
Step 1
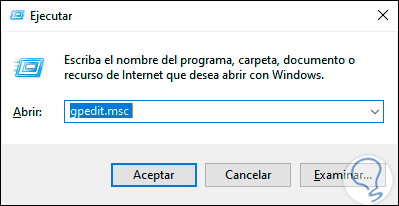
This editor is only available in Windows 10 Pro, Enterprise or Education, to access it we open Run and enter the following command:
gpedit.msc
Step 2
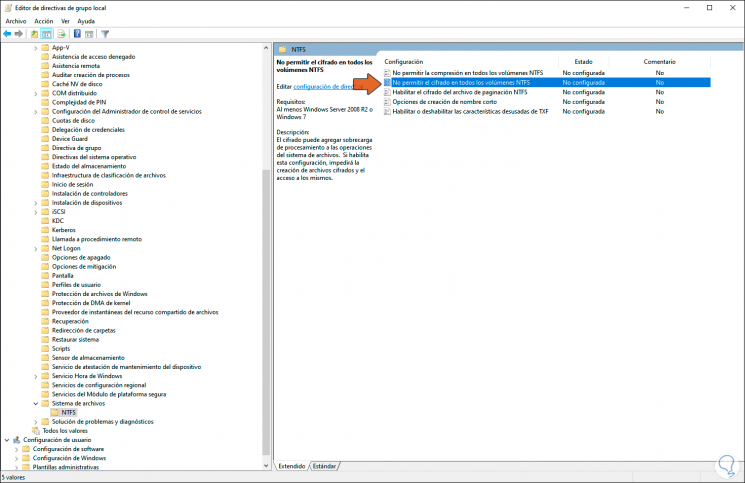
We click OK or press the Enter key and in the editor we will go to the following path:
Step 3
There we must locate the policy called "Do not allow encryption on all NTFS volumes":
Step 4
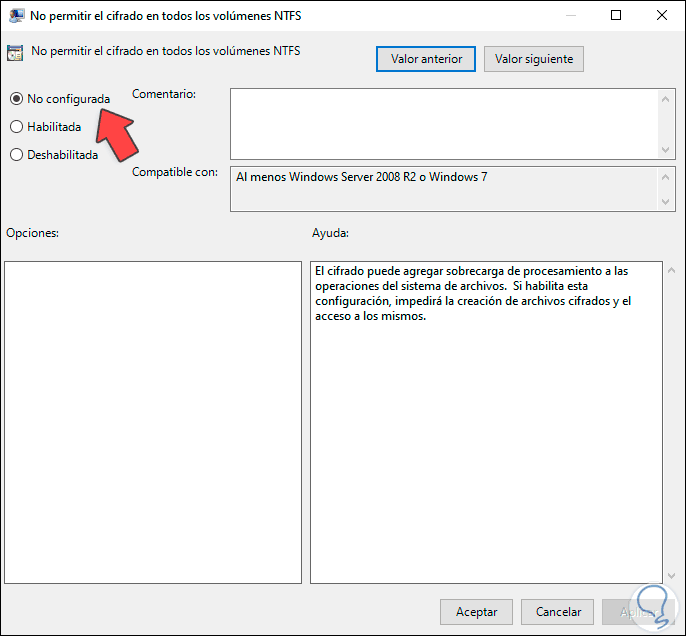
We double click on this policy and we will see the following. To activate the EFS encryption we must leave the default option or activate the “Disabled” box and to deactivate it we activate the “Enabled” box. We apply the changes and accept.
2. Enable or disable EFS Windows 10 from CMD
The command prompt console allows us to perform this process in a simple way.
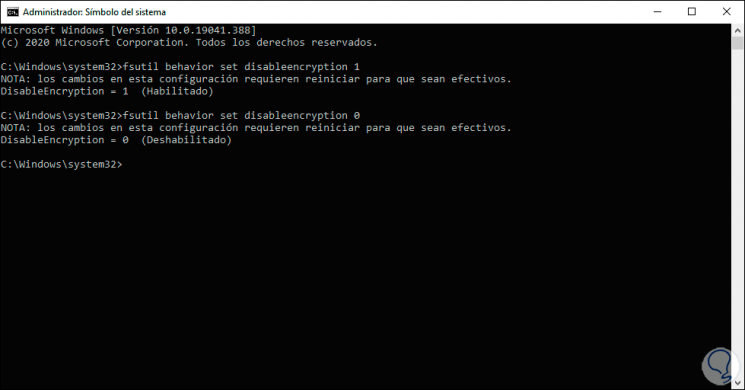
For this we must access as administrators and in the console execute the following. A reboot is required to apply the changes.
To disable EFS: fsutil behavior set disableencryption 1 To activate EFS: fsutil behavior set disableencryption 0
3. Enable or disable EFS Windows 10 from Registry Editor
Step 1
Before this process it is advisable to create a backup copy. After this we access Run and use the command "regedit":
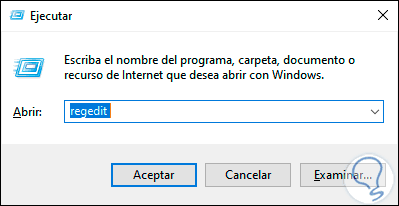
Step 2
We click OK and we must configure two values, first, we will go to the following route:
HKEY_LOCAL_MACHINE \ SYSTEM \ CurrentControlSet \ Policies
Step 3
We right click on that key and select "New - DWORD Value (32 bits)":
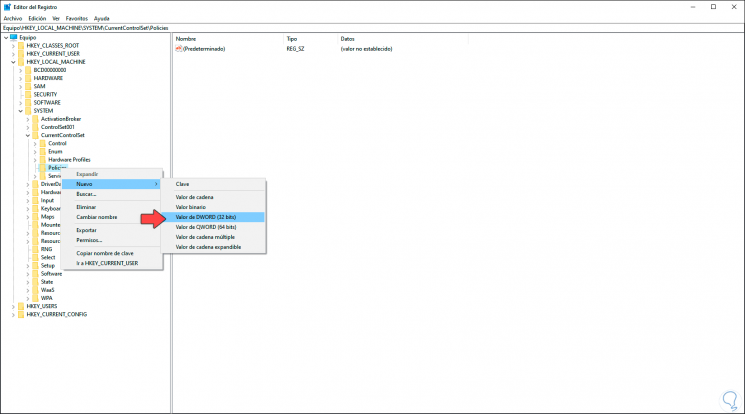
Step 4
This DWORD value will be called "NtfsDisableEncryption":
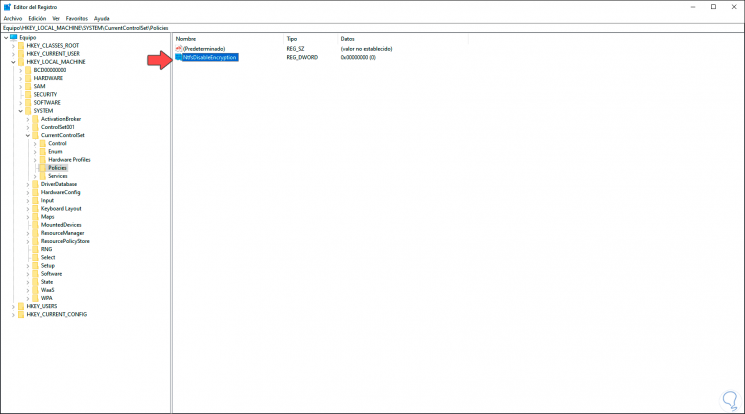
Step 5
We double click on this value and to deactivate it we set its value to 1 and to activate it we leave it at 0. We apply the changes.
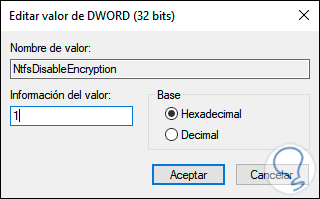
Step 6
Now we will go to the following route:
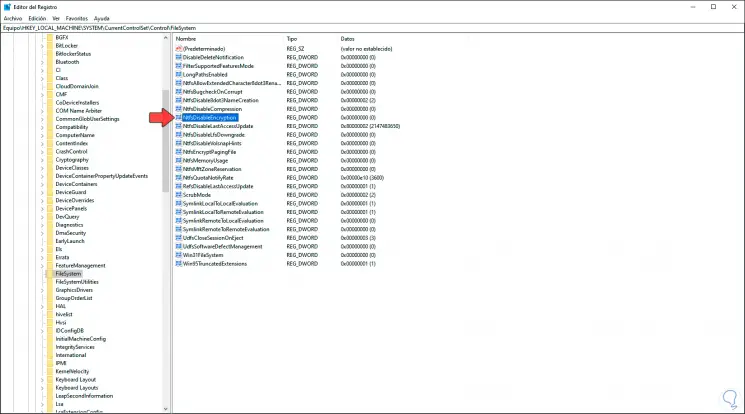
HKEY_LOCAL_MACHINE \ SYSTEM \ CurrentControlSet \ Control \ FileSystem
Step 7
There we locate the DWORD value "NtfsDisableEncryption":
Step 8
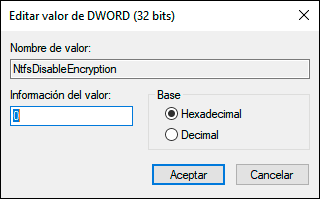
We double click on it and set its value to 1 to disable it or to activate it we leave it at 0. We click OK and we must restart the system to complete the changes.
4. Enable or disable EFS Windows 10 from Local Policies
Step 1
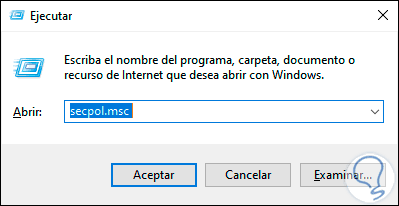
This is another of the mechanisms available in Windows 10 to activate or deactivate EFS, for this we open Run and enter:
secpol.msc
Step 2
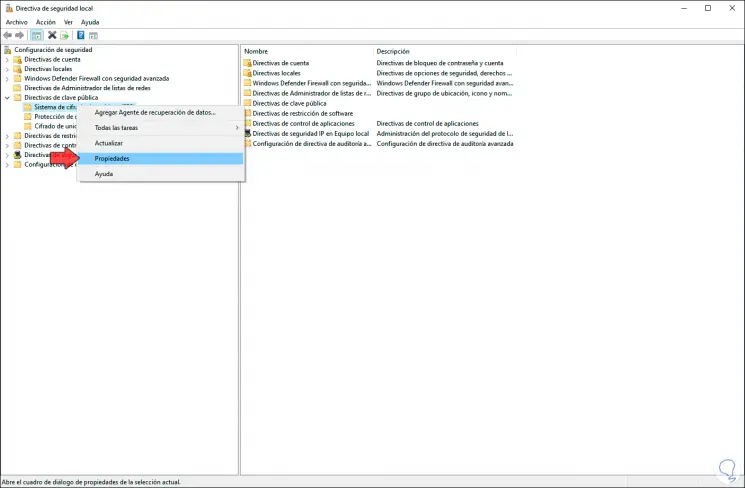
We click OK and in the editor we go to "Public Key Policies" and we right-click on "File Encryption System (EFS)" and select "Properties":
Step 3
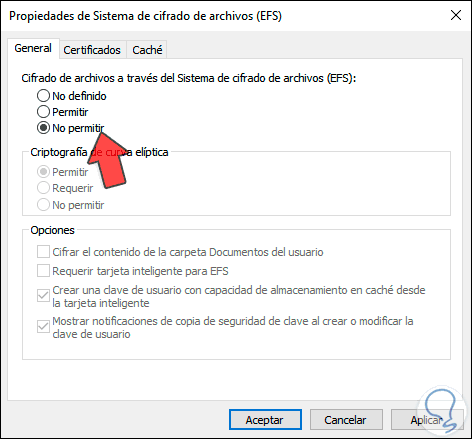
In the pop-up window we go to the "General" tab and activate the "Do not allow" box. We click Apply and OK to save the changes. To activate EFS we must check the "Allow" box.
Step 4
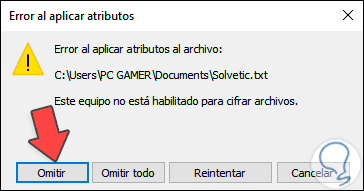
If EFS is disabled when trying to encrypt an element we will see the following:
With some of the methods taught by TechnoWikis we are able to activate or not EFS in Windows 10..