Backups are one of the most practical, simple and popular methods to preserve the integrity and availability of information since by having one or more backups, we will know that a backup of the information will be available for use. determined date, this will logically vary based on the relevance and importance of the information used..
Thinking about this security aspect , Microsoft has decided to integrate in Windows 10 a functionality called File History, which as its name gives clues, has been developed with the purpose of creating a backup of the information or data that are considered sensitive for us from each of the default Windows 10 libraries or from the folders we decide to add to this history.
Although it is a function already used in Windows 8, it has been substantially improved in Windows 10 for data backup issues, so that for the file history to work correctly, the use of the file system will be necessary NTFS (Windows 10 default). In addition to this, it is based on the NTFS journal function which allows you to analyze and detect changes in the files, so any changes that occur will be automatically updated in the copies created..
If we decide to use this function of the Windows 10 file history, we must define where the copies will be hosted and the options we have are:
- We can make use of an externally connected unit such as a USB memory or an external disk.
- It will be possible to make use of a unit in a network.
As we have mentioned, by default the File History will only create backup copies of the files stored in the Documents, Music, Images, Videos and Desktop libraries, as well as the OneDrive files available offline, but we can add more folders so TechnoWikis will explain how to enable (or disable) File History, as well as add new folders for backup.
To keep up, remember to subscribe to our YouTube channel! SUBSCRIBE
1. How to enable Windows 10 File History from the Control Panel
Step 1
To enable this functionality in Windows 10 we will go to the Control Panel and there we will see the following:
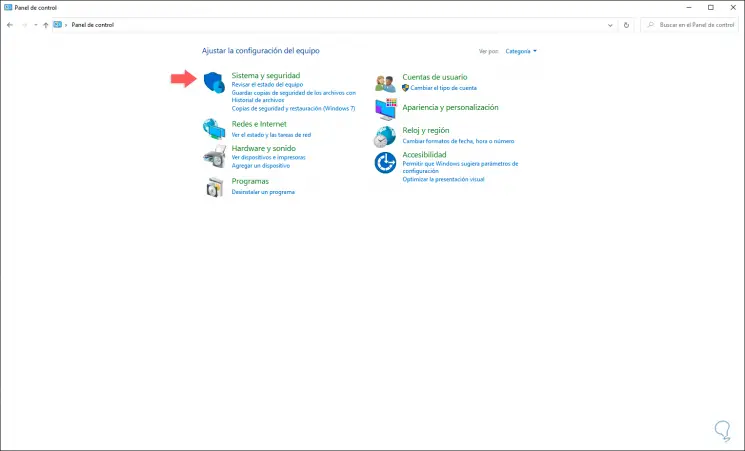
Step 2
There we go to the category "System and security" where we will see the following:
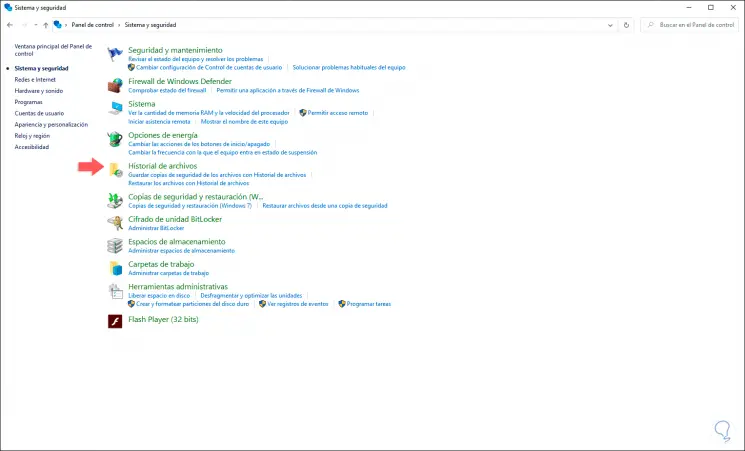
Step 3
There we click on the “File history†line to be redirected to the following window:
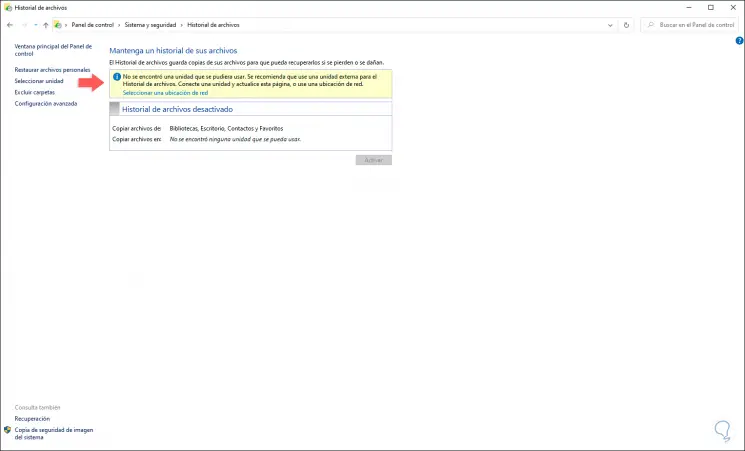
Step 4
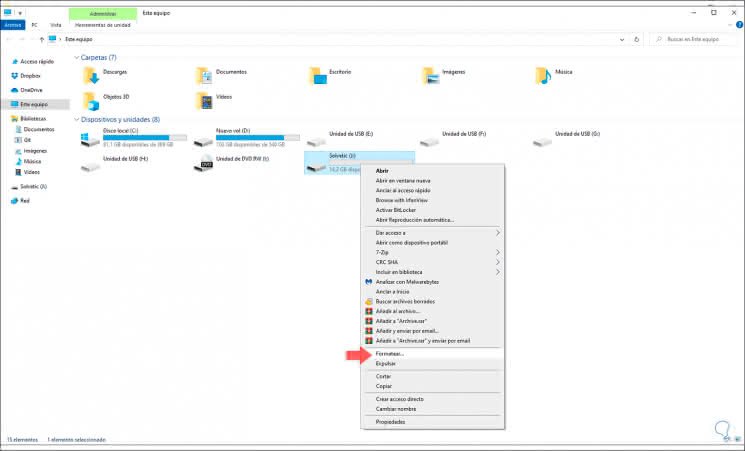
As we see in this case, a backup unit has not yet been connected, now, if the unit we want to connect does not have the NTFS file system, we must format it for that purpose, it is simple, for this you go to the File Explorer and right click on the unit and select "Format":
Step 5
In the displayed window we select NTFS in the "File system" field:
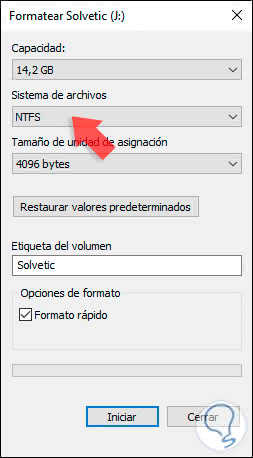
Step 6
We click on Start and the following warning will be displayed:
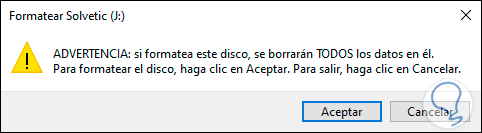
Step 7
Click on accept and once the process is finished we will see the following:
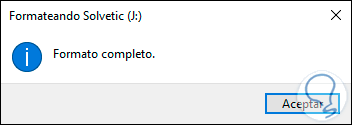
Step 8
We click OK to close the wizard and we are ready to update the File History window where we will see the following:
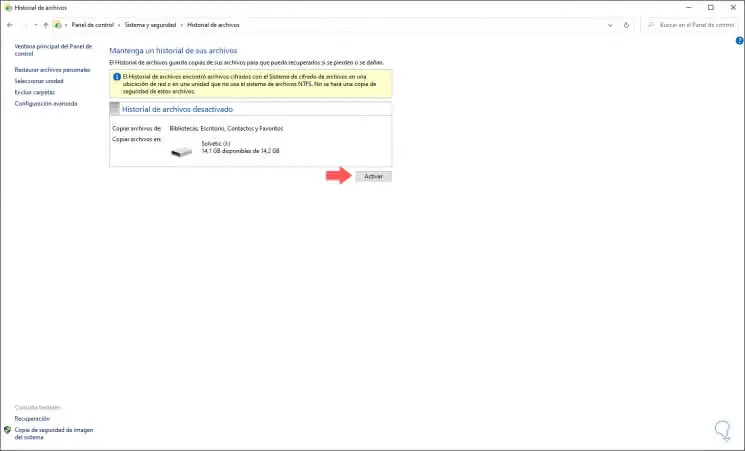
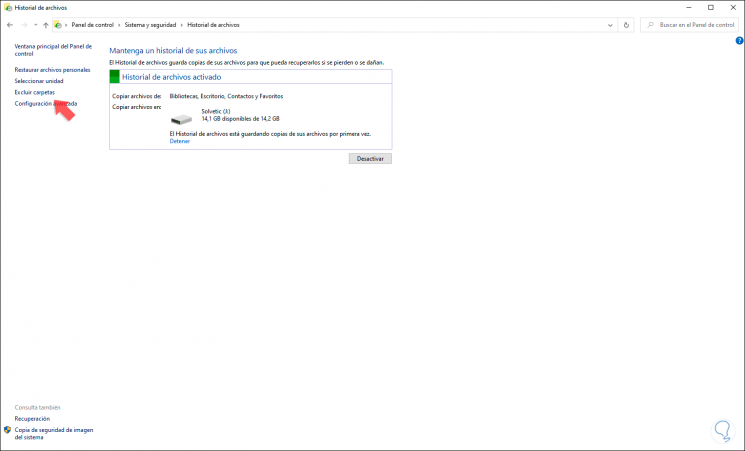
Step 9
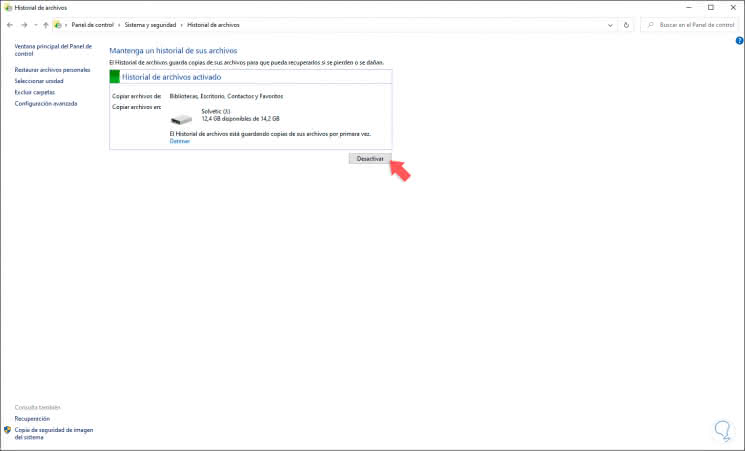
To activate the File History we click on the “Activate†button and after a short time we access the general options of the File History:
Step 10
We can access options such as:
- Disable File History with that particular drive
- Restore files that have been added in previous copies
Step 11
For example, by clicking on the “Exclude folder†line we will see the following:
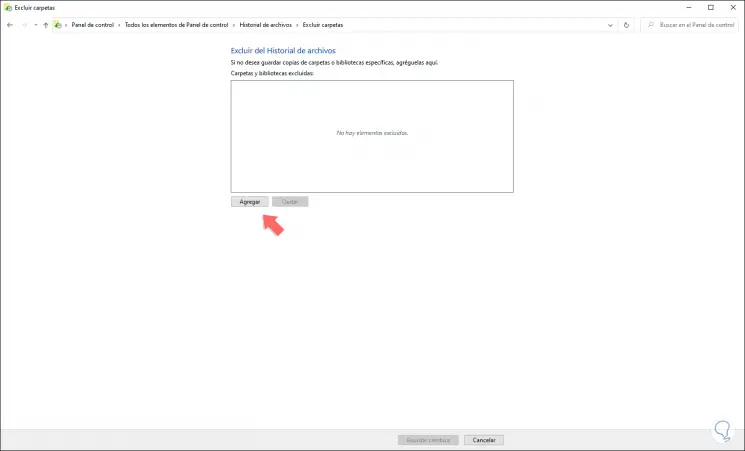
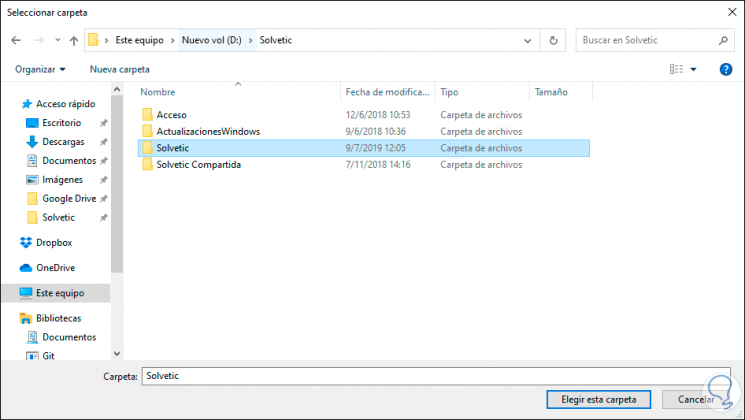
Step 12
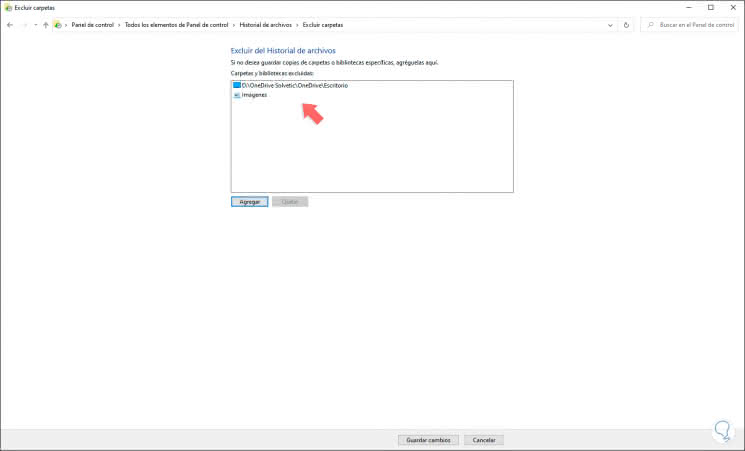
There we click on “Add†and in the pop-up window we define which folder will be excluded:
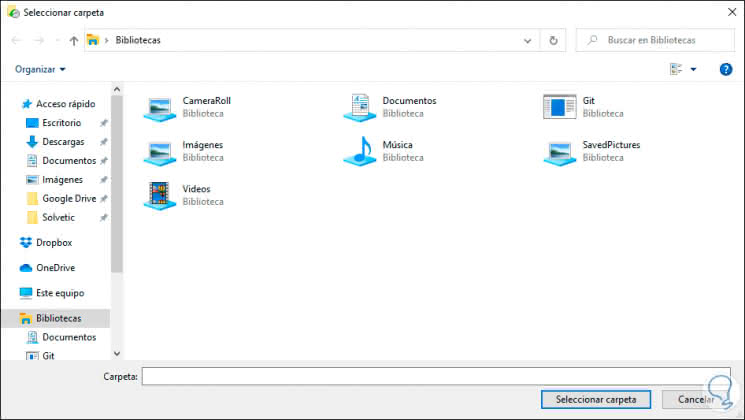
Step 13
We click on “Select folder†and we will see that library or folder is excluded:
Step 14
In the section "Advanced configuration" we will see the following:
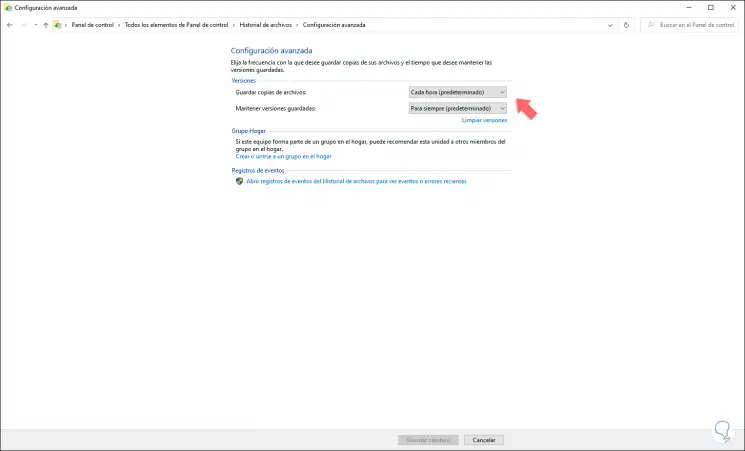
Step 15
As we see, there it is possible to perform actions such as. By clicking on the “Restore personal files†line we can select the copy that has been created previously.
- Define the frequency with which copies are created and as we see their default value is every hour, but we can specify every 10, 15, 20 or 30 minutes, every hour, three, six or twelve hours or daily.
- We can define how long the copies will be kept, we can define until space is needed or every 1, 3, 6 or 9 months or up to 1 or 2 years, note that its default value is always.
- Possibility of adding a home group and more.
2. How to disable Windows 10 File History
At the moment we want to disable this functionality in Windows 10, we can do it from the Control Panel in the indicated path by clicking on the “Disable†button. By clicking there we will see that the function has been disabled..
3. How to enable or disable Windows 10 File History from Settings
Step 1
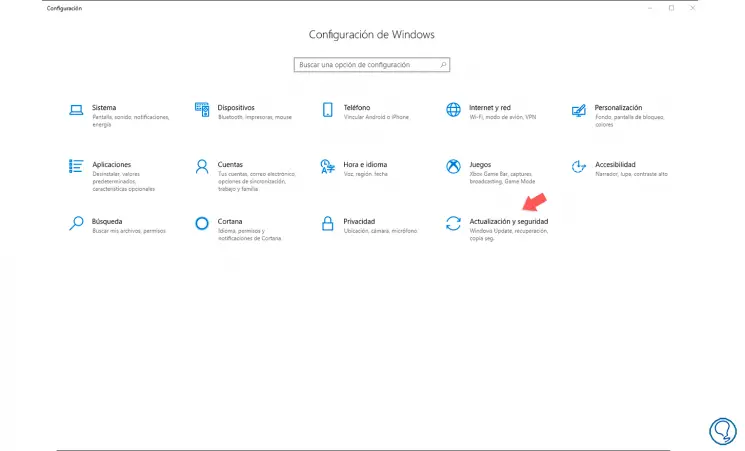
The Configuration utility has been integrated into Windows 10 as a central point to manage the system and its components, if we want to activate or not the File History function from there we must go to the Start / Configuration menu, we will see the following:
Step 2
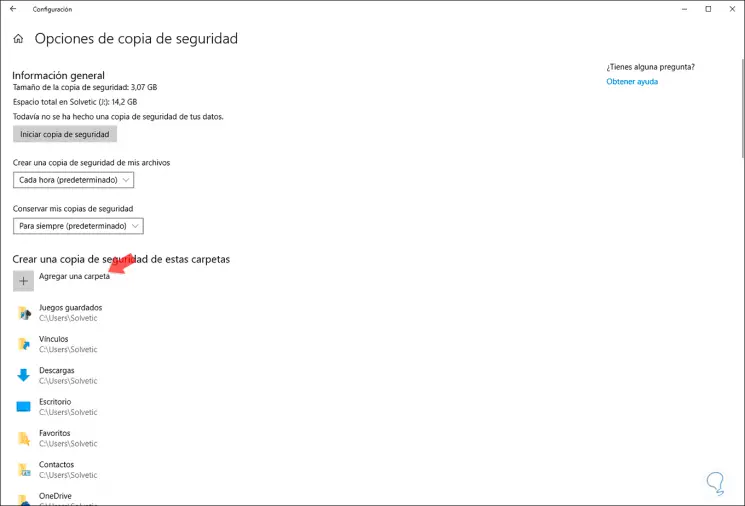
There we go to the “Update and security†category and in the next window we select “Backupâ€:
Step 3
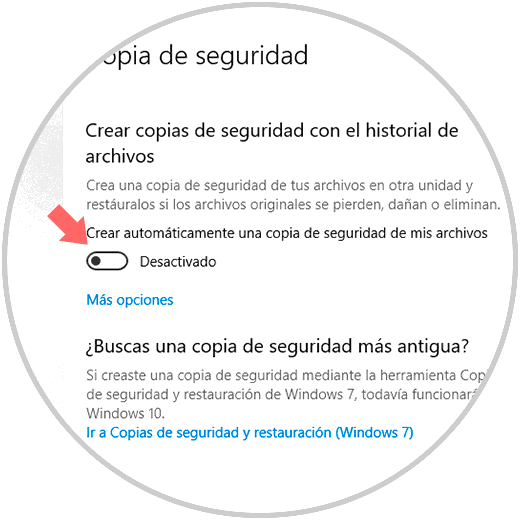
There we activate the “Automatically create a backup copy of my files†switch and click on the “More options†line where we will see the following:
Step 4
There we have options such as:
- Run the backup immediately
- Define the frequency and permanence of the backup in the unit
- Stop using the current unit and add more units
Step 5
From the Configuration option it will be much more practical to add the folders to backup, just click on “Add a folder†and proceed with your selection. To disable this functionality from there, just click on the switch mentioned above so that its status becomes disabled.
Thanks to the File History function we can see how the options to create and manage backups in Windows 10 are really wide and functional.