Surely it has ever happened to you that when you are working quietly in Windows 10 from one moment to another a blue (or sometimes green) screen appears where system information is collected and it restarts to restore the normal session, has it happened to you? If your answer is yes, TechnoWikis has created this tutorial for you and we will not focus on explaining what is the blue screen (call of death) or codes but the functionality of Windows that allows you to recover the execution environment when the system later of some failure it cannot be started and it is the Windows Recovery Environment function..
What is Windows Recovery Environment?
Windows Recovery Environment or Windows Recovery Environment (WinRE) has been integrated into Windows 10 as a recovery environment through which it will be possible to repair various failures that prevent the operating system from booting normally.
WinRE advantages
WinRE is based on the Windows preinstallation environment (Windows PE) and one of its great advantages is that we can configure it as necessary in aspects such as:
- Optional Windows PE components
- Diagnostic and troubleshooting tools and more
By default, WinRE is preloaded on Windows 10 in the Home, Pro, Enterprise and Education editions, as well as in Windows Server 2016 and 2019 installations.
WinRE Utilities
WinRE integrates utilities such as:
- Automatic repair and other troubleshooting tools.
- Reset by button which is a tool with which as users we can repair the equipment while retaining important data and personalizations, avoiding creating a data backup.
WinRE operation
Now, WinRE takes action in situations such as:
- Two consecutive shutdowns within the range of two minutes after the end of system startup.
- Two consecutive failed attempts to start the Windows 10 operating system.
- BitLocker error on touch devices.
- Two consecutive system restarts within two minutes after login.
When WinRE is activated we will access the advanced start of Windows 10:
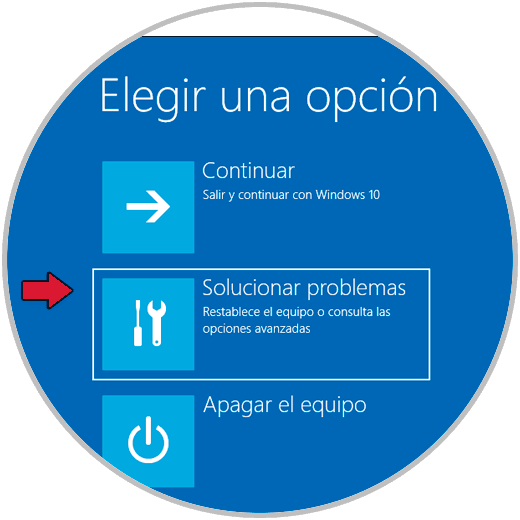
As we mentioned, the Windows recovery environment is enabled by default in Windows 10 and we can validate its current status, as well as activate it or not if necessary and TechnoWikis will explain how to do it in a practical way..
To keep up, remember to subscribe to our YouTube channel! SUBSCRIBE
1. View and check WinRE status in Windows 10
Step 1
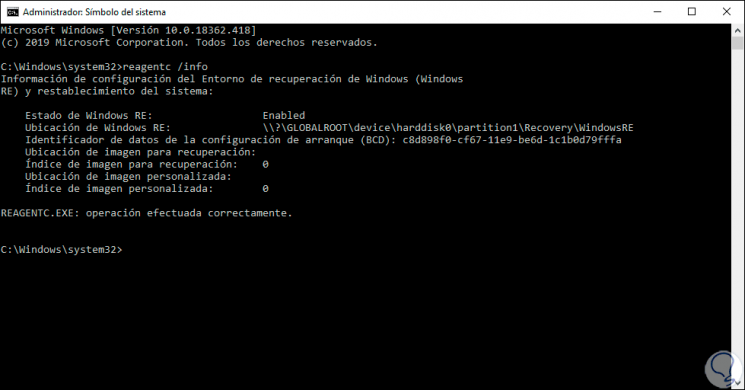
For this process, we access as administrators the command prompt of Windows 10 and there we execute the following command:
reagentc / info
Step 2
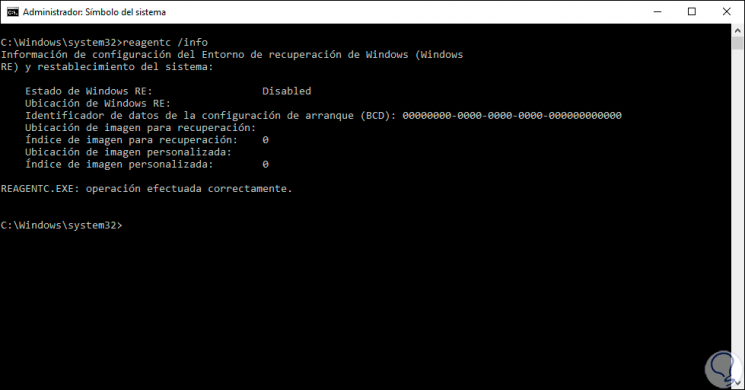
There we will access details such as. If you see the Enabled message it means that WinRE is active, if you see the Disabled message it will be disabled.
- Location of the custom image if we have created it and more
2. Disable WinRE in Windows 10
Step 1
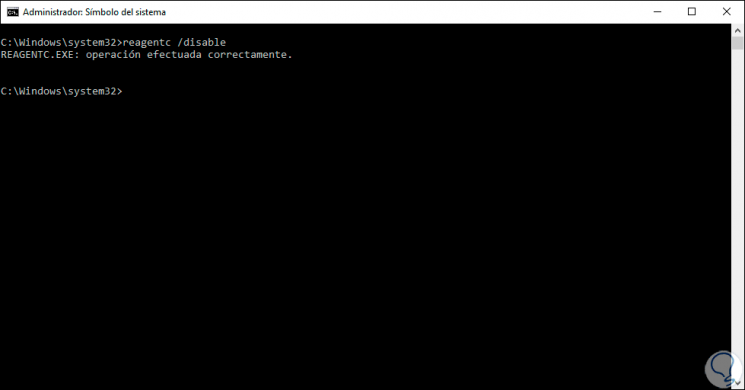
To disable this functionality in Windows 10 we must execute the following order in the terminal:
reagentc / disable
Step 2
We can verify that the order has been applied correctly:
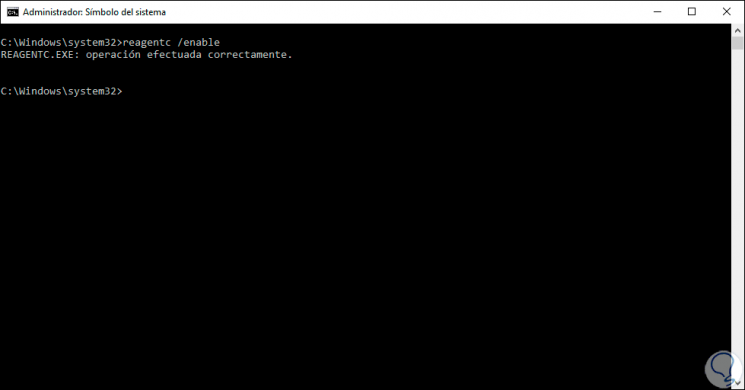
3. Enable WinRE in Windows 10
Finally, if you want to activate WinRE functionality again in Windows 10 you must execute the following in the terminal:
reagentc / enable
With these simple steps it will be possible to activate or not functionality designed to manage the operating system in cases where boot errors are generated and have the necessary tools to apply corrections to it.