Drivers are necessary to allow effective communication between our Operating System and your physical media or hardware. When we install a printer or webcam, we need compatible drivers that make PC and peripherals understand each other when we give orders. In the graphic matter, it is important to have the correct NVIDIA drivers so that on our monitor we can visualize the content well. NVIDIA is one of the most widespread leaders in graphic controllers with a wide range of possibilities for users according to their needs and on its official page we can find the option to update its drivers..
Like other software, it is important to keep a check on the latest versions that we can install on our computer with the drivers. Despite the importance, we may want to go back to an earlier NVIDIA version because the newer one doesn't work properly.
We also leave you the video tutorial to know how to go back to a previous version of NVIDIA drivers in Windows 10..
To stay up to date, remember to subscribe to our YouTube channel! SUBSCRIBE
How to go back to a previous version of NVIDIA Windows 10 Drivers
Step 1
The first thing we will do is open the Device Manager in the following way:
Device manager
Step 2
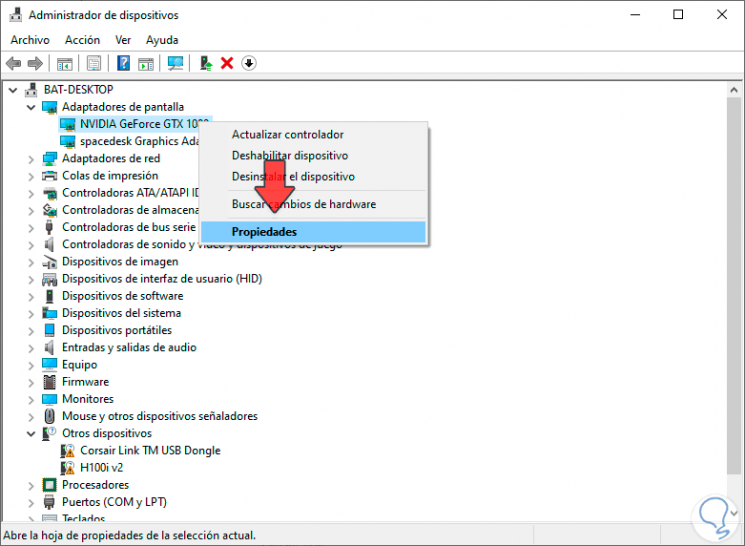
Now look for the "Display adapters" section and expand it. Now we will right click on the NVIDIA adapter and enter "Properties".
Step 3
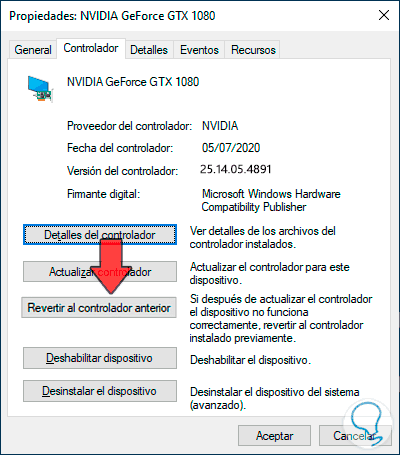
Now we go to the category of "Controller" and click on the option "Revert to the previous controller" after having updated to a more recent one.
Note
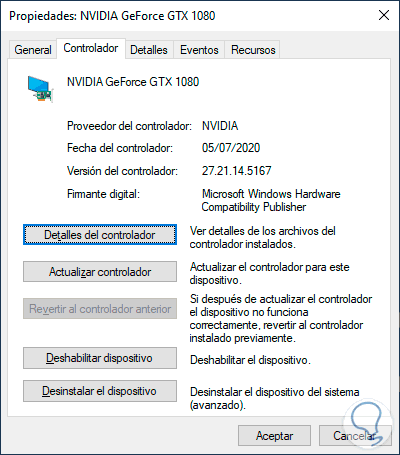
If we see that the button "Revert to the previous driver" appears as disabled, it is because you do not have any current version of NVIDIA installed. To do this go to the official NVIDIA page and install the drivers manually.
NVIDIA
Step 4
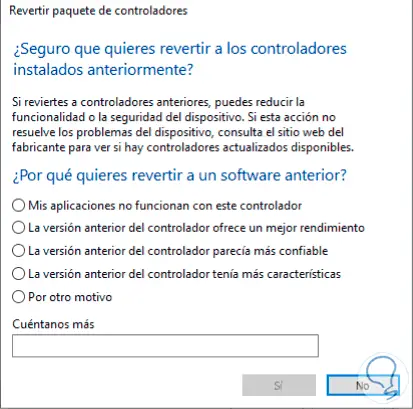
Now choose a reason to reverse and click Yes.
Step 4
Our NVIDIA driver will revert to an earlier version:
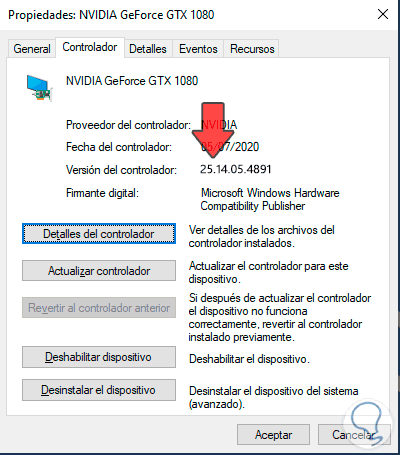
This way we can go back to a previous version of NVIDIA Windows 10 Drivers when we have problems with the most recent version installed.