There are operating systems that have been developed with a special purpose for the user, therefore we find special systems for games, others for multimedia, for design, for company servers and there is one that stands out because it is focused on the security that must be had when developing an application or the system itself and it is Kali Linux ..
Kali Linux is an operating system that has been developed based on a popular distro such as Debian , but its focus is in a high percentage oriented to advanced penetration testing and security auditing of an environment to detect the slightest flaw.
Tasks like penetration testing, security analysis, computer forensics, and reverse engineering are actions that can be performed in a much simpler way..
Kali functionalities and features
Kali offers us functionalities and features such as:
- Options to create a self-installing Kali image, automatic reverse VPN connection and network bridge Complete customization of the Kali Linux ISO images allowing us to be the developers of these
- Ease of creating a Kali Linux Live USB with LUKS encrypted persistence
- Allows you to fully encrypt a hard drive
- Kali can be run on Android
- More than 600 penetration testing tools available
- Kali Linux integrates a kernel or custom kernel which has special patches for injection, this allows the tests carried out to be complete
- All Kali Linux packages and repositories have been signed by GPG
- Its conception was carried out in a safe environment taking the appropriate secure protocols
- Kali Linux is compatible with ARMEL and ARMHF which makes it available for ARM devices and integrates ARM repositories in the main distribution
Kali Linux is a special system and does not require large hardware resources, but logically, there is not always the means to buy a new computer for Kali, so the advice that TechnoWikis gives you is to create a dual boot in Windows 10 which allows to separate a space on the disk for Kali and the rest for Windows 10. So simply when you turn on the computer you can determine with which operating system to boot.
If you do not know how to carry out this process, TechnoWikis will explain in detail the correct way to carry out this operation and thus have a single computer with Windows 10 and Kali Linux..
1. How to configure Windows 10 to install Kali Linux
The first step will be to define the partition in which Kali Linux will be installed on the disk where Windows 10 is.
Step 1
For this we access Windows 10 and access the Disk Manager using any of the following options:
- Opening Run and enter the command "diskmgmt.msc"
- Right clicking on the Start menu or using the Windows + X keys
- From Cortana or the Home search engine
Once we access the Disk Administrator we right click on drive C and select the option "Reduce volume":
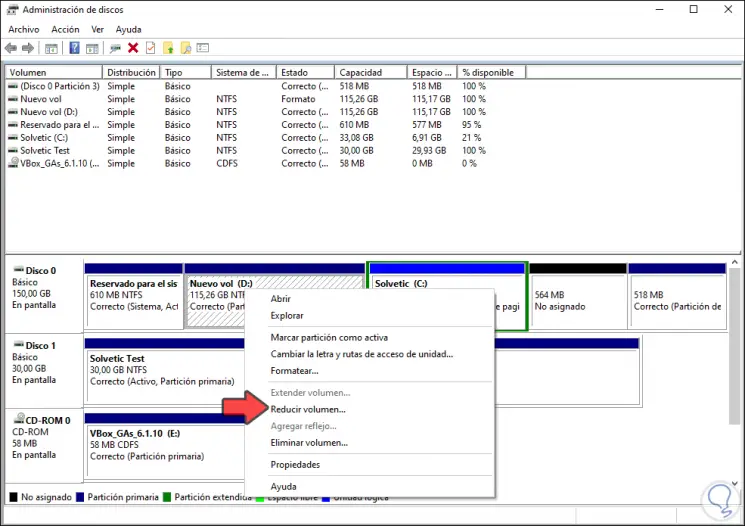
Step 2
By clicking there the system will analyze how much space can be reduced and we will enter the amount in MB destined for Kali Linux there:
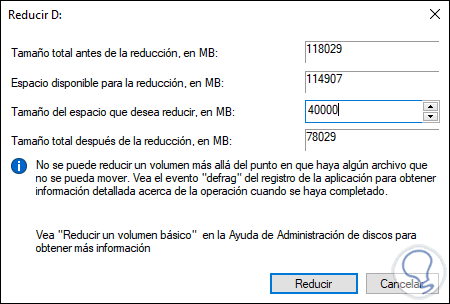
Step 3
We click on "Reduce" to complete the process.
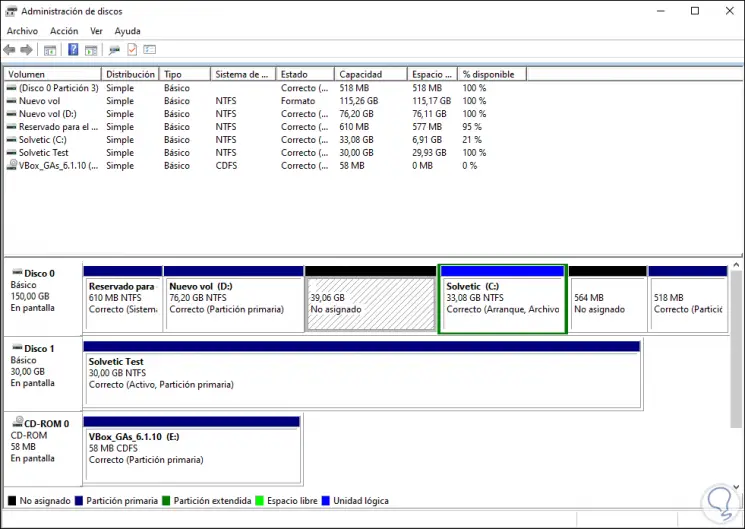
We leave this value with this scheme without applying any formatting.
2. How to configure USB to download Kali Linux on Windows
Now we must download Kali Linux from the following link:
Kali
Step 1
We burn this ISO image to a bootable DVD or USB and we must restart the computer and access the BIOS or UEFI to configure the boot method. We go to the Boot tab and select as the case may be:
- Removable Devices if we have selected the USB
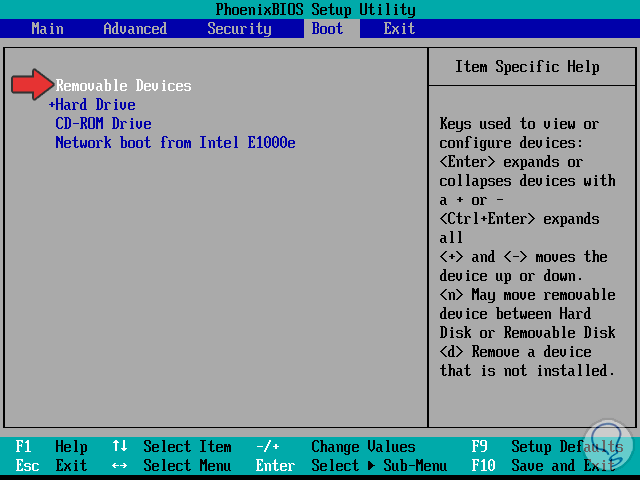
Step 2
We press the F10 key to apply the changes and when we do this we will see the following. There we select the option "Graphical Install"
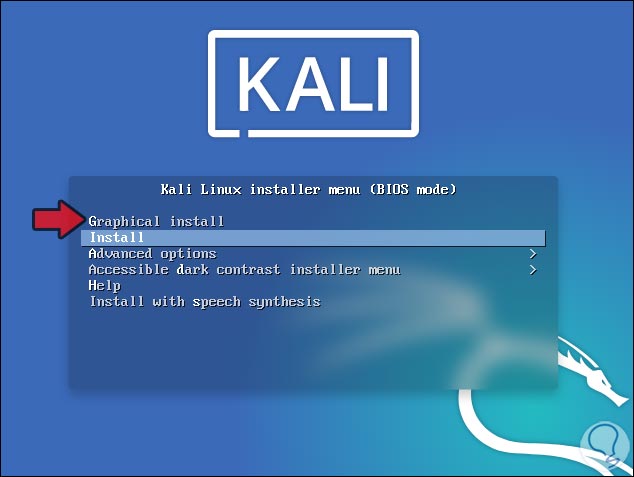
Step 3
Next we proceed to select the installation language of Kali Linux:

Step 4
We click on Continue and define the region:
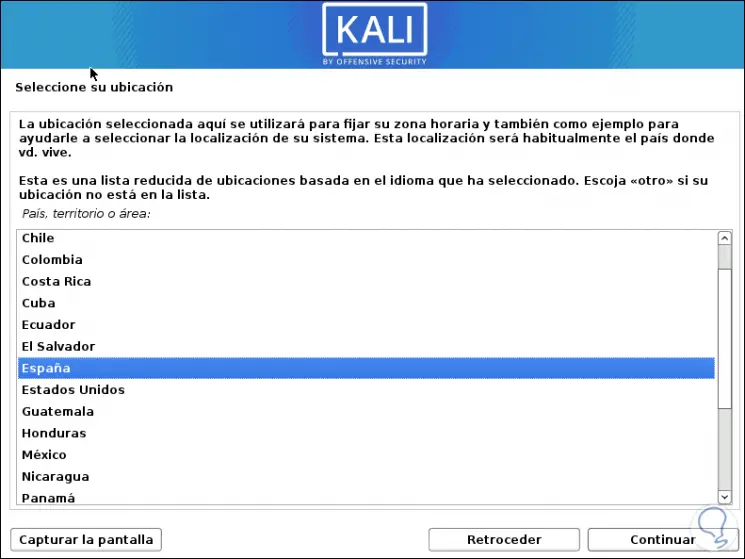
Step 5
We click on Continue and now we will select the language for the keyboard:
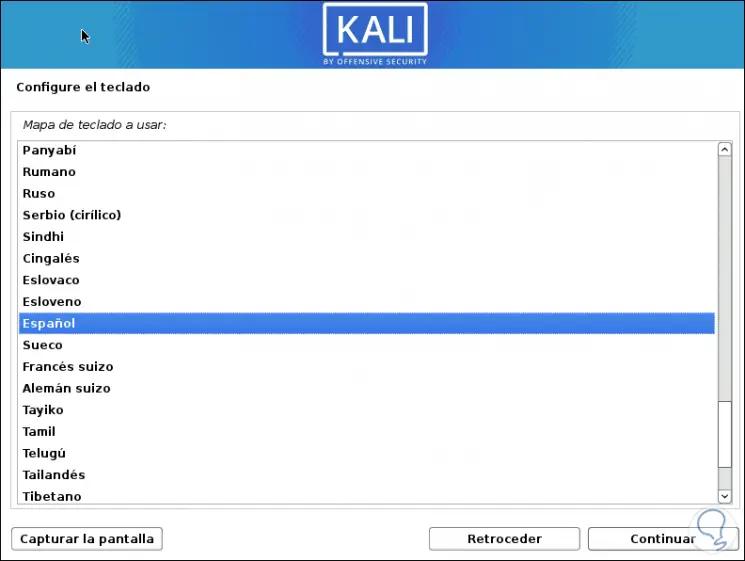
Step 6
Click on Continue again and the CD detection process will start:
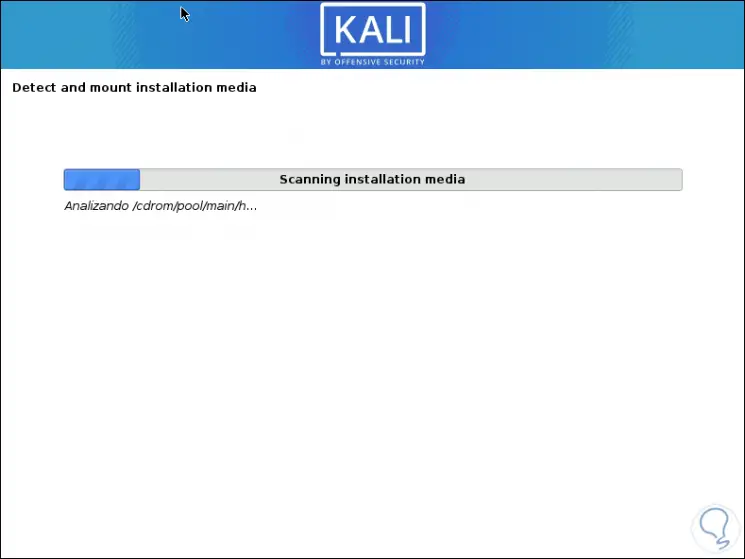
Step 7
Additional system components will then be loaded:
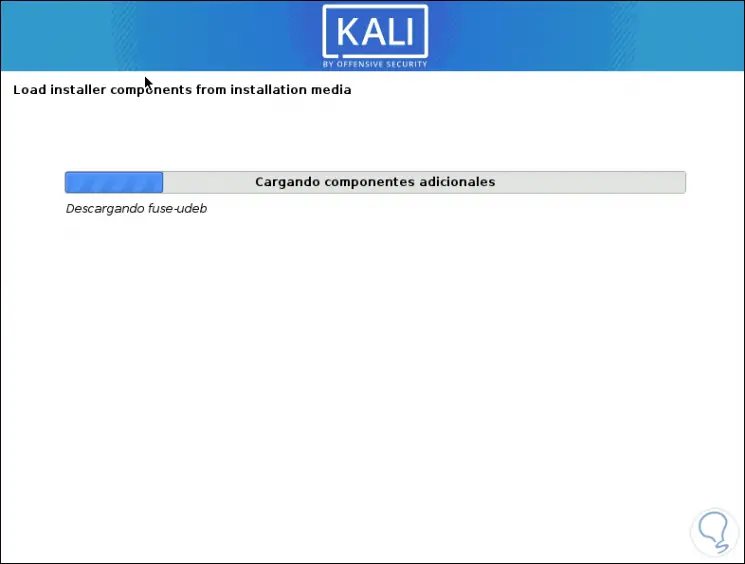
Step 8
The network is configured automatically:

Step 9
Next, we assign the name of the machine:
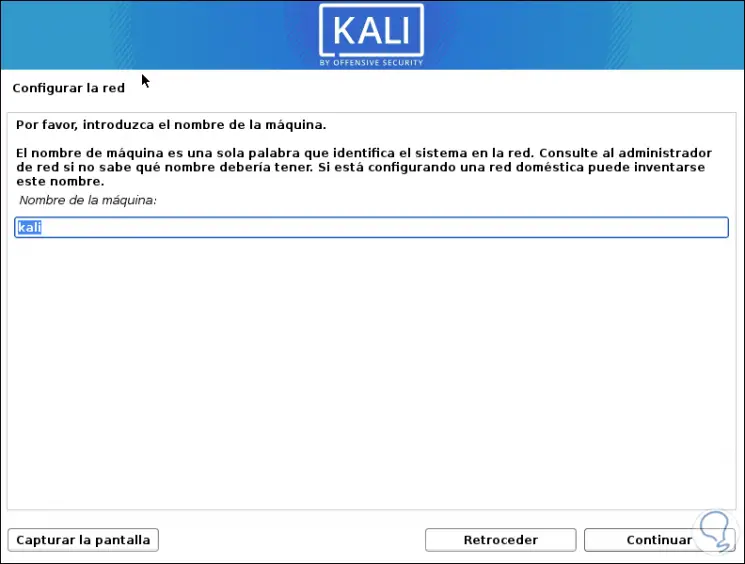
Step 10
We click on "Continue" and now we can enter a domain if we have one:
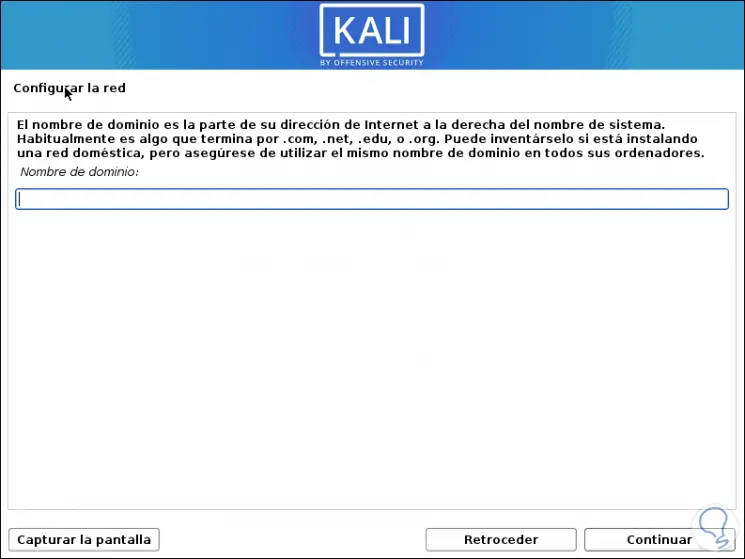
Step 11
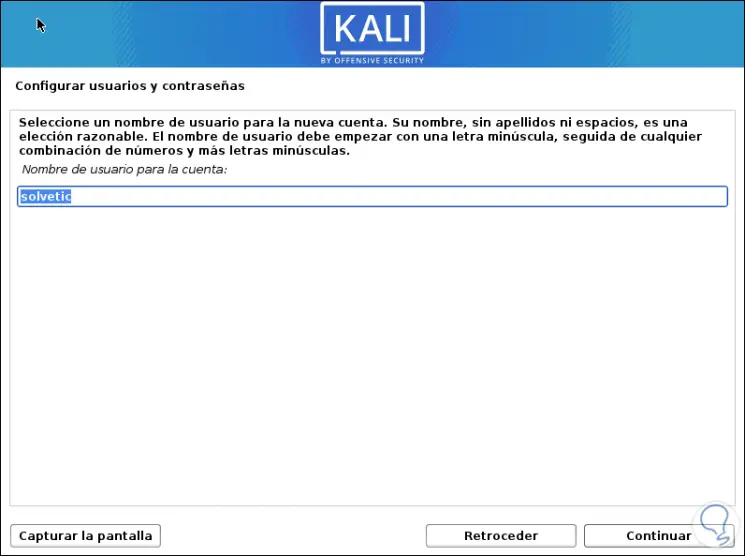
In the next window we enter the username:
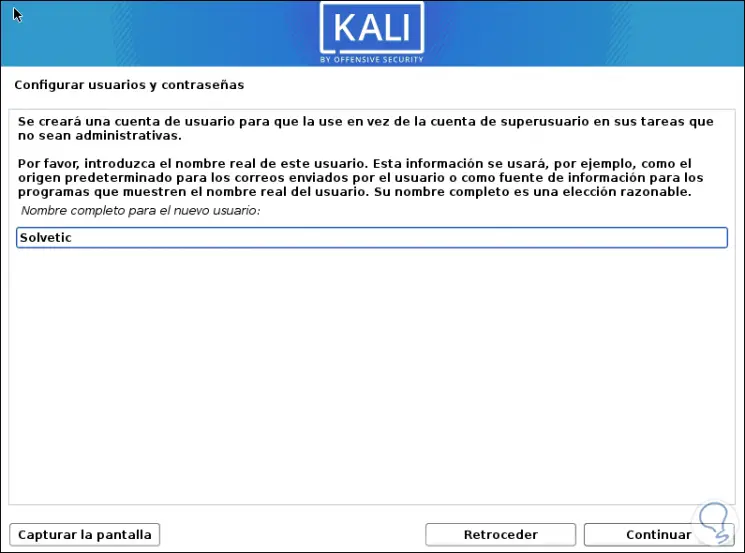
Step 12
We click on Continue and this user will be confirmed:
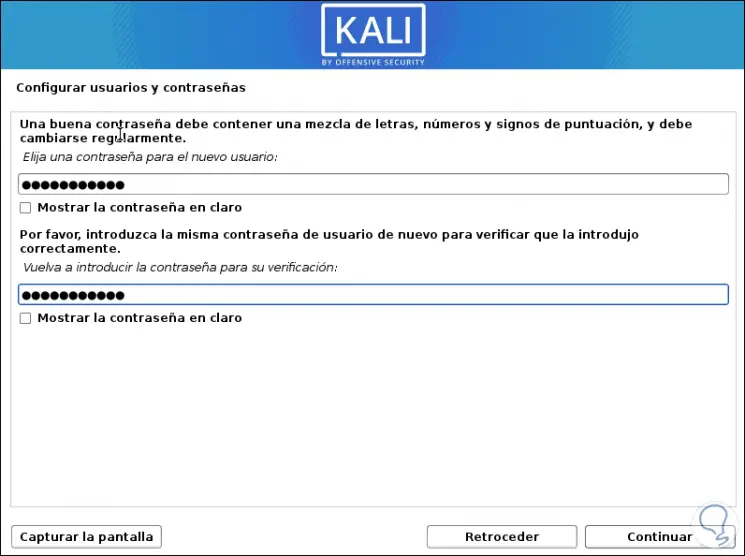
Step 13
Again we click on Continue and assign the password for the administrator user that we have just created:
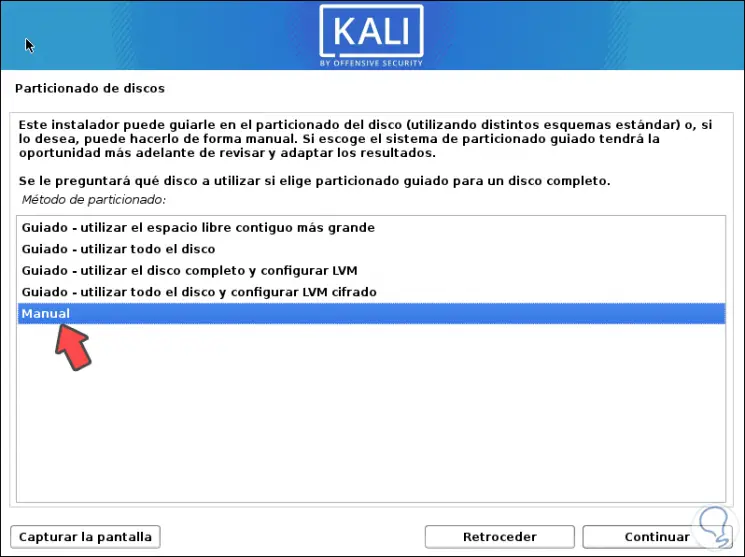
Step 14
We click on Continue and access the configuration of the disks. We select "Manual"
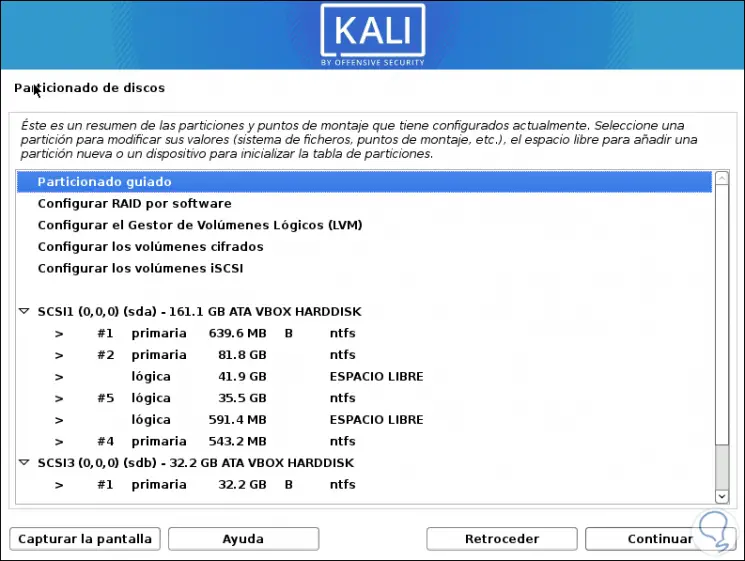
Step 15
We click on Continue, we will see the following:
Step 16
There we are going to select the free space that was created in Windows 10 previously:

Step 17
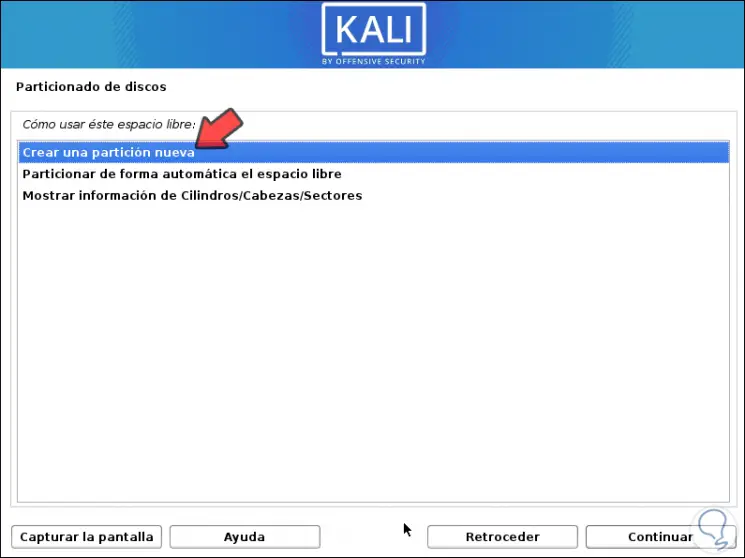
We click on Continue and we will see the following. We leave the default option which is "Create a new partition"
Step 18
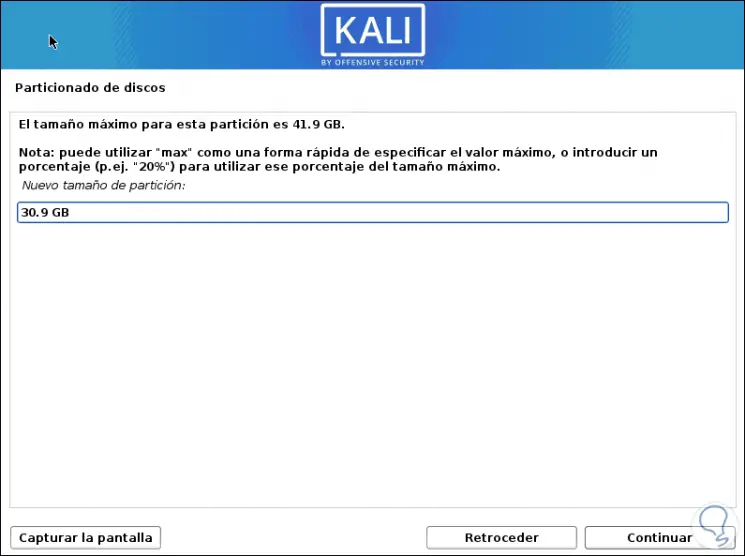
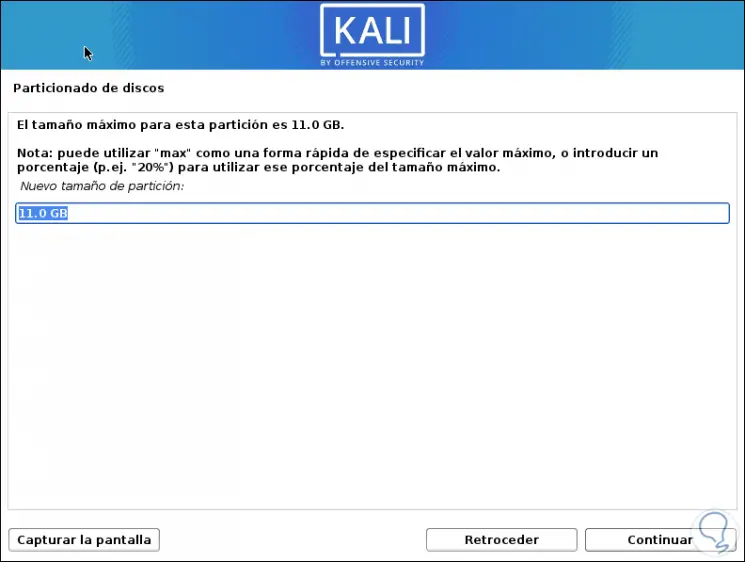
We click on Continue, in the next window we assign the desired size for that partition:
Step 19
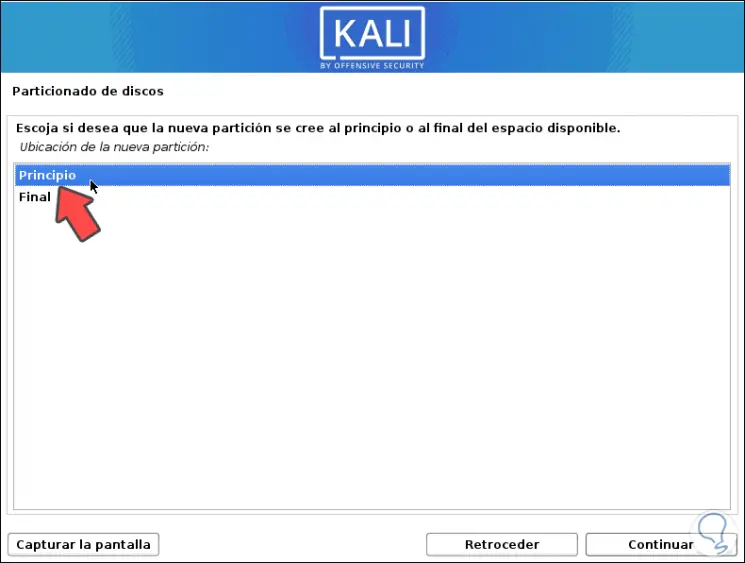
We click on Continue and now we select where the partition for Kali will be created. We leave the option "Principle"
Step 20
We click on Continue, we will see the following:
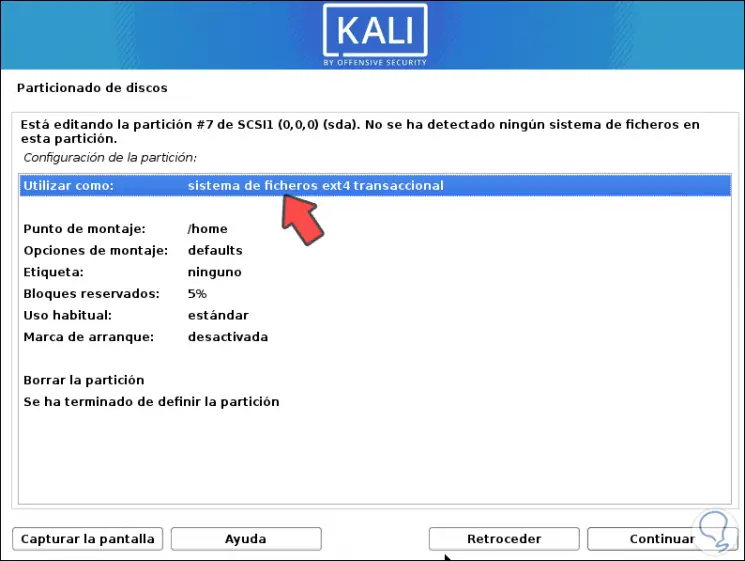
Step 21
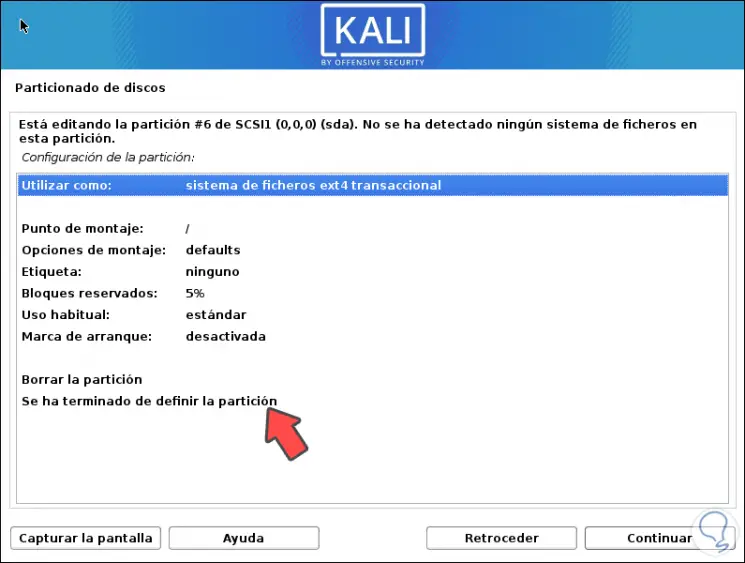
We select the line "The partition has finished defining":
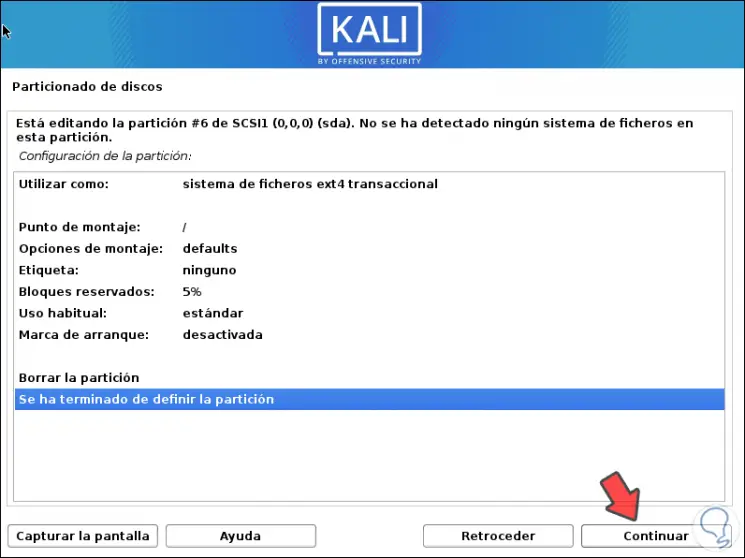
Step 22
We click on Continue, we will see that this partition now has the ext4 file system:
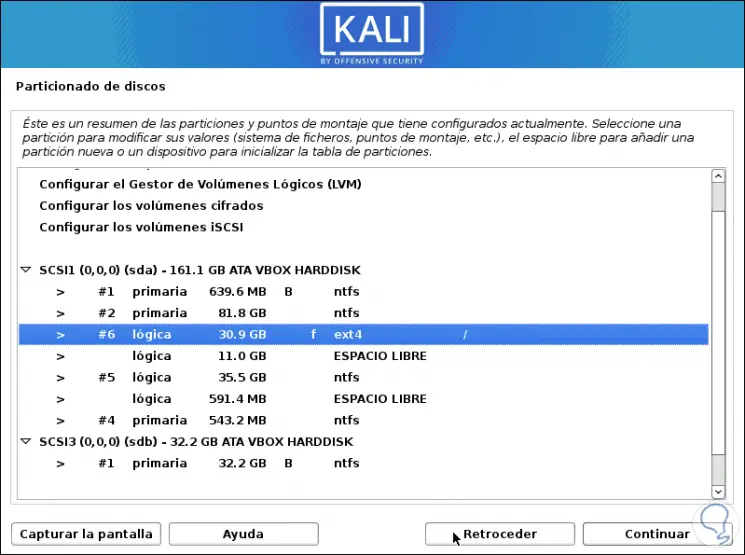
Step 23
We select the free space that has remained:
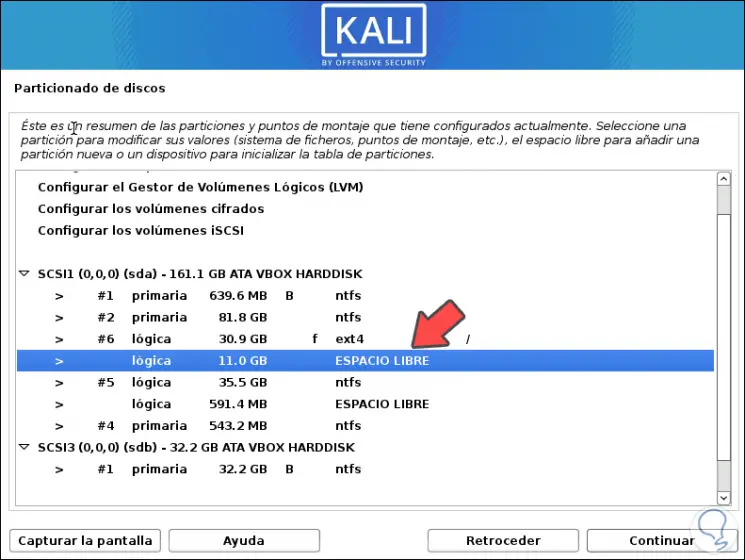
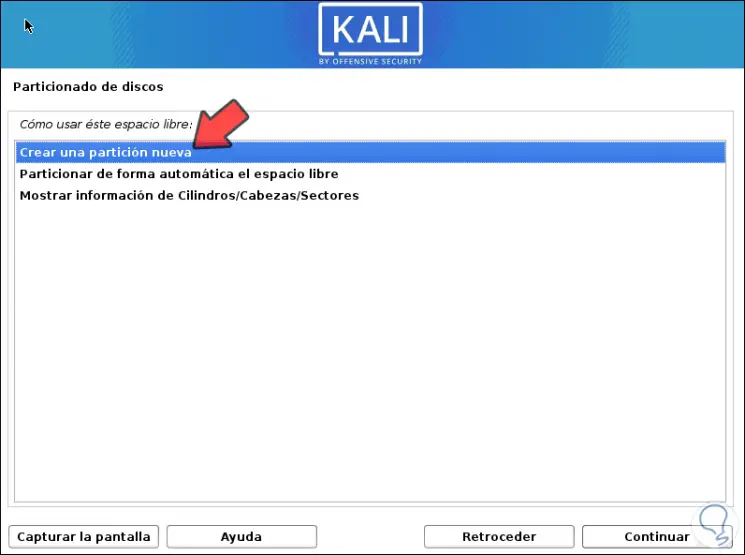
Step 24
We click on Continue and again select "Create a new partition":
Step 25
In the next window we will leave all the space available:
Step 26
Click Continue and we will see this:
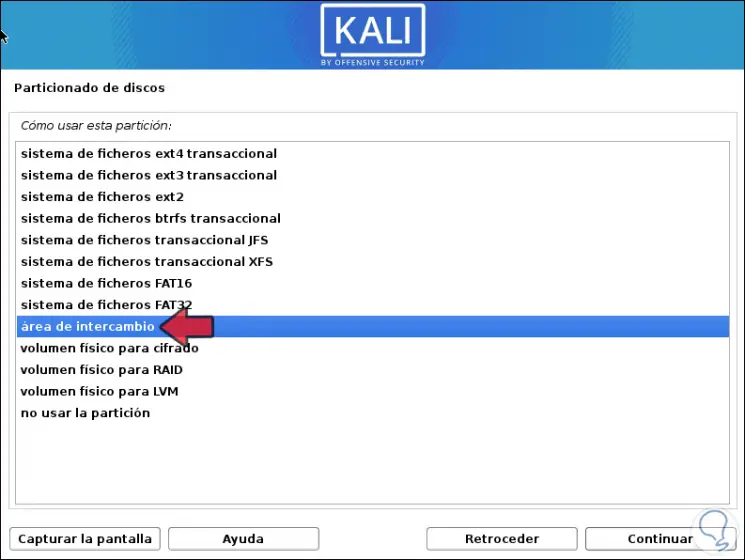
Step 27
We double click on this line and in the displayed list we select "Exchange area" which is the swap memory:
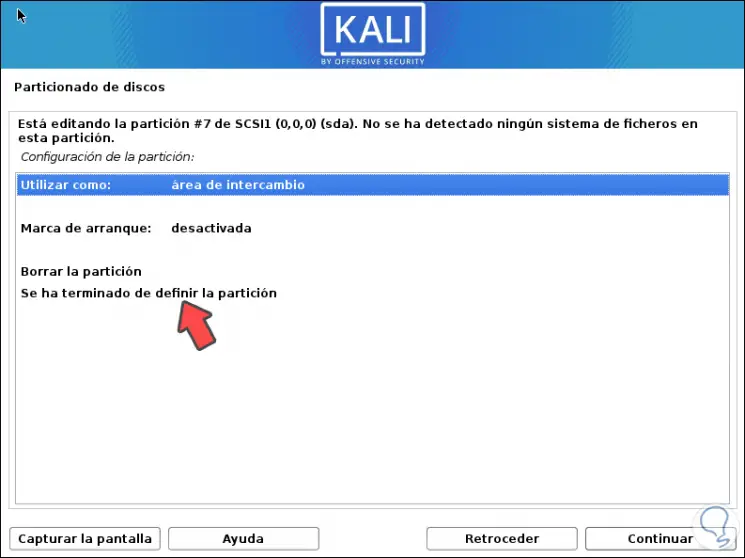
Step 28
We click Continue and see the new change. We select "The partition has been finished defining"
Step 29
We click on Continue, the summary of the action will be displayed:

Step 30
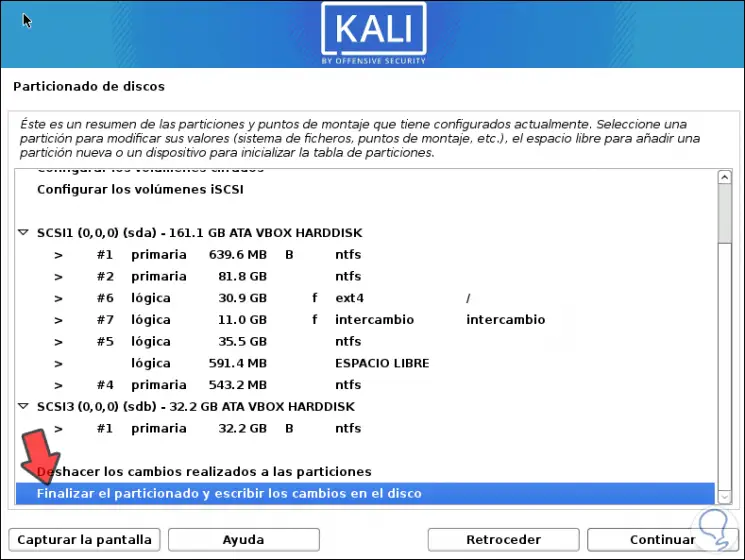
We will go to the bottom and select "Finish partitioning and write changes to disk":
Step 31
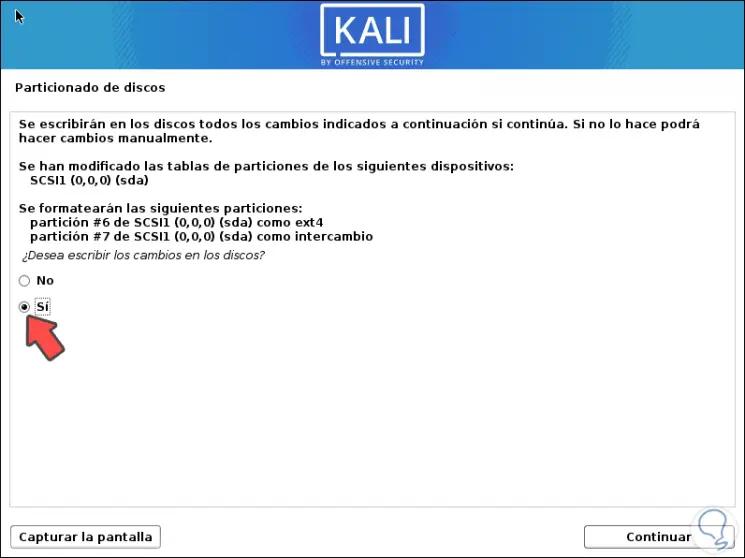
We click on Continue again and we will receive the following warning which we must activate in Yes:
Step 32
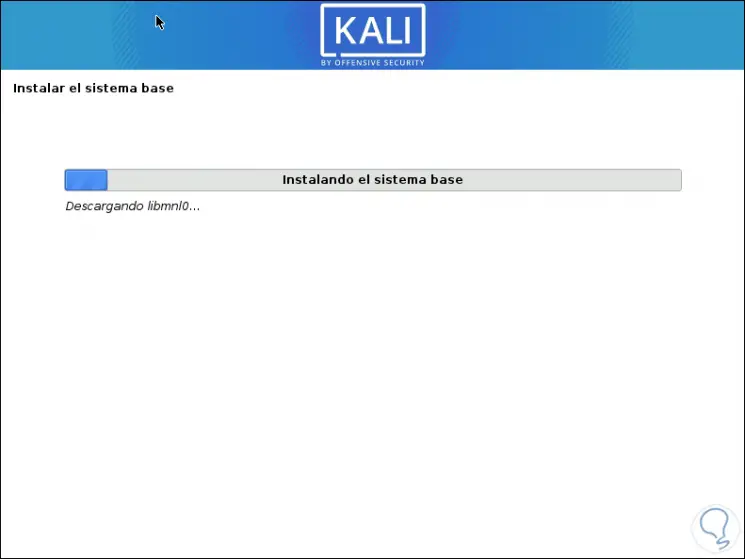
This will lead to the Kali Linux installation process on the partition created:
Step 33
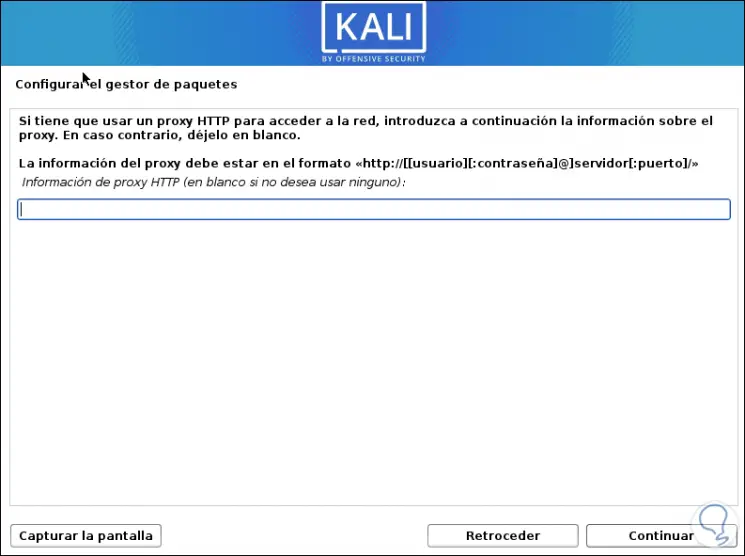
After this we can add a proxy server if we handle one:
Step 34
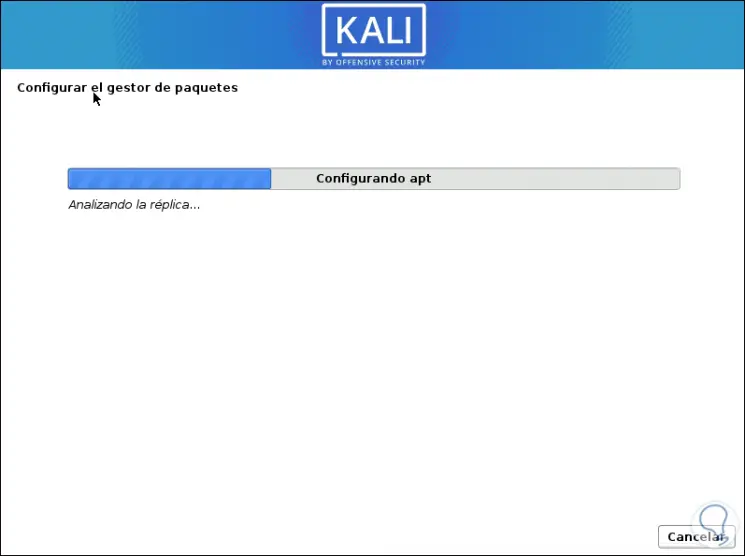
Click Continue and the replica of Kali will be analyzed:
Step 35
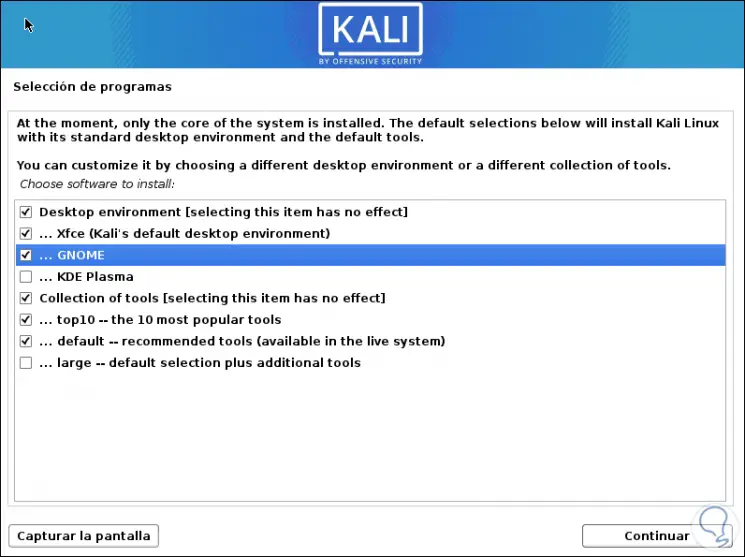
We proceed with the selection of programs available to install:
Step 36
There we can select which components to install in Kali Linux:
Step 37
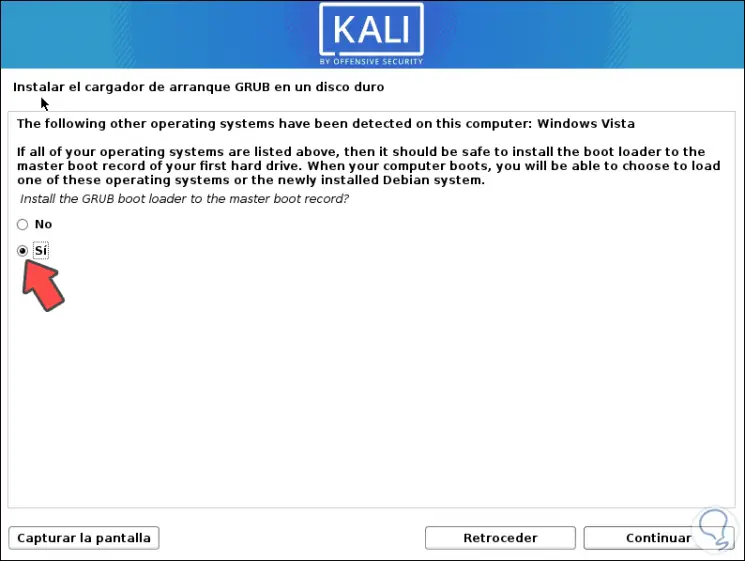
After this process we will see the following message associated with the GRUB boot loader. We activate the Yes box
Step 38
We click on Continue and we must select the partition that we initially created ext4:
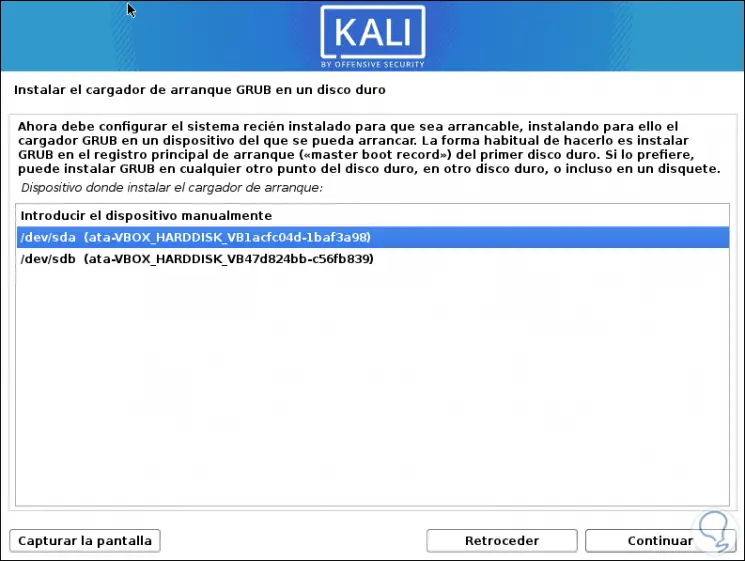
Step 39
Then some additional steps will be completed:
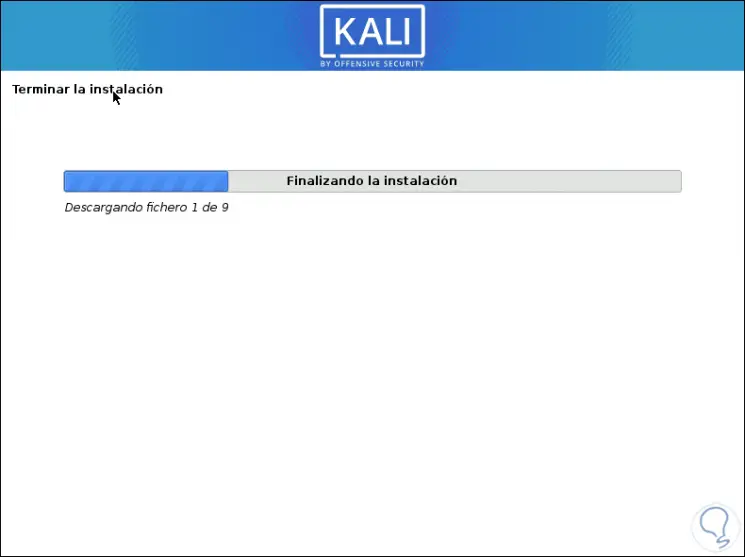
Step 40
Then we will see the following:
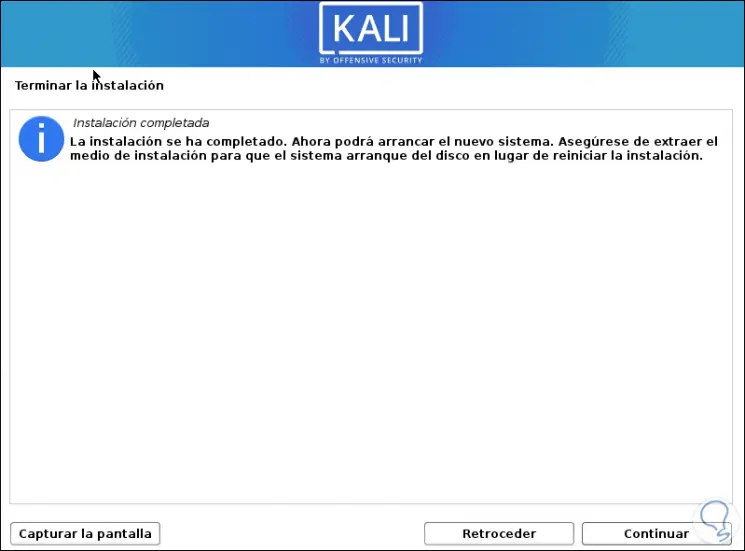
Step 41
We click on Continue and after that we can select which system we will start with:
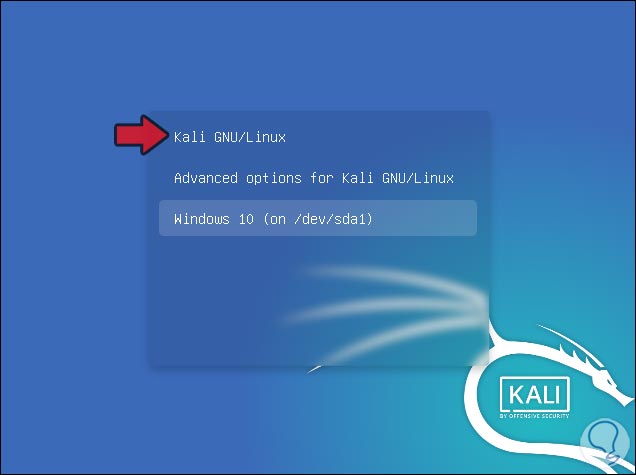
Step 42
We access with Kali Linux, we log in:
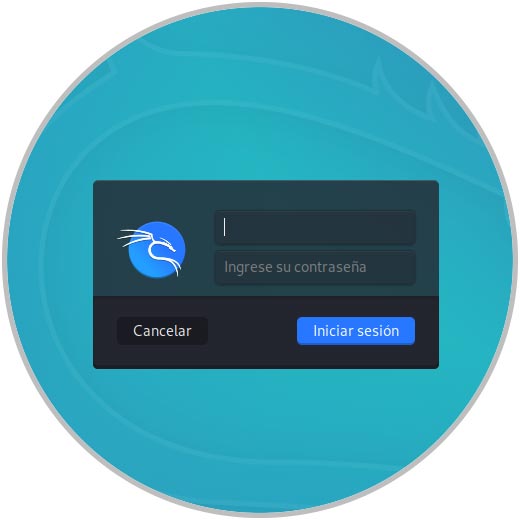
Step 43
Upon logging in, we will be ready to use Kali Linux on the same Windows 10 computer:

So simple we have configured the dual boot of these two great operating systems where each of them fulfills a special role for each type of user, remember that with this method we will use all the hardware potential of the equipment.