Windows Defender is the security-level solution that has been integrated into Windows systems to protect from all types of threats , whether local or external, especially from threats on the network which can have a critical impact on services and general processes of the organization since the presence of a virus can cause general effects. For this reason Windows Defender is the appropriate solution to maintain the integrity of the information, in some special cases it is possible to require that Windows Defender be deactivated or uninstalled (although it is not ideal and this occurs for reasons such as:
Reasons to uninstall Windows Defender
- Purchase of a special firewall for the company
If for any reason you need to disable or uninstall Windows Defender in Windows Server 2019, TechnoWikis will give you the different options for it..
To stay up to date, remember to subscribe to our YouTube channel! SUBSCRIBE
1. Disable Windows Defender Windows Server from Security
Step 1
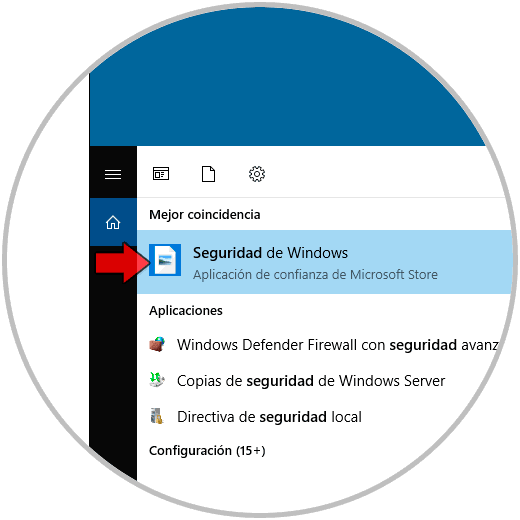
Windows Defender is integrated in the system security section, to deactivate Windows Defender we must go to the search engine and there we enter "security", in the displayed list we select Windows Security:
Step 2
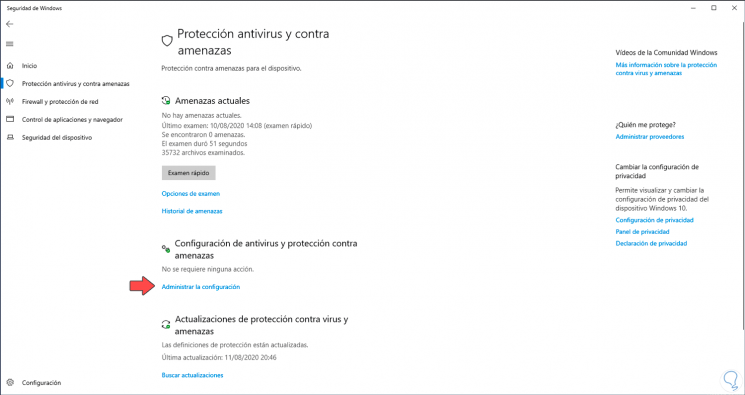
In the open window, go to the "Virus and threat protection" section and click on "Manage settings":
Step 3
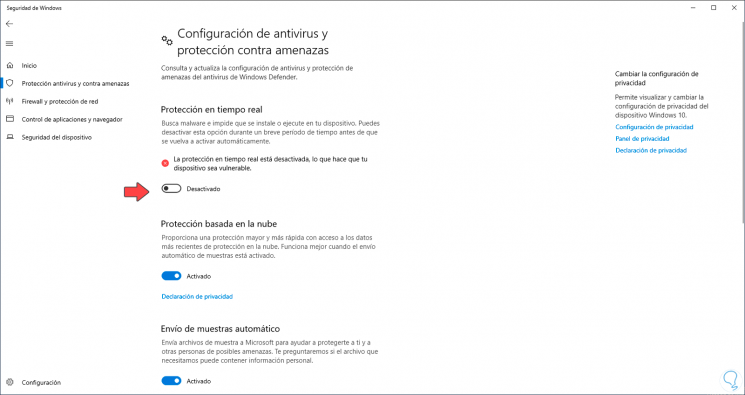
Then we must click on the "Real-time protection" switch to disable Windows Defender security:
2. Disable Windows Defender Windows Server from PowerShell
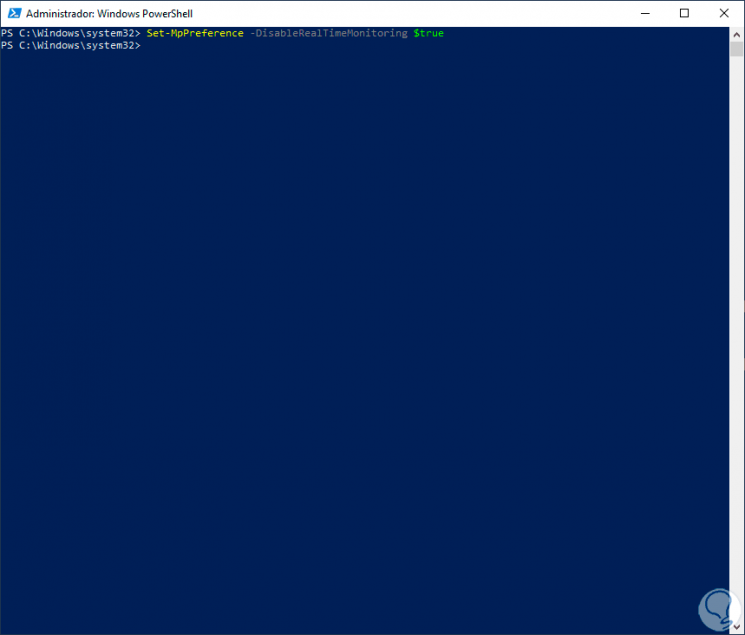
The PowerShell console is another of the options available for this purpose, in this case we must access the PowerShell console as administrators and there execute the following:
Set-MpPreference -DisableRealtimeMonitoring $ true
Note
In case we want to activate Windows Defender again from PowerShell we must execute:
"Set-MpPreference -DisableRealtimeMonitoring $ false"
Now we are going to see how to uninstall Windows Defender in Windows Server 2019.
3. Uninstall Windows Defender Windows Server from PowerShell
Step 1
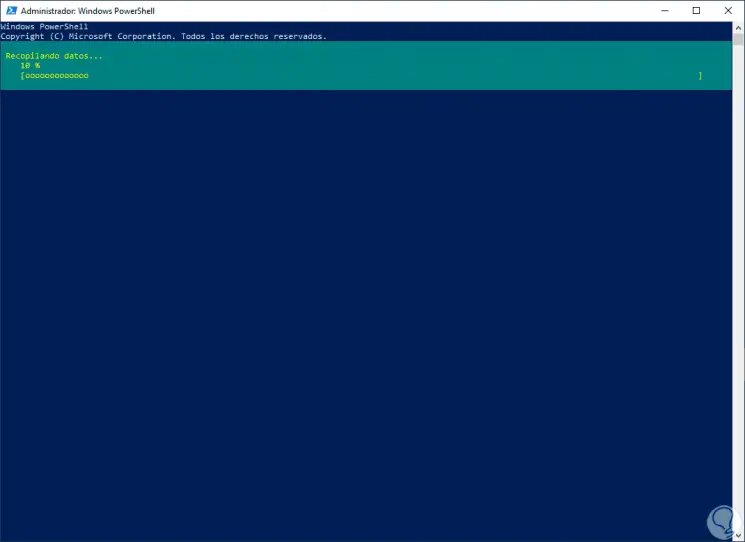
Again the PowerShell console is the ally for this task, we access as administrators and we will execute the following:
Uninstall-WindowsFeature -Name Windows-Defender
Step 2
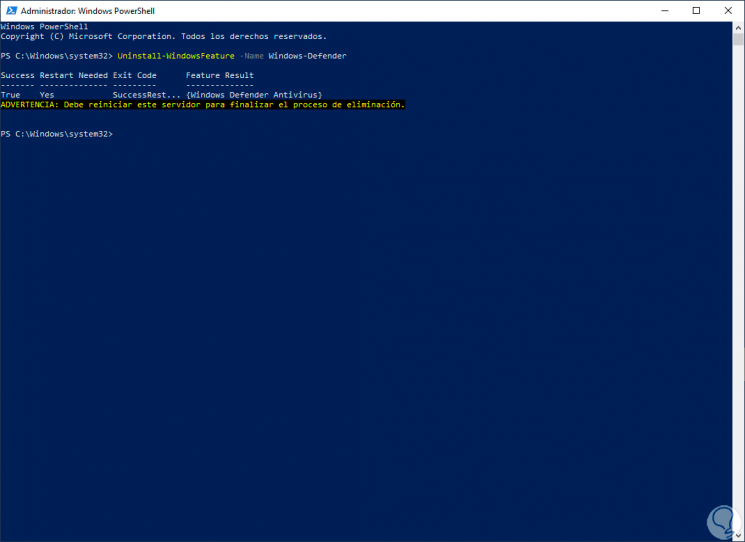
After all the information is collected we will see the following:
Step 3
There we check that Windows Defender has been uninstalled and the process will be completed when the server is restarted.
Note
to install Windows Defender again with this method we must execute:
Install-WindowsFeature -Name Windows-Defender
4. Uninstall Windows Defender Windows Server from CMD
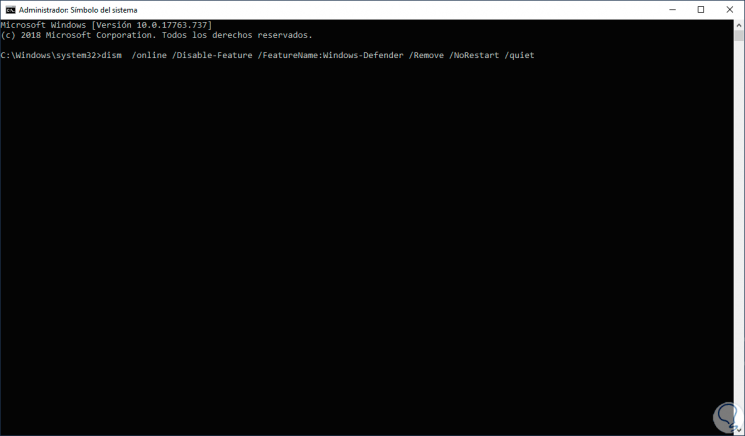
The command prompt console is another of the mechanisms available to uninstall Windows Defender and this is achieved thanks to the DISM command (Deployment Image Servicing and Management) with which we can manage the system image, it should be noted that this command is much more delicate since if we run it, we not only uninstall Windows Defender but also the Windows Defender installation package is eliminated, so we cannot install it again.
As a reference, the order to execute with DISM is as follows: Press Enter and Windows Defender will be completely uninstalled from the server..
Dism / online / Disable-Feature / FeatureName: Windows-Defender / Remove / NoRestart / quiet
4. Uninstall Windows Defender Windows Server from Server Manager
Step 1
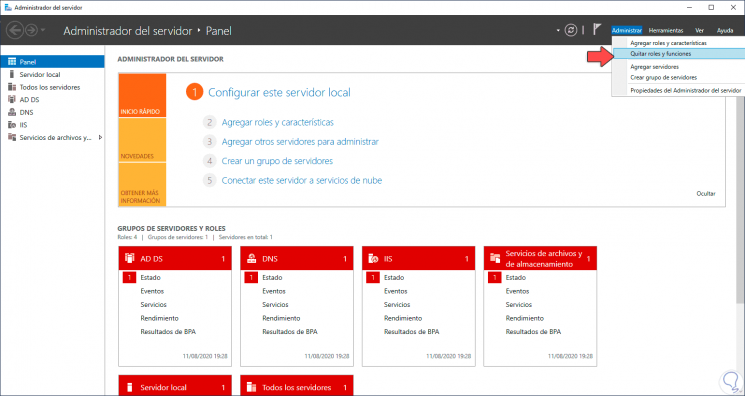
The Server Administrator is a central point in Windows Server from where we manage the team roles, to use this method we open the Server Administrator and we will go to "Manage -Remove roles and functions":
Step 2
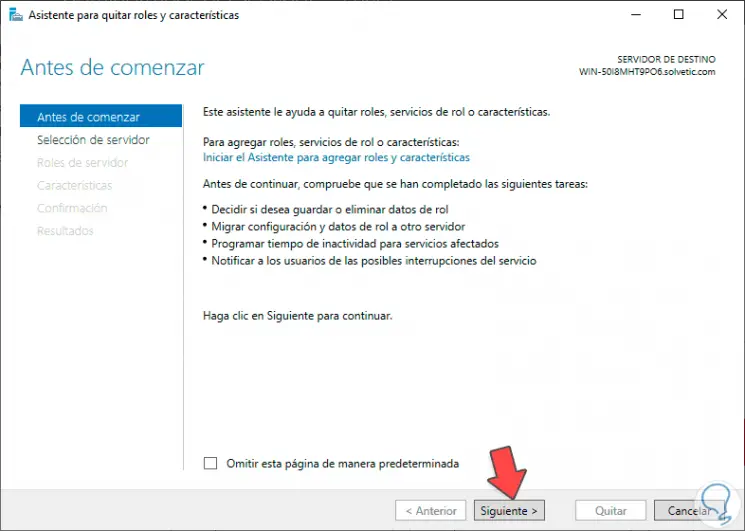
The uninstall wizard will be displayed:
Step 3
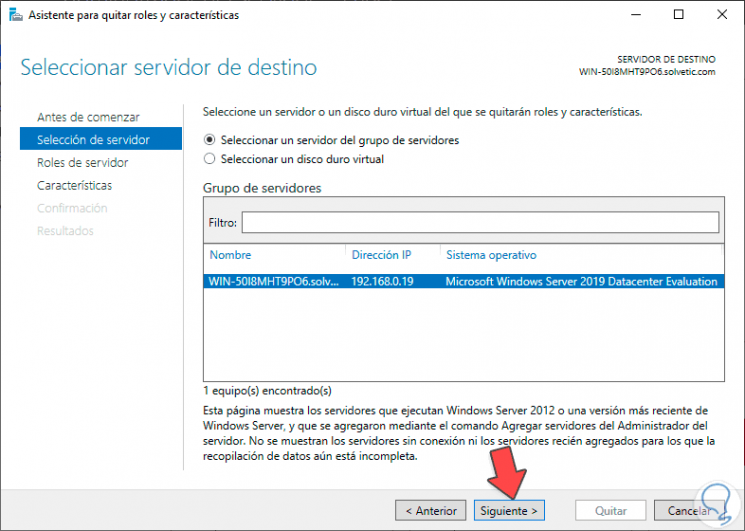
We click Next and select the current server:
Step 4
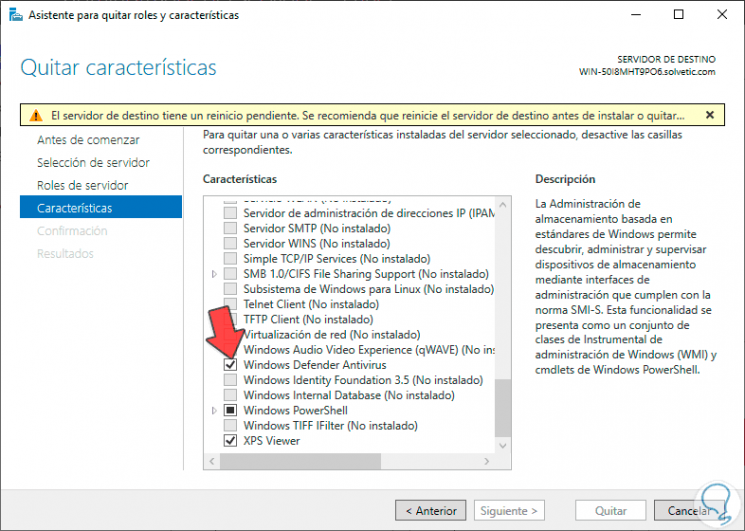
In the next window we do not edit anything and we will go to the "Features" section where we locate the Windows Defender Antivirus line:
Step 5
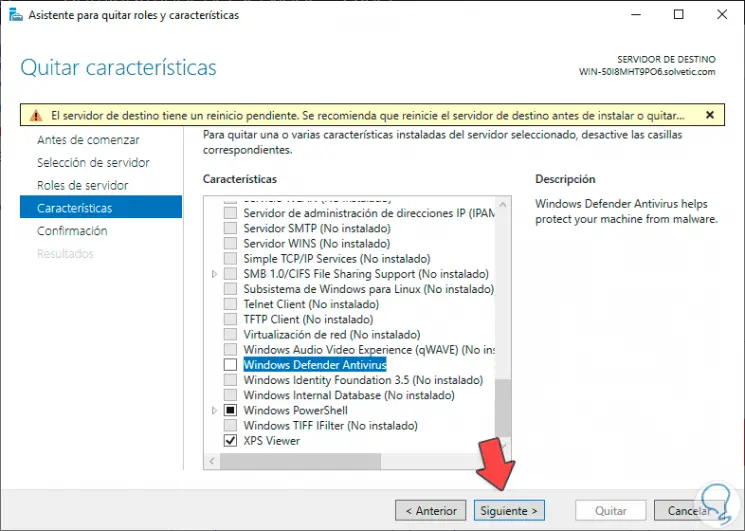
We deactivate the Windows Defender Antivirus box:
Step 6
We click Next and we will see the summary of the action to execute:
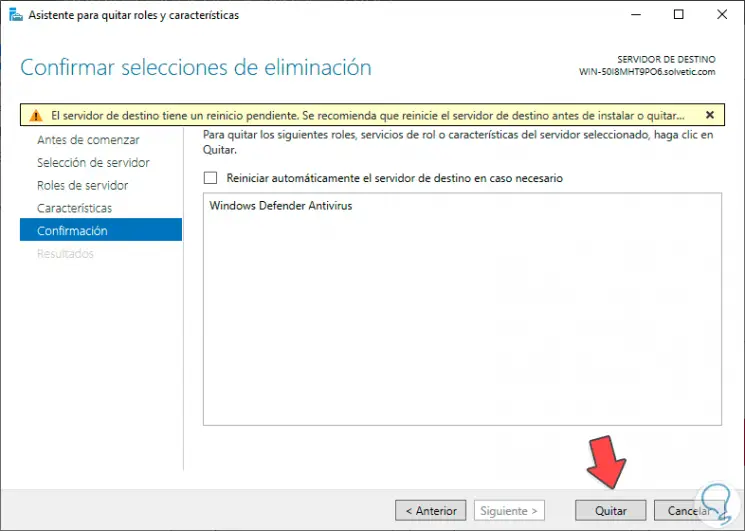
Step 7
We click on "Remove" to complete the process:
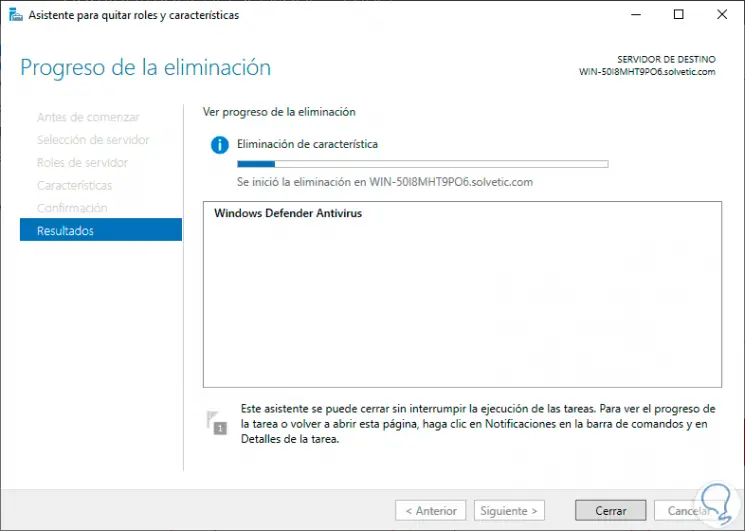
Step 8
When this comes to an end we will see the following:
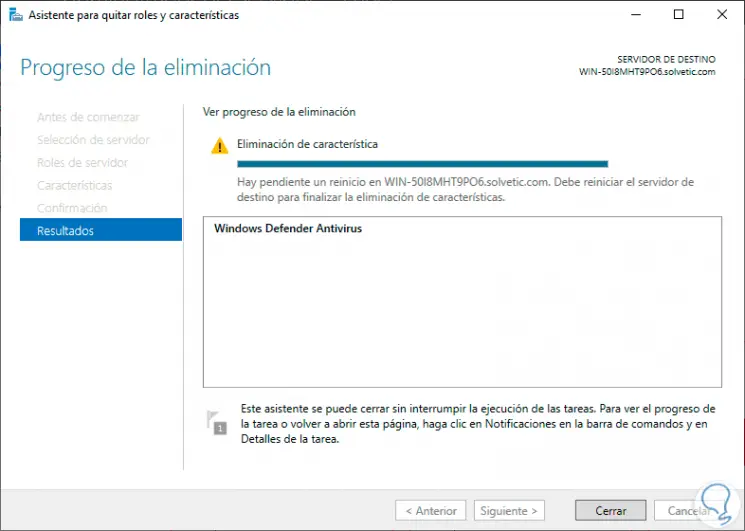
Step 9
We click Close and in all cases we must restart the system to complete the uninstallation process. Once you log in, we will be without Windows Defender.

Step 10
If we want to activate it with this method, we must go to the Server Manager and select "Add roles and functions":
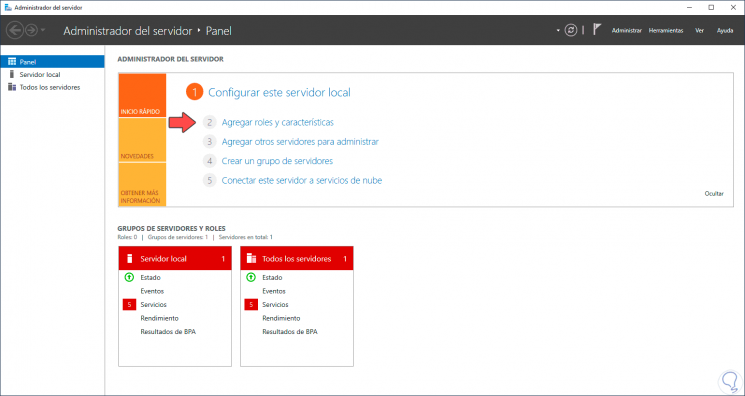
Step 11
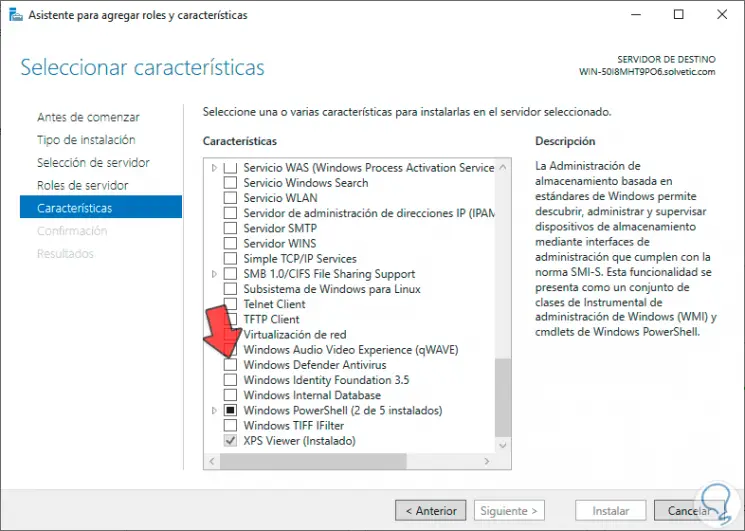
In the wizard we select the server and we will go to the "Features" section where we will locate "Windows Defender Antivirus":
Step 12
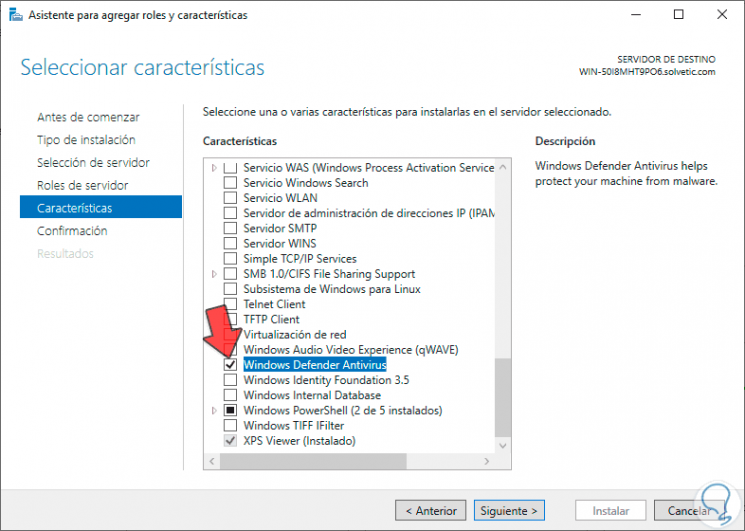
We activate the box to enable it:
Step 13
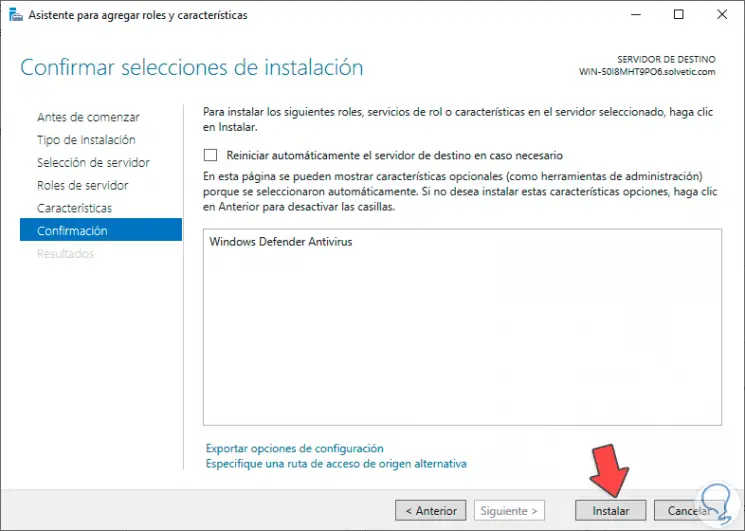
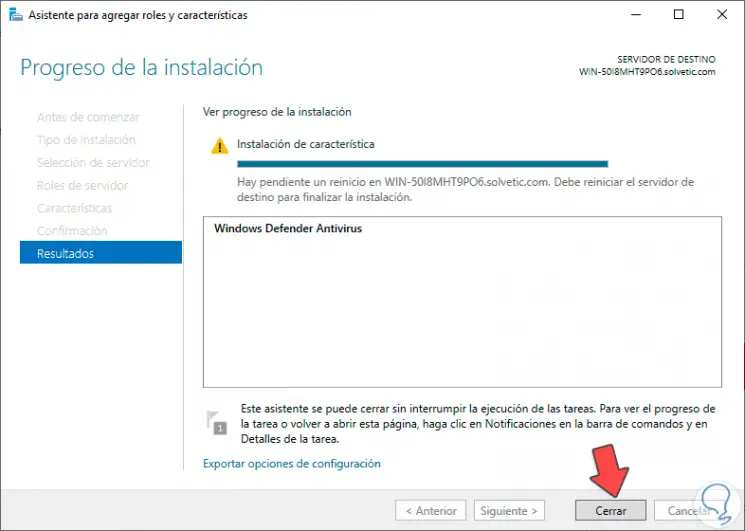
We click Next and after confirming we are ready to install it again in Windows Server 2016 or 2019. We click Install and when the process finishes we will see the following:
Step 14
It only remains to restart the computer so that everything is active at the level of Windows Defender in the system.
We have seen different ways either to deactivate or to uninstall Windows Defender in Windows Server 2016 or 2019 but always remembering that this is one of the system's built-in default security measures.