If we take time in the tasks of support and management of systems we have noticed how new technologies have occupied a wider space in our activities and how the processes have evolved as each second passes. Currently what we used to work with CDs, DVS and other media is now possible to do online, now the support is remote and many other things that have drastically simplified the activities but no matter how much progress there is, the hand of the human being will always be required because systems will continue to fail and sooner or later we will have to install or repair an operating system and especially if it is Windows Server which is developed by Microsoft for small, medium and large companies..
We must be very aware of the difference between a traditional system (Windows 7 or Windows 10) to a server (Server 2016/2019), the reason is that our Windows 10 can be shut down at any time while a server is not possible since due to its integrated roles and services it must remain active 24 hours, 7 days a week and 365 days a year, or good 366 if it is a leap year, hence the importance of always having the best tools for support of Windows Server.
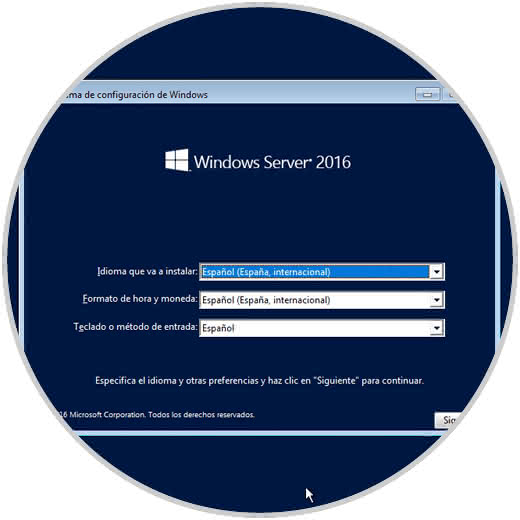
The most basic support action lies in having the means of installation of Windows Server 2016 or 2019 because through them it will be possible to install a new system or access utilities to repair the system, configure the boot and more tasks, and what better to use the new advances and have the means of installation directly on a USB medium . This avoids loading one or more DVDs with the image of Windows Server and therefore TechnoWikis will explain in detail how we can create a USB medium to boot Windows Server 2016 or Windows Server 2019 to keep up with the technology..
Before knowing this process we will remember some of the features of each operating system.
To stay up to date, remember to subscribe to our YouTube channel! SUBSCRIBE
1. Features of Windows Server 2016 and 2019
Windows Server 2016 was launched at the end of 2015 and since then it has been used by thousands of organizations thanks to its performance and versatility, some of the features and functionalities of this version of Windows Server are:
Windows Server 2016 features
- Use of containers to expand the global operation of the system by having the own containers of Server 2016 as well as the containers of Hyper-V.
- Integration of Linux Secure Boot which is part of UEFI.
- Improvements in ReFS (Resilient File System).
- Update from Active Directory Federation Services (ADFS) to version 4.
- News in Storage Spaces Direct.
- Improvements in Hyper-V virtualization hardware .
- Armored virtual machines .
The new bet of Microsoft is the edition 2019 of Windows Server which is already available in beta versions and offers us features such as:
Features of Windows Server 2019
- News in the graphical interface (GUI) of the server.
- Support and integration of the Honolulu project .
- Improvements in the Windows subsystem in Linu x.
- Improvements at security level.
- Integration of new features in the Windows Admin Center .
- Updates in the role of Storage Migration Services.
- New analysis functions through System Insights.
- New improvements in Windows Defender Advanced Threat Protection (ATP).
- Improvements in the shielding of virtual machines .
- Use of HTTP / 2 for safer browsing .
- Improvements in storage replicas and much more.
2. How to download ISO images from Windows Server 2016 and 2019
Windows Server 2016
To create our USB boot medium of these two operating systems will be necessary to download official ISO images, in the case of Windows Server 2016 we can go to the following link:
Windows Server 2016
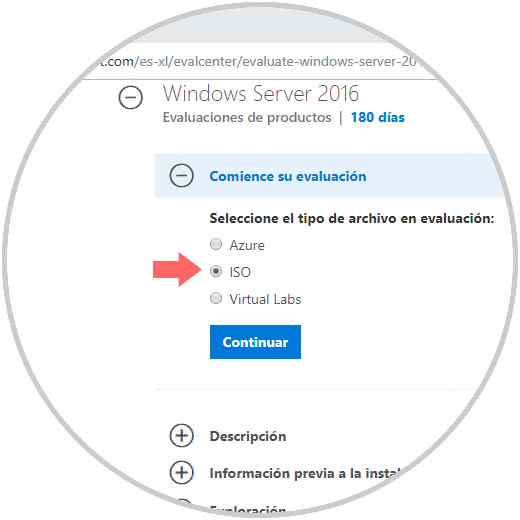
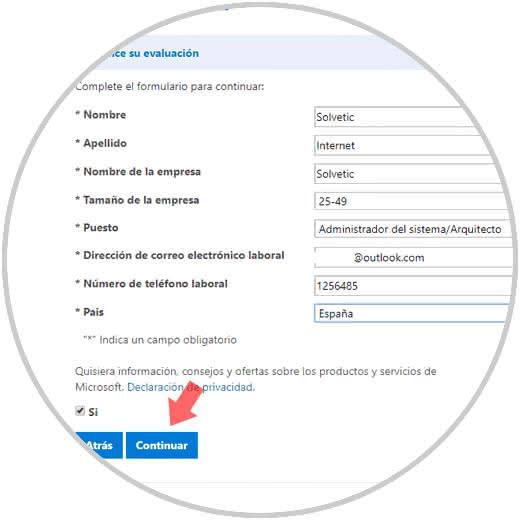
There we select the ISO box and click on Continue and it will be necessary to complete some required information:
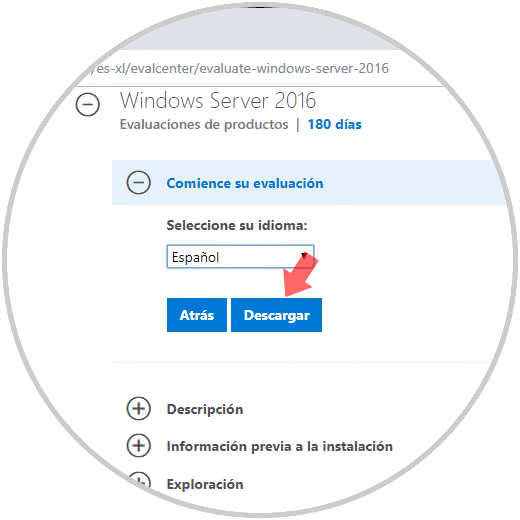
Again click on Continue and define the Windows Server 2016 language and click on the Download button to execute the process:
Windows Server 2019
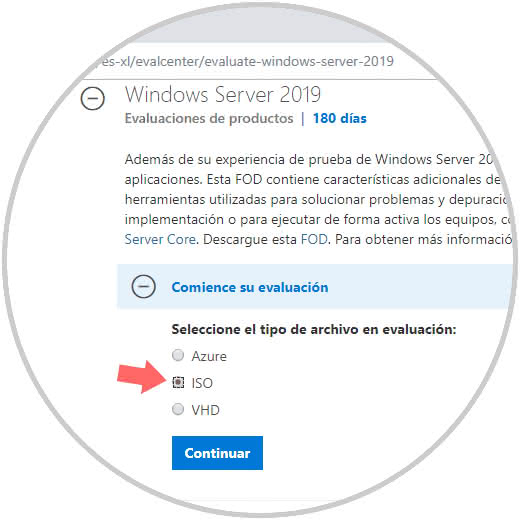
To download the ISO Windows Server 2019 we will go to the following link:
Windows Server 2019
There we activate the ISO box to download the server image:
In the next window we must enter contact details and then we select the language in which we want to download the ISO image and click on the Download button to start downloading the ISO image:
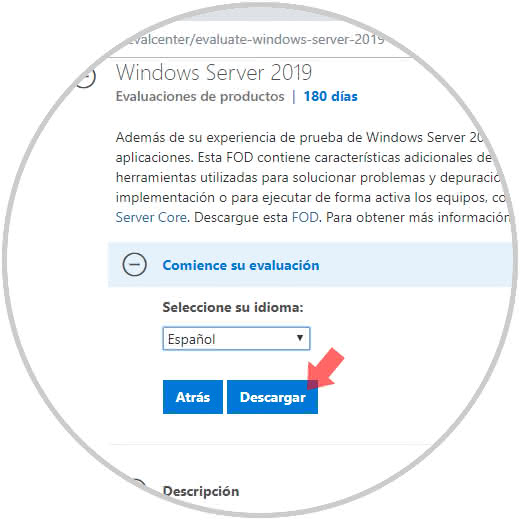
It is worth saying that we must have a USB memory of at least 8 GB of space for that purpose..
3. How to create Windows Server 2016 bootable USB
Step 1
First we will see how to create the USB medium for Windows Server 2016, this whole process we will do through the command prompt but do not be scared that it is nothing special.
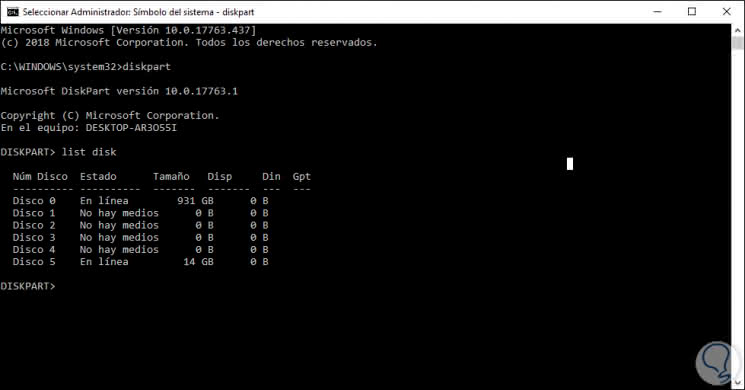
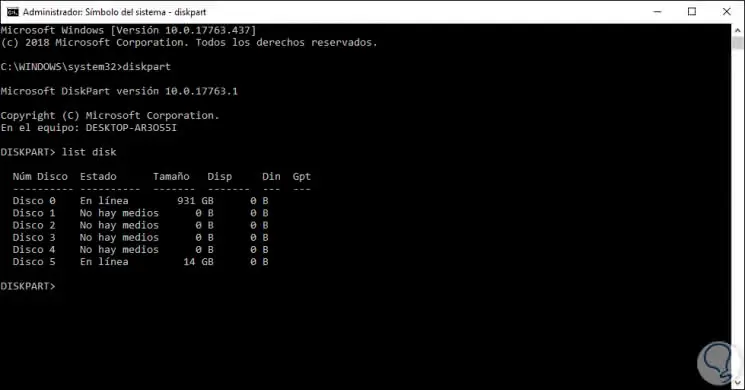
For this we will accede as administrators to the symbol of the system and there we execute the following line:
diskpart
DiskPart has been developed and integrated into Windows systems as a command interpreter thanks to which we can manage objects such as disks, partitions or volumes either through the use of scripts or directly executing commands in the console.
There we will use the list disk command which allows us to see the list of available discs in the equipment with their respective status and assigned number, in our case the USB medium is Disk 5:

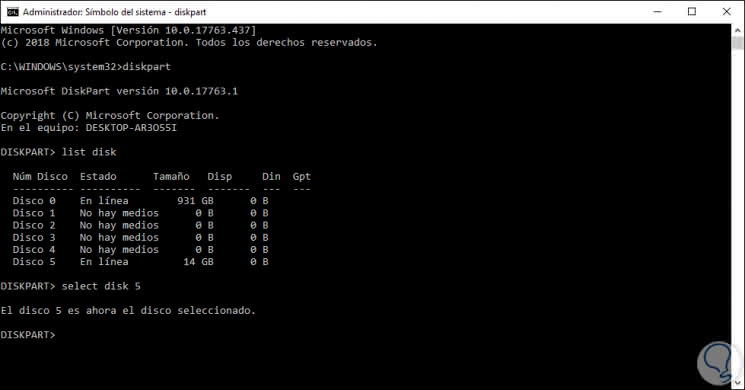
Step 2
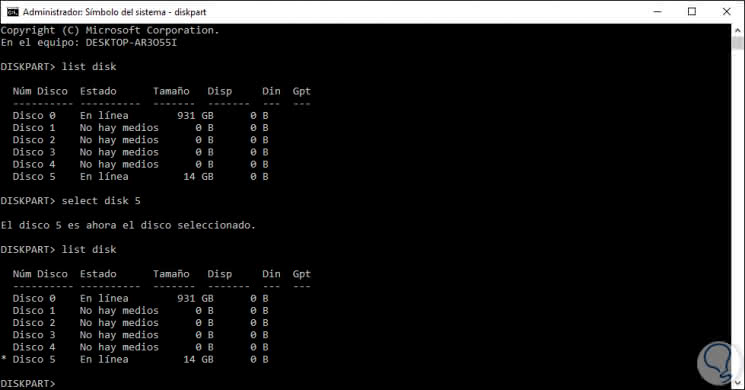
The next step is to select that disk, for this we execute the following:
select disk 5
We noticed that Disk Part confirms the selection:
Step 3
If we execute the command list disk again, we will see that the selected disk is marked with a * sign:
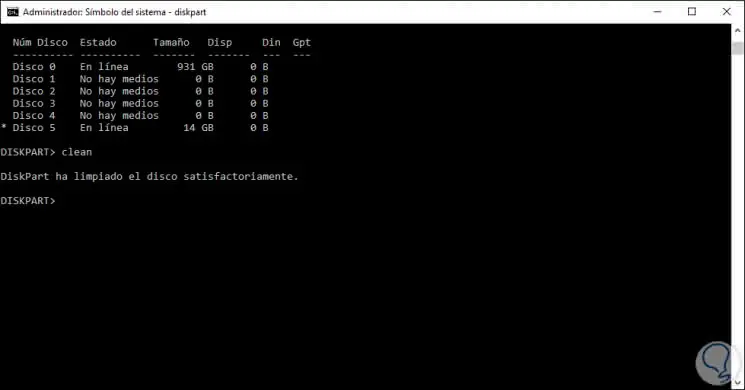
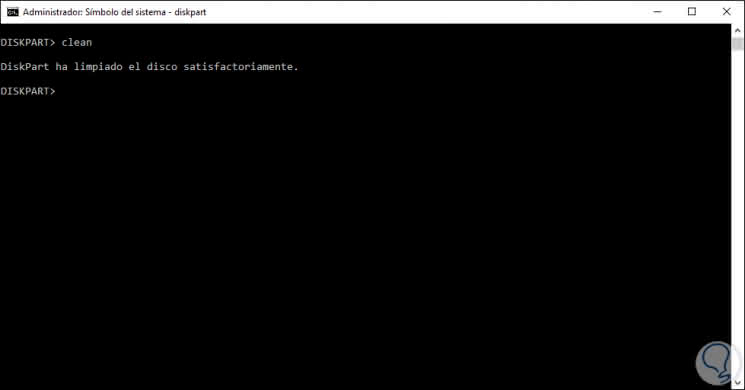
Step 4
Now we must proceed with the format of the USB medium and assign the MBR scheme, this allows the boot to work properly through there, to achieve this we first execute the following:
clean
When running clean, we will erase the entire partition format or volume of the selected disk, in the case of Master Boot Record Disks (MBR), this command only overwrites the partition information of MBR and in the case of the disks of the GUID partition table (GPT), the GPT partition information, including the MBR, will be overwritten.
Step 5
Now let's create the boot partition on the USB by running:
create partition primary
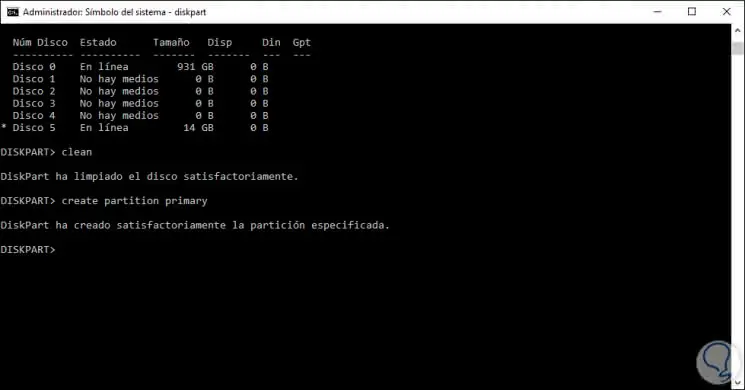
Step 6
This command creates a primary partition on the selected disk, once we execute it, it will be redirected to the new partition, by default the partition will not have a drive letter, in this case Windows assigns the label
"partition 1"
The next step is to select that partition by executing:
select partition 1
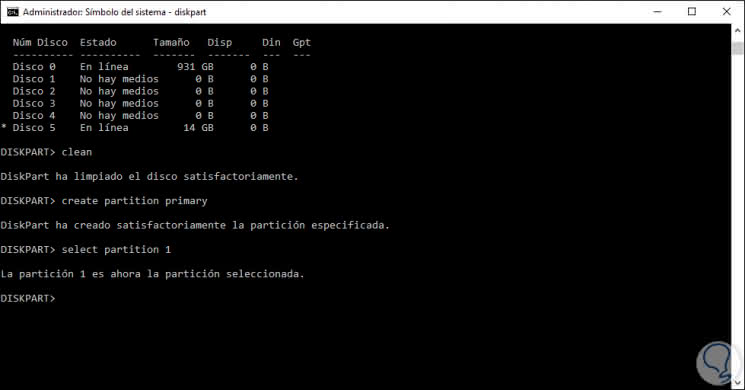
Step 7
This command will select the partition indicated for its use, in case of not indicating some partition, the command "select" will use the current partition, to know all the current partitions we can execute the following order:
list partition
Once the partition is selected, we will activate it for its use:
activate
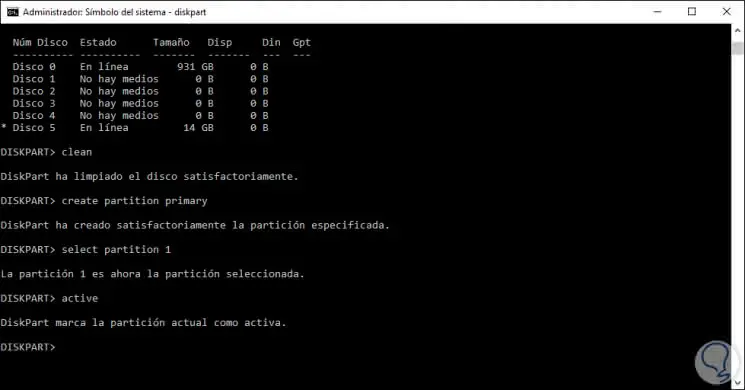
Step 8
The "active" command will indicate to the BIOS or the EFI that the partition or volume has been marked as a valid system partition or an available system volume, taking into account that only partitions can be marked as active.
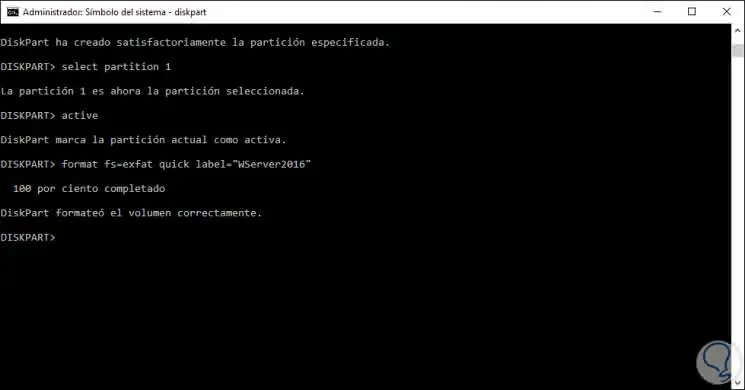
Once we have activated it, we proceed to apply the format to that USB drive, in passing we can assign a label if it is the case, for that we format the unit as NTFS like this:
format fs = ntfs quick label = "WServer2016"
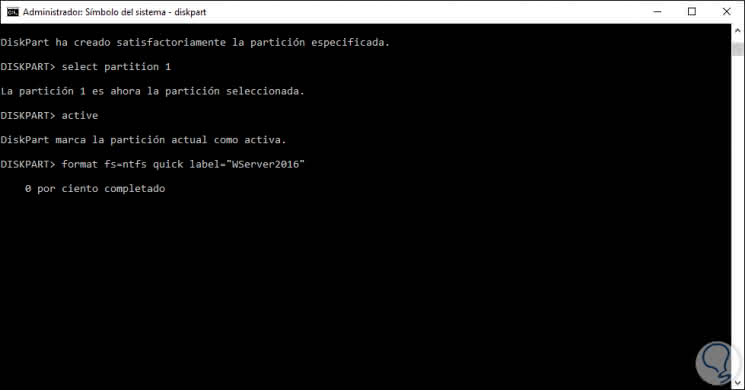
Step 9
There we see that the process starts and if we wish it can also be formatted with exFat which is compatible with most current systems:
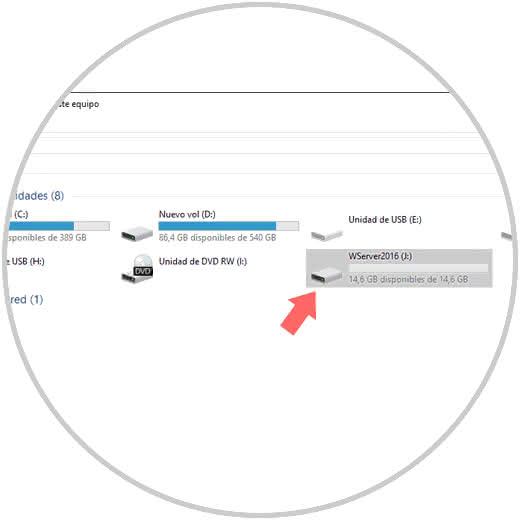
Step 10
At the end we can see the message that the process has finished correctly and we can check in the file browser that the USB has been assigned with the name executed:
Step 11
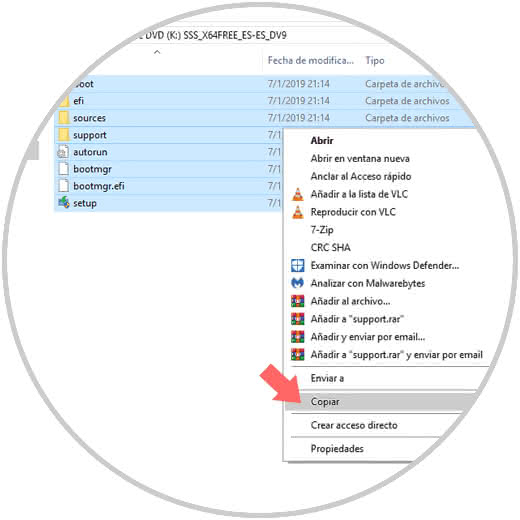
The next step is vital since it consists of copying the sector boot to the USB drive so that the boot is correct, for this we have two options that TechnoWikis will explain and thus select the one that best suits your taste.
The first is in graphic mode, for this we must go to the downloaded ISO image, right click on it and select the option "Mount":
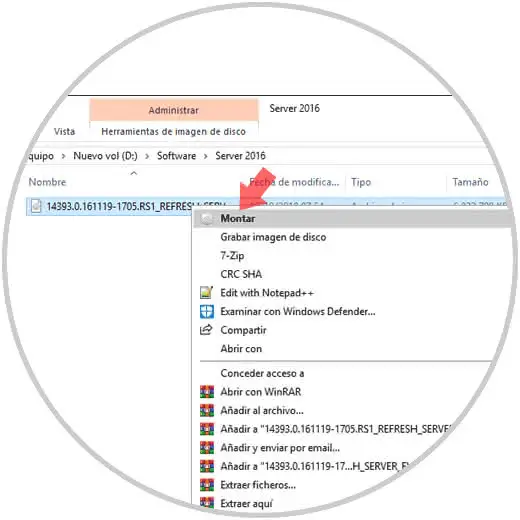
Step 12
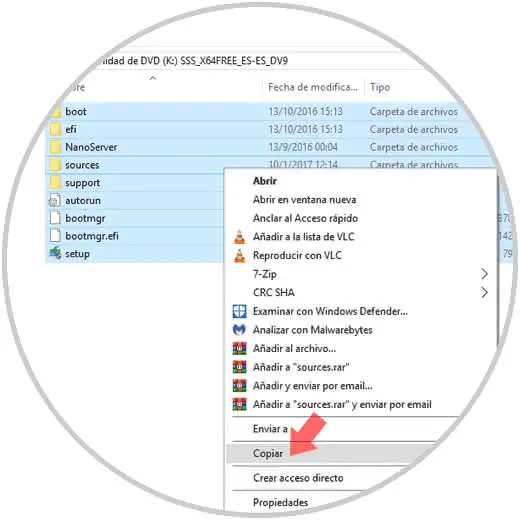
This will create a virtual unit in the system with the parameters of the image, then just access them and copy them. These will be pasted on the USB drive and we have completed the process.
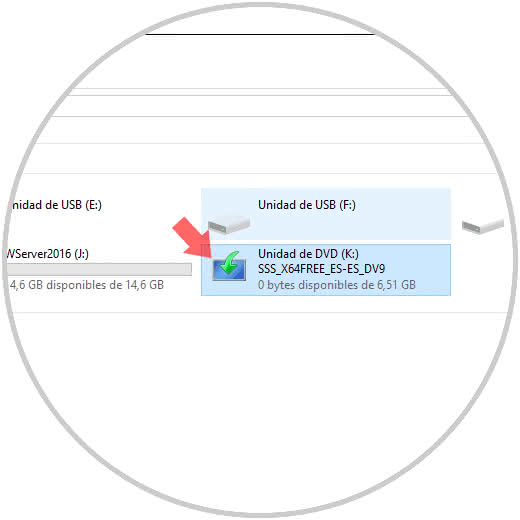
Step 13
Now, the second process (it seems mystical but it is not) is to do this from the console, for it we must know which letter is assigned both the USB medium and the image, in this case the USB drive is with the letter J and the ISO with the letter K:
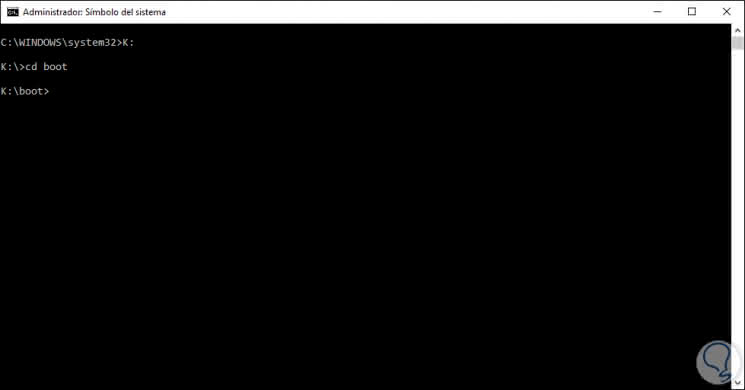
Step 14
With this in mind we will go to the console and access the unit where the ISO image is running in this case K: and then access the boot directory by running cd boot:
Step 15
Once there we will create the boot sector on the USB drive, with the following command:
bootsect / nt60 j:
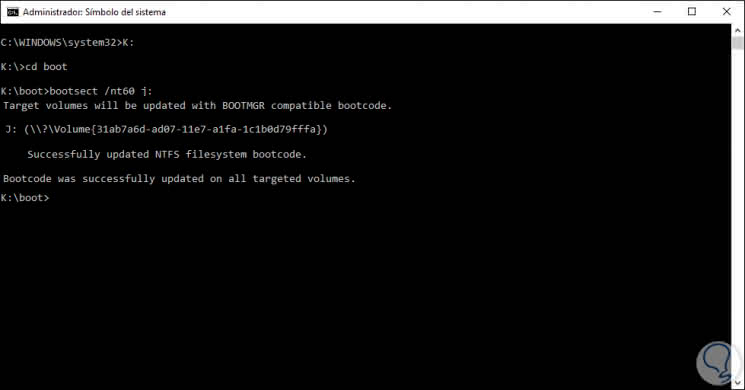
Step 16
Note that the process has been completed correctly which indicates that the USB medium is ready to be used, finally to copy all the files from the ISO to the USB we execute:
copy k: \ *. * / s / e / fj:
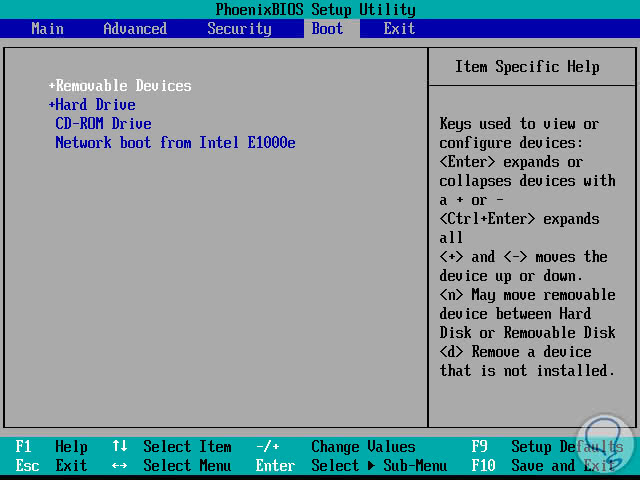
Once this process is finished we are ready to install Windows Server 2016 from the boot medium, for this we will go to the computer where it has to be installed and access the BIOS or UEFI to configure the boot from the USB, this will be done in the Boot tab and selecting the option "Removable Devices":
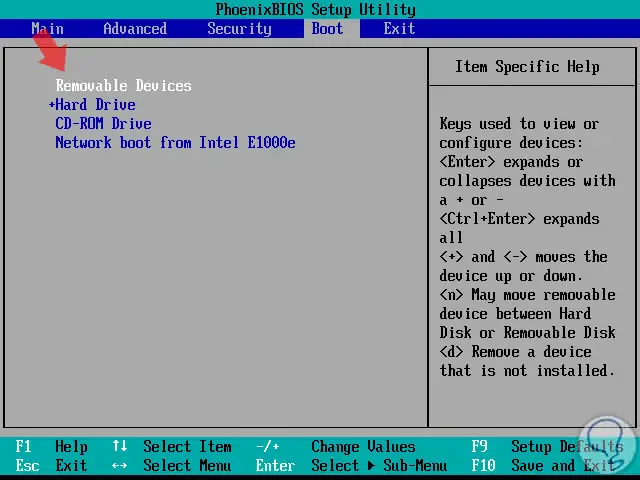
Step 17
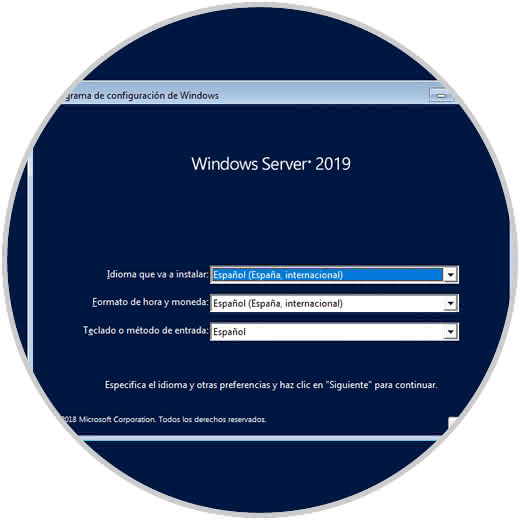
Press the F10 key to save the changes and restart the system and the installation process will be started:
We have learned how to create a Windows Server 2016 boot medium in a simple but effective way.
4. How to create USB boot than Windows Server 2019
The process does not differ much but we will explain it to you in detail so that you understand how simple it is.
Step 1
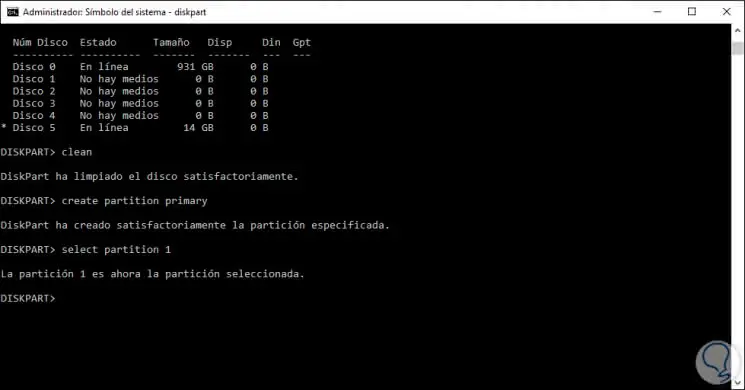
First connect the USB media to the computer and from the command prompt as administrators execute the command "disk part" and then "list disk" to list the disks and available media:
Step 2
We select our disk by executing:
select disk 5
Step 3
The next step will be to execute the "clean" command to erase the USB media partition format:
Step 4
Once this is done, we will create the boot partition by executing one of the following options:

Step 5
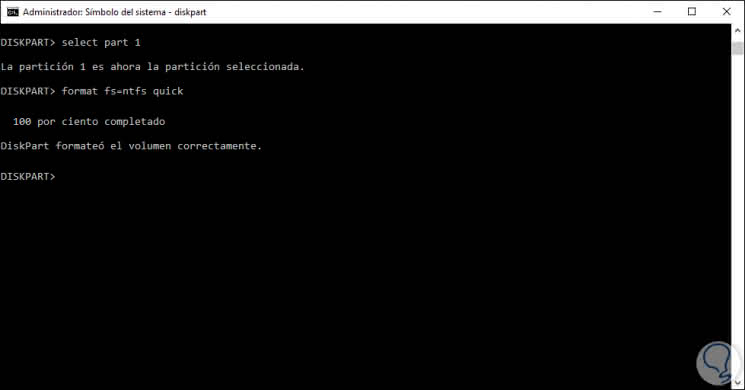
We will select our partition by executing:
select part 1
Step 6
Now we are going to activate this partition by executing the "active" line:

Step 7
Now let's format the USB with the NTFS file system:
format fs = ntfs quick
Note
Remember that if we want we can assign a label to the unit directly from this option.
Step 8
Now let's go to the ISO image, right click on it and select the Mount option in order to create a virtual drive in Windows:
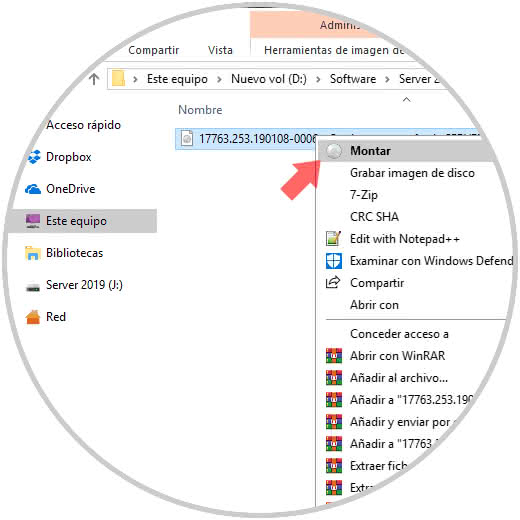
Step 9
Once assembled, we access the files and proceed to copy their content:
Step 10
This we will stick it on the USB drive and so we are ready to use it, as we mentioned above, we must access the BIOS or UEFI and configure the boot from the USB medium:
Step 11
We press F10 and when the system restarts we can see that we are ready to install Windows Server 2019 or use one of its integrated support tools:
We are ready and prepared to create our Windows Server 2016 or Windows Server 2019 boot media in a simple way, in a few minutes but always with all the advantages that this process gives us for an integral support.