The use of the network in server environments or on client computers is essential to allow both local and external communications to be carried out as expected, but some error, no matter how minimal, will prevent all processes from being fully executed. ( Internet access , file transfer, updates, etc).
For this reason, it is ideal whether we are administrators or not , to have utilities for network analysis and thereby determine the root of the errors. In this case, Linux offers us two functional commands for this type of analysis, such as the dig and nslookup commands, which we will talk about in detail.
What is the dig command
Dig (Domain Information Gopher) is a command line utility with which it is possible to carry out DNS searches by consulting the name servers and displaying the final result.
By default, the dig command sends the DNS query to the nameservers hosted in the /etc/resolv.conf directory, but we may manually indicate the server to which it should point.
The syntax for using dig is as follows:
dig [server] [name] [type]
The specified values are:
- Server: refers to the IP address or hostname of the nameserver to query in Linux
- Name: indicates the name of the resource record to search
- Type: is the type of query requested by dig, it can be an A record, an MX record, a SOA record, etc.
What is Nslookup
Nslookup (name server lookup), is a command used to perform DNS lookups in Linux, its output can include complete DNS details such as the IP address, MX records of a domain or the NS servers of a particular domain.
When using nslookup we have two modes that are:
- Interactive mode with which it is possible to query the name servers to access information about various hosts and domains
- Non-interactive mode with which we can print only the name and information requested for a host or domain
The syntax for nslookup is as follows:
nslookup [option]
Today's Linux systems already include the dig and nslookup utilities by default, but we may have accidentally deleted them.
Now let's see how to install and use these commands on Linux.
1. How to install dig and nslookup on Linux
Step 1
In case of using CentOS or Red Hat we must execute the following command:
dnf install bind -utils
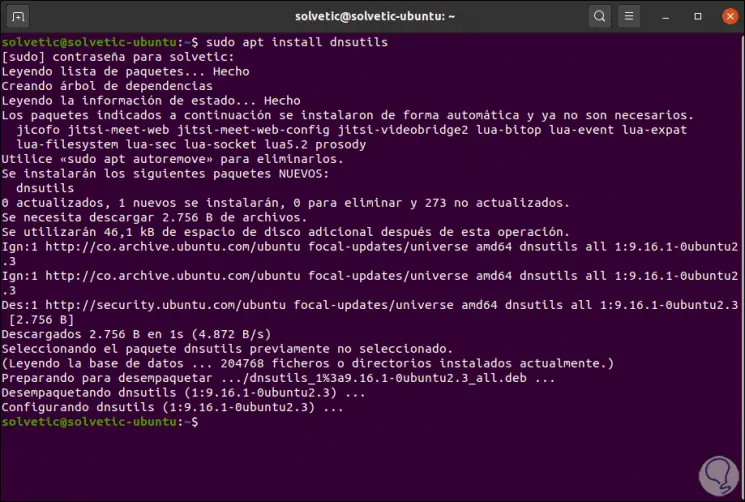
If we use Debian or Ubuntu we will execute the following:
apt install dnsutils
In case of using ArchLinux we execute:
pacman -Sy dnsutils
Step 2
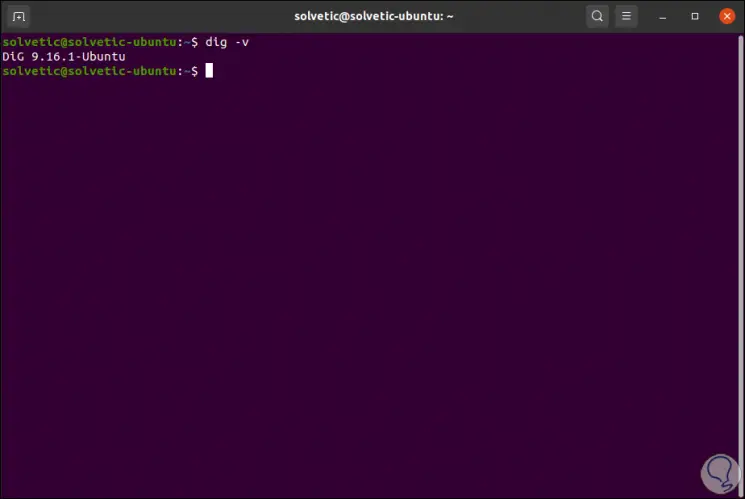
Once installed we can validate the version used with the following command:
dig -v
2. How to use dig and nslookup Linux
Step 1
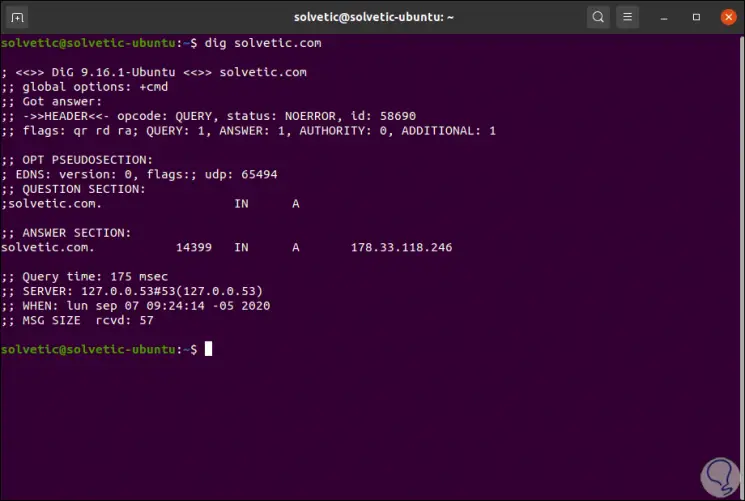
Once installed we are ready for use, we can use dig to query a domain name and retrieve information from it, for example, we execute:
dig technowikis .com
Step 2
In this case we have details such as:
- Date and time the query was made
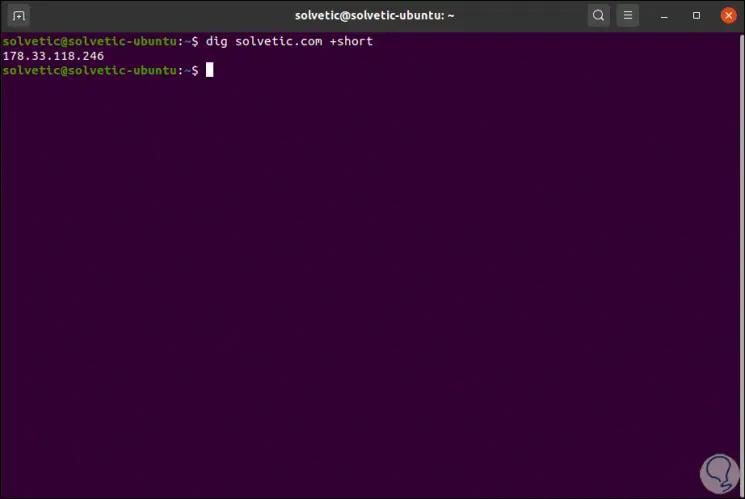
If we only want to view the IP of the device, we must add the parameter + short like this:
dig technowikis.com + short
Step 3
To view the MX records we execute the following:
dig technowikis.com MX + short
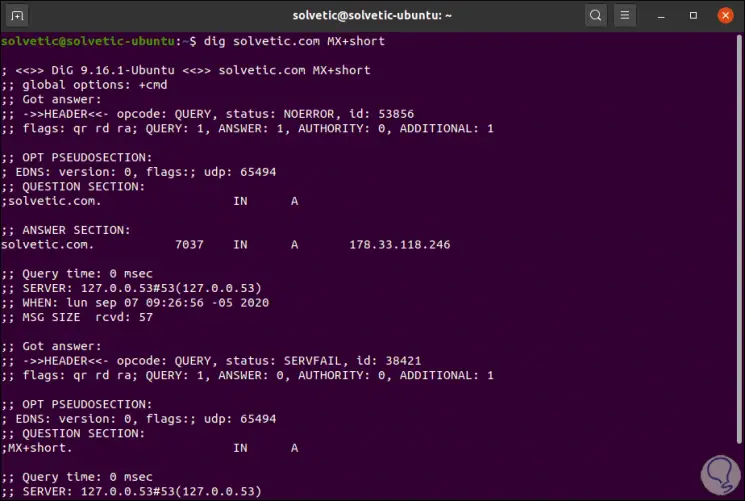
We see that the details are much more complete.
Step 4
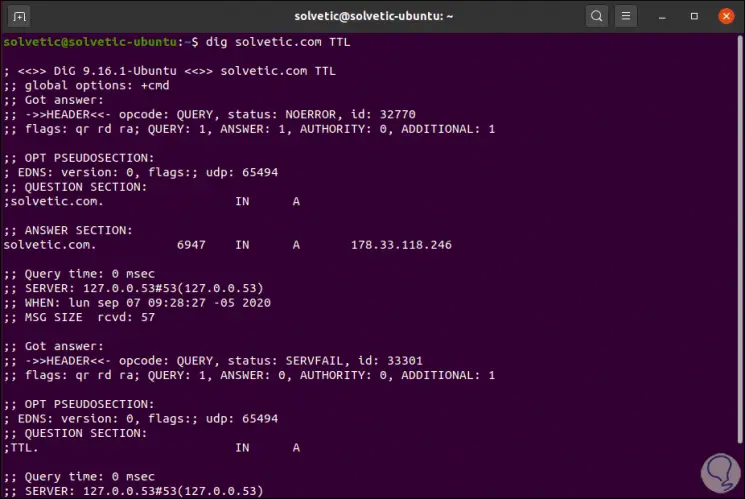
You can access TTL details with the following command:
dig technowikis .com TTL
Step 5
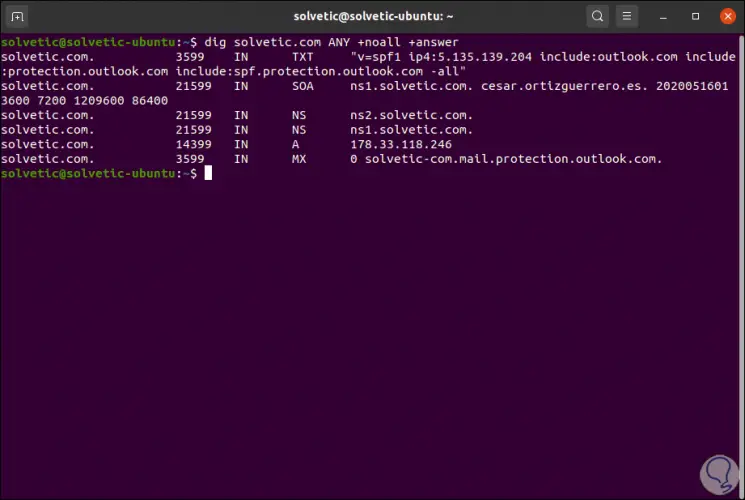
To consult all DNS records we execute:
dig technowikis .com ANY + noall + answer
3. How to use nslookup Linux
Step 1
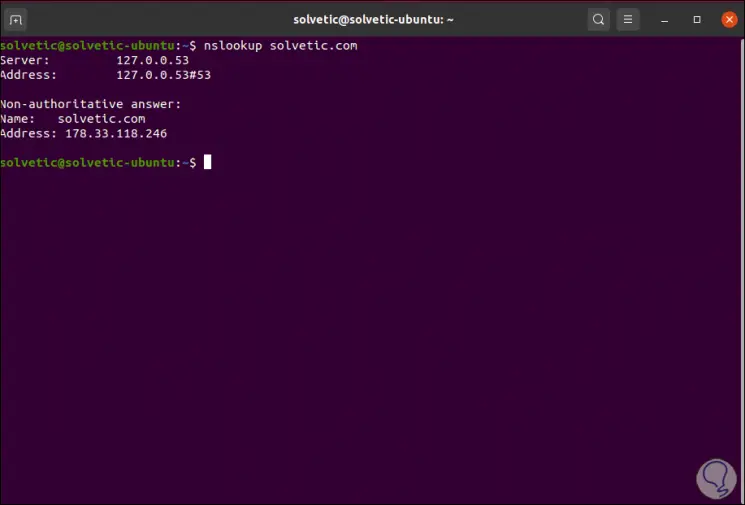
With nslookup if we want to obtain domain information we execute:
nslookup technowikis .com
Step 2
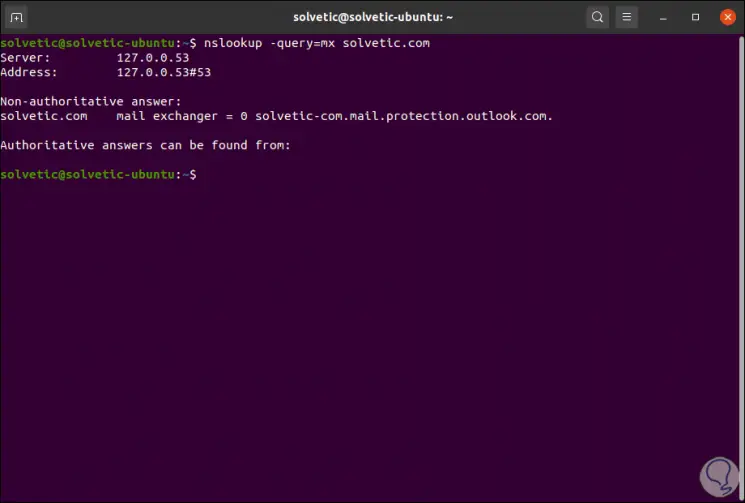
We can see the MX records using the following parameter:
nslookup -query = mx technowikis.com
Step 3
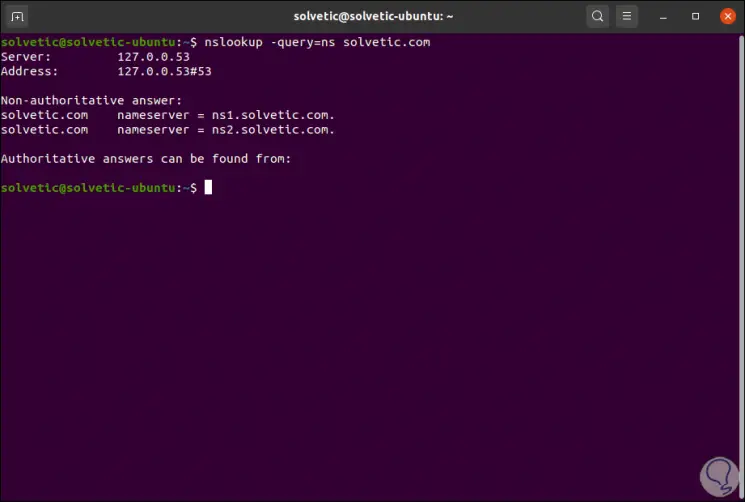
To review the NS records we enter:
nslookup -query = ns technowikis.com
Step 4
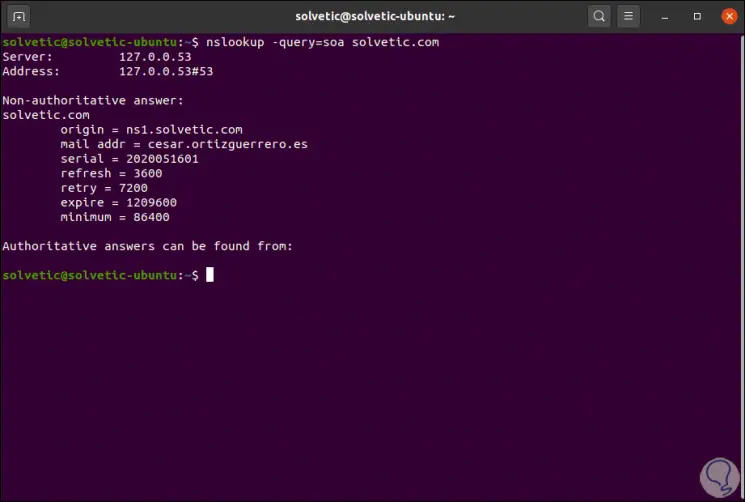
If it is necessary to access the SOA records we enter:
nslookup -query = soa technowikis.com
With dig and nslookup we can perform domain and network analysis tasks to detect possible errors either in our equipment or in the objects that participate in the communication.