The printer is one of the peripherals that today are still being acquired when we need physical documentation. Although the completely digital is very present, the data on paper is still present and a printer is important to be able to quickly print any document. In this case, even if we have a Chromebook, we will see how we can easily install and configure a printer..
Chromebook is an online system in which we work directly with our Google account and all work is done on Chromium . But regardless of this there are certain tasks that we can still carry out from there and one of them is the printing of what we are managing and for this TechnoWikis will explain how to add a printer on Chromebook to have the option to print whatever is necessary.
To stay up to date, remember to subscribe to our YouTube channel! SUBSCRIBE
How to set up and install a printer on Chromebook
Step 1
Let's go to Chromebook, click on Start and then click on the pinion icon (Settings):

Step 2
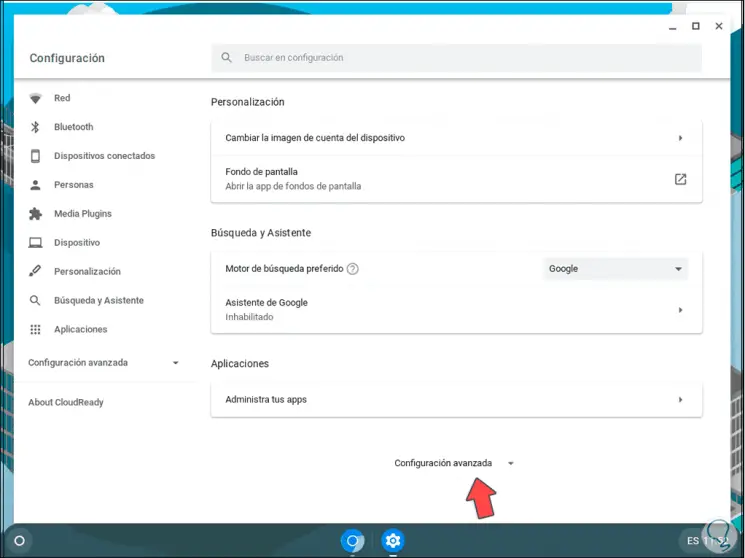
In the displayed window we go to the bottom and click on "Advanced Settings":
Step 3
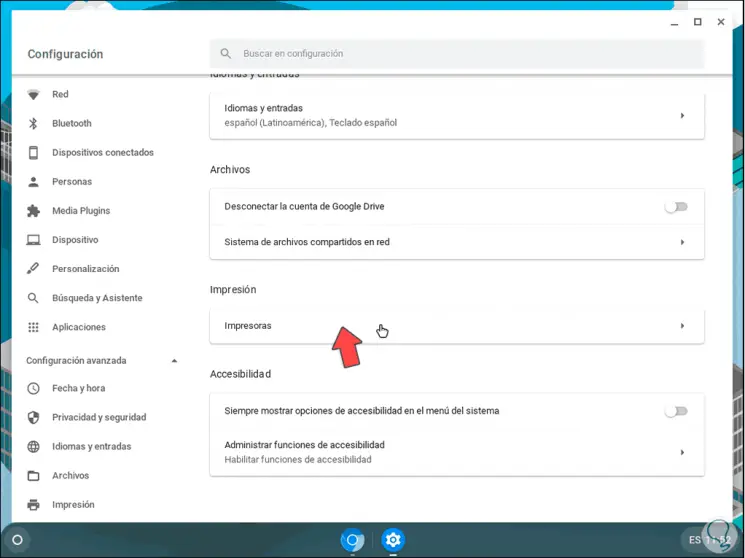
Then we will go to the "Printing" section and click on "Printers":
Step 4
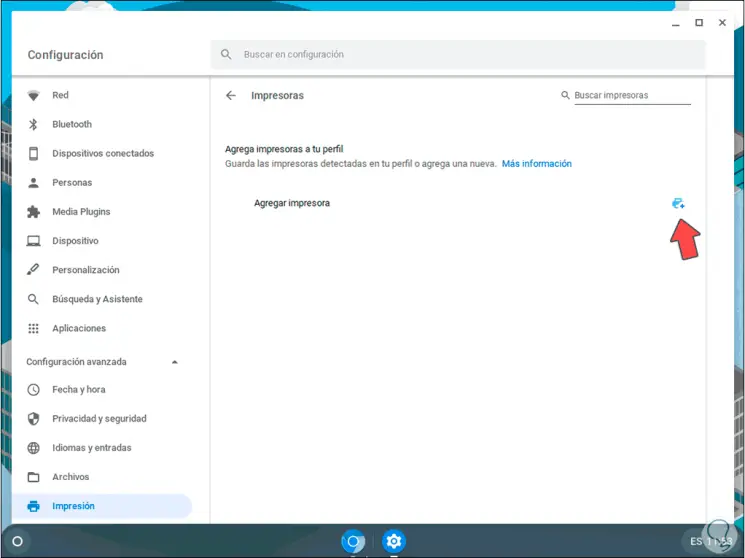
In the next window we click on the option "Add printer":
Step 5
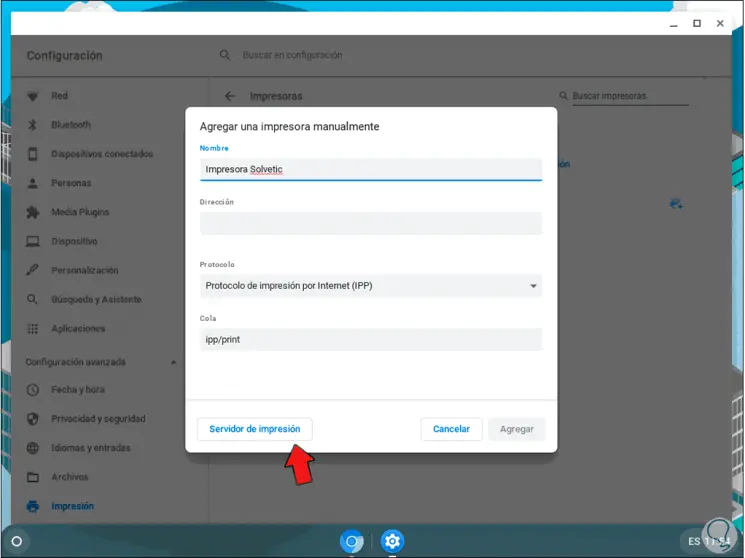
Initially we will see the following:
Step 6
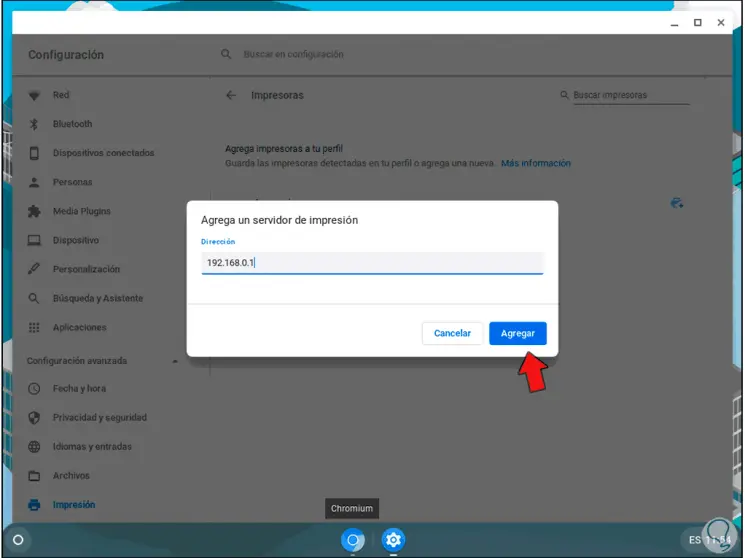
There we can manually enter the printer data (name, protocol, IP address; etc) or we can click on the "Print Server" button to manually add the IP address of the print server to use:
Step 7
In this case we will use the manual mode and record the data from our printer:
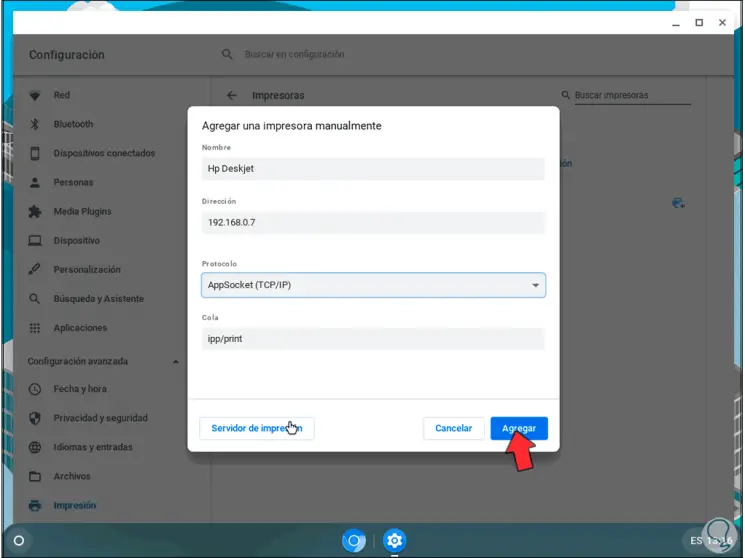
Step 8
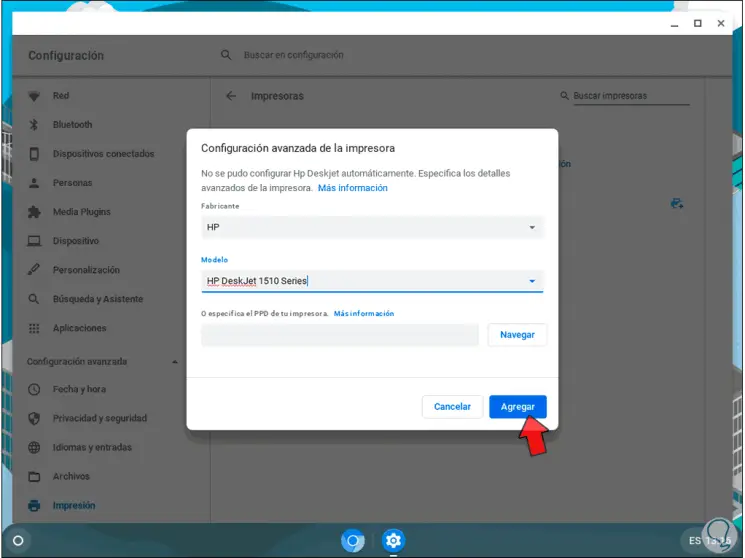
We click on "Add" and after that we select the manufacturer and model of the printer to use:
Step 9
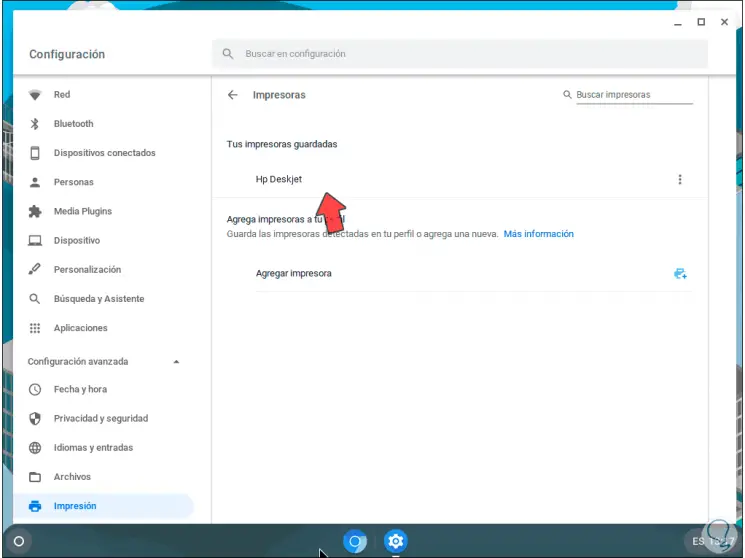
We click on "Add" and we will see our printer added to Chromebook:
With this it will be possible to carry out all the printing tasks that are required from the browser. With this process explained by TechnoWikis you have learned how to install and configure a printer on a Chromebook..