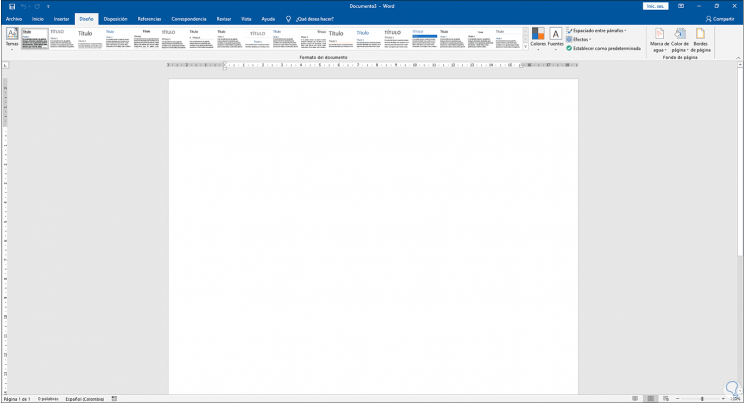
We can see that Microsoft Word offers us a modern, functional environment with the necessary tools to carry out quality work thanks to its functionalities. All of them are located in a toolbar where you can quickly access a specific action or a general menu. Therefore, when accessing a new Word 2016 or 2019 document we will see this:
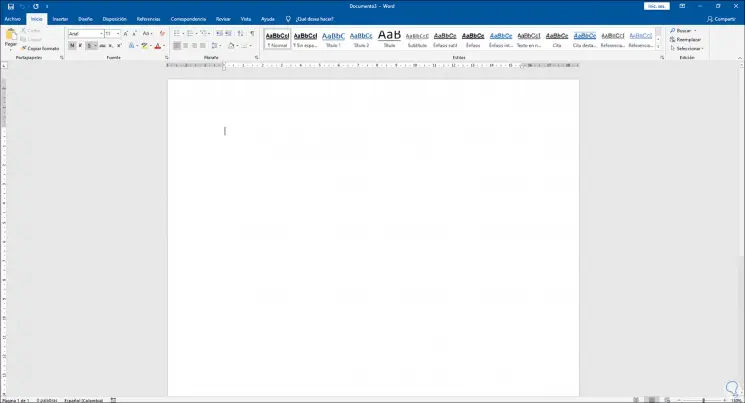
At the top we see the toolbar or options which are made up of multiple menus in which we find various options to work either with the sources, with the paragraphs, with headings or with the general structure of the file. Although this bar is visible by default, some users may want to hide it to have a better perspective of what they are working on in text , hiding or fixing this bar is really simple and with TechnoWikis you will learn how to do it..
To stay up to date, remember to subscribe to our YouTube channel! SUBSCRIBE
Hide or pin the toolbar in Word 2016 or Word 2019
Step 1
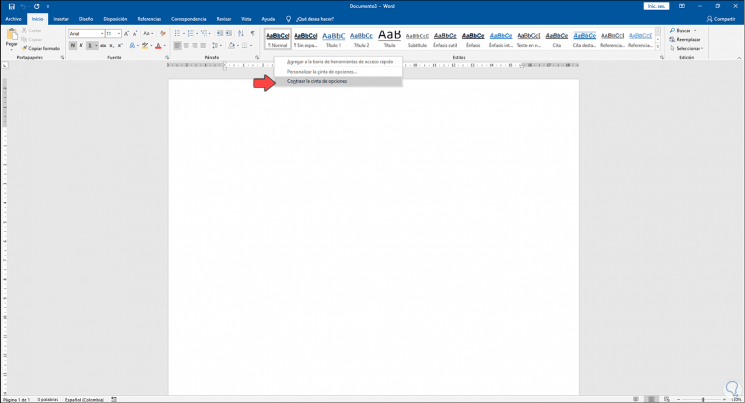
To hide the toolbar, just right-click somewhere free of it and in the displayed menu select "Collapse the ribbon":
Step 2
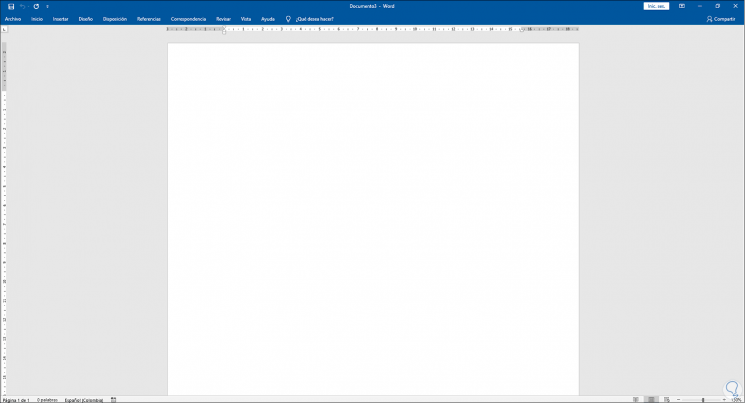
As a result of this we will see the following:
Step 3
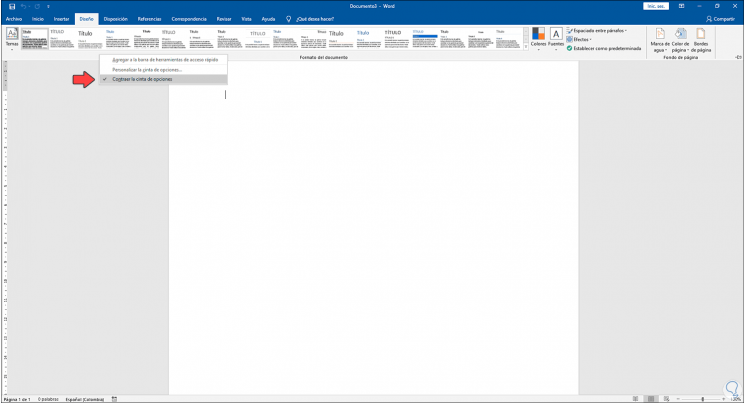
So that the toolbar is fixed again in Word, we open one of the available menus, again right-click somewhere free and click on "Collapse the ribbon" which is with a check mark:
Step 4
After clicking there we can see that the options or tool bar will be visible in the document:
Simple and easy is to hide or make the toolbar visible in Word 2016/2019.