Our hard drives have a certain capacity which we can adjust for additional tasks such as backups, file storage, space reserved for administrative tasks and more, that is why we create partitions on the hard drive that allow us to divide the hard drive into other sections for it. Partitioning our disk is important to create individual parts to store different types of data, for example, it is important to create an individual system data partition to avoid loss of information in case of system errors..
On many occasions we resort to extra programs to partition our disk , but there is a really simple method to create one or more partitions there and TechnoWikis will tell you how to achieve it in Windows 10 without the need to format the C drive, which results in all the Disc content will be erased .
To stay up to date, remember to subscribe to our YouTube channel! SUBSCRIBE
Partition C disk without formatting Windows 10
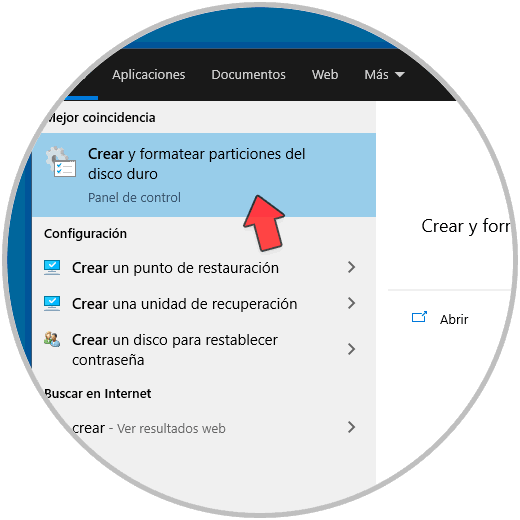
Step 1
To start we go to the Start search box and enter the word "create", select "Create and format hard disk partitions":
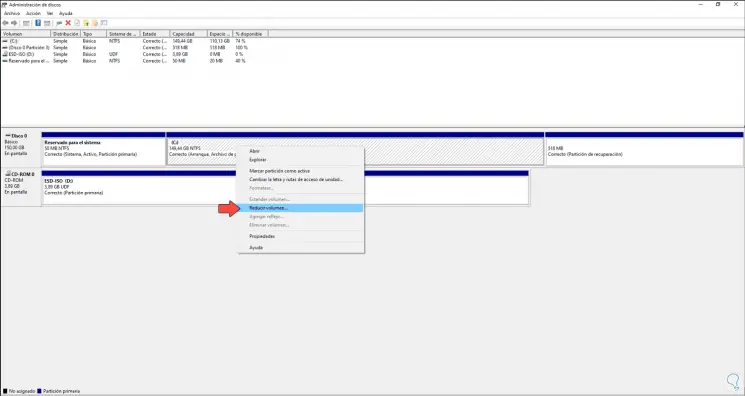
Step 2
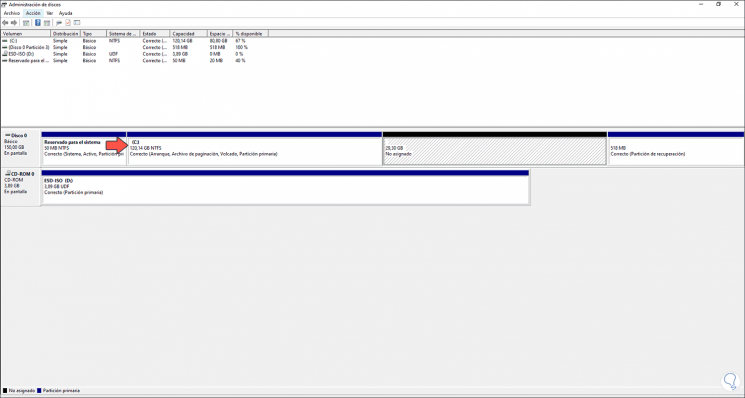
In the open window of Disk Manager we right click on drive C and select the option "Reduce volume":
Step 3
Windows 10 will do an analysis to calculate how much space will be available to reduce, then a window will be launched with the available capacity to reduce:
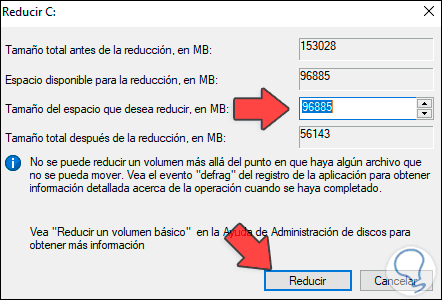
Step 4
There we enter the desired value in MB for the partition:
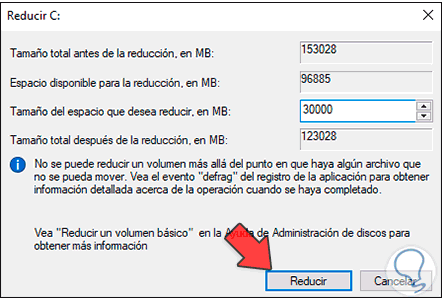
Step 5
We click on "Reduce" and after a moment we will see the result of this reduction in drive C:
Step 6
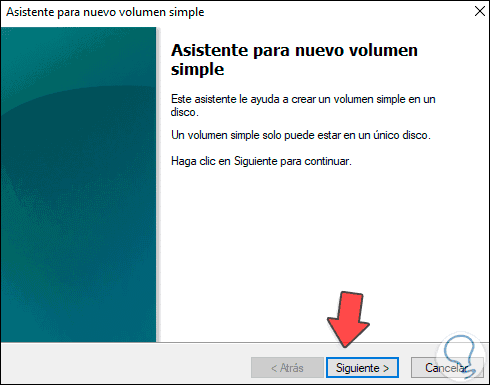
Now we must configure this new partition created on drive C, we right click on this new space and select the option "New simple volume":

Step 7
The following wizard will be displayed:
Step 8
We click Next and we will see the following:
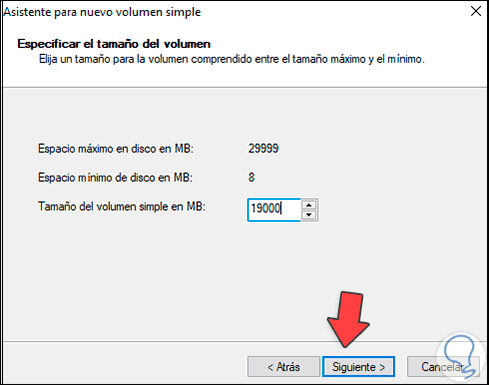
Step 9
There we can leave the same default value or we can enter a new size if necessary, we click on "Next" and now we define the letter that the system will assign to this partition or we can mount it in an empty NTFS folder:
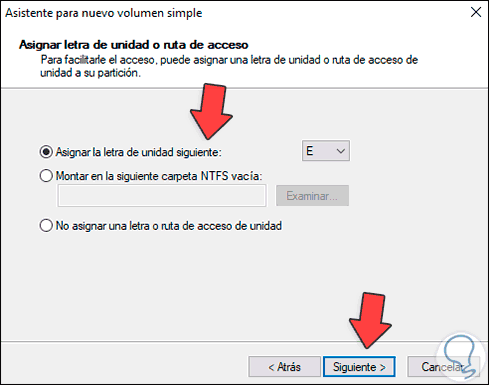
Step 10
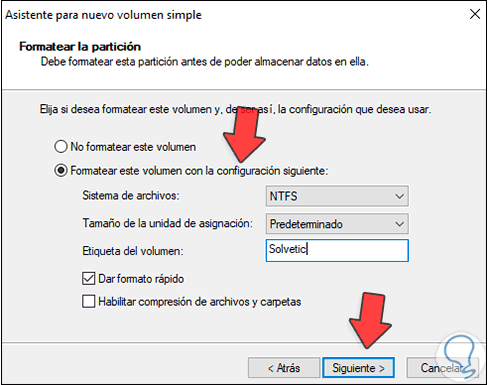
Once this is defined, we click Next and we will assign the name of the partition as well as the file system and the size of the unit:
Step 11
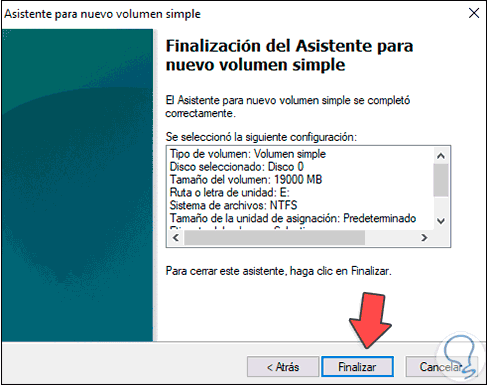
In the next window we will see a summary of the task about to be carried out in Windows 10:
Step 12
We click on "Finish" to complete the process:
Step 13
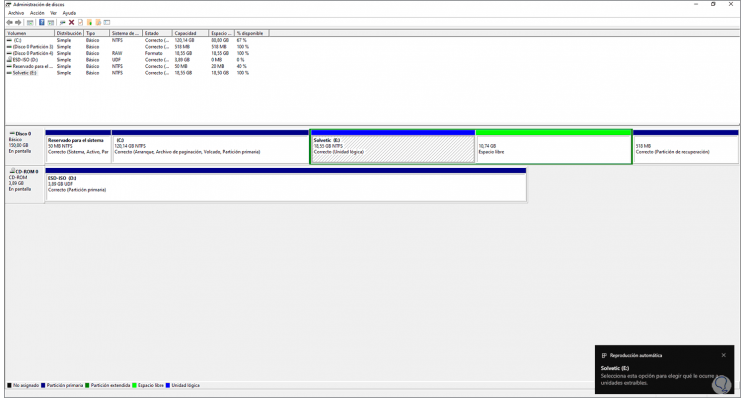
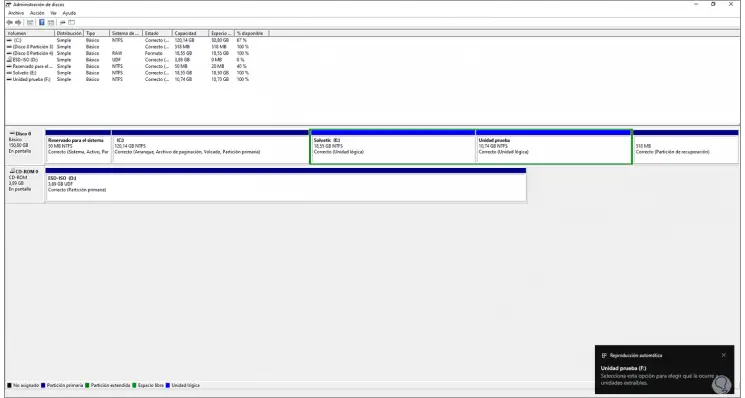
At the bottom we see the message that the unit was created, we can check this from the Windows 10 File Explorer:
Step 14
Now we can carry out the same process with the space that was left free:

Step 15
we right click, select "New simple volume" and adjust all the values already seen previously:
Step 16
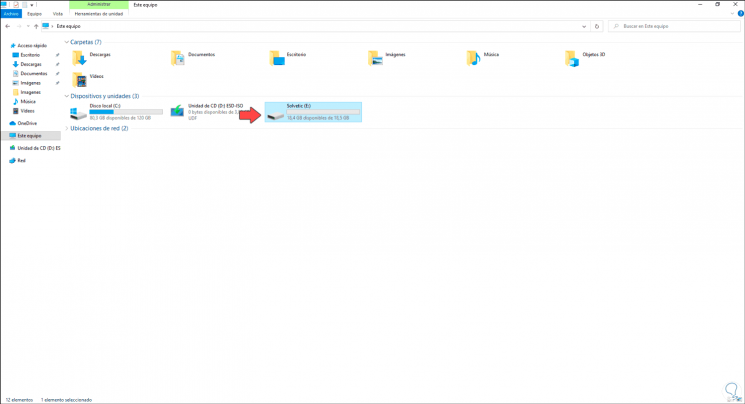
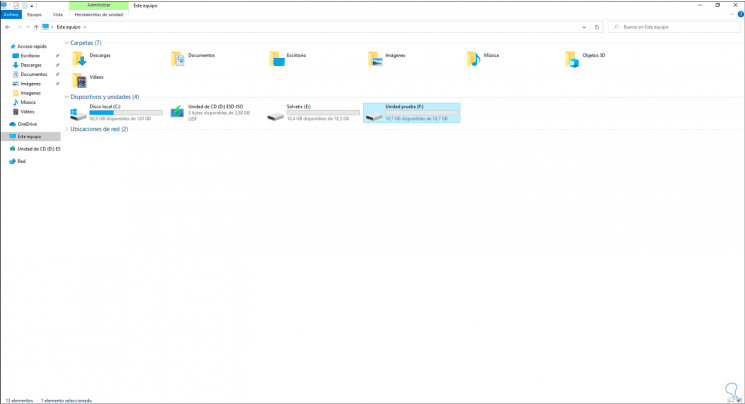
In Explorer we check that the partition has been created correctly:
With this process, without the need for extra programs, we can create partitions on the Windows 10 C drive as long as it has extra space for this type of task and we must be clear about what size and what it should be used for..