One of the most popular games today is Minecraft with which it is possible to develop and create your own universes based on the location and destruction of blocks. There, our full potential as analyzers and creators comes to the fore. Without more words, we are going to see how to install Minecraft on Chromebook and thus be able to play this interesting game on our PC..
Although Minecraft has different game modes, its syntax is summarized in the free construction through cubes of three-dimensional textures, these blocks are linked to elements of nature, with Minecraft we have:
Minecraft Features
- Sleek and modern graphics
- Blaze3D for rendering images
To stay up to date, remember to subscribe to our YouTube channel! SUBSCRIBE
How to install Minecraft on Chromebook
He passed
The first step to take is to go to Google and in a new tab enter the following:
chrome: // flags
Step 2
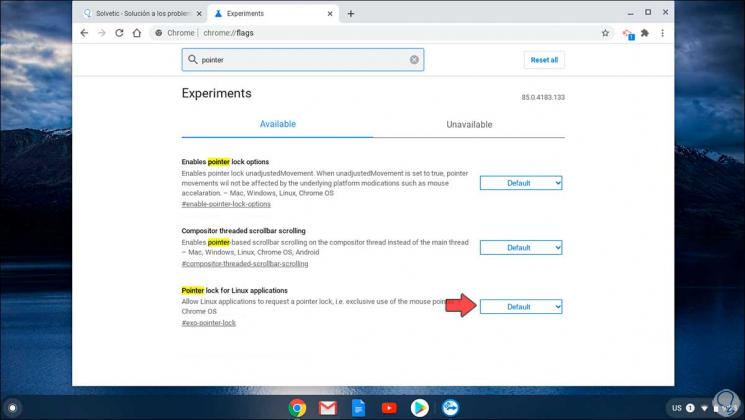
In the search engine we enter "pointer", in the displayed results we select "Pointer lock for Linux applications":
Step 3
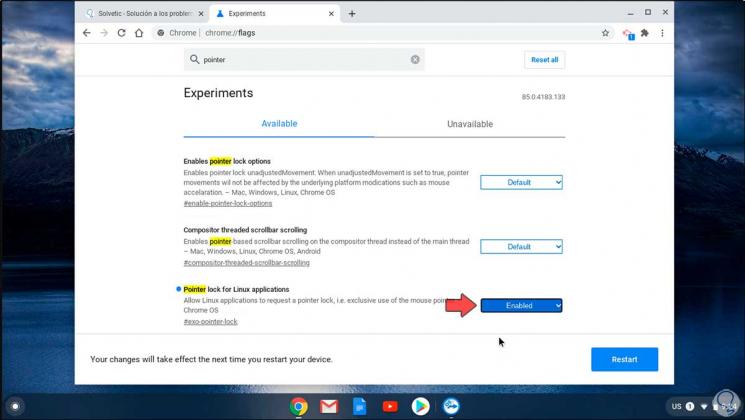
Its status is Default, disabled, we must change it to Enabled. We click on "Restart" to restart the browser and the changes are applied.
Step 4
After this we will go to the following route:
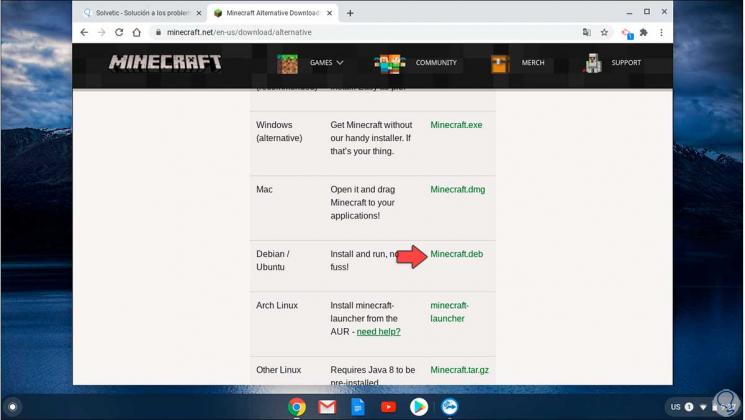
Alternate Minecraft Downloads
Step 5
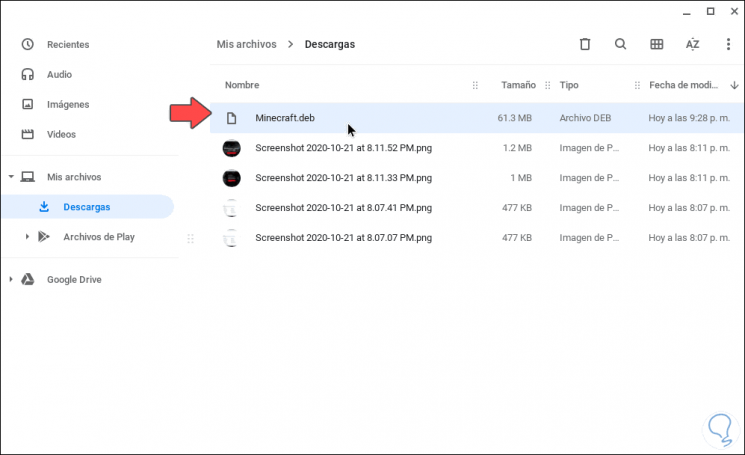
In the case of Chromebook we must click on the line "Minecraft.deb", we save the file locally:
Step 6
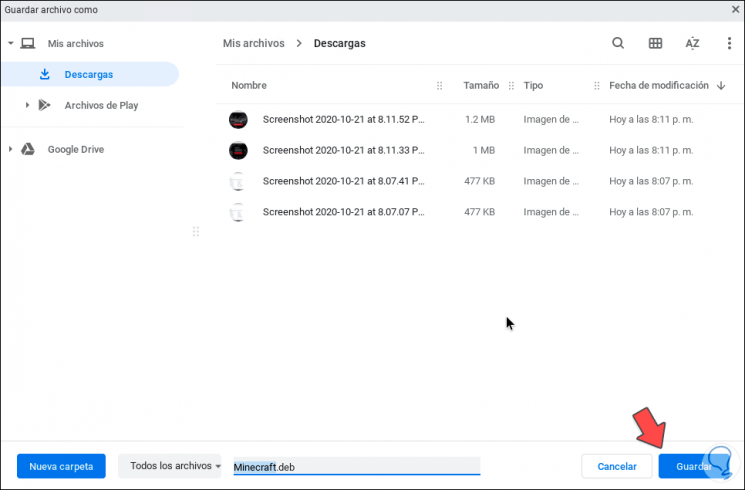
Click Save to host it in Downloads:
Step 7
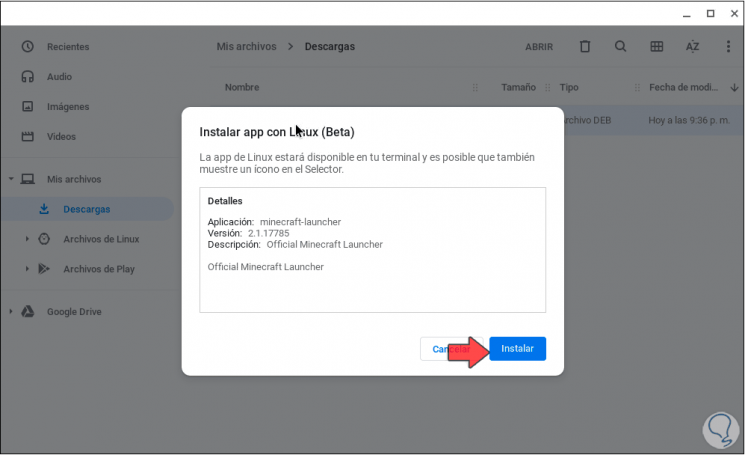
We double click on this .deb file and the following window will be displayed:
Step 8
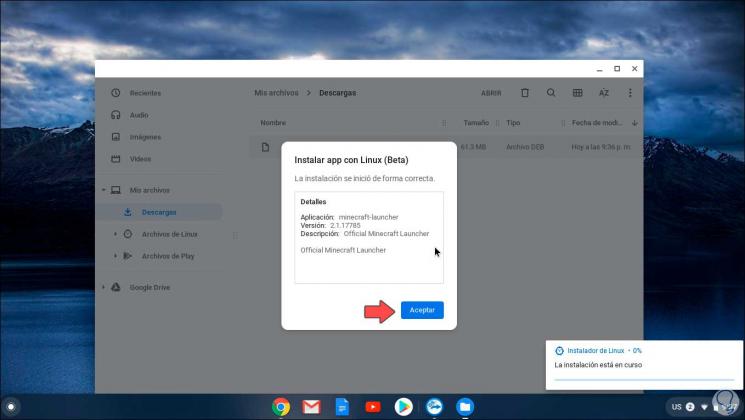
This indicates that this file will be installed through Linux (Beta) which is a terminal that we can enable on Chromebook. We click on "Install" and the installation will take place in the background:
Step 9
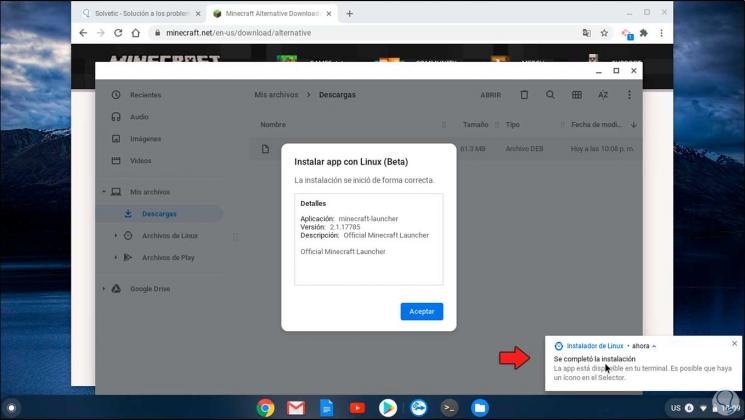
Once this process reaches its end we will observe the following:
Step 10
We click OK to close the wizard. We go to the application search engine on Chromebook:
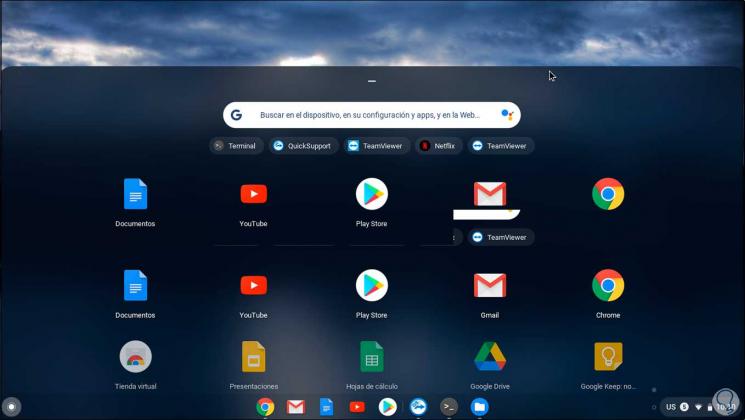
Step 11
We locate the option "Linux Apps", we double click on it and then we will click on "Minecraft Launcher":
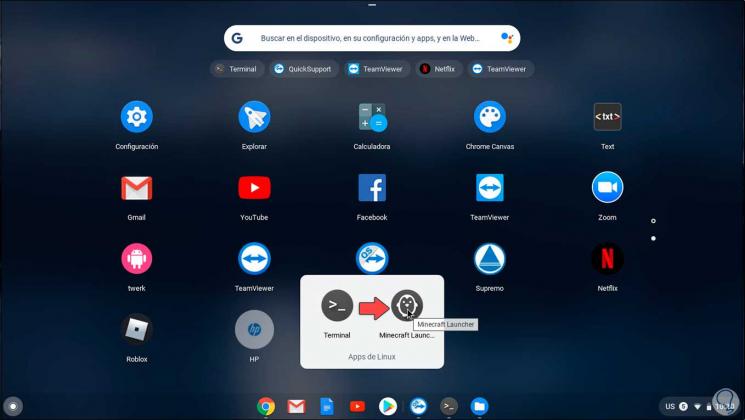
Step 12
Double-clicking on it and the Minecraft wizard will open:
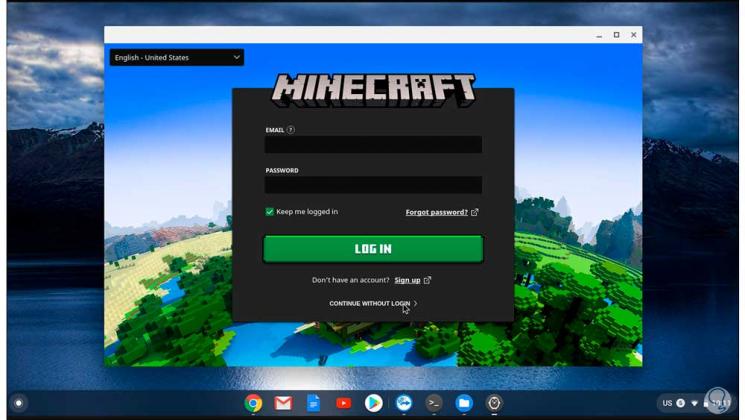
Step 13
We enter our credentials or we register to create the user:
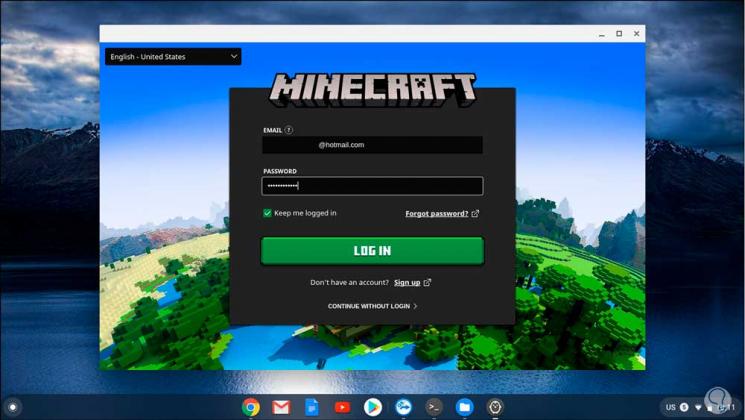
Step 14
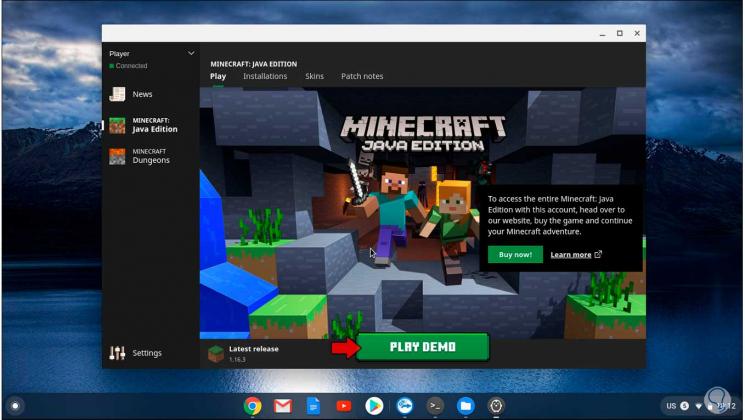
We click on "Log In" and we will access Minecraft:
Step 15
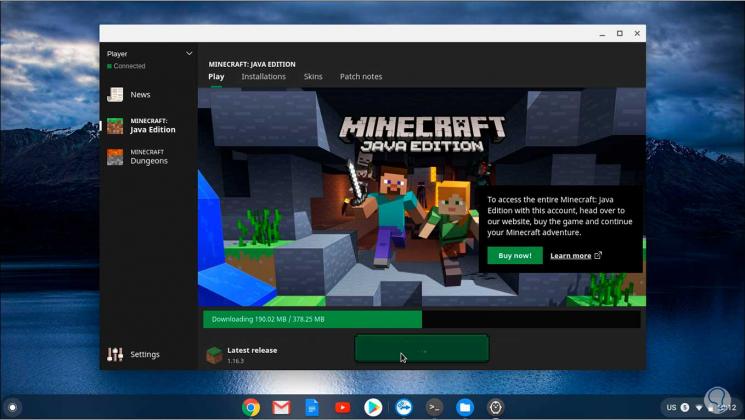
There we can play the demo and it will be downloaded first:
Step 16
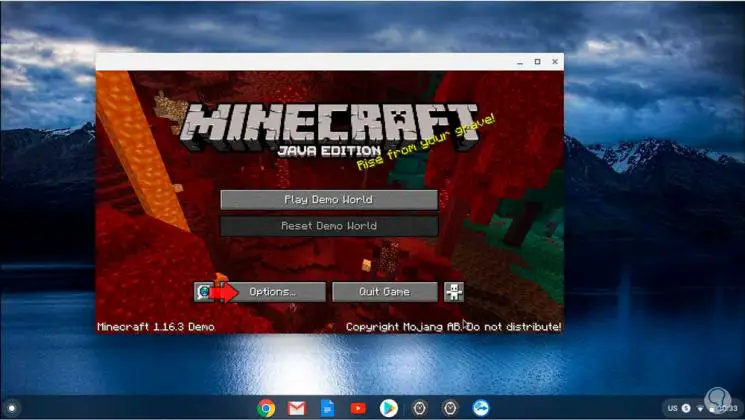
Once downloaded we will see the options and configuration of the game:
Step 17
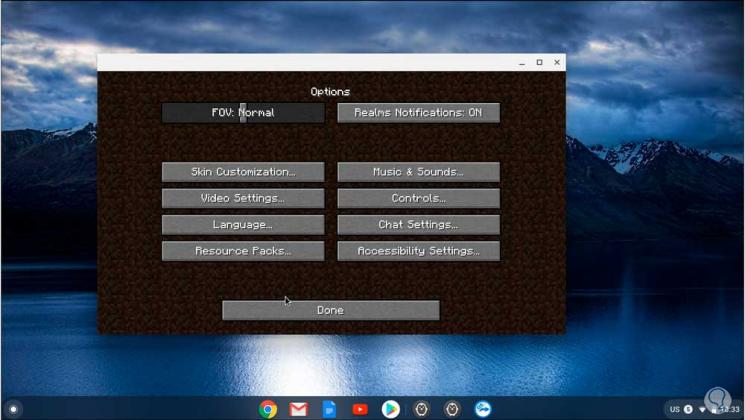
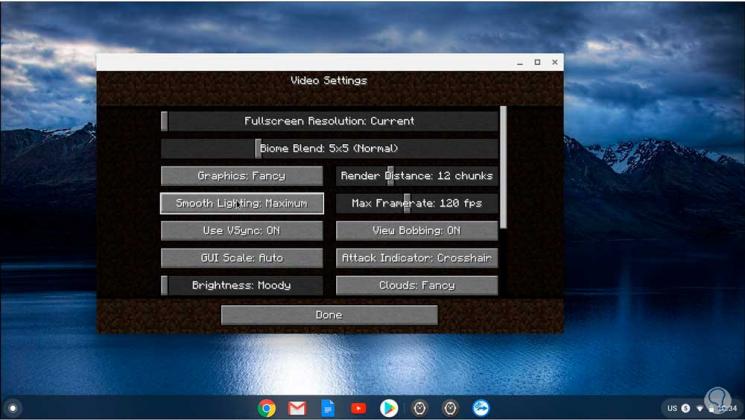
We click on the "Options" button and in the next window it will be possible to configure everything related to images, audio, video, controls, etc:
Step 18
We make the adjustments that we consider necessary for an optimal game:
Step 19
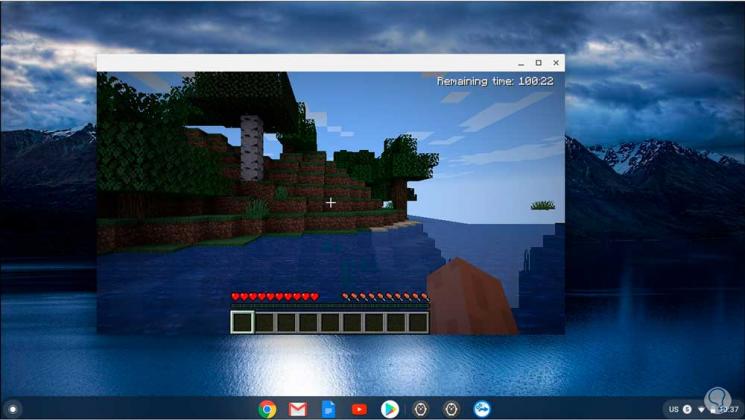
Once we configure what is necessary, we return to the game and we can start the Minecraft game on Chromebook:
This is the process we must follow to correctly install Minecraft on Chromebook.