Executable Windows applications are exclusive to Windows 10 operating systems and therefore when trying to run them on other systems an error will appear. This is due to the file system of each system, to use any of these .exe applications on systems other than Linux, special software is needed. Chromebook is a Chrome based system so naturally it is not compatible with Windows applications. If you need to install an .exe application there on Chromebook, we will use Wine for this purpose and TechnoWikis will explain how to achieve it..
Wine (Wine Is Not an Emulator) is an application with which a layer is created that allows an operating system not compatible with Windows to be able to install Windows' own applications (.exe). It is normal that 100% of the applications cannot be installed and sometimes the performance is not as expected, but it is a good option to consider for this type of task.
Let's see how to install Wine on Chromebook and open exe files..
To stay up to date, remember to subscribe to our YouTube channel! SUBSCRIBE
How to open EXE files on Chromebook with Wine
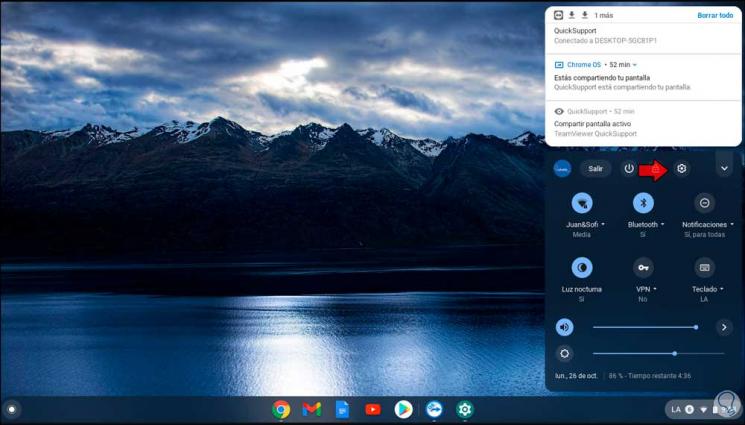
Step 1
We are going to:
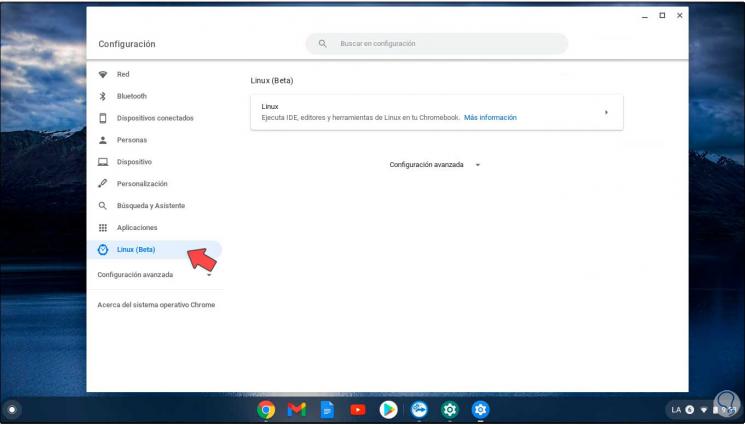
Step 2
Then we go to the "Linux (Beta)" section and validate that the terminal is enabled:
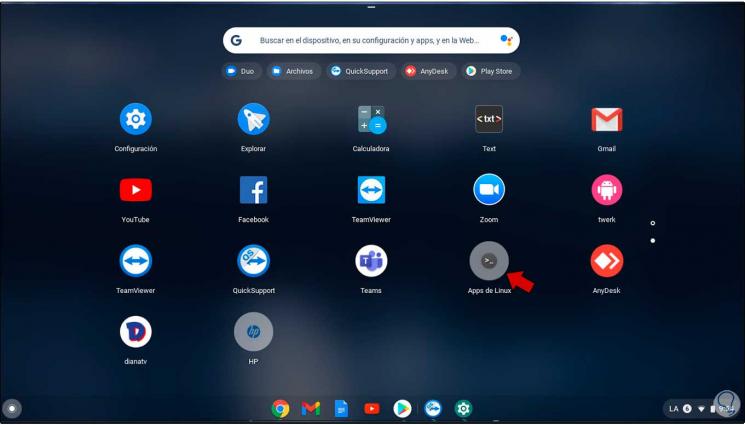
Step 3
Now from the search engine we go to "Linux Apps" and there we select the terminal:
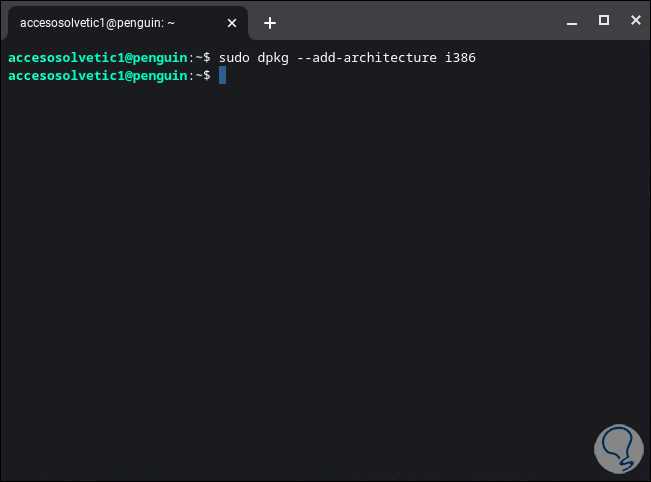
Step 4
The first step in the terminal will be to add the 32-bit architecture to the system, for this we execute:
sudo dpkg --add-architecture i386
Step 5
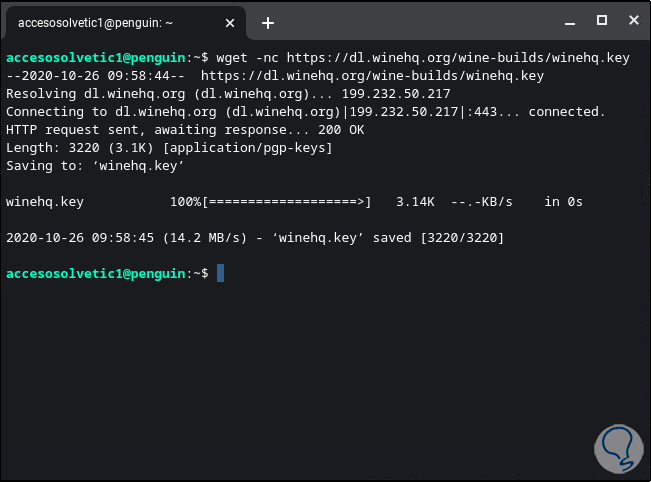
After this, we are going to download the Wine key and:
wget -nc https://dl.winehq.org/wine-builds/winehq.key
Step 6
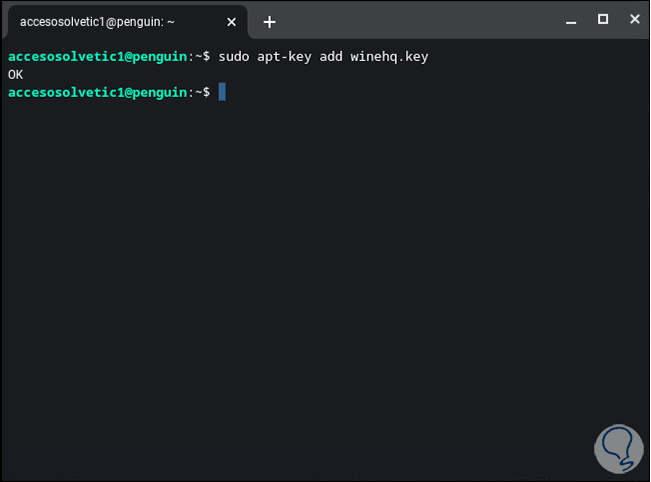
We add it to the system:
sudo apt-key add winehq.key
Step 7
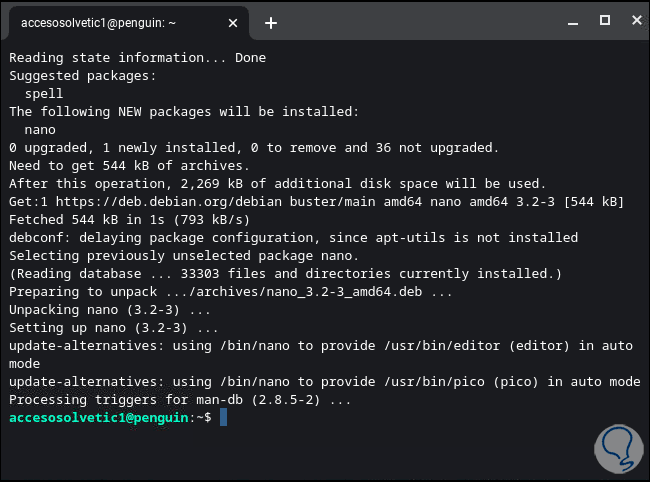
We install the nano text editor:
sudo apt install nano
Step 8
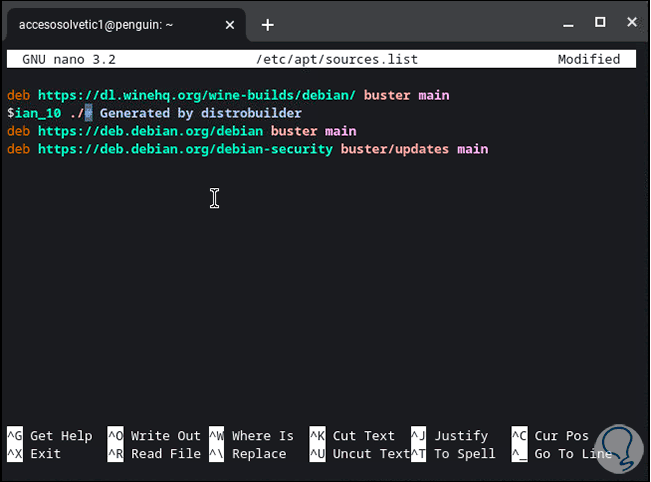
Once nano is installed, we are going to execute the following lines:
sudo nano /etc/apt/sources.list deb https://dl.winehq.org/wine-builds/debian/ buster main deb https://download.opensuse.org/repositories/Emulators:/Wine:/Debian/Debian_10 ./
Step 9
We save the changes using the following key combination:
Ctrl + O
We leave the editor using:
Ctrl + X
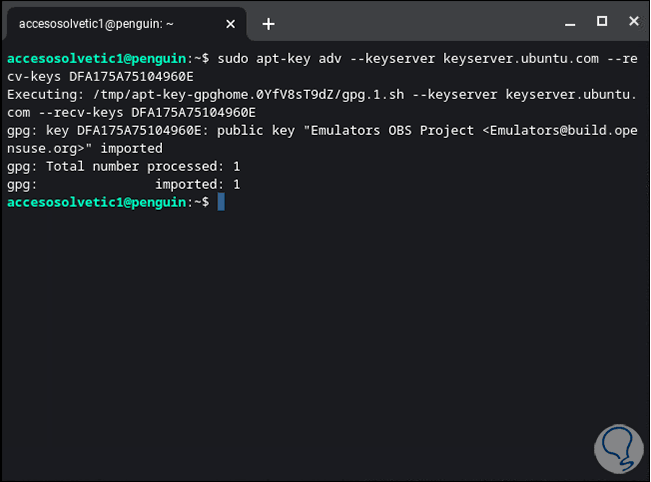
Step 10
We add the Ubuntu key:
sudo apt-key adv --keyserver keyserver.ubuntu.com --recv-keys DFA175A75104960E
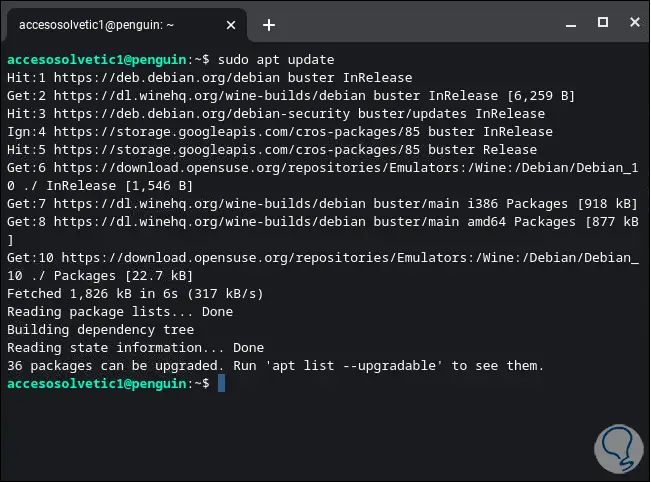
Step 11
We update the system:
sudo apt update
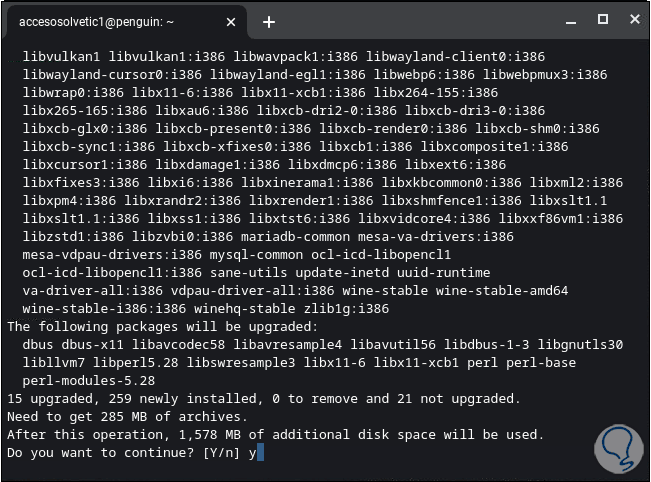
Step 12
Now we are going to install the stable version of Wine with the following command. We enter the letter y to confirm the process.
sudo apt install --install-recommends winehq-stable
Step 13
Once Wine has been installed, we are going to configure it with the following command:
winecfg
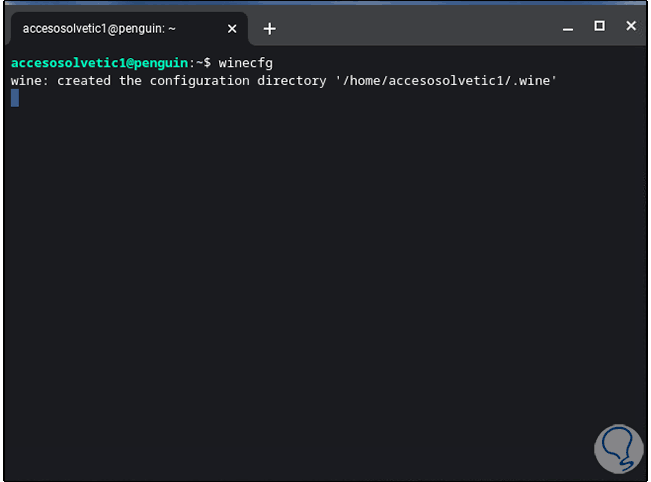
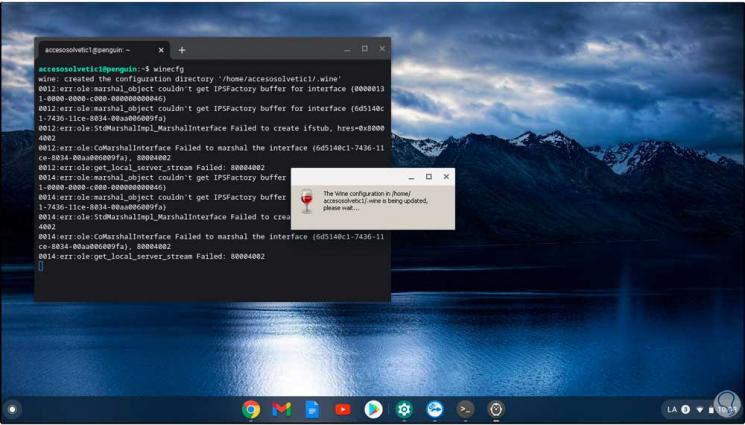
Step 14
The configuration process starts:
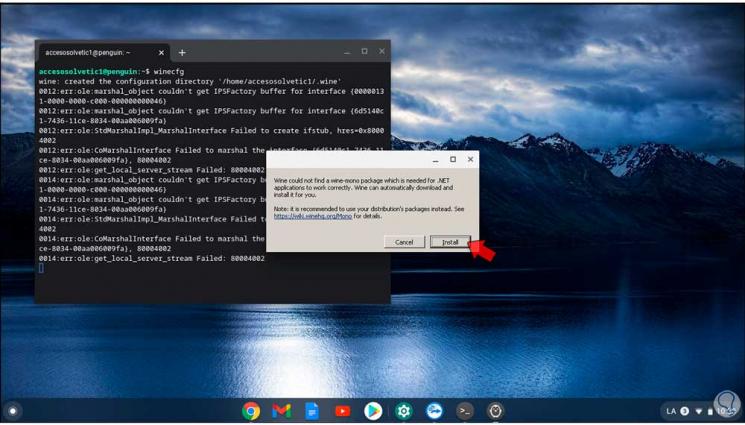
Step 15
This will display a series of required plugins:
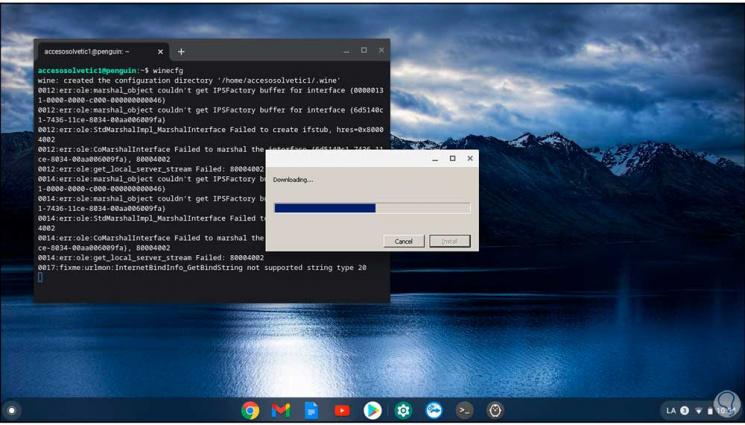
Step 16
We click on "Install" in each of them so that they are downloaded and installed:
Step 17
Once this process has finished, the following will be displayed:
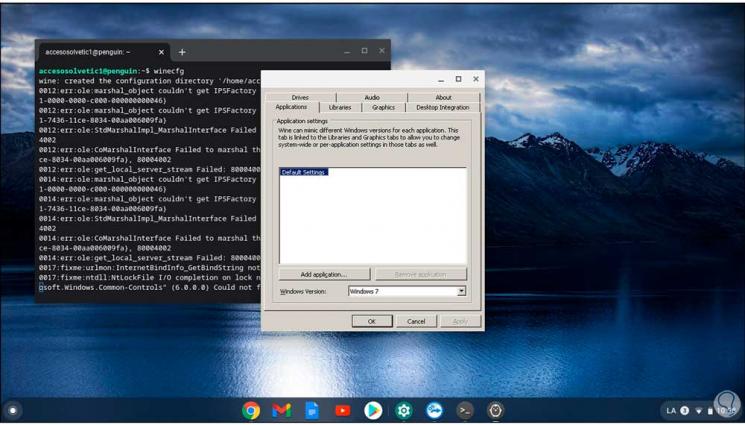
Step 18
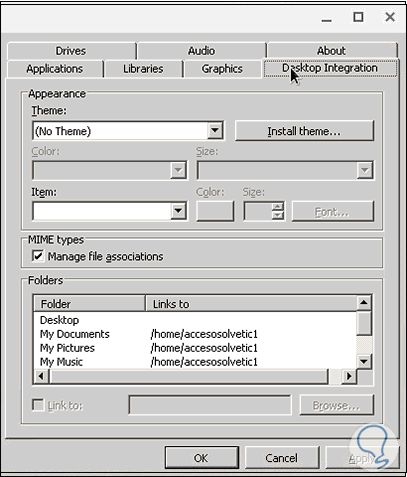
There we can go through each of the tabs to configure Wine as necessary:
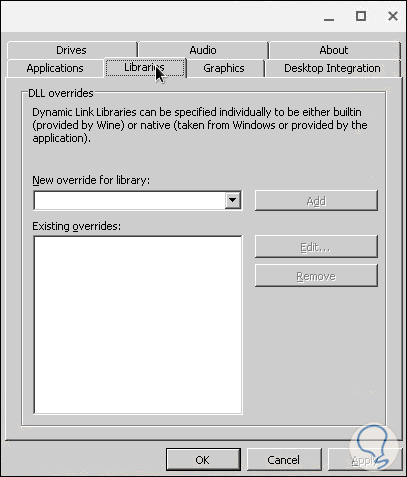
Step 19
We can configure the graphics:
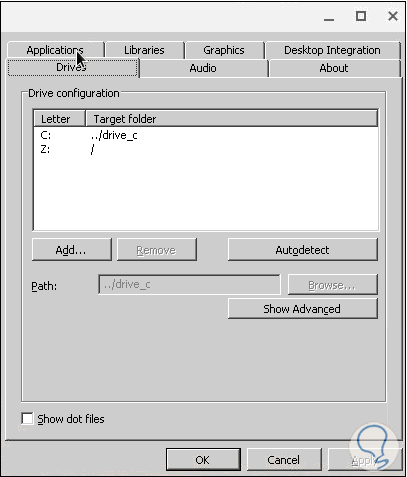
Step 20
Go to units:
Step 21
After this we are going to download the executable file and save it locally on Chromebook:
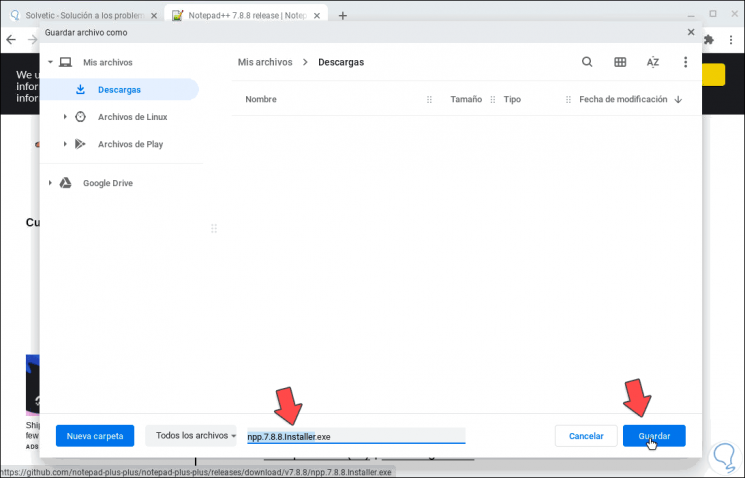
Step 22
We right click on the downloaded file and select "Copy":
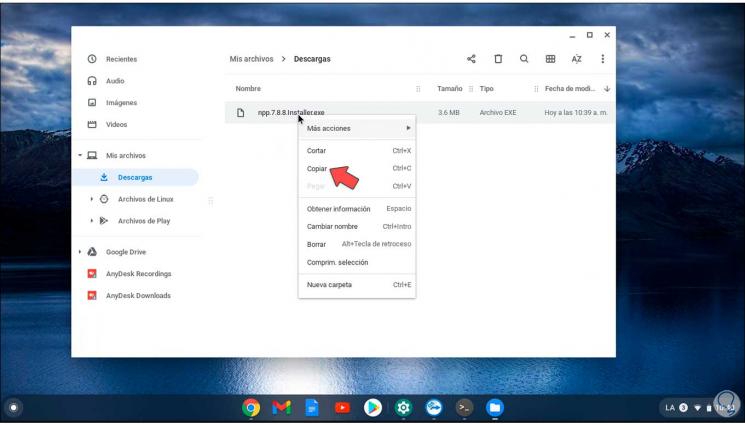
Step 23
We go to the option "Linux Files" and paste it there:

Step 24
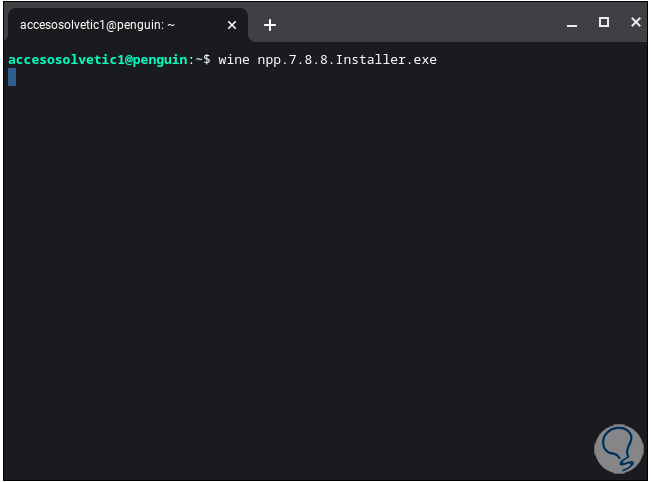
Now we go back to the terminal and there we execute the following syntax:
wine file.exe
Step 25
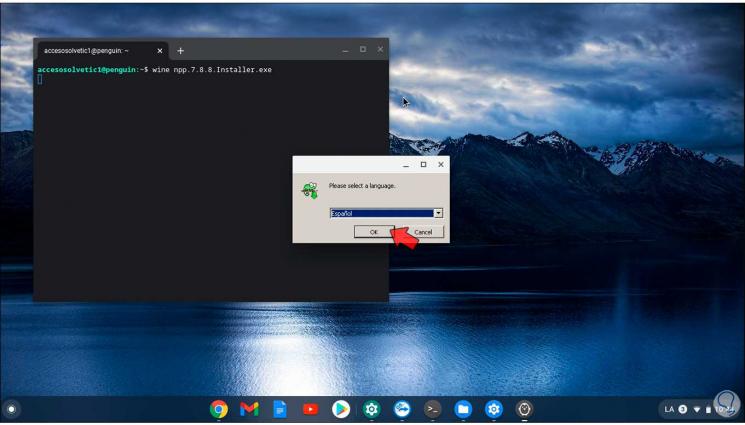
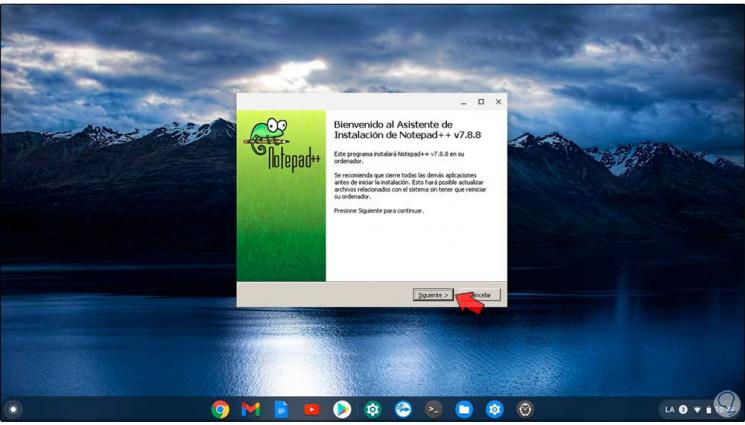
Press Enter and after a moment the installation wizard of the .exe application will open:
Step 26
We configure each of its parameters:
Step 27
When the installation is complete we see that everything is correct:
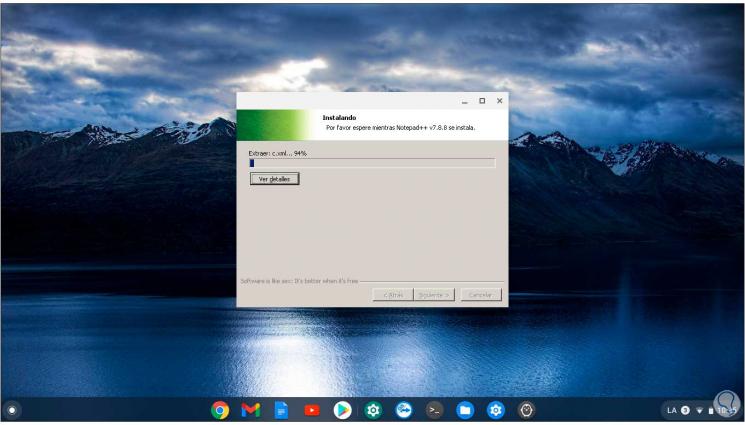
With this method it is practical to install the necessary Windows applications, .exe applications, on Chromebook, but always keeping in mind that not all of them will run in the same way as on a Windows 10 computer since Wine acts as an intermediary between Chromebook and .exe .