The virtualization options are one of the most functional ways that we have to know all the news of each operating system that is launched or of new applications, this in order that if something were to fail it is not directly in a productive environment because the errors can be critical.
Among the various options to create a virtual environment we have VMware which is one of the most complete, robust and with the best functions for use, VMware can be downloaded at the following link:
VMware
With Vmware we will be able to virtualize in a complete way thanks to its list of complete functions that makes an easy integration between virtual machine and physical hardware. By creating a virtual environment, we will be able to test tester versions of different software thus avoiding possible problems in the equipment due to failures. TechnoWikis will explain in detail how to install Ubuntu 21.04 in VMware and thus be able to know its news and features before the others. The Ubuntu 21.04 ISO image is available for download at the following link:
Ubuntu 21.04
To stay up to date, remember to subscribe to our YouTube channel! SUBSCRIBE
How to install Ubuntu 21.04 on VMware
Step 1
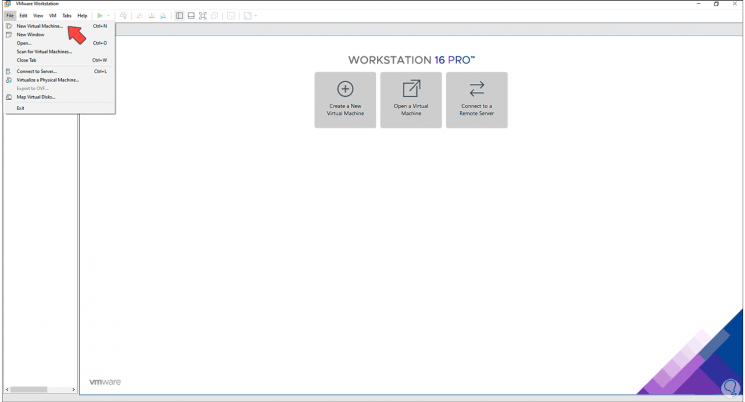
We open VMware and create a new machine using any of the following options:
- Clicking on "Create a New Virtual Machine"
- From the File - New Virtual Machine menu
- Using the following keys:
Ctrl + N
Step 2
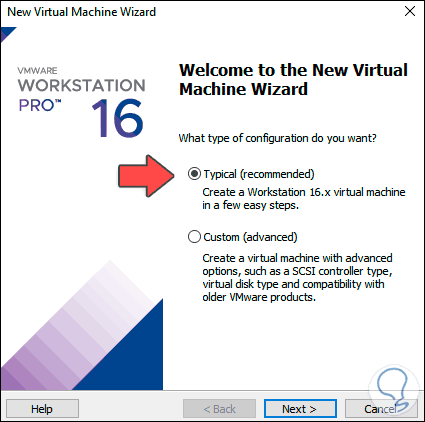
The following wizard will be displayed:
Step 3
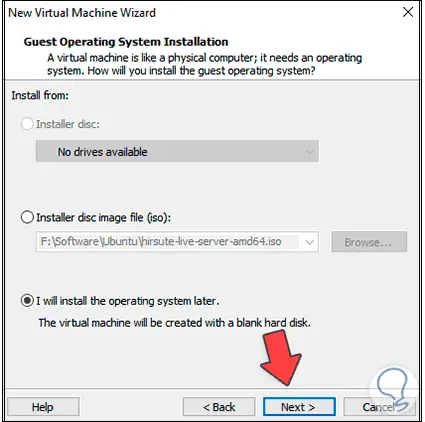
We leave the default option and in the next window we select the option "I will install the operating system later":
Step 4
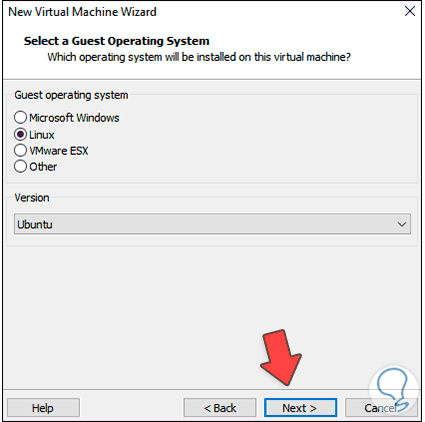
We click Next and in the next window we define:
- In the "Guest Operating System" field we select "Linux"
- In the "Version" field we select "Ubuntu"
Step 5
We click Next and now we assign the name of the virtual machine and the path where it will be installed:
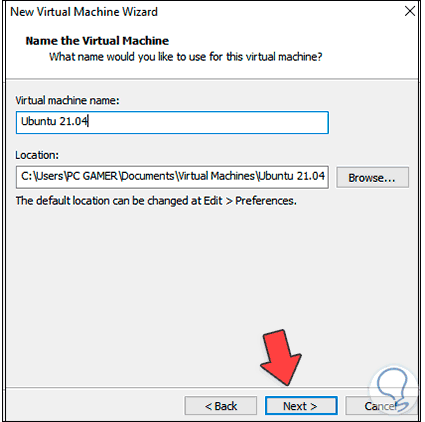
Step 6
In the next window we assign the size of the disk and the type of storage:
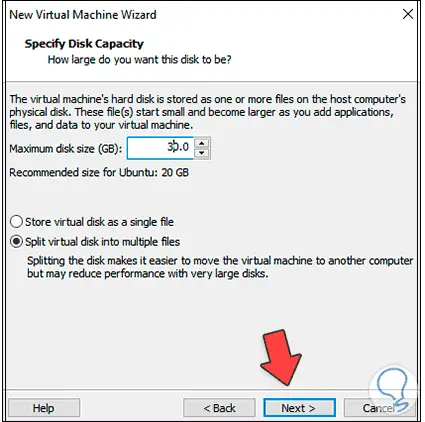
Step 7
Click Next and we will see a summary of the virtual machine to create:

Step 8
We click on "Finish" and we will see the virtual machine created:
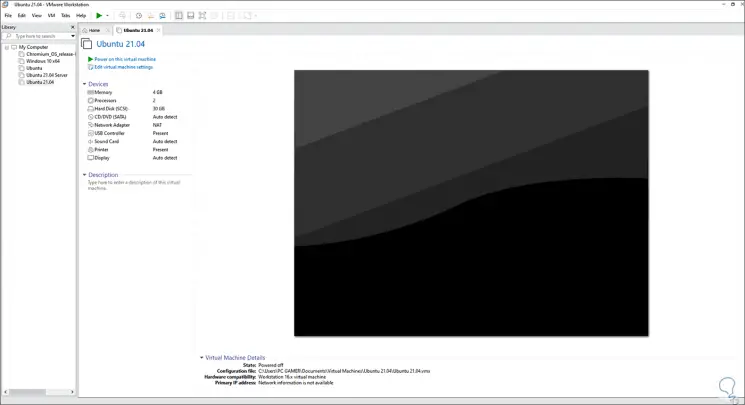
Step 9
We click on the "Edit virtual machine settings" line and in the displayed window we go to the CD / DVD section, activate the "Use ISO image file" box and select the ISO image that we have downloaded:
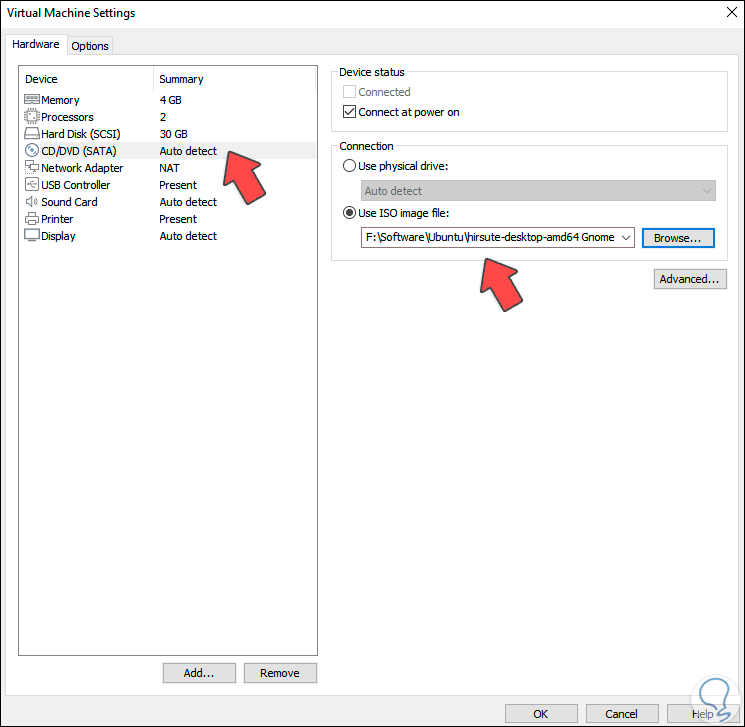
Step 10
We click OK and start the virtual machine, in the initial window we select "Ubuntu":
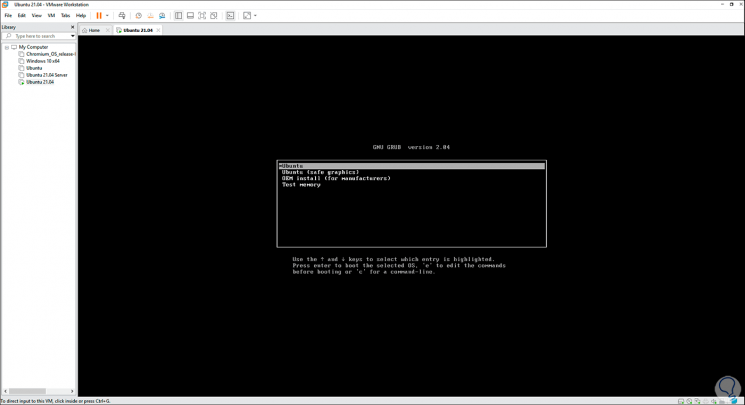
Step 11
The operating system will scan the hard drive:
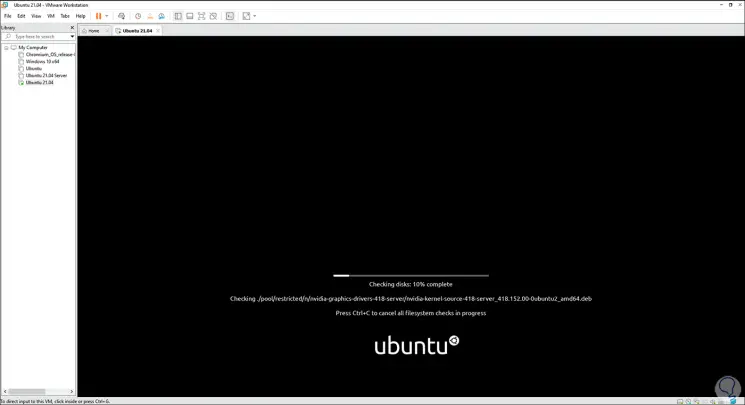
Step 12
After this we define the language with which Ubuntu 21.04 will be installed in VMware:
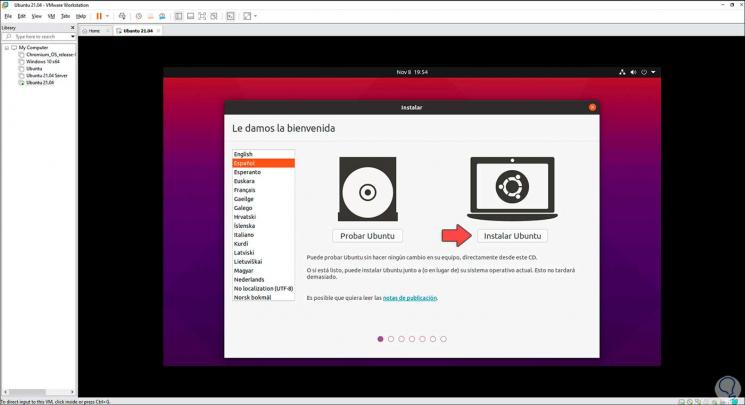
Step 13
If we only want to try Ubuntu we click on "Test Ubuntu", to install it we click on "Install Ubuntu", then we select the keyboard language:
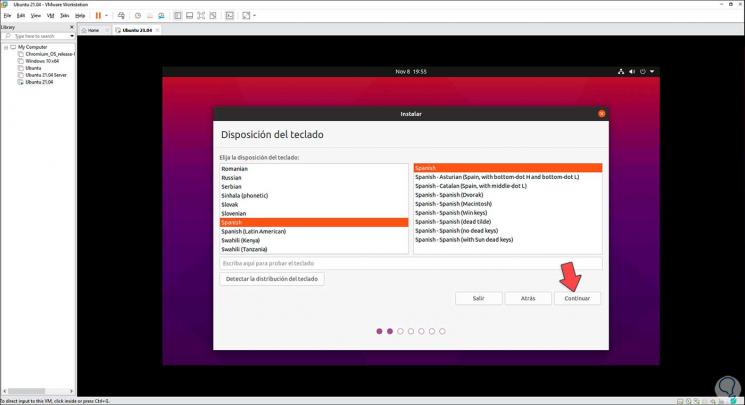
Step 14
In the next window it is possible to select the type of installation to perform:
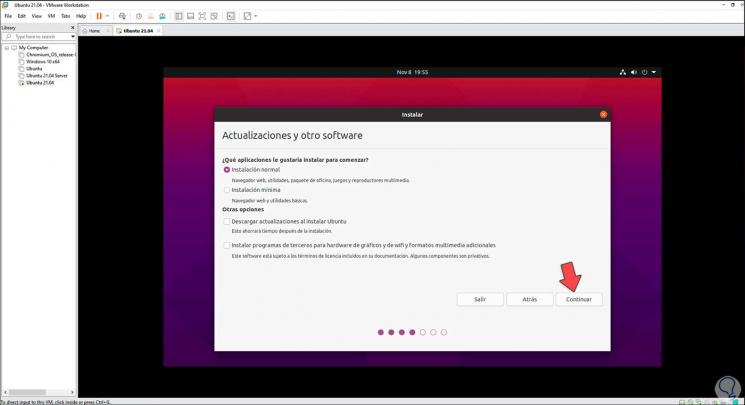
Step 15
We click on Continue we are in front of the options to install Ubuntu 21.04:
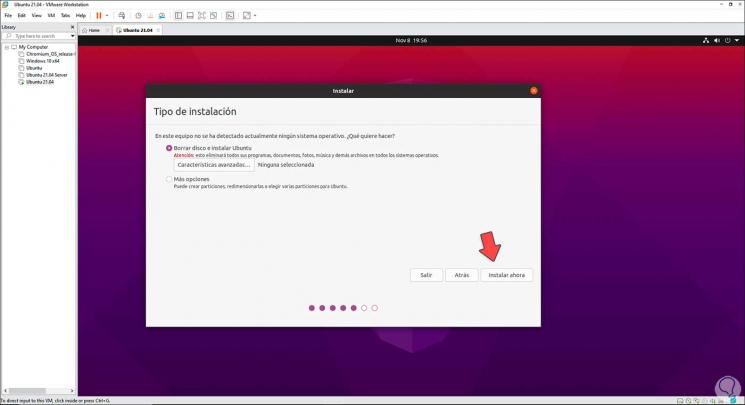
Step 16
There we can click on "More options" to perform the partitioning manually, if we do not click on "Install now" for the system to structure it automatically:
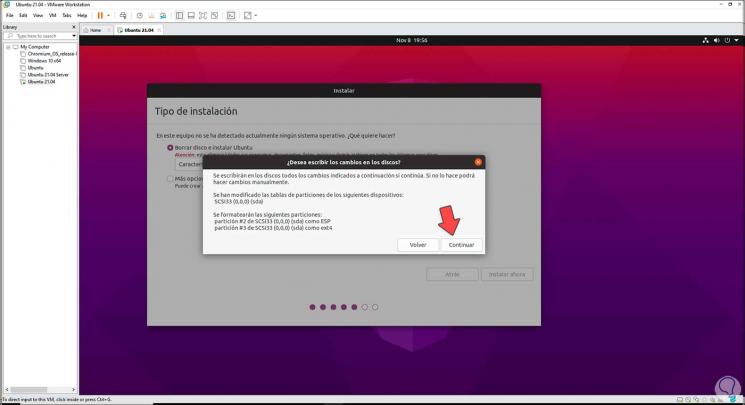
Step 17
We click Continue and assign our geographical location:
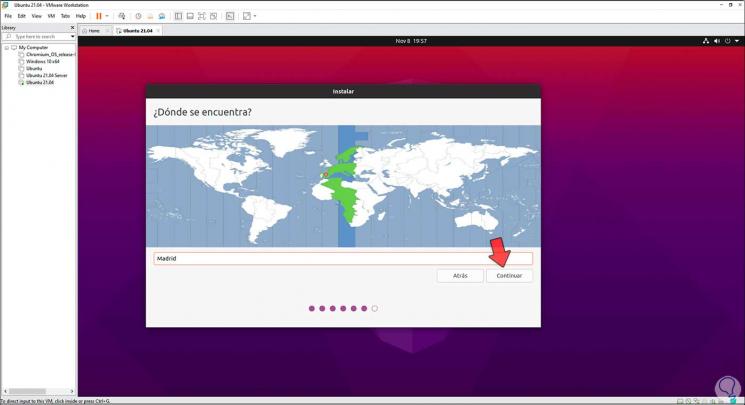
Step 18
In the next window we assign the name to the equipment and the credentials of the administrator user:
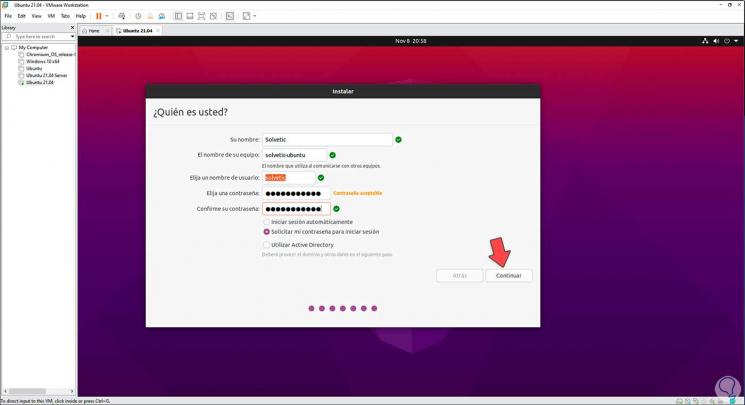
Step 19
To start the installation process, click on "Continue":
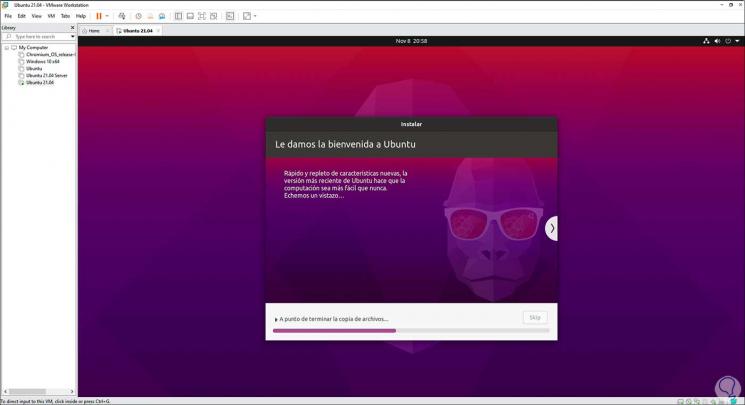
Step 20
Now the operating system will be installed:
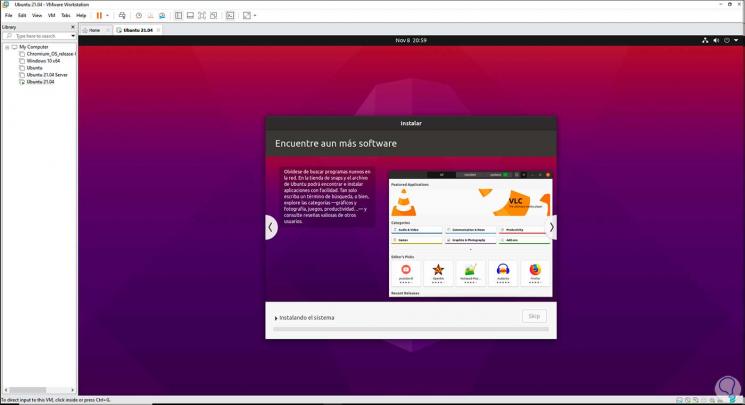
Step 21
At the end of this process we will see the following:
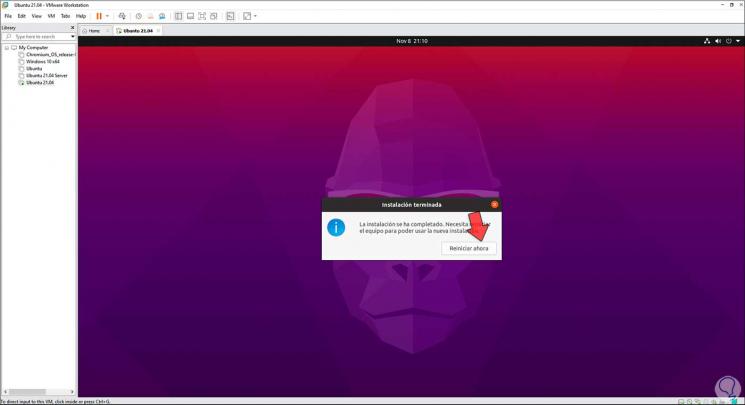
Step 22
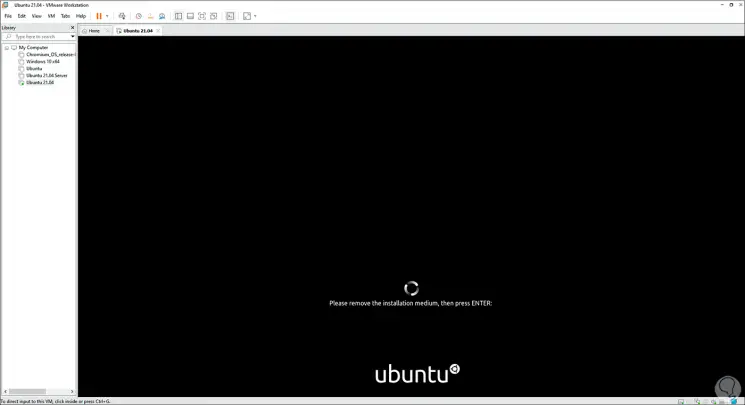
We click on "Restart now" and when the system restarts we will see the following error in the ISO image:
Step 23
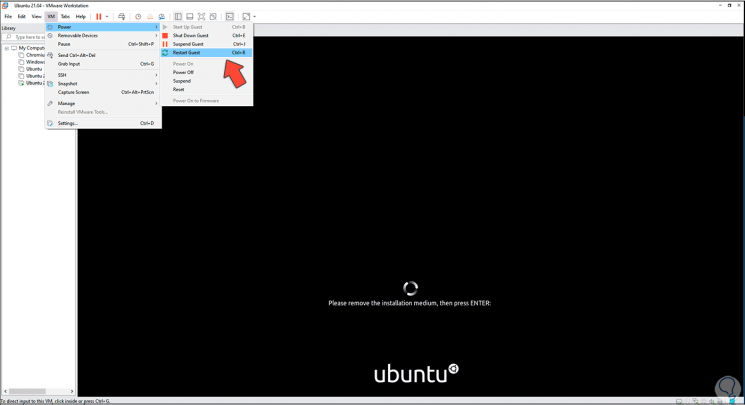
To correct it we click on "VM - Power - Restart Guest":
Step 24
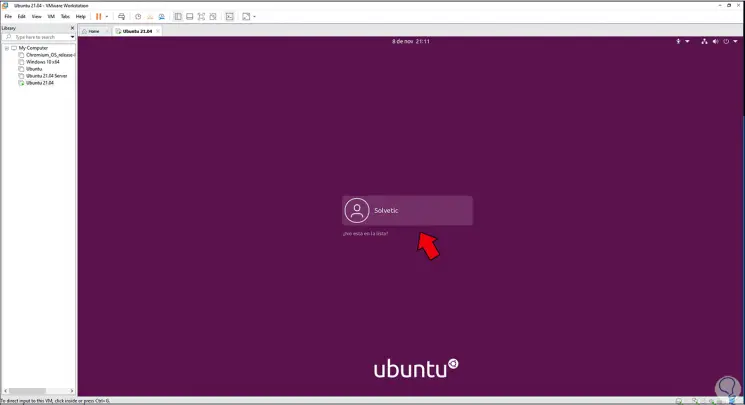
This will cause Ubuntu 21.04 to be started correctly and we can log in:
Step 25
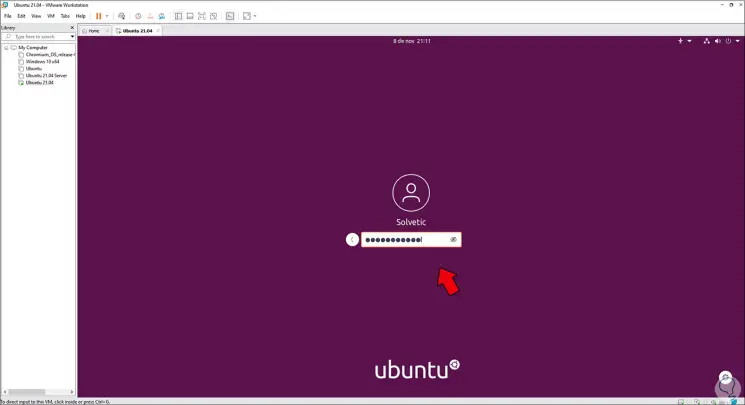
We enter the assigned password:
Step 26
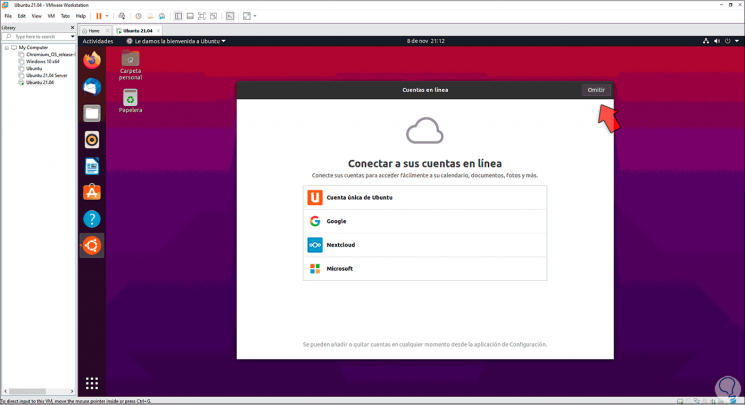
When logging in we must complete some to configure Ubuntu 21.04:
Step 27
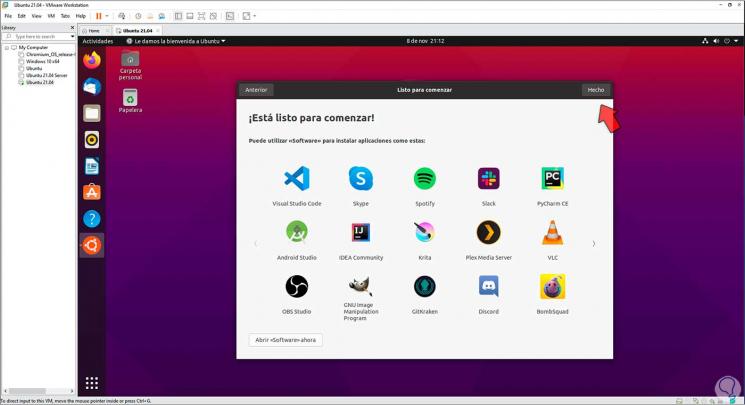
At the end of this the following will be displayed:
Step 28
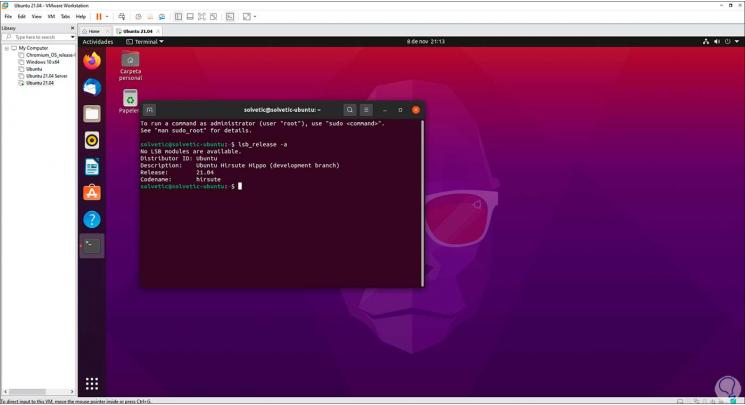
In VMware by default the VMware Tools will be installed automatically during the process, in the terminal we check that Ubuntu 21.04 has been installed with the command:
lsb_release -a
TechnoWikis has explained the process to correctly install Ubuntu 21.04 in VMware..