Microsoft has developed Outlook as a special application for all messaging, contact management, calendar control and other functions integrated and available there..
There are certain parameters available to configure our mail in Outlook and one of the most functional is the ability to redirect or forward our email to another alternate address. This helps us receive, edit, manage or simply read and reply to messages from another email account in case we are not present to verify the Outlook account.
It will also be possible to configure the redirection of emails that another authorized person can receive and respond to our email account during our period of absence which may be due to health, holidays, work, etc..
Microsoft Outlook allows us to configure this option in a practical way and we must keep in mind that if we are in a Microsoft Exchange Server environment or failing Office 365 or Outlook.com (Outlook on the web), it will be necessary that the amount of Outlook is executed on a computer for the forwarding task to work due to its online configuration.
Some aspects to consider when configuring email message forwarding in Outlook are:
- Messages that are forwarded are listed as messages forwarded from our selected email account, that is, replies to those messages are automatically directed to our account but not to the original sender of that email.
- To configure that replies to messages to be sent automatically to another address be redirected to the original sender, it will be necessary to make use of the inbox rules in Outlook on the Web in order to create a redirect rule With these values.
TechnoWikis will explain how to forward our mail in Outlook 2019 but this same process applies to Outlook 2016.
1. How to forward email in Outlook 2019 and Outlook 2016
Step 1
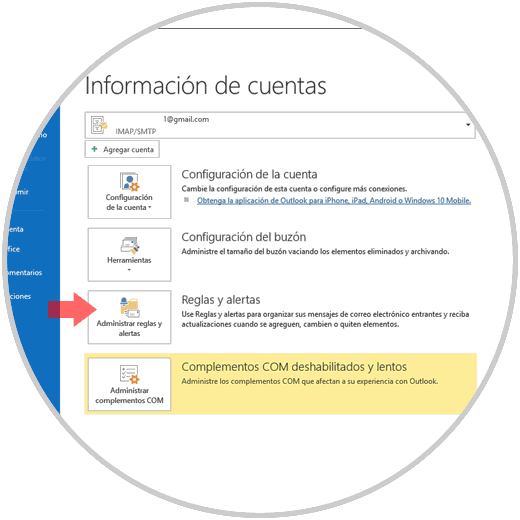
To start this process, we access the Outlook application and go to the File menu and in the Information section we will see the following:
Step 2
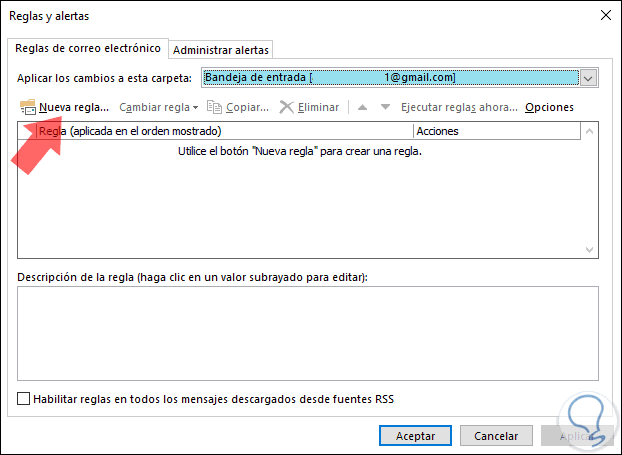
There we click on the option Manage rules and alerts and the following wizard will be displayed:
Step 3
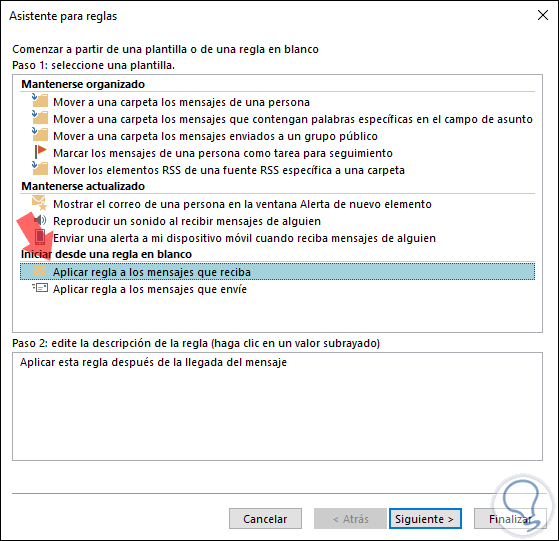
There we click on the New rule option located at the top and in the window that will open we will go to the Start section from a blank rule and select the rule Apply rule to the messages you receive:
Step 4
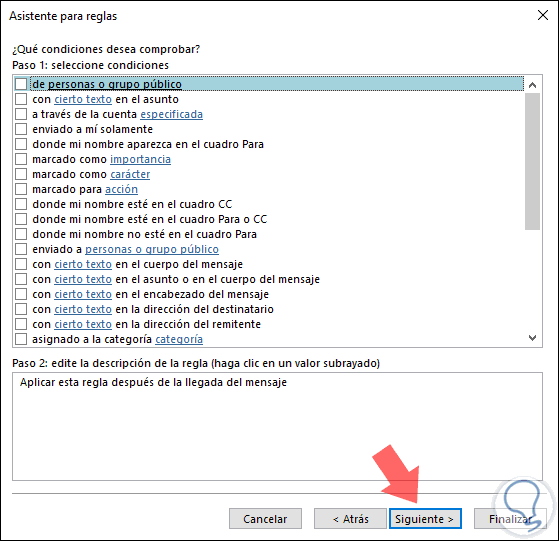
Click Next and in the next window if we want to resend only some messages, it will be possible to select the conditions for each message to be forwarded, otherwise, that is, if we want all messages to be forwarded, we can leave unchecked the Available options:
Step 5
Note that the conditions are quite broad and based on the daily use we give to Microsoft Outlook.
Regardless of how we manage this option, if for all messages or not, clicking Next will display the following pop-up window:
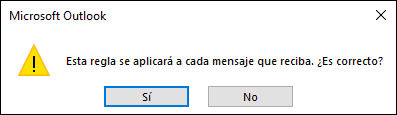
Step 6
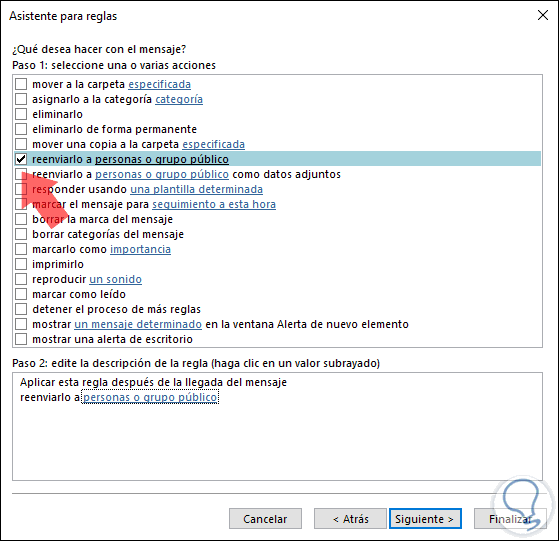
We confirm the action by clicking on the Yes button and then we will see all the options available to perform with the email message we receive, in this case we must select the Forward it to people or public group box:
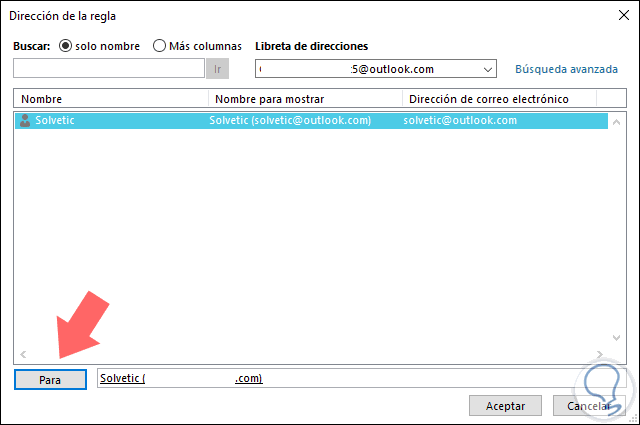
Step 7
There we must click on the line people or public group located at the bottom in the section edit the rule description and in the pop-up window displayed all contacts of the selected account will be listed and we must click on the button To located in the part bottom to select the desired contact:
Step 8
Once we select the desired contacts, click on the Accept button to complete the action and we will see that our contact or contacts are added to the rule:
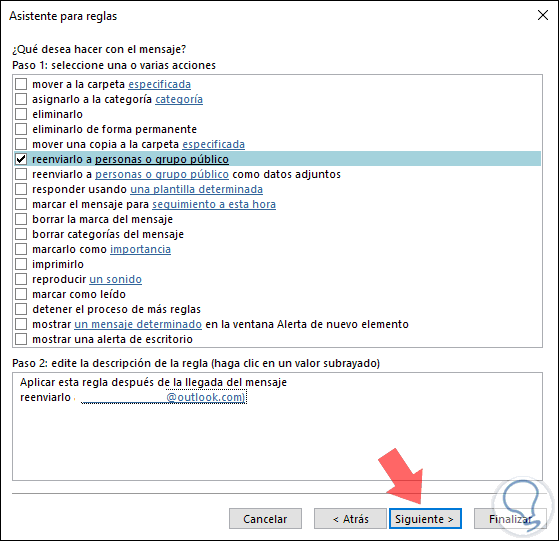
Step 9
Click on Next and in the next window Outlook gives us the possibility of applying exceptions to the rule, these may or may not be configured:
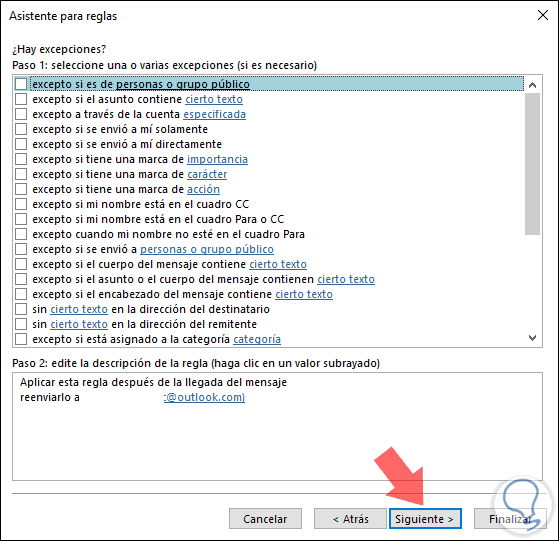
Step 10
Click on Next and in the next window it will be possible to perform actions such as:
- Assign a name to the created rule
- Execute the rule for all messages in the inbox of the selected account
- Activate the rule so that from that moment the messages are redirected
- Apply this rule to all email accounts added in Outlook 2016 or 2019
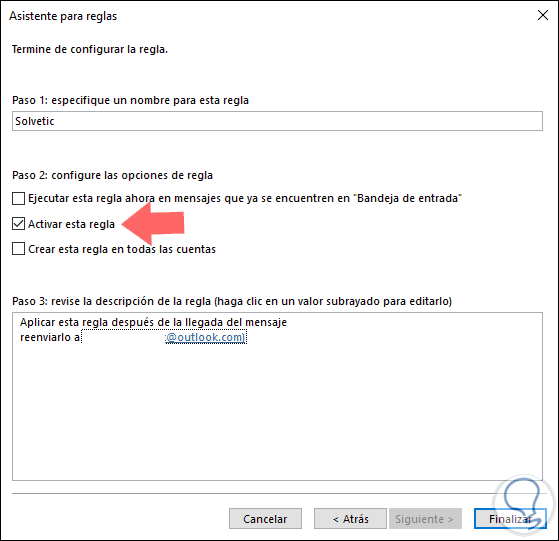
Step 11
Click on Finish and we will see our rule created in the correct way:
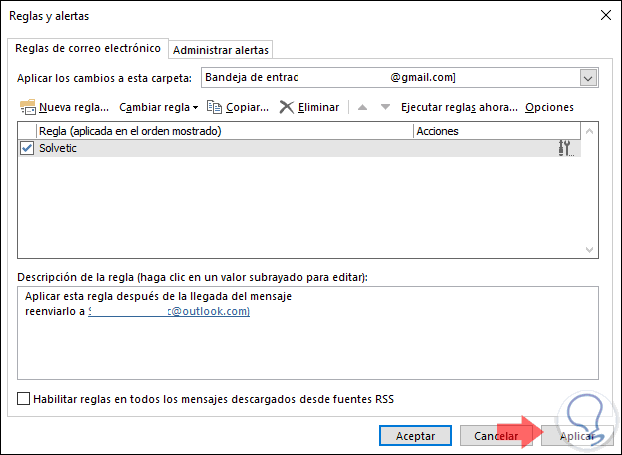
Click on the Apply button and then click on OK to complete the rule adjustment process. Now, when someone sends us an email to this account, that message will be redirected to the email account that we have specified.
2. How to forward email in Outlook.com 2019 and 2016
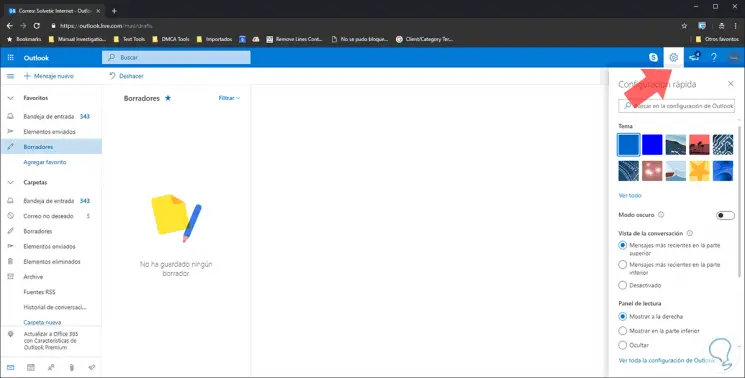
If we use the Outlook online application, it will also be possible to configure email forwarding there in a simple way.
Step 1
For this, we will log in to the following link:
Outlook
Step 2
Once there, we click on the gear icon located in the upper right and in the displayed list we select the option View all Outlook settings:
Step 3
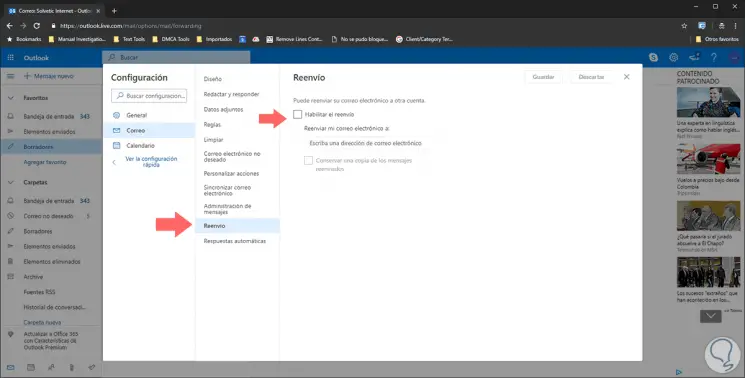
There we activate the Enable forwarding checkbox and in the field Resend my email to enter the desired email address:
Note
It is possible to keep a copy of the forwarded emails in our original account, for this we activate the Keep a copy of the forwarded messages box.
Finally we click on the Save button to apply the changes in Outlook.com. As we can see, we have both Outlook 2016 or 2019 as an application or Outlook 365 in web format, but both give us the opportunity to resend emails using simple methods and with high configuration options as appropriate..