The personalization of our system and its components will always be one of the most practical ways to impose our style since each of us is a different world and it is for this reason that we find various themes, templates , effects and other elements that will help that the work is mea enjoyable and fun..
When we talk about Outlook, which is part of the Office family , we should know that we are talking about one of the most common and popular applications for messaging work (emails), contact management , events, special dates and much more. . But by default Microsoft defines parameters for the application which can not always be to our liking, one of these, and perhaps one of the most essential, is the size and type of source which for Outlook 2016 and 2019 is Segoe UI with a 8 point size:
Outlook gives us the opportunity to change these values ​​in a simple way and for this reason TechnoWikis will explain how to carry out this process in Outlook 2019 but the same process applies for Outlook 2016.
To stay up to date, remember to subscribe to our YouTube channel! SUBSCRIBE
Step 1
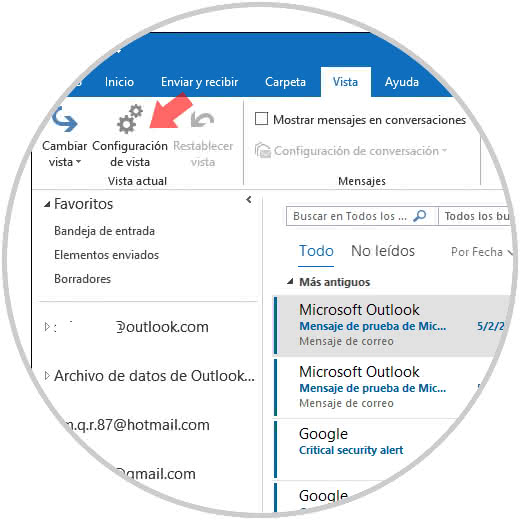
To achieve this goal, we will go to the View menu in Outlook and there, in the current View group, we select the option "View configuration":
Step 2
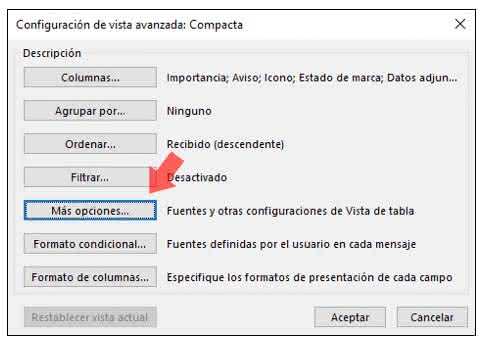
The following pop-up window will be displayed where we must click on the "More options" button
Step 3
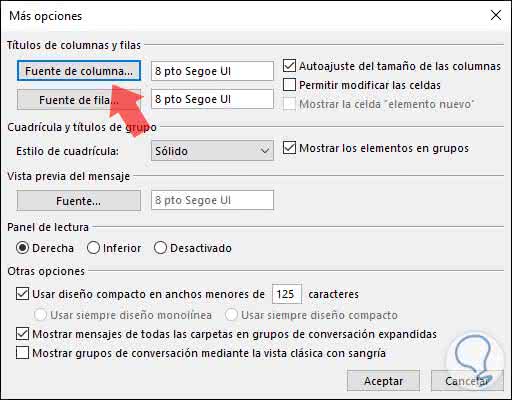
We will see that the description of this line is associated with the source and other Outlook parameters. Clicking on it will display the following window where we will basically focus on the "Titles of columns and rows" section:
Step 4
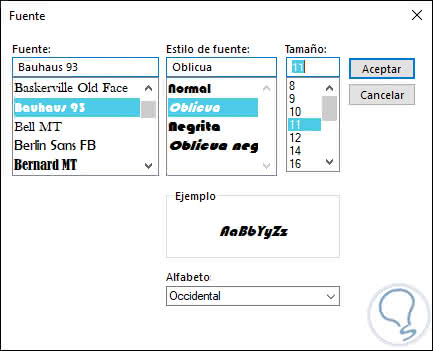
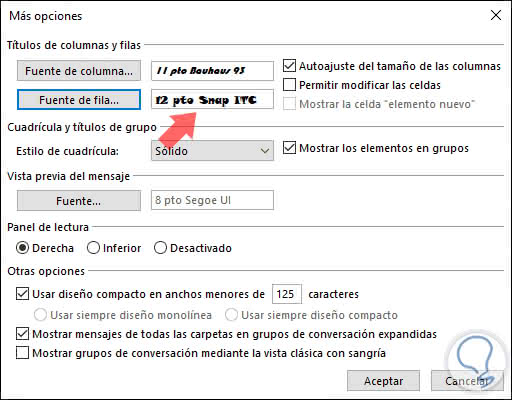
In this section we will see that there are the default values ​​of Outlook 2016 or 2019, when clicking there, it will be possible to define the new font, the style of this and the desired size.
Step 5
Once we define the new configuration of the source, click on "Accept" and we will see that the change is defined in the main window of the configuration:
Step 6
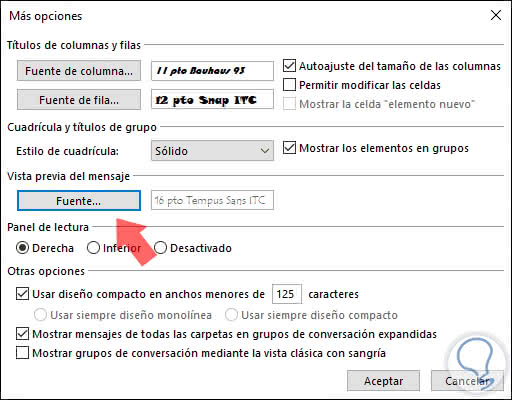
In addition to this, we can configure the grid style, the preview of the message and some additional configurations if we want:
Step 7
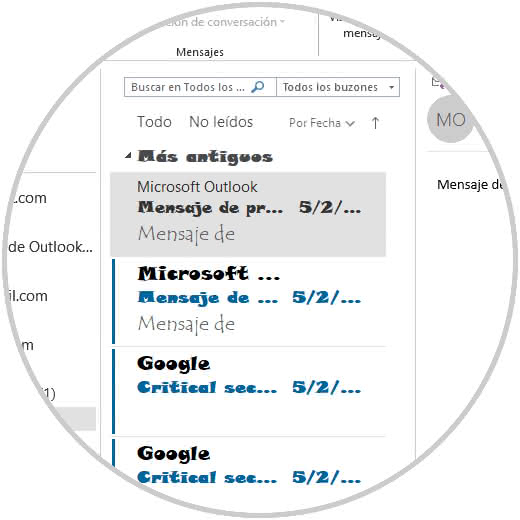
Press OK again and we can see how the source configuration will be applied automatically to the different sections of Outlook:
Step 8
The moment we want to use Outlook with the default values ​​we must go back to View Settings and this time click on the "Reset current view" button located at the bottom.
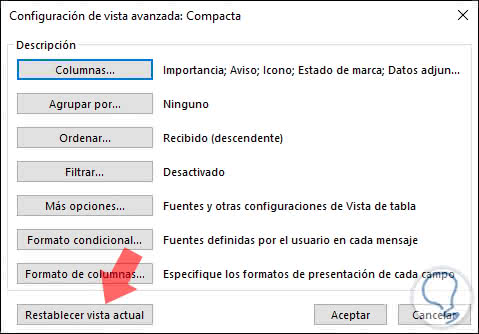
The following message will be displayed. We click on "Yes" to accept the changes

This way, Outlook 2016 or 2019 will be at its default values. It's as simple as we can change the size and source of Outlook as the case may be and further customize the experience of using this powerful messaging application..