Outlook is integrated into Office, but has its web version and has been developed to provide the end user with a wide range of options for sending email messages, managing contacts, calendars and more. But one of the functions that many times we do not use in Outlook is the option to schedule the sending of an email, this is useful if for some reason we will not be available at a certain time or to avoid forgetting to send that email, this function allows you to define date and time in which the mail will be sent automatically..
TechnoWikis will explain how to carry out this process both in the Office 2019 Outlook application as well as on the web page.
To stay up to date, remember to subscribe to our YouTube channel! SUBSCRIBE
1. Schedule Outlook 2019 email sending
Step 1
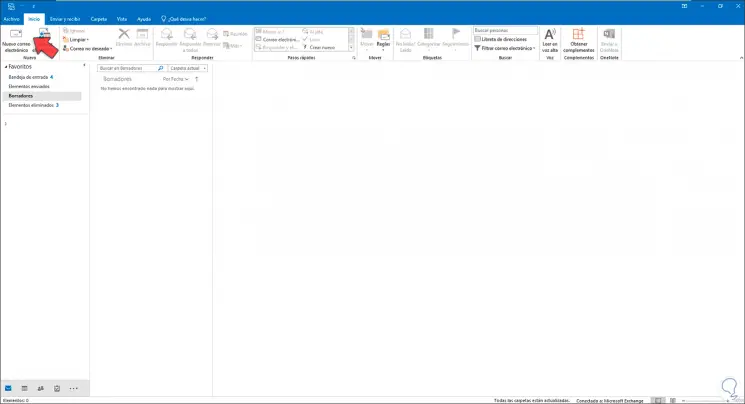
For this, we open Outlook and we will see the following:
Step 2
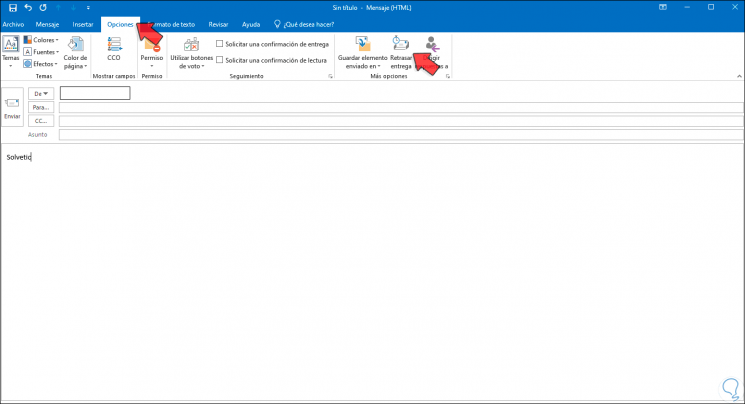
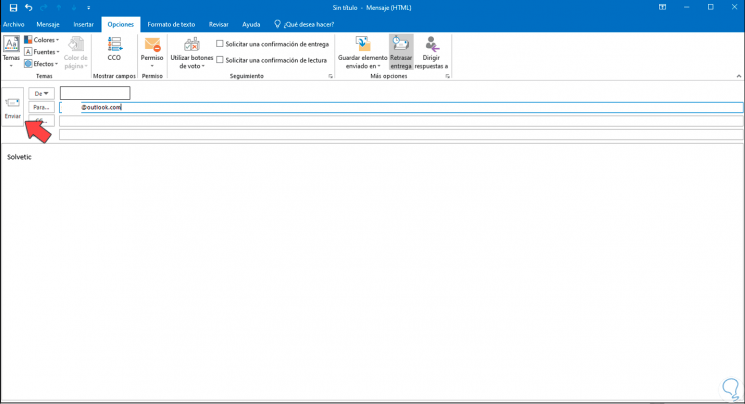
We click on "New email" to write a new email, the following pop-up window will open, in it we go to the "Options" menu and we will have the following options:
Step 3
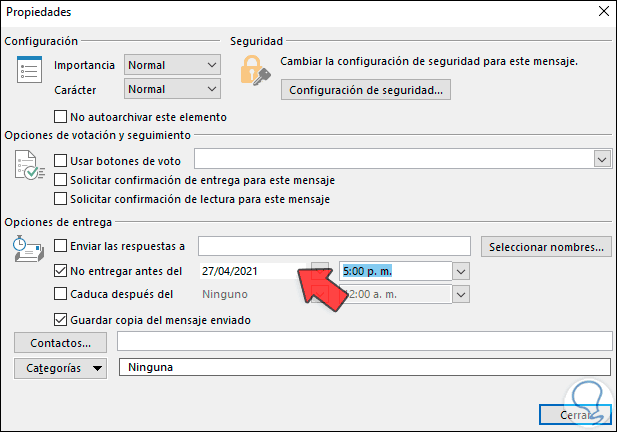
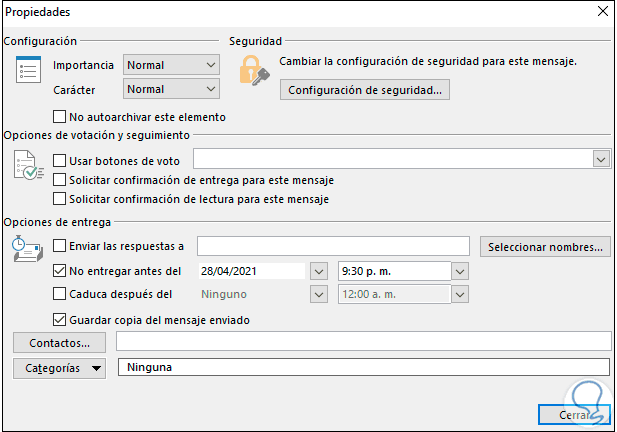
We click on "Delay delivery" and the following window will be opened:
Step 4
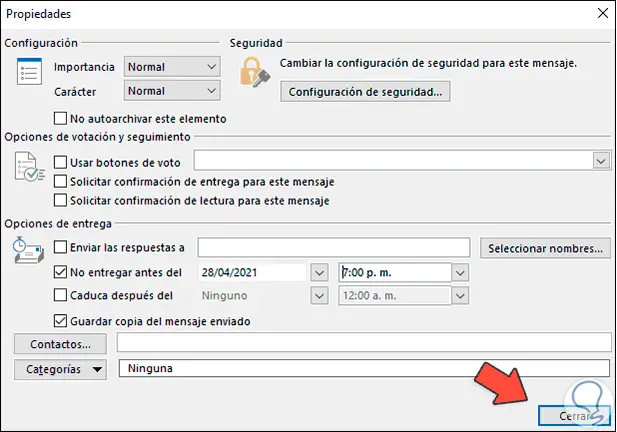
In the Delivery options section we activate the "Do not deliver before" box and select the date and time to send the email in Outlook 2019:
Step 5
We click Close to apply the changes. We write the email and click Send.
Step 6
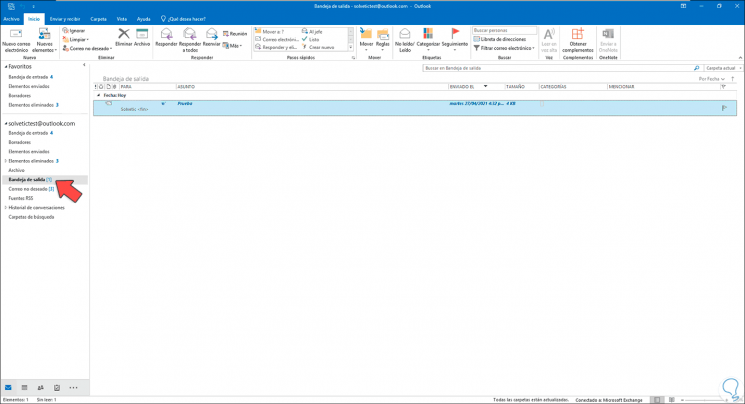
The sent mail will be hosted in the Outlook outbox:
Step 7
There we find the details of this, it is possible to double click on it to access the content:
Step 8
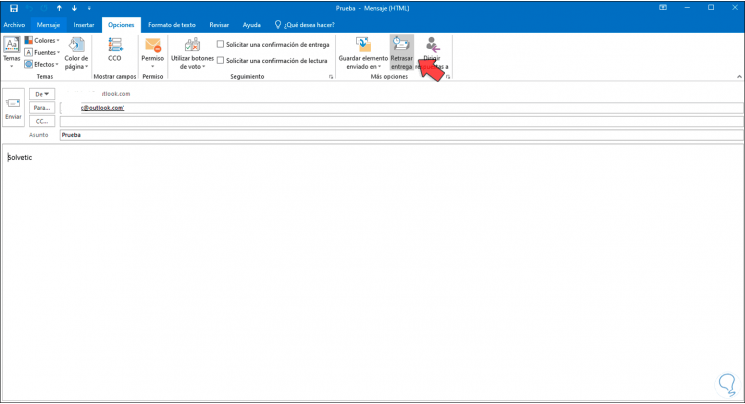
If necessary from Options we will "Delay delivery" to edit the desired date and time:
This has been the process to schedule the sending of an email in Outlook 2019..
2 . Schedule Outlook web mail sending
Step 1
For this case we open the URL of Outlook web in the following link:
Outlook
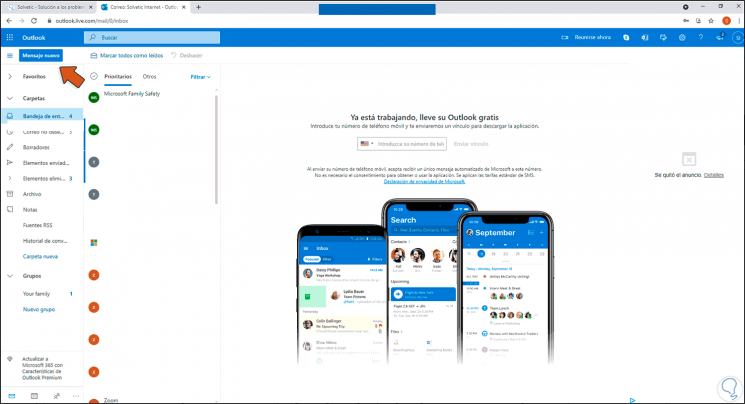
Step 2
We write a new email by clicking on "New message":
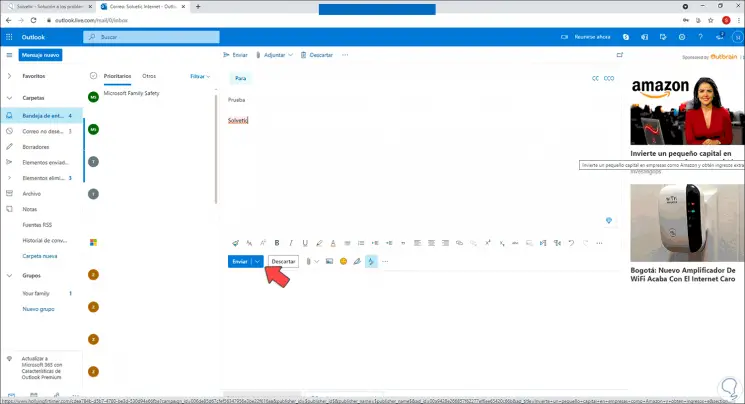
Step 3
We add the email data, after that we click on the "Send" drop-down arrow at the bottom of the message:
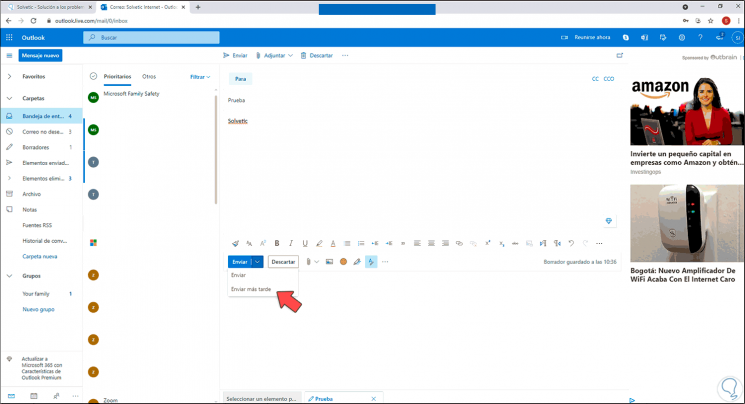
Step 4
We select the option "Send later", this will open the following pop-up window:
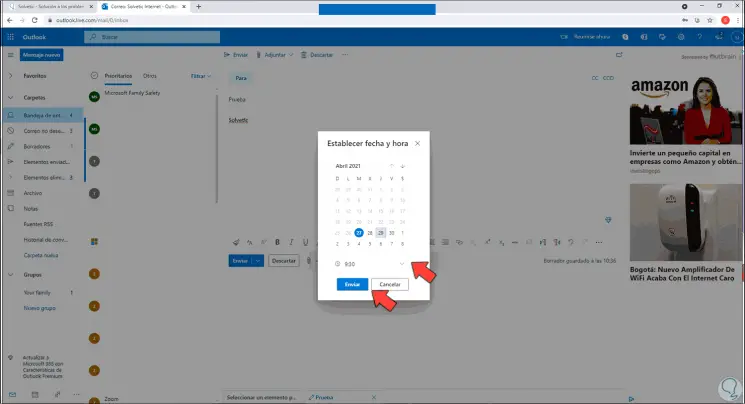
Step 5
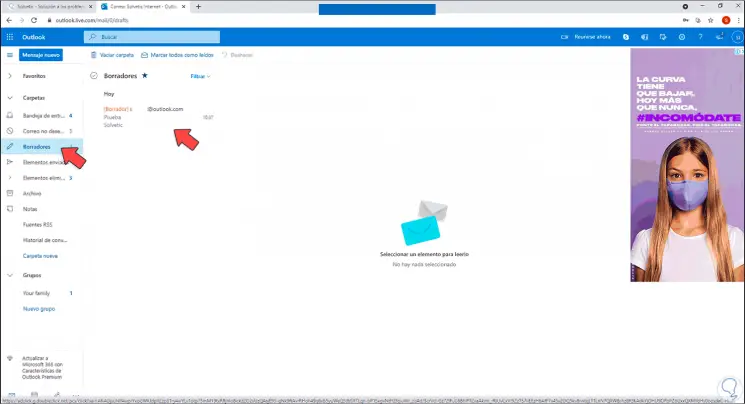
There we set the desired date and time and then we click on "Send", the email will be in the Outlook web drafts:
Step 6
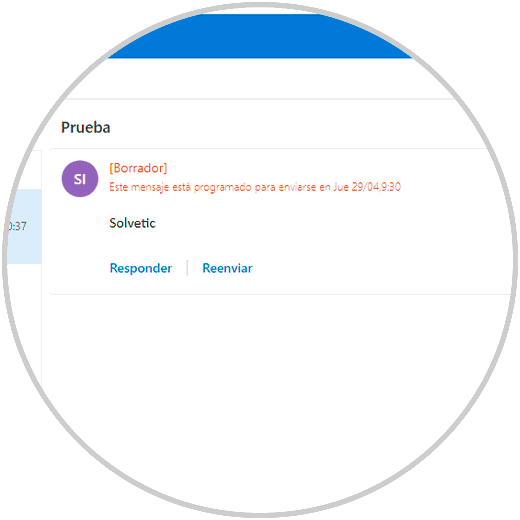
We click on the email and we will see the date and time it will be sent, in addition to this, it is possible to click on "Cancel delivery" to not send the email as needed:
These are the ways we have both in the Outlook application and in Outlook web to schedule the sending of an email and thus have the certainty that it will be sent on the stipulated day and time without forgetting it.