Current messaging platforms provide us with multiple solutions to manage correctly not only emails but also other elements such as contacts, meetings, calendar and more..
Precisely in the matter of meetings and calendars it is important to have a solution that allows us to notify all contacts about a certain event such as our absence, an important message or a reminder.
For this, the automatic response has been developed in these platforms so that when some user sends us an email they receive a notification stating that we are not available in a specific period of time and today we will learn how to create this type of response. in Outlook as in the Mail application integrated in Windows 10..
1. Create an automatic reply in the Windows 10 Mail application
Step 1
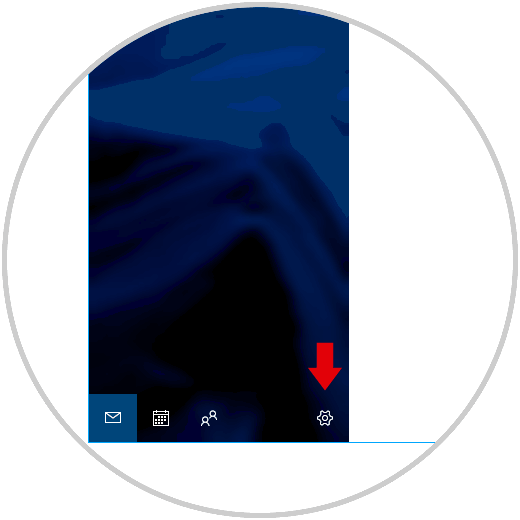
To carry out this process in Mail we click on the gear icon located at the bottom of the application and select the line “Automatic replies†on the right side:
Step 2
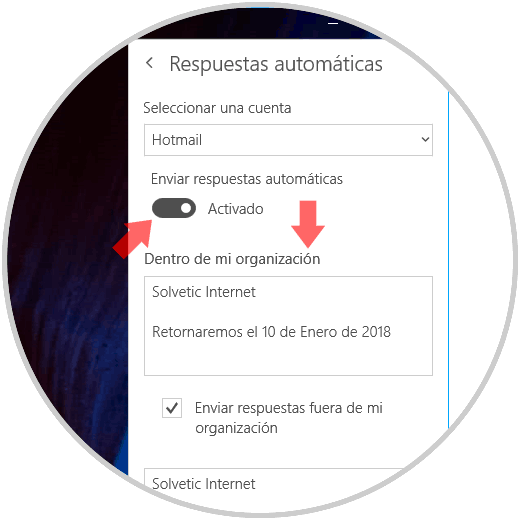
Selecting this line will display the following window where we will configure the following.
- We can select the “Send response only to my contacts†box in order to prevent it from being sent to the hundreds of email replies we receive frequently.
- Activate the “Send automatic responses†switch
- Enter the message to be displayed in the field “Within my organizationâ€
Step 2
We see the following, we have two options:
- Within my organization: This section sends only the automatic response to users within the domain.
- Outside my organization: This option allows us to send the response to all users.
It's that simple to create an automatic response in the Windows 10 Mail application.
2. Create an automatic reply in Outlook 2016
This option applies to the version of Outlook on the web but not in the application that comes integrated with the Office 2016 suite or earlier.
Step 1
For this we can log in to the following link:
Outlook
Step 2
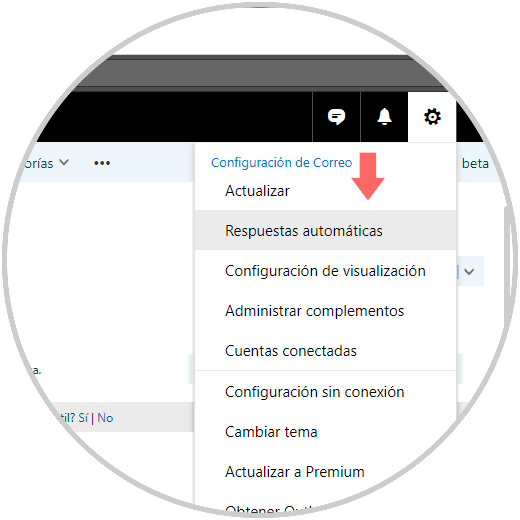
Once we log in, click on the gear icon located next to our account and in the options displayed select “Automatic answersâ€:
Step 3
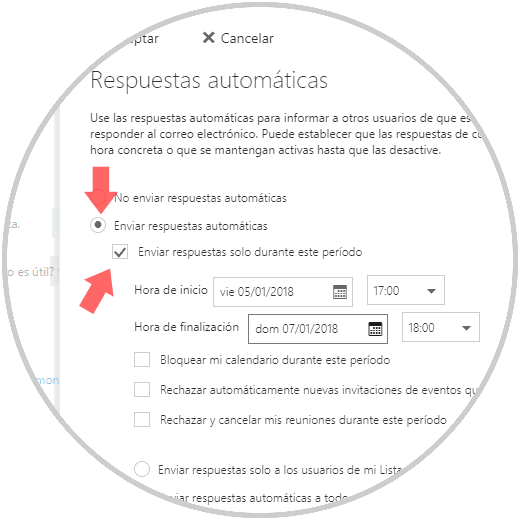
By selecting this option we can configure the following:
- Check the "Send automatic replies" box.
- Check the “Send answers only during this time†box and define the date and time range in which the responses will be sent to users
Step 4
We can note that additionally we can carry out tasks such as blocking the calendar so as not to be scheduled in this time range, reject invitations, send response only to certain contacts or to everyone in general.
Once these points are defined, click on OK to save the changes.
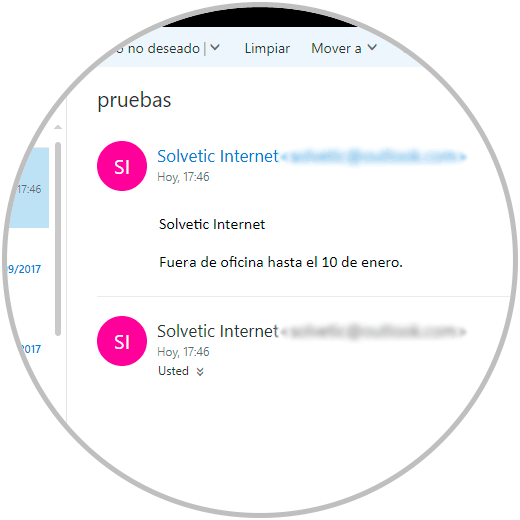
Now when we receive a new email, the sender will receive the automatic reply as configured:
We have seen how it is possible to establish this type of response in order to provide information to users during our absence.