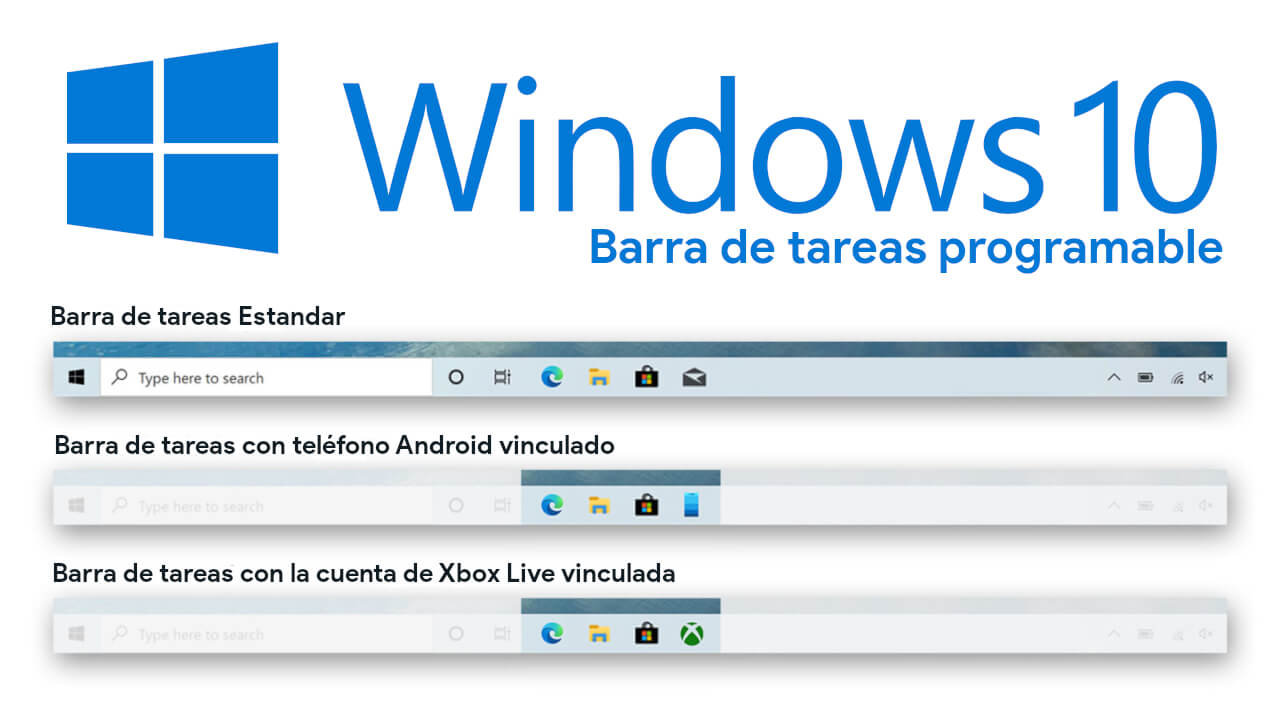
The Windows 10 operating system incorporates new functions in each update that Microsoft releases. One of the latest features added to Windows 10 is the Programmable Taskbar, which aims to customize the default set of icons displayed on the taskbar based on the applications and services in which you use your Microsoft account. .

Related: How to resize the Windows 10 taskbar
Windows 10's programmable taskbar will pin certain icons based on your user activity. For example, if you have your Microsoft account linked to your Xbox, your taskbar will automatically show the Xbox icon for quick and easy access to this service. In addition, these icons may appear or disappear depending on the use that we make of the services and applications with which we link our Microsoft account..
The purpose of this feature is to offer Windows 10 users more personalized and highly accessible content directly from the taskbar. The feature is part of Windows 10 20H2, but it will not work on computers using existing Microsoft accounts. In order to take advantage of this function, you will have to create a new Microsoft account in order to enjoy the personalized icons on the taskbar.
However, it should be noted that for Microsoft to display the custom icons on the Windows 10 taskbar based on your activity, it must collect diagnostic data and uses of users to evaluate and identify which is the app or service in the one that each user would be interested in accessing from the taskbar..
This is precisely something that can be somewhat controversial in terms of privacy, apart from the fact that there are many users who want to have full control of their taskbar settings and prevent Microsoft from including items automatically. This is why many users wonder how to deactivate this function and here we show you how to do it:
How to disable the Windows 10 programmable taskbar.
Method 2: Disable Windows 10 Programmable Taskbar using Local Group Policy Editor.
1. Make use of keyboard shortcut: Windows + R
2. In the Run tool window you will have to enter the following command:
3. After pressing Enter, you will see how the Group Policy Editor will automatically open.
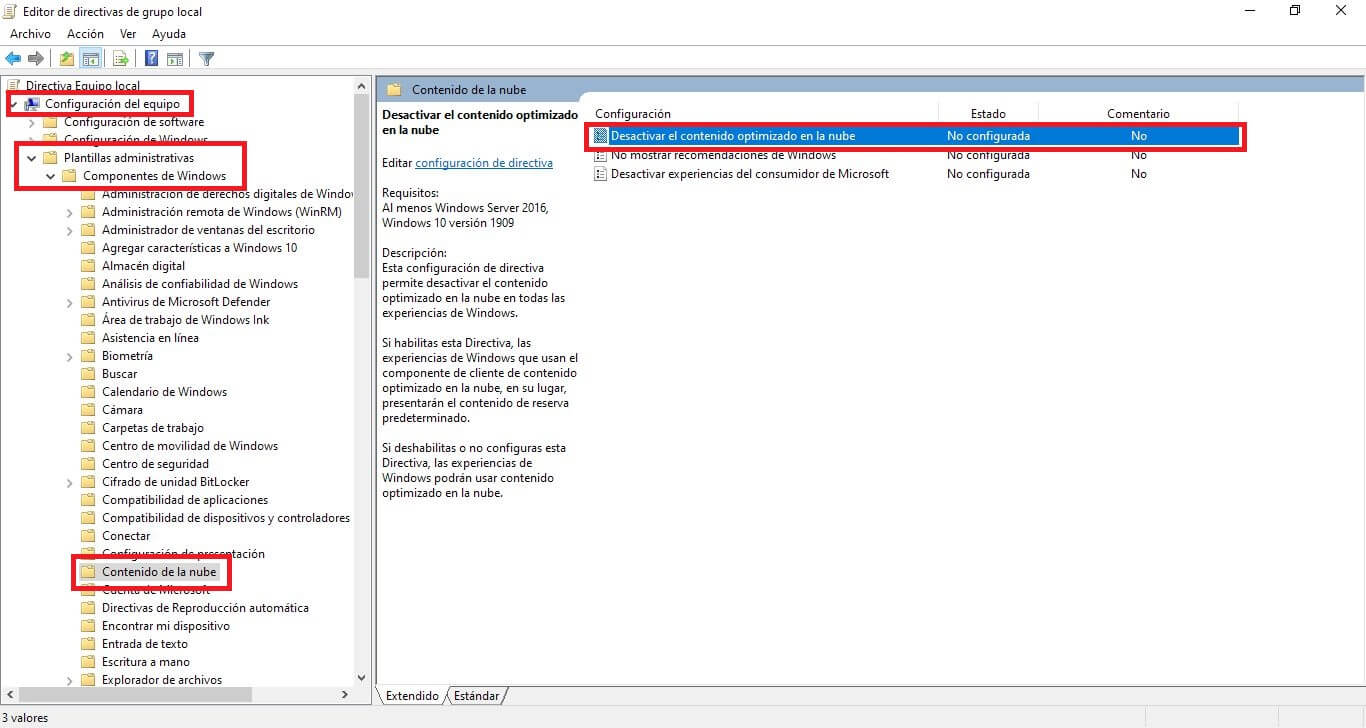
4. Use the menu on the left side of the window to navigate to;
Computer Configuration> Administrative Templates> Windows Components> Cloud Content.
5. Now, in the right part of the window you will see the option that you must select: deactivate optimized content in the cloud.

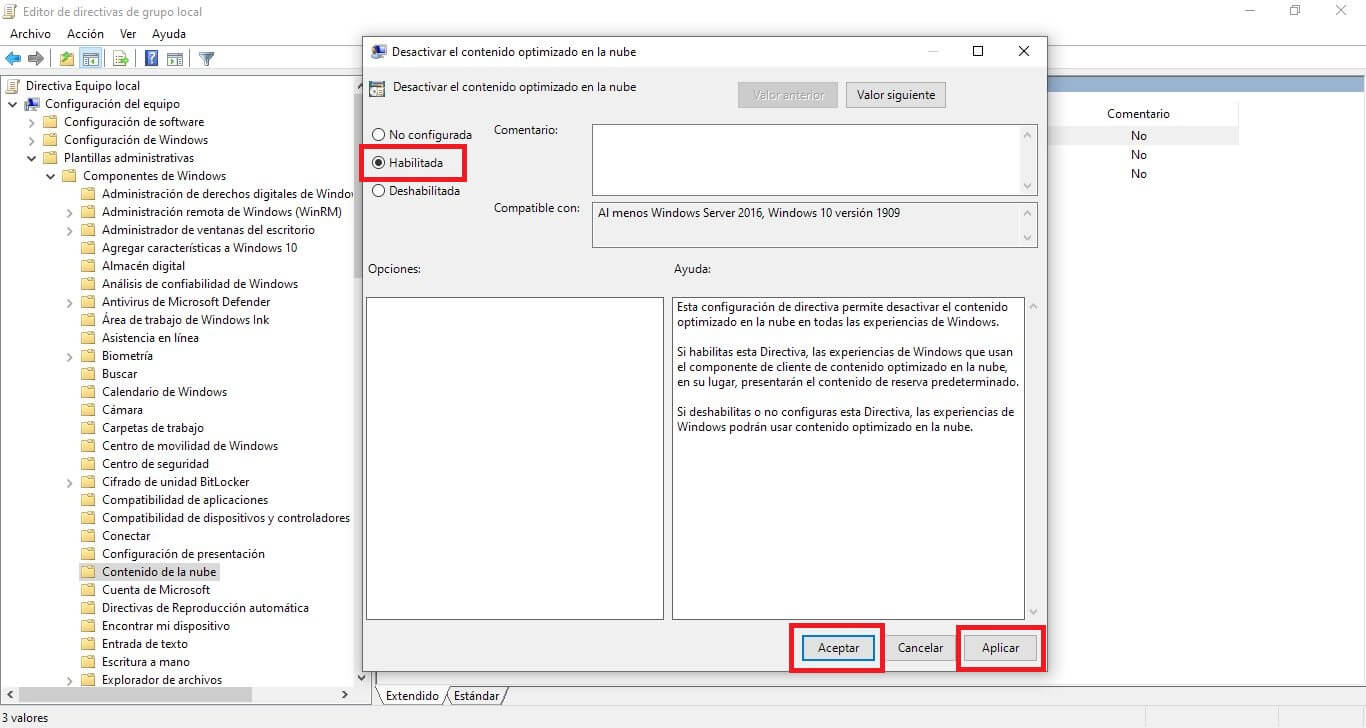
6. This opens a configuration window in which you will have to check the option: Enabled
7. To save the new configuration you will have to click on the button: Apply and then OK.

From now on, your Windows 10 taskbar will behave in the classic way and nothing will be added to your taskbar if you don't do it manually..
Note: If at any time you want to reactivate this function, you just have to follow the same steps but you will have to check the Disabled option.
Method 2: Use Registry Editor to disable the Windows 10 programmable taskbar
* This method can be used by all users regardless of the version of Windows 10 they have, including Windows 10 Home.
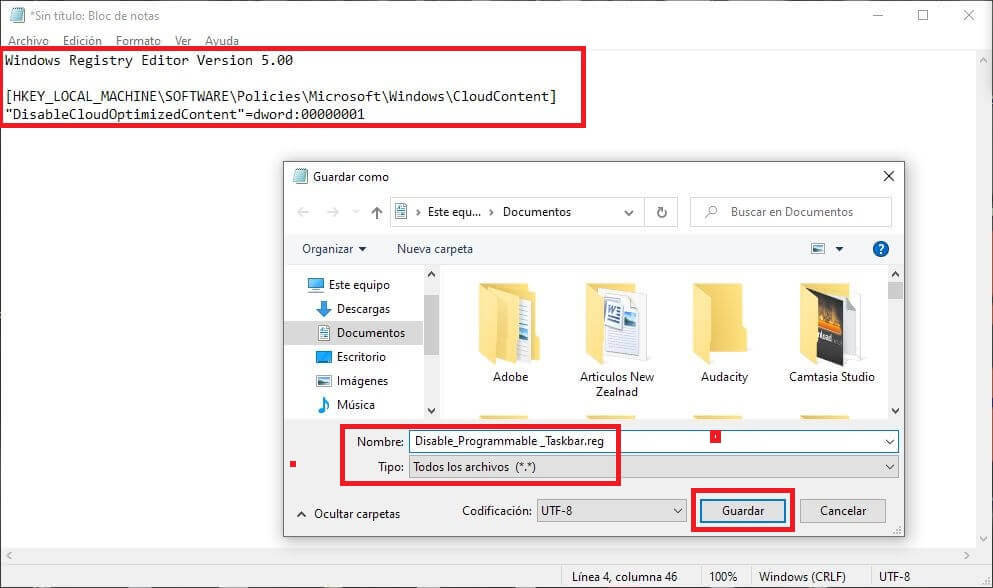
1. Open Notepad and paste the following code inside it:
Windows Registry Editor Version 5.00 [HKEY_LOCAL_MACHINE \ SOFTWARE \ Policies \ Microsoft \ Windows \ CloudContent] "DisableCloudOptimizedContent" = dword: 00000001
2. Within the notepad, you will have to click on: File> Save as ...
3. In the new window you will have to choose the location where to save the file.
4. In the Type section, make sure to check the option: All files.
5. In username you will have to provide the following: Disable_Programmable _Taskbar.reg
6. When everything is configured correctly, you only have to click on: save.

7. Locate the newly created file and double click on it to run it.
8. You will be shown a warning message asking if you want to continue with the process that you will have to accept.
9. From this moment on, the programmable task bar will be completely deactivated.
Note: If you want to activate the programmable taskbar again, you will have to open the Windows 10 registry editor and access the following path:
HKEY_LOCAL_MACHINE \ SOFTWARE \ Policies \ Microsoft \ Windows \ CloudContent
Once here you will have to configure the CludContent key with the value: 0
adsnse4