Whether you are a professional or a photography and video enthusiast, it is essential to calibrate your monitor, especially its color. When we edit photographs on our computer, we do so through a screen, this implies that if our monitor screen does not show accurate colors, when we have finished editing a photo or video and reproduce it on another monitor or screen, colors may differ.
Related: How to change the contrast and saturation of your Windows computer screen.
Definitely, color calibration should be an essential part of the workflow of a videographer or photographer, but it is no less important for non-professional users if we want our final work to be true to reality or to the edition we want to do. Otherwise, it is impossible to know if the colors displayed by your monitor are really accurate and if what you see through the screen will match the printing or display of the images or video on other well calibrated screens..
Monitor calibration can be done in a number of ways and as such the process, as well as the time it takes to perform the calibration, can differ significantly. Generally, there are 2 types of calibrations: Hardware calibration (using an external device) or software calibration (Windows 10 operating system offers a tool by default).
In this article we will focus on calibration using software and that as we have indicated, it can be carried out by a Windows 10 tool or by third-party software. Note that some monitors may have built-in calibration software or functionality. However, this will depend on the monitor we have, since not all monitors have this calibration system and if they do, the process is not identical on all monitors. If you want to know more about it, we recommend: monitor guide for photography ..
One of the big misunderstandings about color calibration is that many users think it is only necessary if you are printing your photos. This is a huge mistake as it is really important for photo or video display for both you and other people. If the color of your monitor is not calibrated correctly, chances are you will not see the colors in an image or video as they really are. In this way you can have a soft and beautiful sunset, but in reality it is a very dim sunset.
This makes selecting the right monitor and calibrating it essential if we want our photos or videos to have true colors and that they look the same on other screens or in print..
Undoubtedly, the choice of a monitor is very important when it comes to calibration and the final result, since if we have a low-end monitor, it is most likely that it was manufactured with a "TN" panel. This type of panel is not able to display colors accurately due to limited color gamut and dithering. It is also possible that you have a good viewing angle. This is because these monitors are not designed for jobs where image color is the priority. This type of monitor is designed to display basic information, video games, and other needs.
That said, below we show you step by step how to calibrate the color of your computer monitor with Windows 10.
How to calibrate the color of your Windows 10 computer screen.
1. Use the Windows 10 search and enter: Calibrate screen color
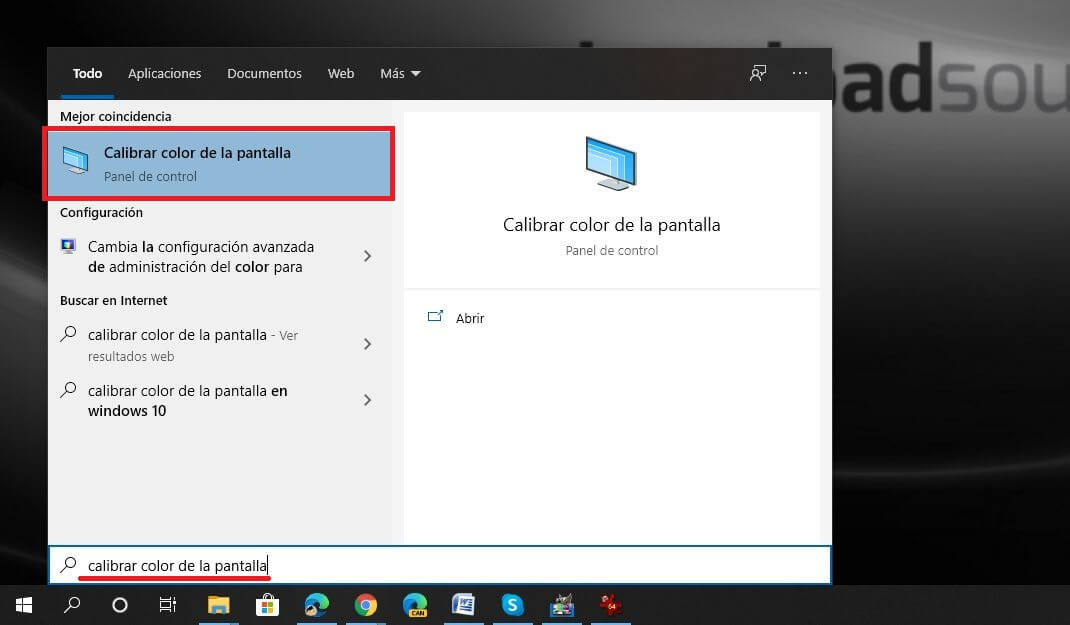
2. In the search results you will have to double click on the displayed tool.
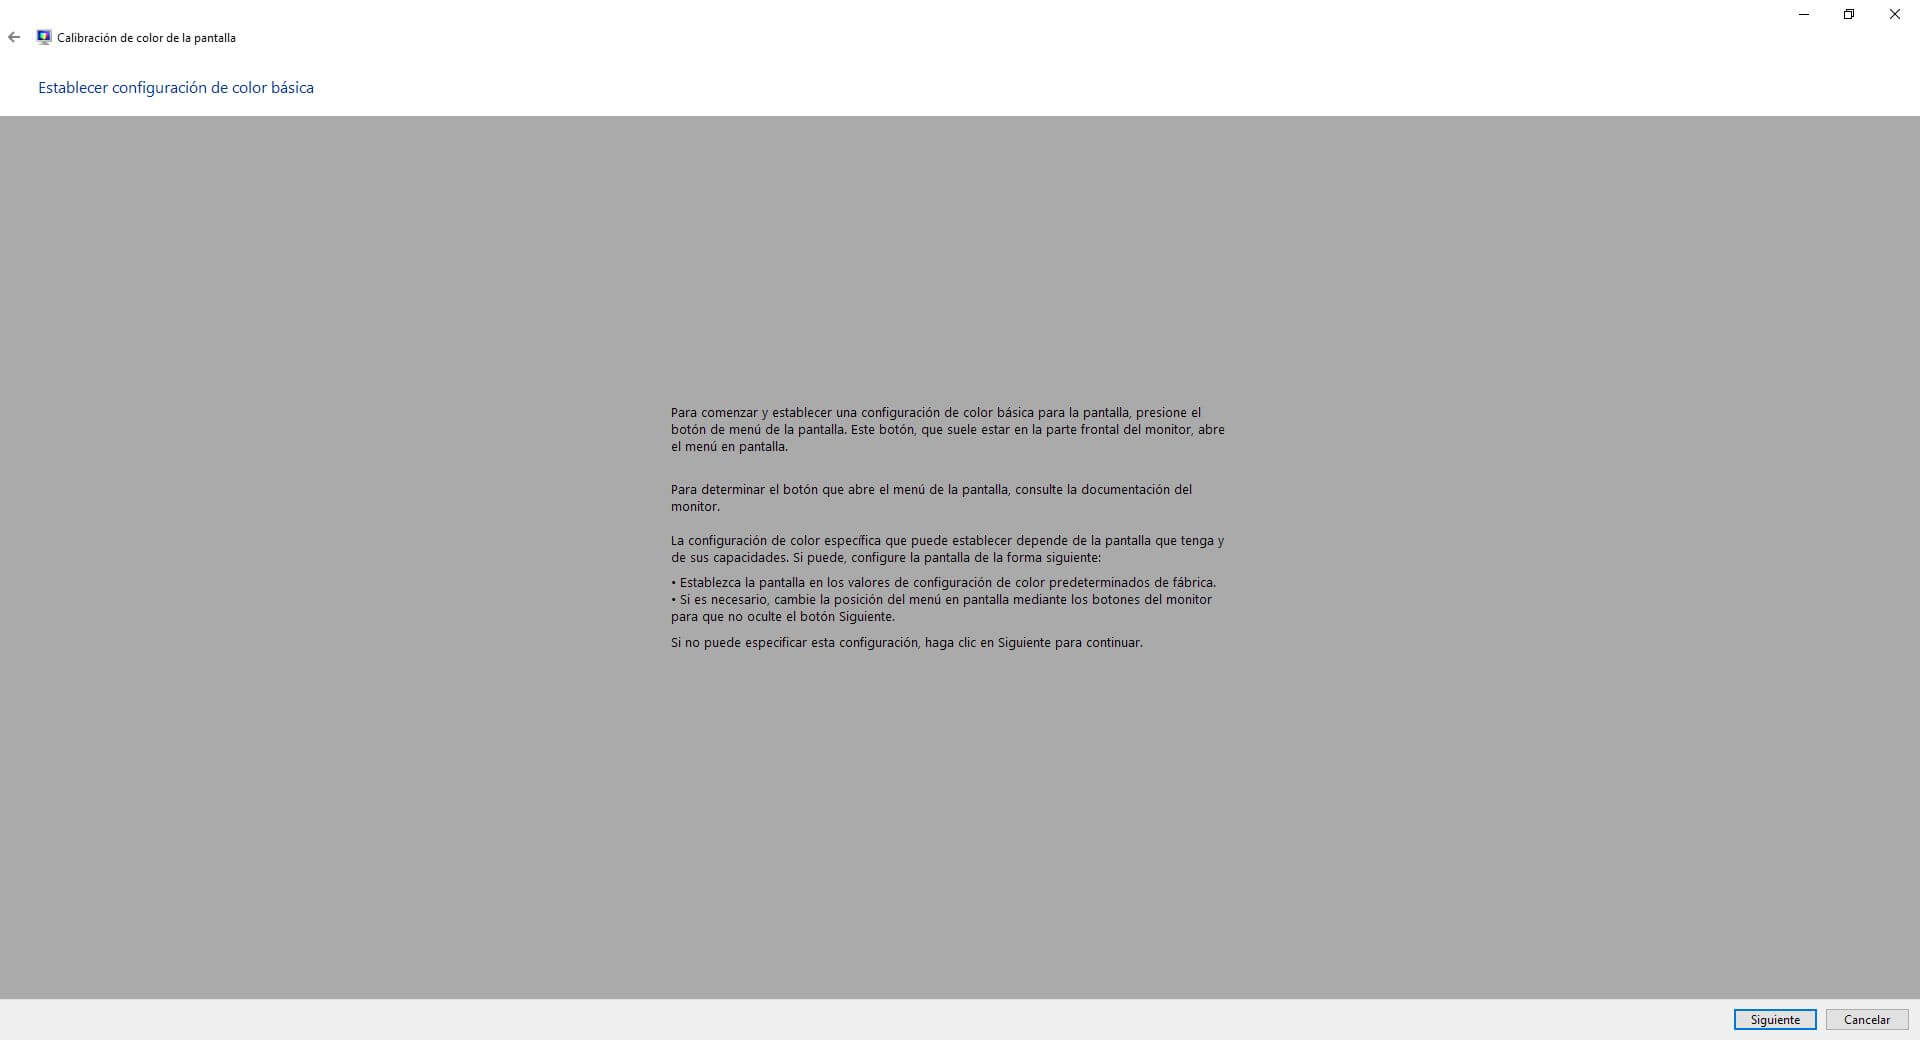
3. This will show the calibration wizard in which you will have to click on the button: Next
4. In the new screen you will find an explanation of what the color calibration consists of.
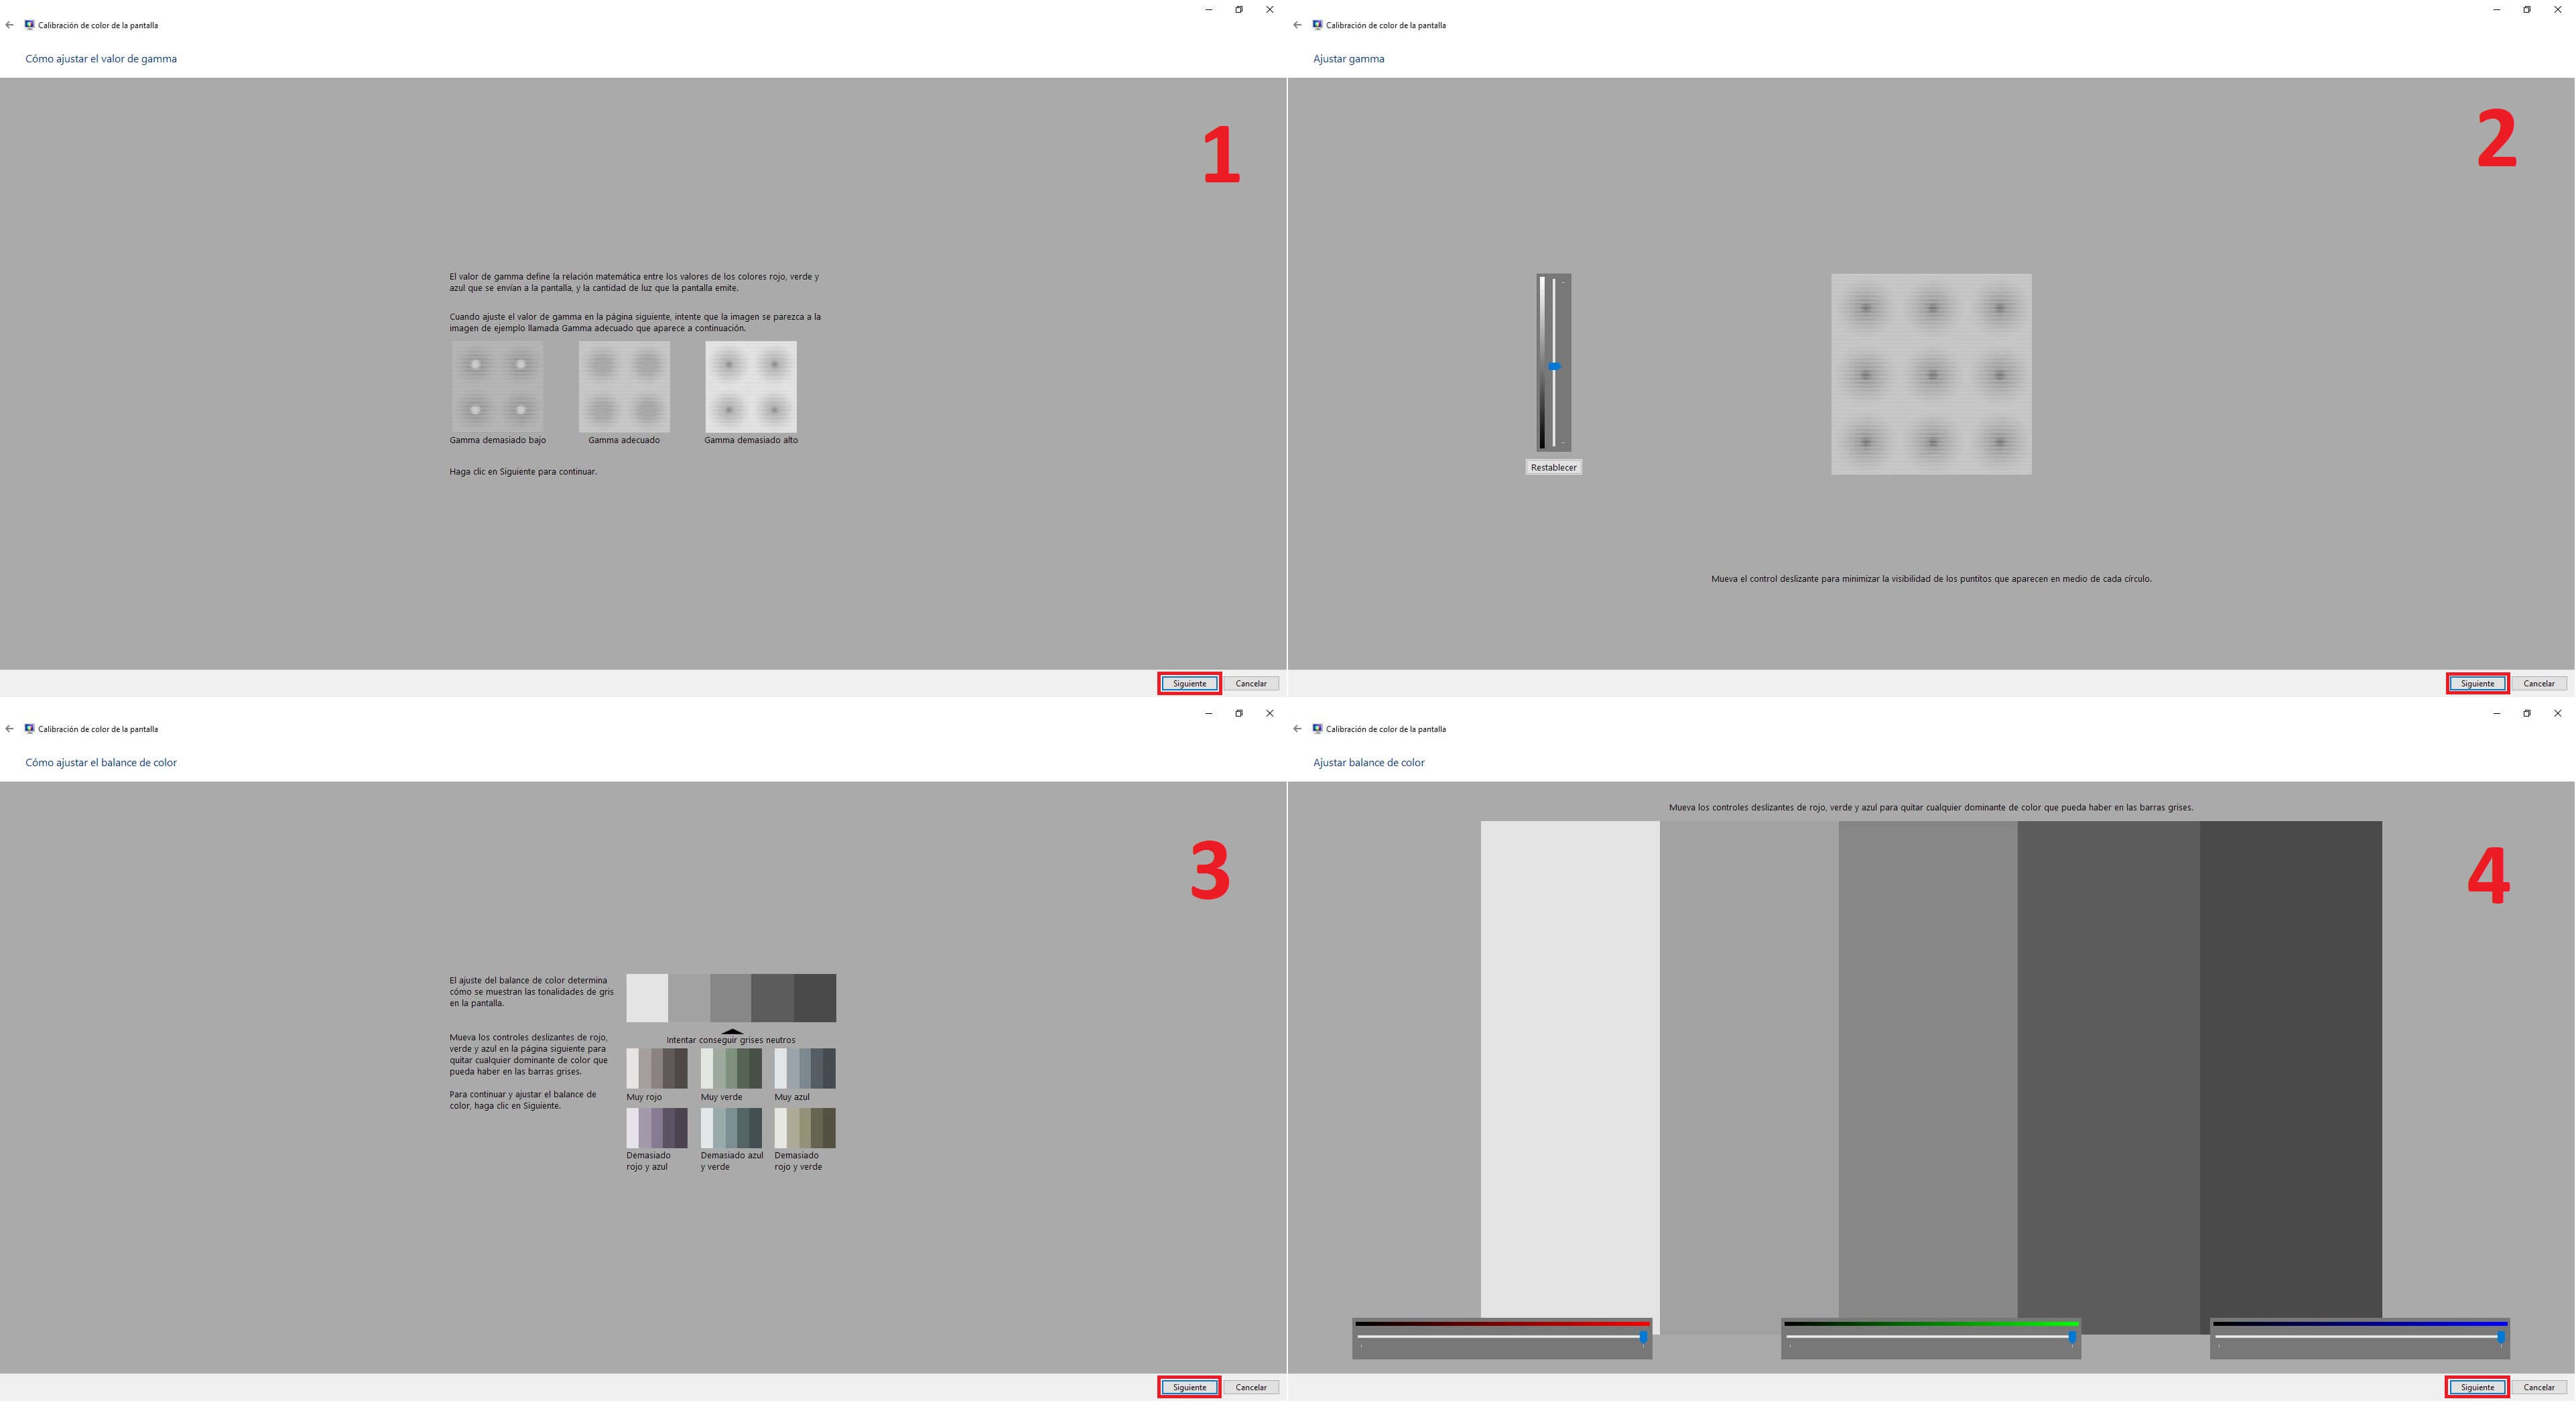
5. After clicking on Next again, several interactive screens will be displayed in which an action is required from the user, in order to calibrate the color of your screen:
- Gamma value settings.
- Contrast and brightness adjustment (optional and can be omitted).
- Adjusting the color balance.
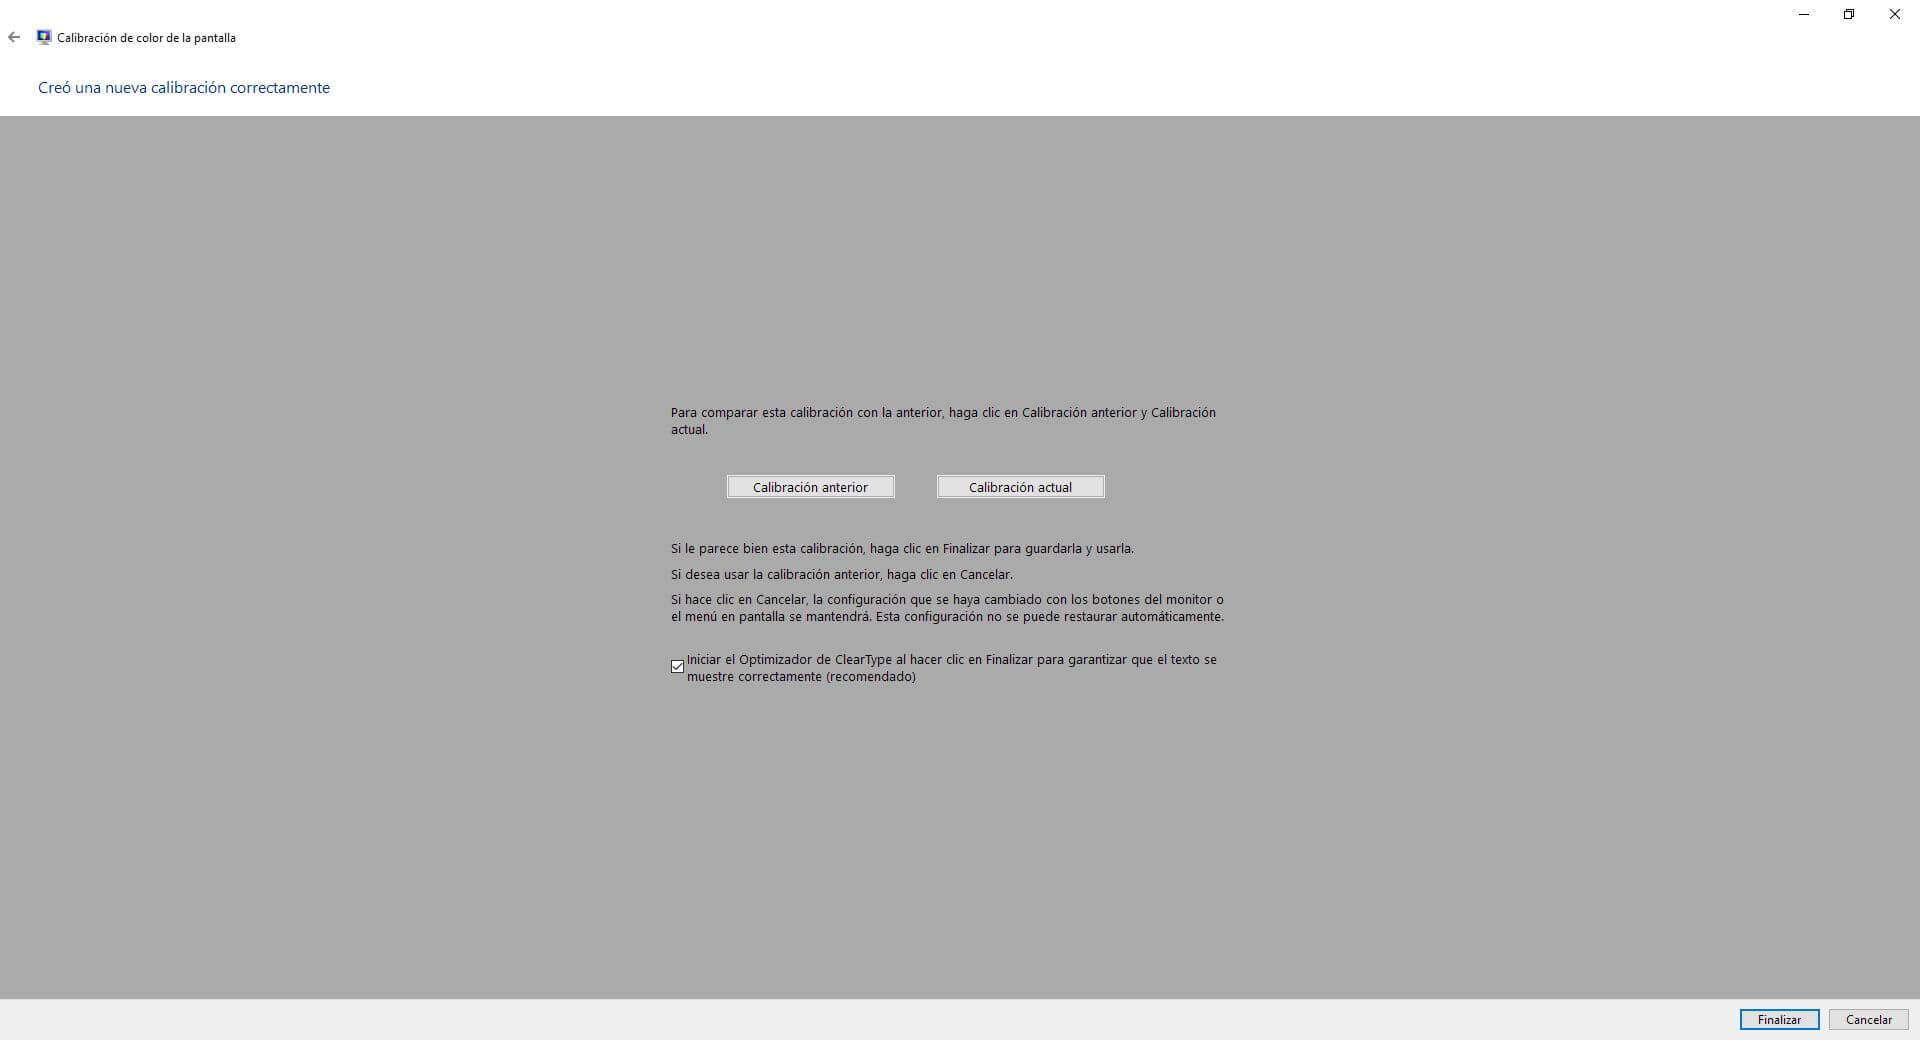
6. After all adjustments are made, Calibration is complete. Now on the last screen of the wizard, you can compare the changes by clicking on the buttons: Previous Calibration and Current Calibration.
7. Finally, when everything is ready and calibrated, click Finish.
8. From now on, the color shown on your monitor screen should be much closer to the real one.
Another aspect that can affect the colors of your photos and videos displayed on the screen of your Windows 10 computer are color profiles. Windows 10 allows you to install and use different color profiles that can cause a big difference in the shades of the images displayed. If you want to know more about the subject, we recommend reading the following post: How to install or change the color profile in Windows 10.
Important Note: It should be noted that the color calibration carried out using the Windows 10 tool is something basic, so if we want a much more precise and professional color calibration, we recommend that you use specialized software that are usually paid or a Colorimeter .