When we install applications or programs on our Windows 10 computer, you will surely come across a port forwarding warning. Without port forwarding, "incoming" traffic and data coming in from the Internet will not be able to communicate with the application / program, and you will not be able to carry out certain functions that involve the Internet. This tutorial will show you how to configure port forwarding in Windows 10.

Related: How to disable or enable Wifi, Ethernet or Bluethooth network adapters in Windows 10, 8 or 7.
Port forwarding in Windows 10 is a widely used technique to redirect your computer's traffic through selected ports between computers within a LAN (local network) and / or remote computers (Internet). In short, it is a process that allows you to send your network traffic through a number of ports of your choice and make it accessible to others on the local network or on the Internet..
The Windows 10 operating system offers the ability to perform port forwarding through the firewall. However, it should be noted that although Windows 10 allows you to carry out this redirection, it may also be necessary to make some changes to your router.
Having said that, below we want to show you step by step how to perform port forwarding through the Windows 10 firewall:
How to do port forwarding on your Windows 10 computer
1. Open the Windows 10 start menu
2. In the search shown you must enter the following term: Windows Defender Firewall with advanced security ..
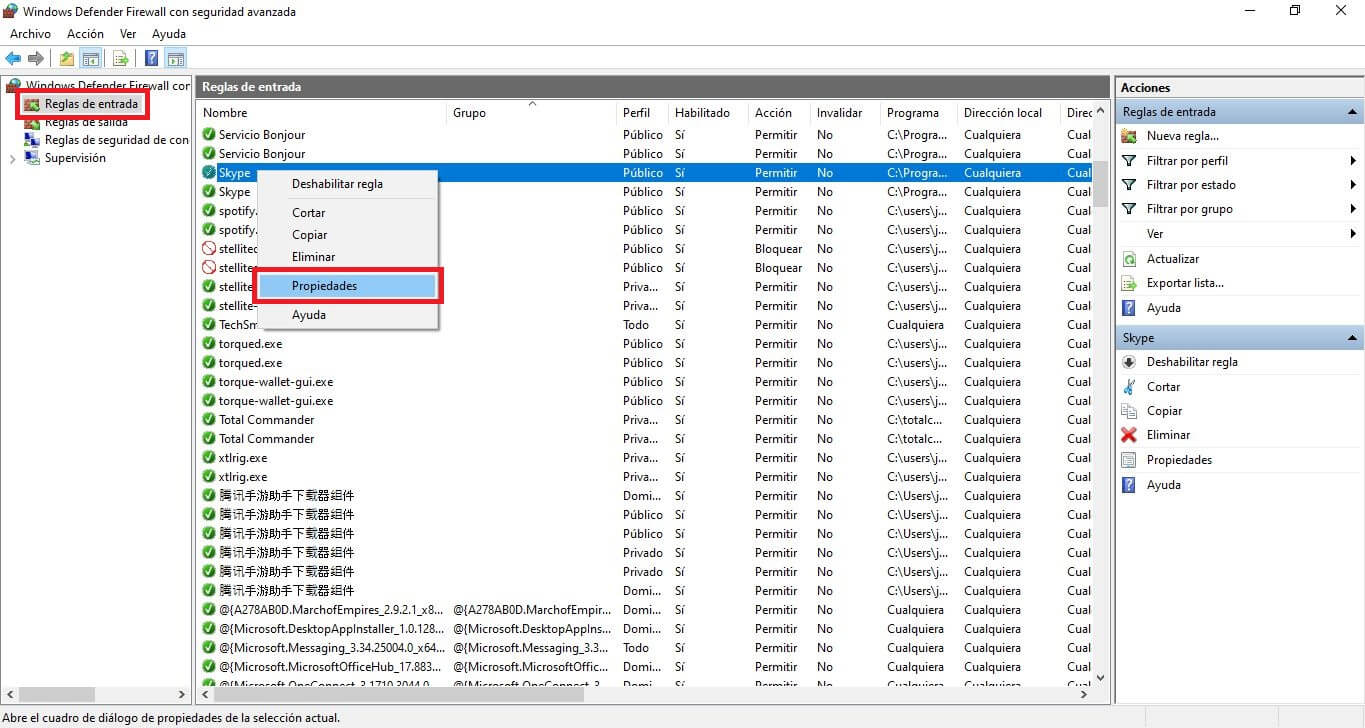
3. In the left menu you will have to select the option: Ticket rules .
4. Now you will see a list of rules in the center panel. These rules are those that apply to the various applications, services and programs that allow you to send traffic to your PC. Find the one you are interested in and click with the right mouse button..
5. When a contextual menu is displayed, you must select the option: Properties
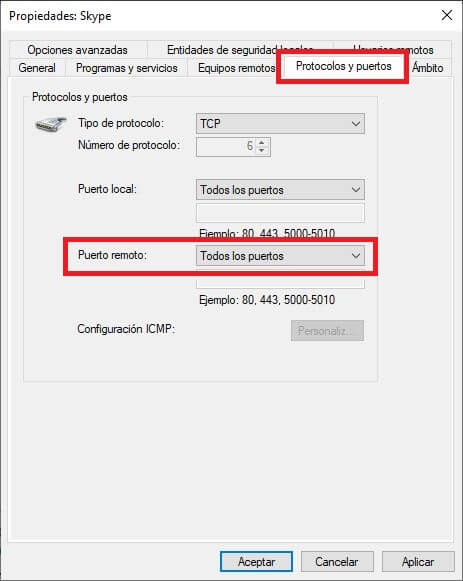
6. In the new window, you will have to go to the tab: Protocols and ports.
7. Here you will see the " Remote port " section , which is the port that the client (application, software that tries to connect) is using to connect with other services, servers or remote computers through the Internet.
Note: By default the client randomly assigns a remote port, so by default it is simply set to "All ports" in Windows firewall.
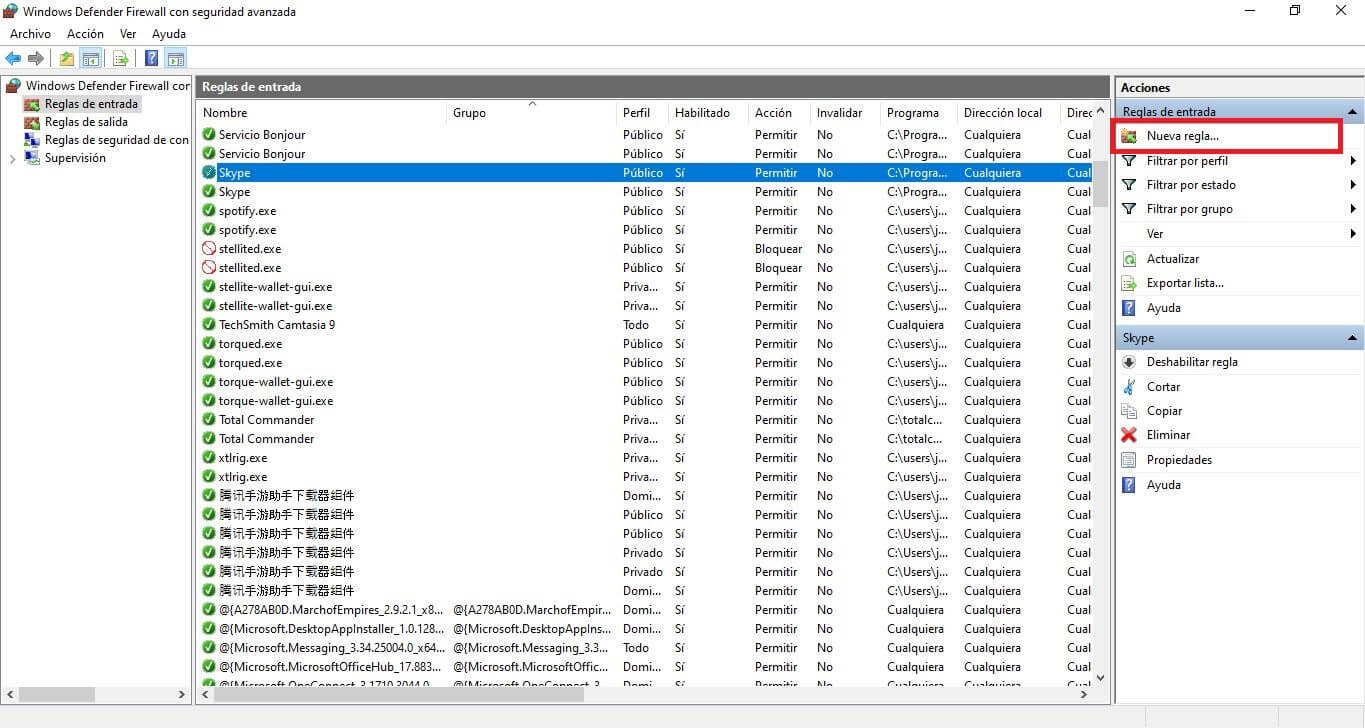
8. Close the small window and now click on the option: New Rule located on the right side of the main window.
9. In the new window select the Port option .
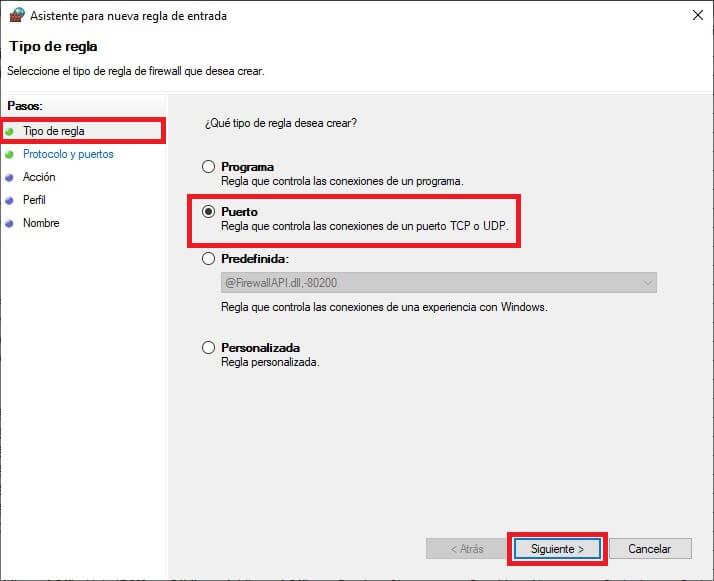
10 Then go to the section: Protocol and Port.
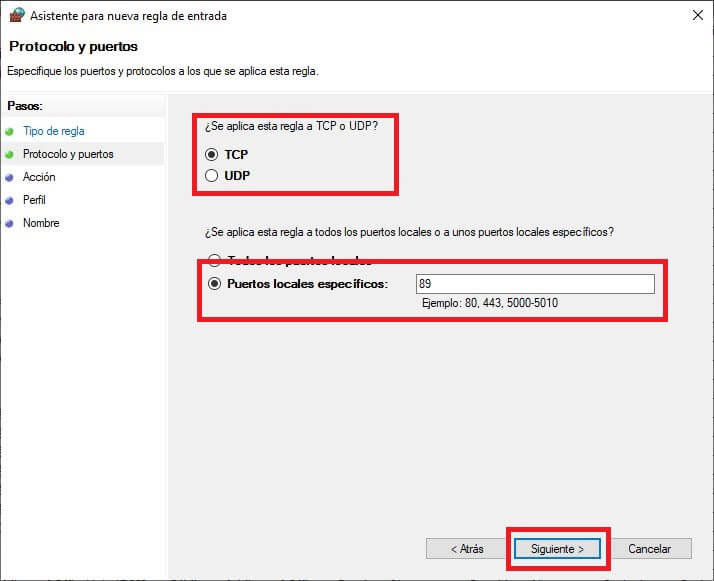
11. The next thing will be to select the protocol: TCP or UDP (the application that asks you to forward the port must specify the protocol)
12. Click Next and now you can select "All local ports" or, on the contrary, specify which local ports you want to open. You can specify a single port, a range of ports, or choose multiple ports separated by commas.
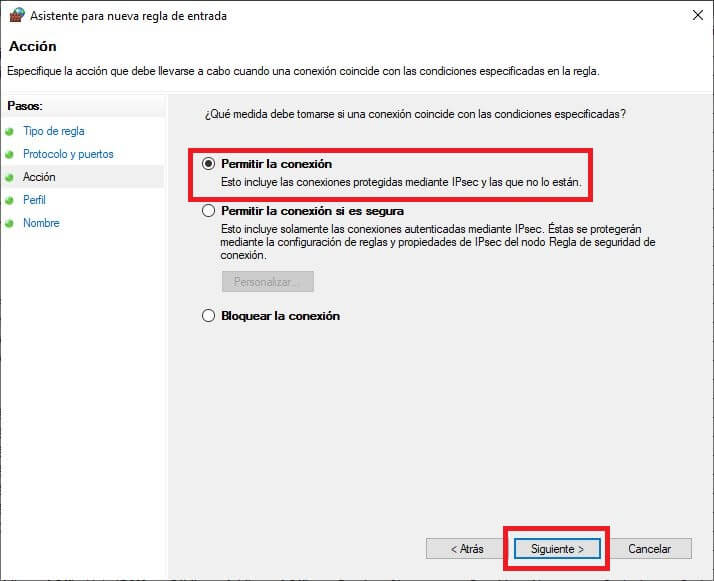
13. Click Next, then check the " Allow connection " option .
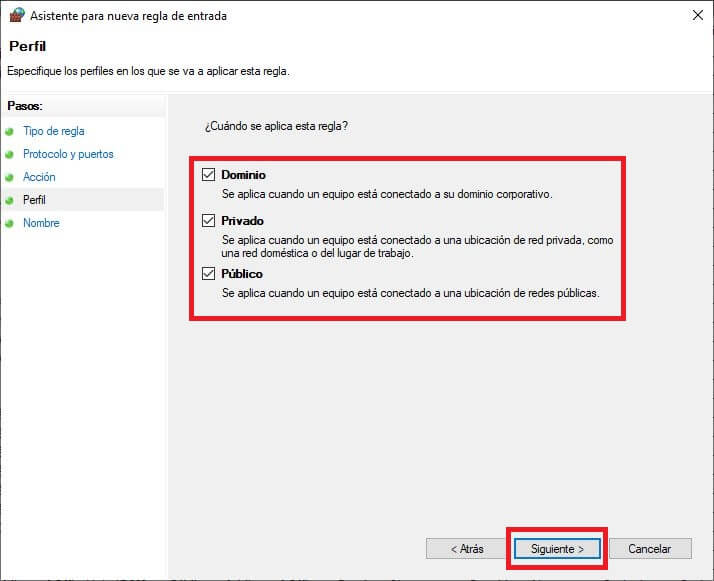
14. Choose whether the connection should be applied to: Your domain, Your private home network, or a public network location (not recommended for security reasons).
15. On the next screen, provide a name for the rule.
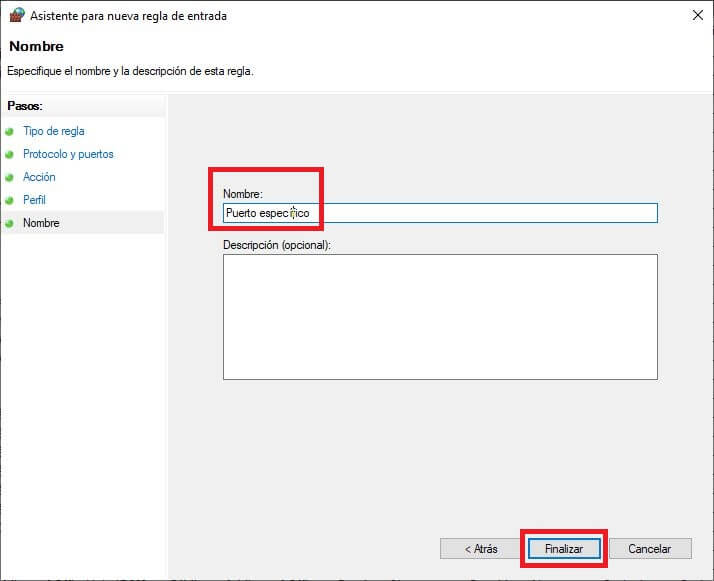
16. Once the rule is created, it will be added to the Inbound Rules list in the Advanced Security window .
17. Your new rule will now be joined to your list of incoming rules where you can double-click to modify it, make it apply only to specific programs and services, and so on.
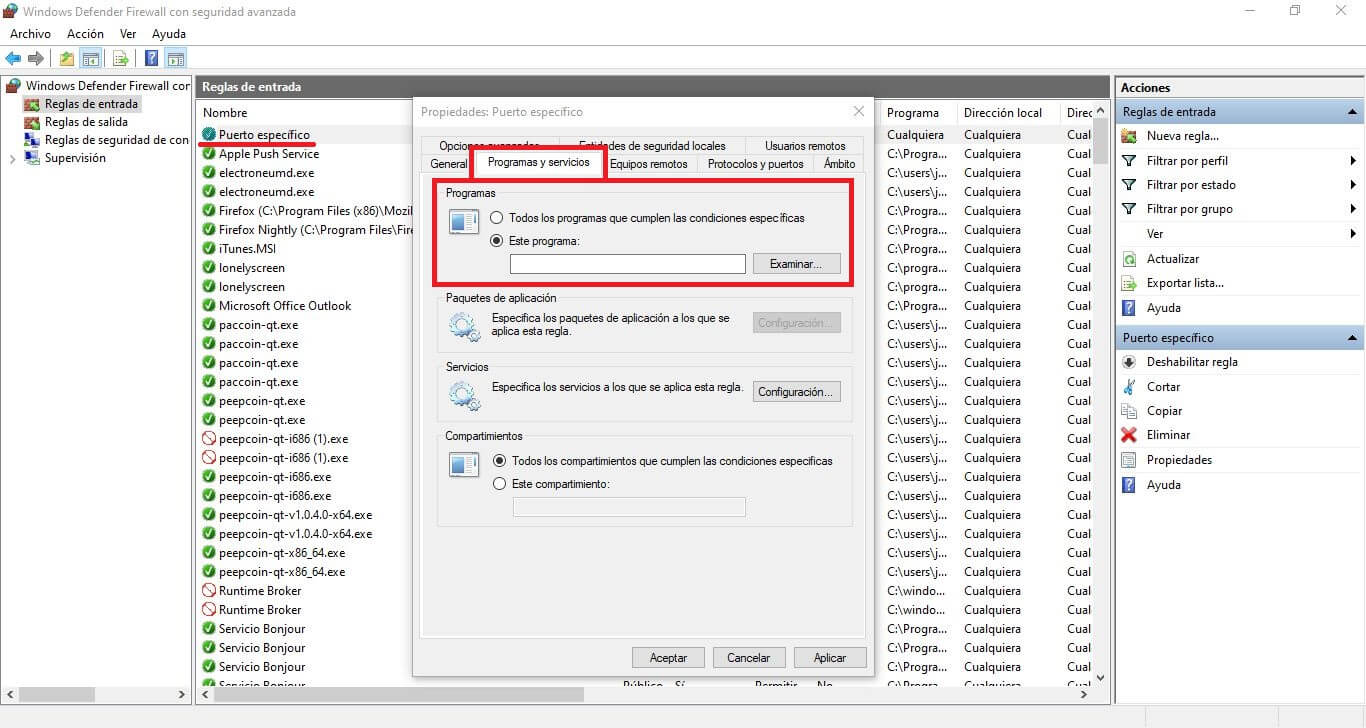
18. At any time, you can right-click on the rule and select "Disable" or "Delete" as well.
19. And that's it. Now you know how to configure port forwarding in Windows 10.
Important note: you may also need to configure port forwarding on your router.