One of the most essential components in any operating system is the RAM (Random Access Memory) which plays a vital role in the entire system performance process at a general level so that the larger the size of this we can notice a much better performance of the system and the applications installed in it..
The RAM memory is called Random Access Memory because the operating system accesses the stored data in a non-sequential manner to them, this makes it a different type of memory from other existing memories.
Windows 10 makes use of RAM as a temporary data storage medium with the aim of storing information both for itself and for the programs that must be run. The volatile term in RAM means that all data stored in that memory will be lost as soon as we turn off the equipment. This allows you to always have space in it to host new data, currently the RAM modules can reach speeds above 15,000 MB / s which is positively reflected in the performance of the actions in the equipment..
RAM types
There are various types of RAM as they are:
- VRAM - Video Random Access Memory
- SRAM - Static Random Access Memory
An important point in the use of RAM is that it must be closely related to the board or motherboard, since, if it supports a RAM limit, at present, some computers can support up to 128 GB of RAM while that older ones can only support 4GB. Regardless of this, it is ideal and practical to know in detail how much RAM is in our equipment and therefore TechnoWikis will explain various methods to access this information.
To keep up, remember to subscribe to our YouTube channel! SUBSCRIBE
1. Know the RAM using System Properties in Windows 10
Step 1
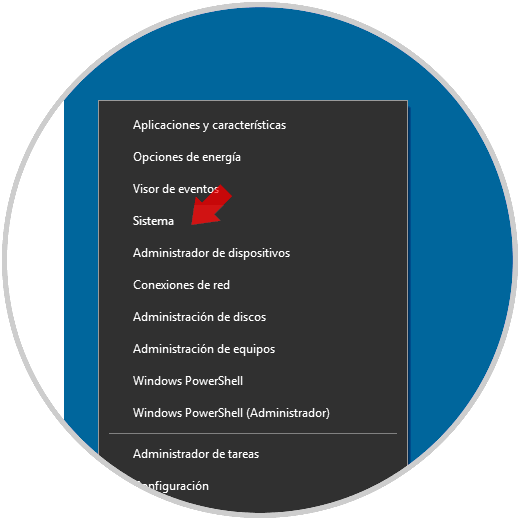
To make use of this first method, we can use the following key combination or right-click on the Start menu and in the drop-down list select the "System" option:
+ R
Step 2
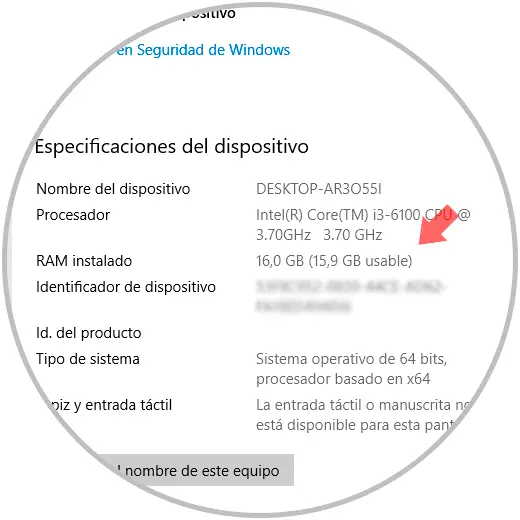
Selecting this option will display the following window, there, in the section "Device specifications" we will see the amount of RAM installed in the line "RAM installed":
2. Know the RAM using Control Panel in Windows 10
Step 1
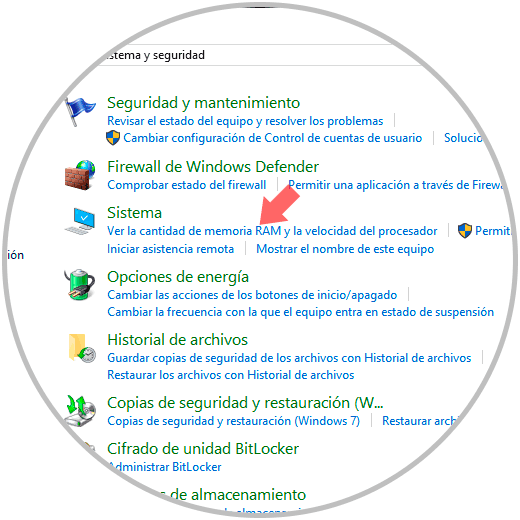
Another way to access this information is through the Control Panel which is a centralized administration point of multiple aspects of the system, to use this method we must go to the following route:
Step 2
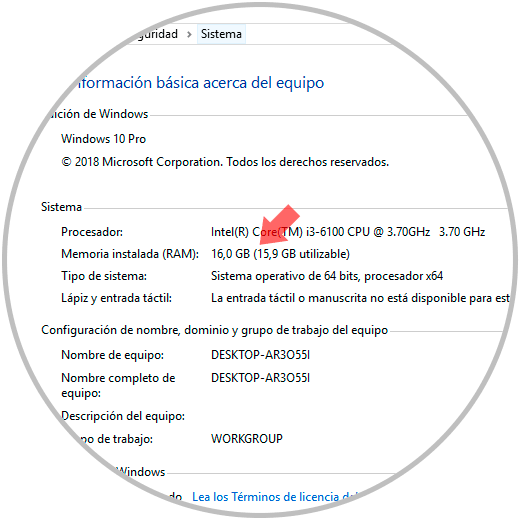
There we click on the line "See the amount of RAM and processor speed" to access this information. In the "System" section we see the available RAM in the "Installed memory (RAM)" line.
3. Know the RAM using Task Manager in Windows 10
Another of the global administration options of Windows 10 is the Task Manager which allows us to manage processes, services, startup and hardware configuration of the equipment.
Step 1
To access the "Task Manager" we have some options such as:
To keep up, remember to subscribe to our YouTube channel! SUBSCRIBE
Step 2
Now, in the Administrator window displayed, we will go to the “Performance” tab and in the “Memory” section we can access details such as:
Step 3
In the upper right we find the amount of memory installed in the device:
![image]()
4. Know the RAM using the msinfo32 command in Windows 10
The msinfo command or System Information modifiers is an integrated function in Windows 10, and in all Windows operating systems, through which we can access general information about the hardware, the system components and the software environment facilitating the task of understanding the structure and composition of the system.
Step 1
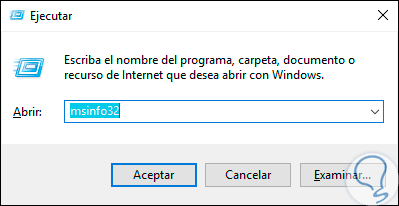
To validate the RAM through this method, we must use the following key combination and execute the “msinfo32” command:
+ R
Step 2
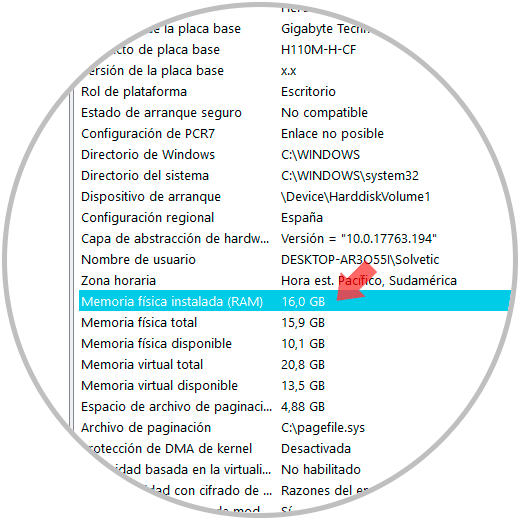
Click on Accept and in the window that will be displayed go to the "System Summary" section and locate the line "Physical memory installed (RAM)" and there will be displayed the total of this:
5. Know the RAM using CMD in Windows 10
The command line is useful for performing certain administrative tasks and obtaining system information, the Windows command prompt gives us the opportunity to obtain not only RAM capacity but much more information through the wmic command
Step 1
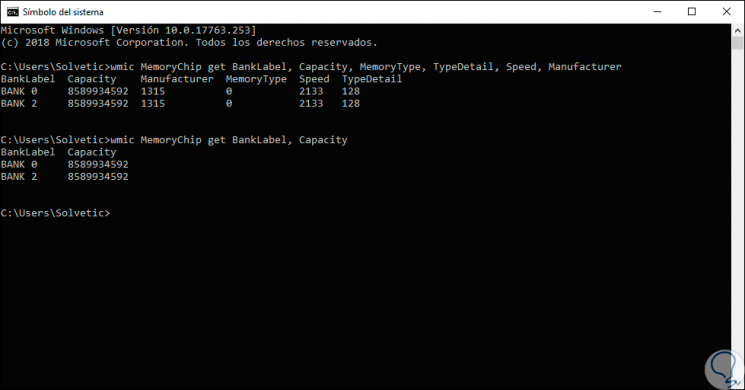
For this we access a console and we can execute the following:
wmic MemoryChip get BankLabel, Capacity, MemoryType, TypeDetail, Speed, Manufacturer
Step 2
With this command we will obtain specific details such as:
- Slot in which the memory module is
Note
We can also delete details and access more specific information, for example, just knowing the capacity and the slot used. In this case, "MemoryChip" is the filter used to access RAM.
wmic MemoryChip get BankLabel, Capacity
Note
The memory capacity will be displayed in MB. There we must add the capacity of each module to know in detail the total amount of RAM used in Windows 10.
As we can see, the options are varied when it comes to knowing in detail the capacity of our RAM and it is worth checking on the website of the manufacturer of our equipment the maximum capacity supported in case we want to add more modules..