RAM memory is key for the vast majority of the tasks that we carry out in Windows 10 since hundreds or thousands of processes pass through it, which based on the capacity and technology of the RAM is noticeable in the speed of their execution processes. Modern computers support up to 64 GB of RAM in DDR4 technologies and although this should be enough to have a fairly fast computer..
Many times when we update the system it is possible that we notice some slowness in some processes, the strange thing is that with a good amount of RAM we should not experience this, the cause is that some Windows 10 services are running in the background resulting in other processes are affected.
TechnoWikis wants through this tutorial to give you some guidelines to solve the high consumption of RAM memory in Windows 10..
To stay up to date, remember to subscribe to our YouTube channel! SUBSCRIBE
1. Windows 10 high RAM memory solution from REGEDIT
Before performing this step we must create a backup of the information either with a restore point or a copy of the files,
Step 1
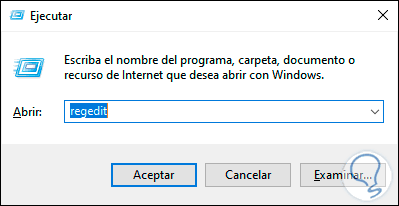
We open the registry editor using one of the following ways:
Registry Editor
Step 2
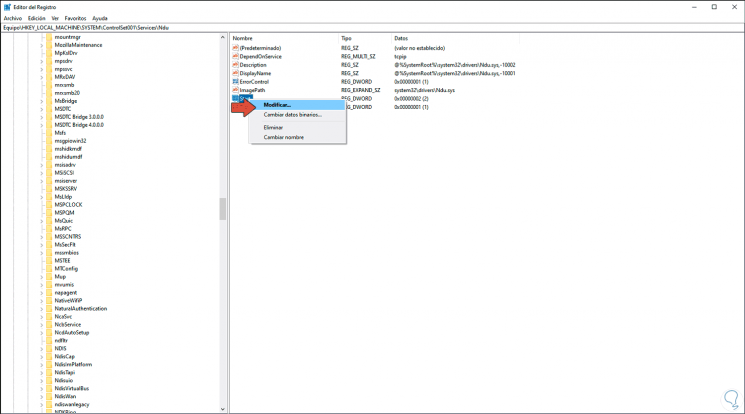
In the registry editor we will go to the following path:
HKEY_LOCAL_MACHINE \ SYSTEM \ ControlSet001 \ Services \ Ndu
Step 3
In the central panel we right click on the value "Start" and select "Modify":
Step 4
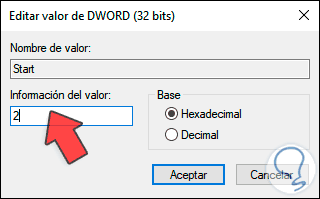
We will see the following default value:
Step 5
We modify this value from 2 to 4. We click OK to save the changes.
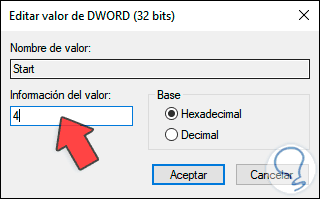
In this way we optimize the use of RAM memory through the system registers.
2. Windows 10 high RAM memory solution from Services
Step 1
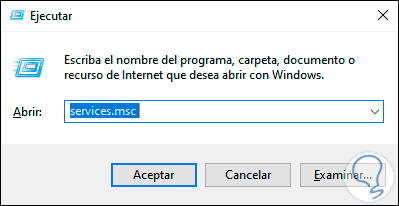
Windows 10 integrates numerous services so that the applications and system configurations work in the correct way, to access these, we open Run and enter the following:
services.msc
Step 2
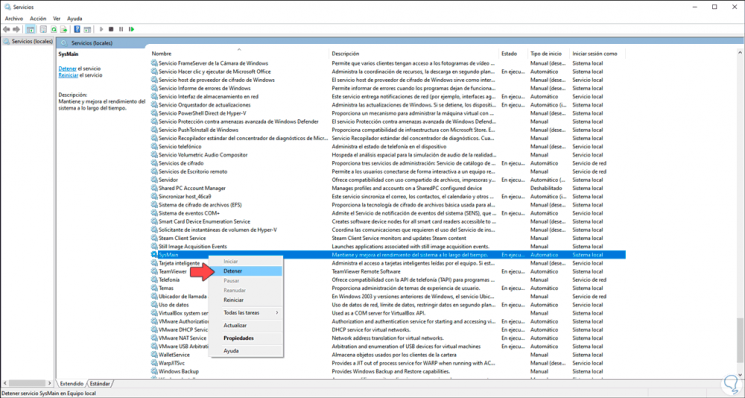
We click OK and in the service manager we locate the service called "SysMain", this is a service that helps optimize the performance of the system, we right click on it and select "Stop":
Note
in case of not finding the SysMain service we must look for "SuperFecth" which is the name in previous versions.
Step 1
Once stopped, we double-click on it and in the "Startup type" field we set "Disabled". We click Apply to save the changes and then OK.
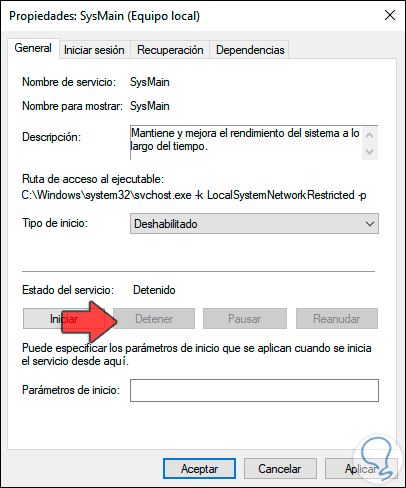
After this we restart the computer so that all the changes are effective and we note the proper use of RAM as it should be for the execution of applications or processes of the system and thus optimize our productivity to the maximum..