Microsoft Outlook is the messaging and contact management platform developed by Microsoft in order to give all users of the Office suite the ability not only to send and receive emails but also to have the necessary tools for task management , calendars , meetings and others. One of the great advantages of Outlook in its 2019 edition , is the ability to configure various aspects of mail. One of them, which is essential, is the possibility of implementing an automatic response which will be sent to each email received, or as configured, indicating to the sender some news regarding our status..
For example, if we go on vacation or are incapacitated by a health issue, we can create an automatic response indicating that we are not available by adding the return date. This is useful since some emails, especially corporate ones, may require some type of action or response from us and, if not available, this could pose some kind of problem if the sender is not told that we are not available for a period of time. concrete.
Due to the great utility of this function in this tutorial TechnoWikis will explain how we can add an automatic reply in Outlook 2019 and thus customize this aspect of our mail..
Note
This auto reply feature is only available for Exchange accounts, that is, how many corporate type.
To keep up, remember to subscribe to our YouTube channel! SUBSCRIBE
1. How to add an Exchange account in Outlook 2019
Step 1
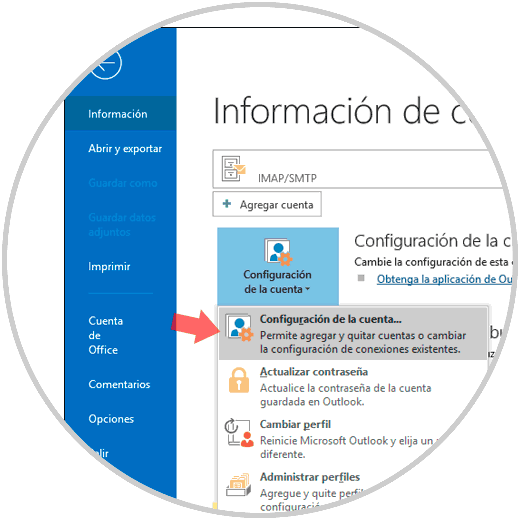
If you have an Exchange type email account, but it is not added in Outlook 2019, we must go to the "File" menu and in the "Information" category create the account either by clicking on the "Add account" button or by clicking on the "Account settings" option and then again on "Account settings":
Step 2
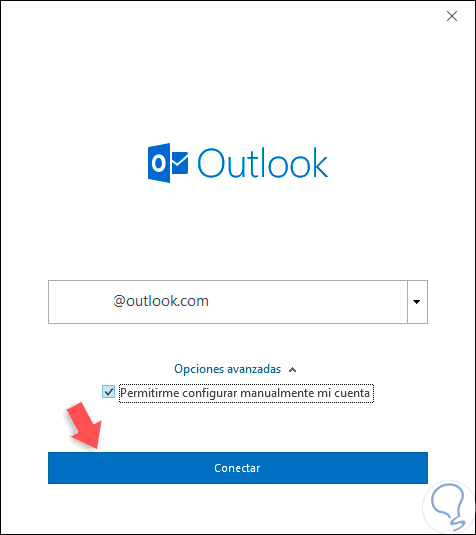
The following wizard will be displayed where we will enter the Exchange account to be added and we must check the "Allow me to manually configure my account" box located in the "Advanced options" section. There we click on the "Connect" button.
Step 3
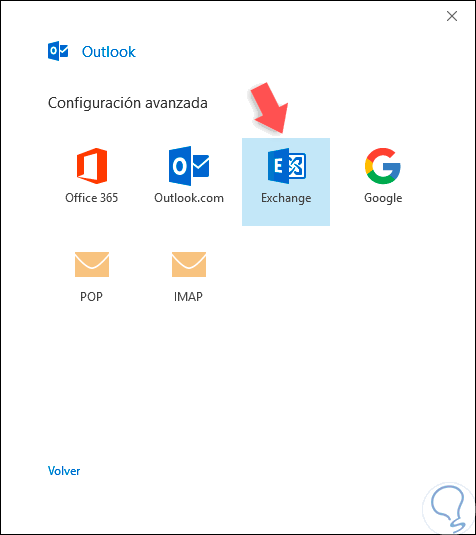
In the following window we select "Exchange":
Step 4
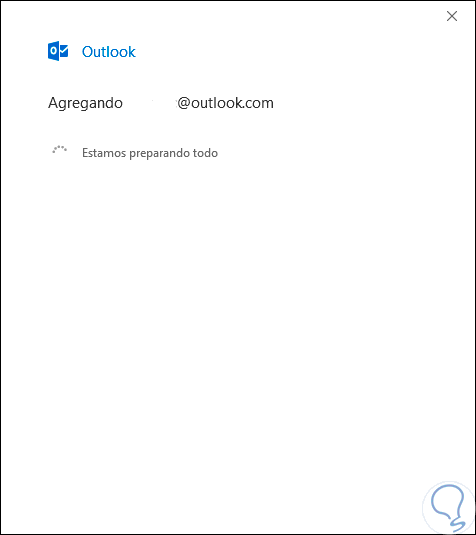
By clicking there we will see the following. A pop-up window will be displayed.
Step 5
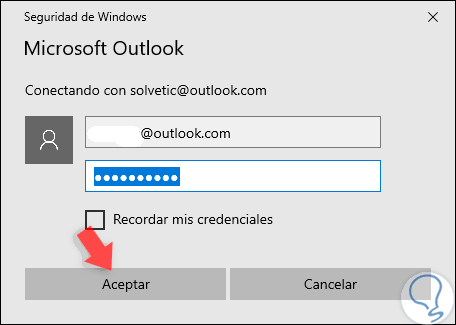
Enter the password of the selected account. Click on "Accept" and wait for the process to finish adding the Exchange account in Outlook 2019.
2. How to add auto reply in Outlook 2019
Step 1
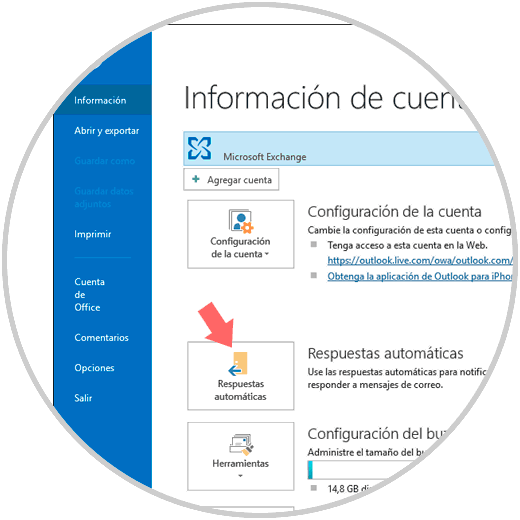
To start this process we access Outlook 2019 and there we go to the "File" menu and select the Information category, we will see the "Automatic replies" option:
Step 2
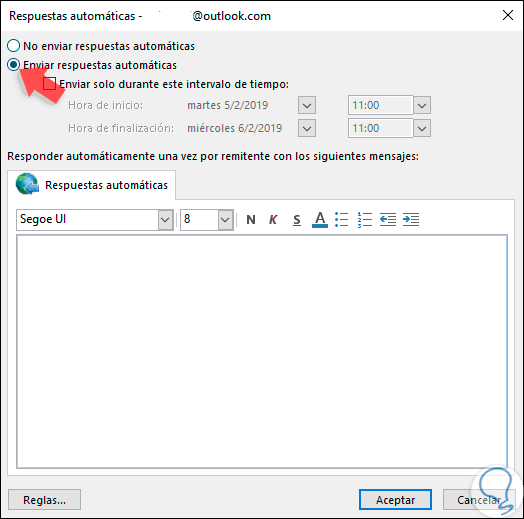
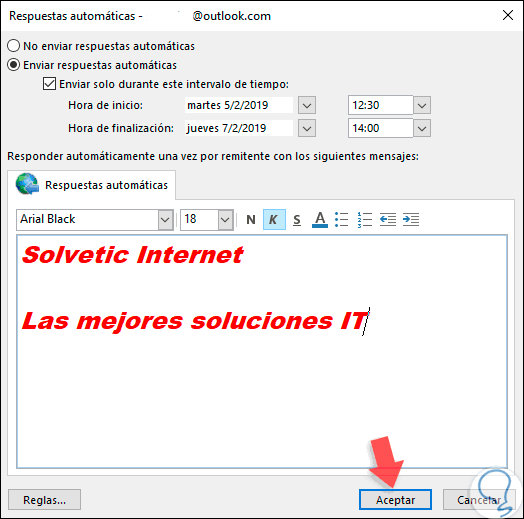
The following window will be displayed and there we must activate the "Send automatic replies" box:
Step 3
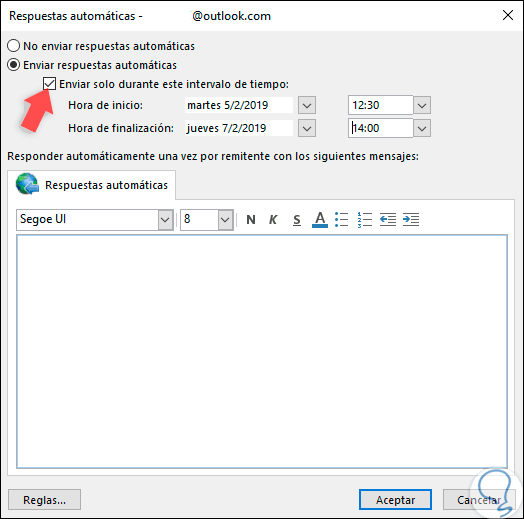
If we check the box "Send only during this time interval" it will be possible to tell Outlook 2019 to send the answers only in the indicated time range, they can be days and hours:
Step 4
In the body of the message we can enter the desired message and edit its format if we want with other types of fonts, size, bold, italic, etc. Click on "Accept" to apply the changes.
Step 5
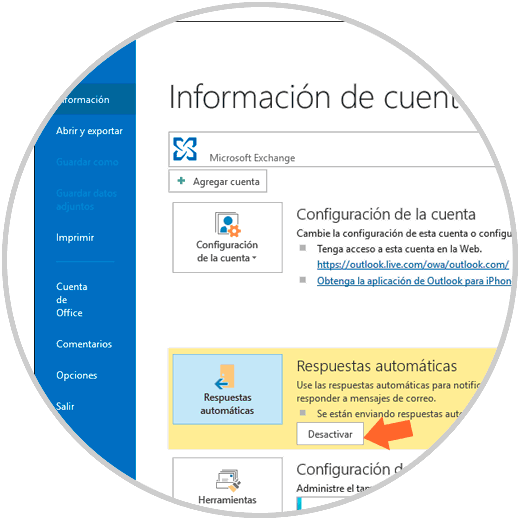
In the Information section we will see that they are active and there we have a "Disable" button to prevent automatic responses from being sent.
Step 6
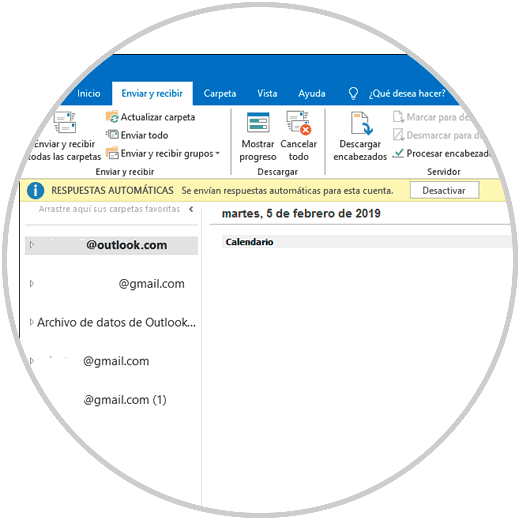
Similarly when we access the account we will see at the top that this account uses automatic responses:
This way it will be possible to configure automatic responses in Outlook 2019 as needed.