Holidays are one of the words that we all want to hear because this term is synonymous with rest, travel, relaxation and everything that involves disconnecting from the daily routine but always being responsible..
It is natural that by our roles within the organization or by the number of friends and family receive hundreds of email almost daily, there the word "vacation" changes its context because if we do not warn that we will be out is possible (100% insurance) that when we return from resting we find our inbox to the point of collapse which will be transmitted to us and until that moment everything that we recharge of energy can be lost.
You do not have to worry, because then TechnoWikis will show you the steps to follow to know how to add a holiday message that we can assign in Outlook 2019 , so when someone sends a mail message will be notified of our absence and thus avoid that write us until the date of our return or you can wait without being pressed for an answer..
We will learn to assign this message in a simple way in Outlook 2019.
To stay up to date, remember to subscribe to our YouTube channel! SUBSCRIBE
1 How to add vacation message in Outlook 2019
Step 1
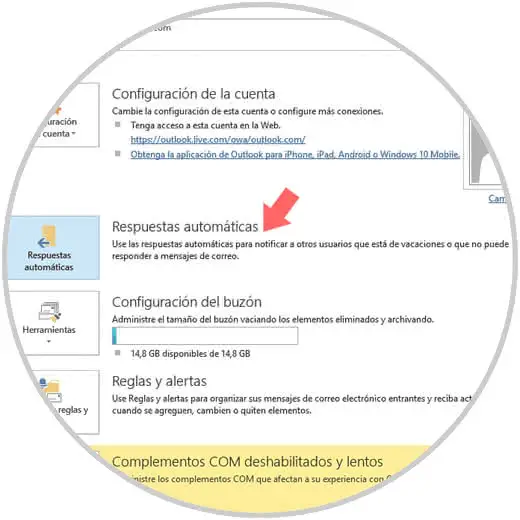
To start this process we open the Outlook 2019 application and go to the File menu and in the Information section we find the option "Automatic responses"
Step 2
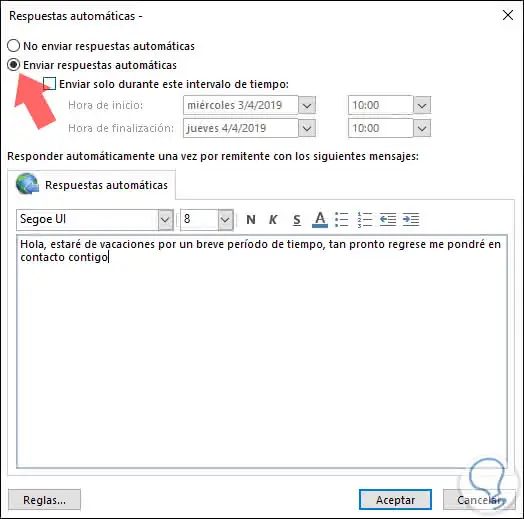
When clicking on this option, the following window will be displayed where the following will be configured so that the answer is correctly adjudicated:
- Activate the "Send automatic replies" box.
- Enter the message to answer in the respective field.
Step 3
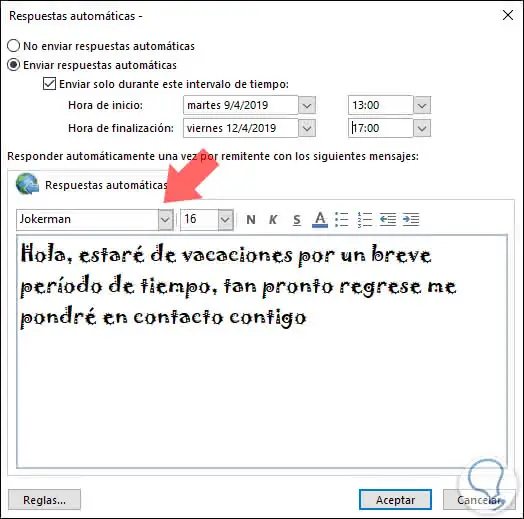
The source of the text entered can be modified as we deem necessary in the respective section, there it will be possible:
- Apply underlining, bold or italic
In the upper section we can define a time range indicating start date and time as well as completion in which the responses will be sent, for this we must activate the "Send only during this time interval" box and assign the desired times:
Step 4
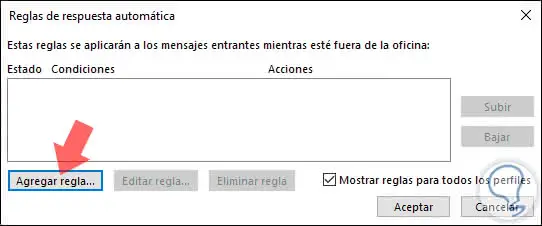
In the lower part we find the option Rules, by clicking there the following will be displayed. Click on the "Add rule" button
Step 5
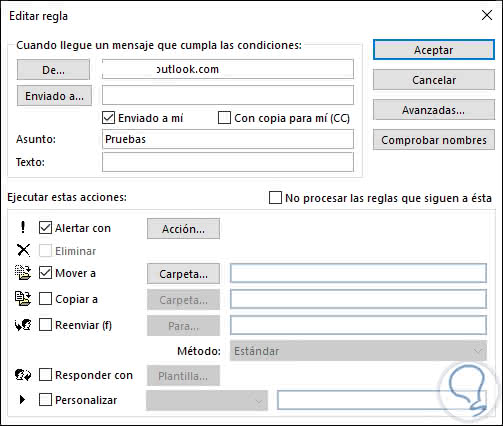
In the window that is displayed it will be possible to establish a set of rules so that holiday responses are applied, these values ​​are:
- Type of alert to execute (action, move to a folder, copy to a different route, answer, forward and many more)
Step 6
Once we have defined this, we click on OK to save the changes and we can see that the "Automatic responses" section will be highlighted, this indicates that there is a rule there:
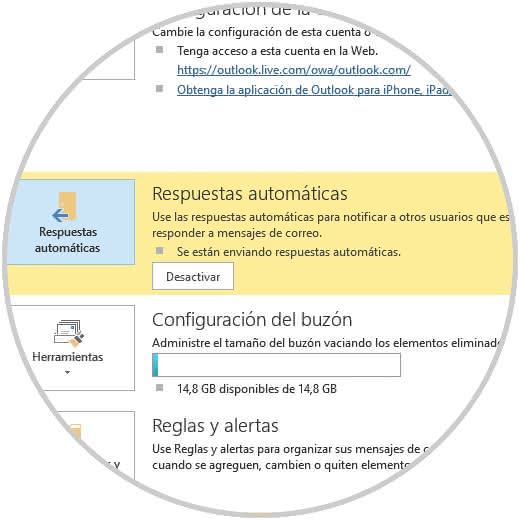
At the moment we want to stop using this automatic answer in Outlook 2019, just click on the Deactivate button to disable it..
This process applies to Outlook accounts under Exchange.
2. How to create a holiday message in the POP and IMAP accounts of Outlook 2019
Another type of account that we can add in Outlook 2019 are the IMAP and POP accounts but these do not have the option of Automatic responses like the Exchange accounts, for this we must create a rule for that purpose.
Note
This process is also possible in an Exchange account.
Step 1
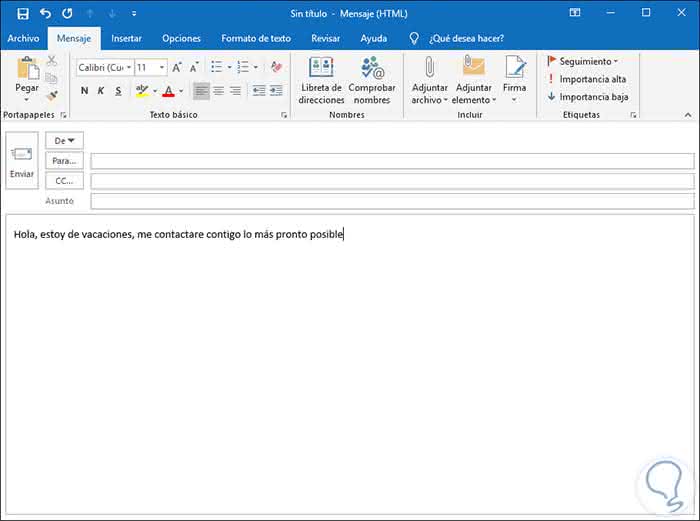
In this case we must create the message template from the Start menu and there use the option "New email" and enter the desired message that will be the holiday:
Step 2
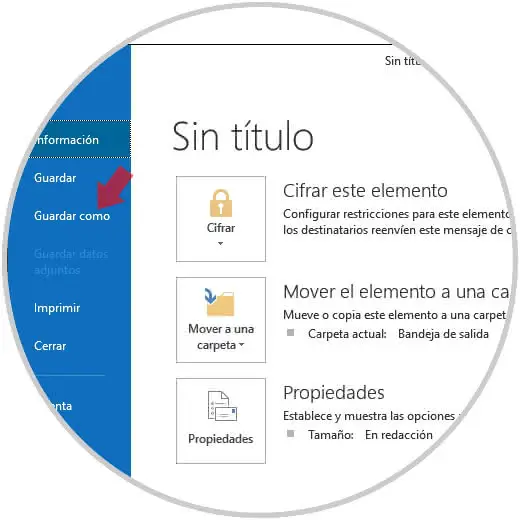
Now we will go to the File menu and there we select the option Save as:
Step 3
In the window that will be displayed, we must assign the desired name to the template and in the "Type" field choose the option "Outlook Template":

Step 4
This will be lodged by default in the route:
C: \ Users \ user \ AppData \ Roaming \ Microsoft \ Templates
It is possible to define another route if we wish.
Step 5
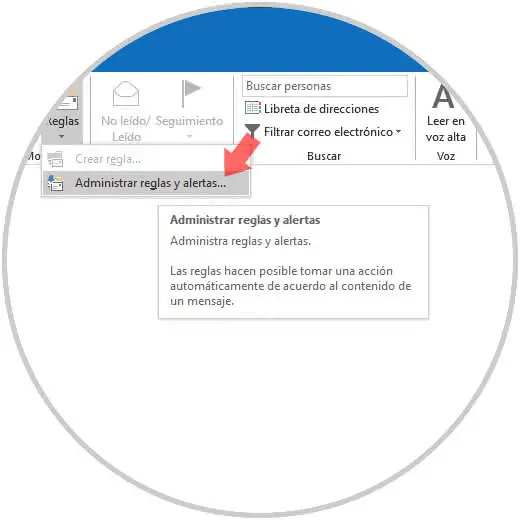
Once we perform this process, we will create a new rule which will have as task to automatically replicate the created message, to achieve this we will go to the Start menu and in the group "Move" click on the option "Rules" and there we will select the option " Manage rules and alerts ":
Step 6
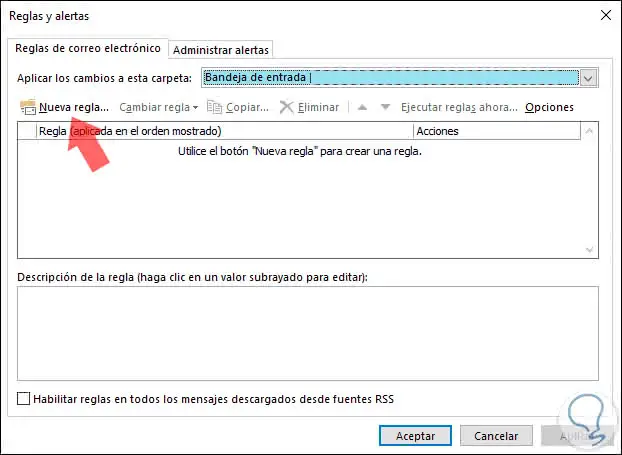
In the displayed wizard, we go to the option "New rule" located at the top:
Step 7
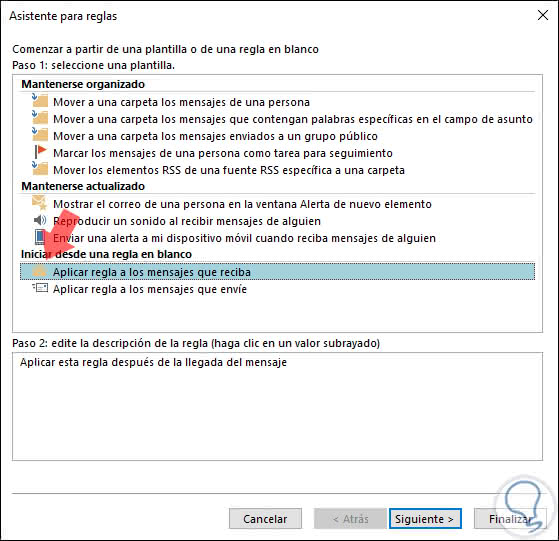
The following window will be displayed, there we will go to the section "Start from a blank rule", then select the option "Apply rule to the messages that you receive":
Step 8
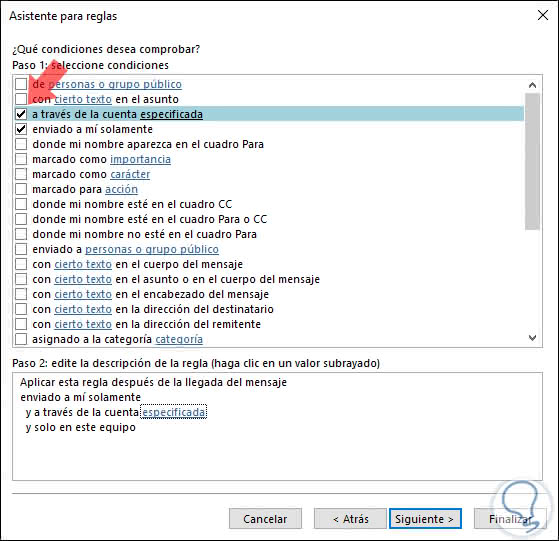
We click Next and now it will be possible to activate the boxes that must be applied to the filtering:
Step 9
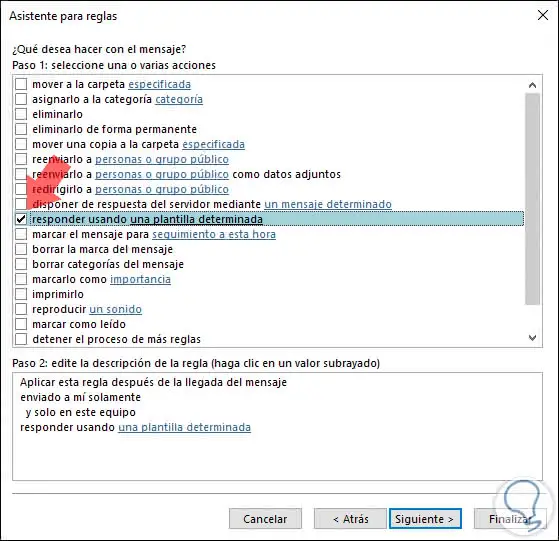
We will be able to select all the desired ones, after this, we click on Next and there we will activate the box "Respond using a certain template":
Step 10
In the lower part we will see the line "a certain template" highlighted, we click on it and then select the option "User templates in the file system" in the "Search in" field located at the top:
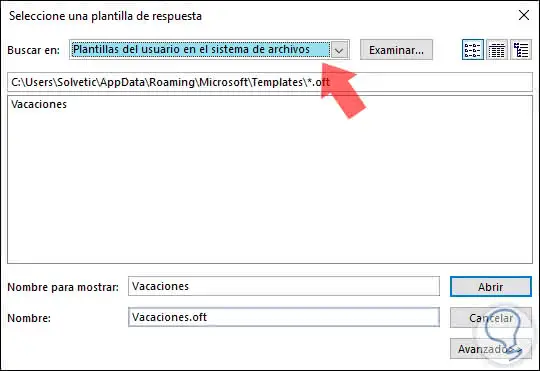
Step 11
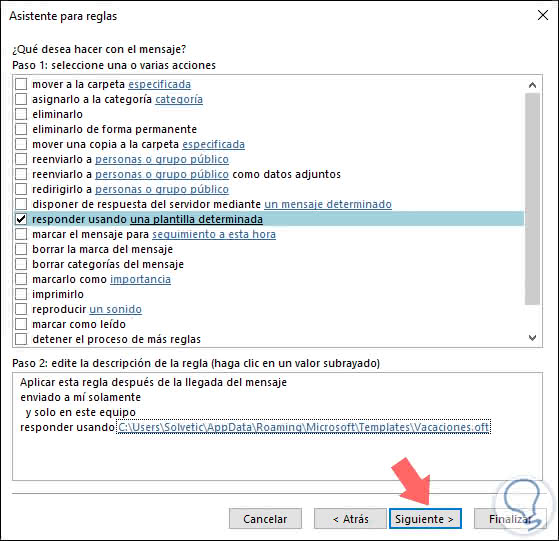
Note that the template we have created is automatically displayed, we select it and click on the Open button, note that it has been marked on the bottom:
Step 12
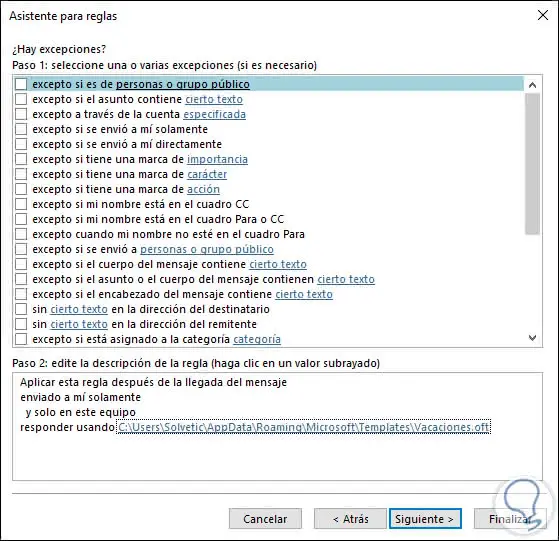
We click Next and in the next window it will be possible, if applicable, to create exceptions to the rule:
Step 13
Once this is processed, we click on Next and we can give a name to the rule as well as activate it, apply it to all existing messages or make it a standard for all Outlook 2019 accounts:
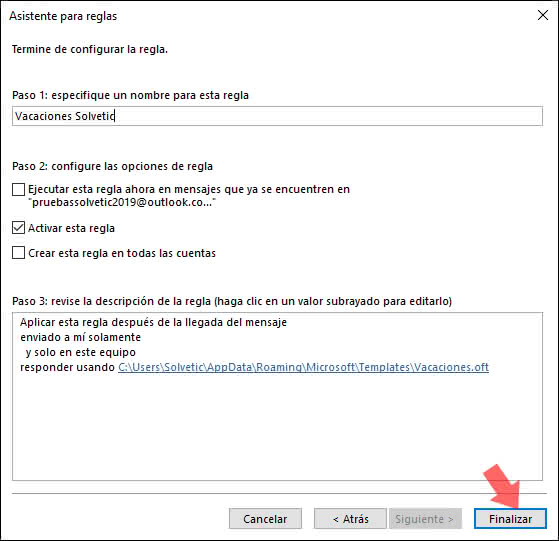
Step 14
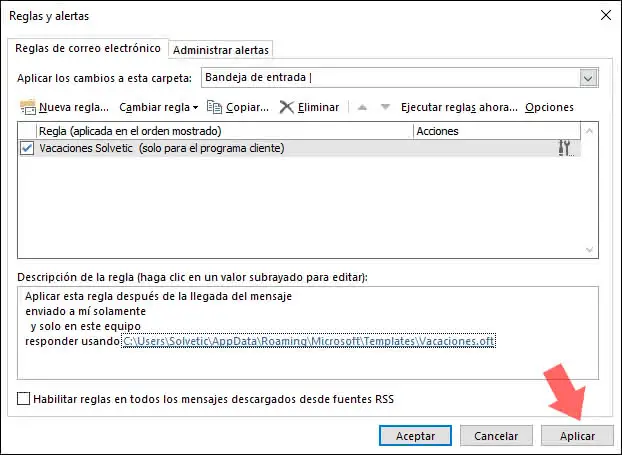
Click on Finish to complete the process and we will see the rule created. Click on Apply and Accept to complete the process.
3 How to create a vacation message in Outlook for macOS
Step 1
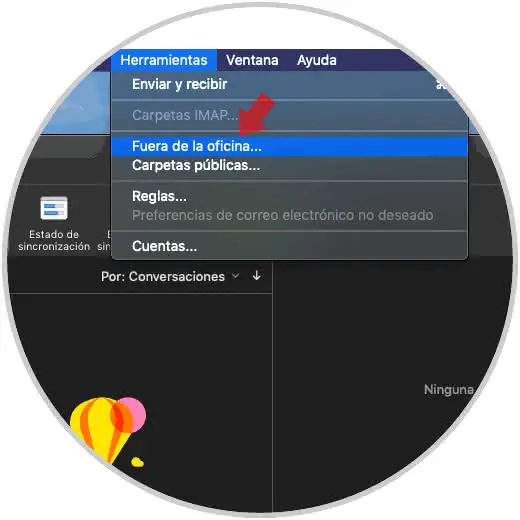
The process in macOS is much simpler, for this we must open the Outlook application and assign the out-of-office message using one of the following options:
- From the Tools menu / Outside the office
- Or from the internal menu of the Tools / Out of Office app
Step 2
When clicking there the assistant will be displayed where we must activate the box "Sending automatic responses for the account ....". In the field "Reply once to each sender with" enter the desired message:
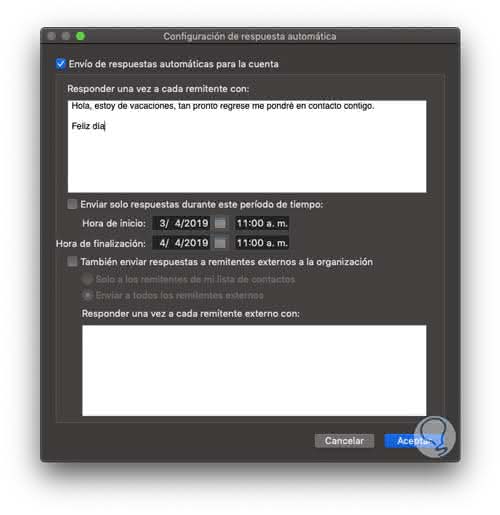
If we wish to establish a period of time for sending the answer, we will activate the "Send only automatic responses during this time period" box and assign the desired range.
As an additional option, Outlook 2019 in macOS gives us the opportunity to send holiday messages to external users, for this we activate the box "Also send responses to external senders to the organization" and assign the respective message. Once defined, click on OK to apply the changes.
This way we will be calm and we will be able to enjoy our vacations to the maximum.