Microsoft has developed Outlook as a messaging platform thanks to which it will be possible to perform multiple tasks both at the level of user management and of mail or calendar thanks to integrated tools for this purpose. Logically the most frequent task to perform in Outlook 2019, the latest version developed by Microsoft, is the sending of emails either personal or corporate; And, something that is essential in any written email is the addition of the signature which allows us to appear before the various senders..
A signature in Outlook 2019 can contain text, images or some digital element that clearly shows who we are and what we do. It is for this reason that through this tutorial, TechnoWikis will explain the way to create or edit our signature in Outlook 2019 and thus personalize our email.
For this you will have to follow the steps that you will see in this video and read in this tutorial:
To keep up, remember to subscribe to our YouTube channel! SUBSCRIBE
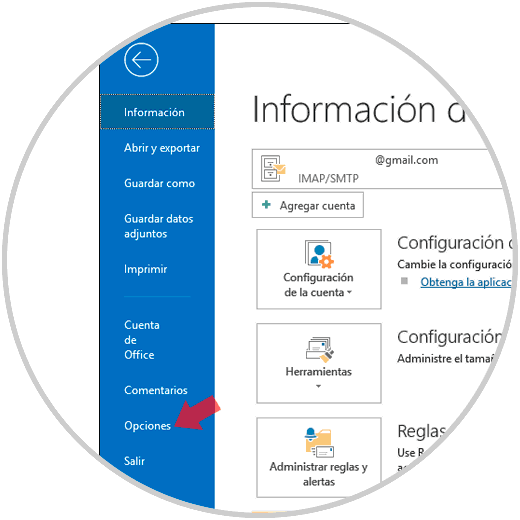
Step 1
To use this method, we open Outlook 2019 and go to the "File" menu and there we select "Options":
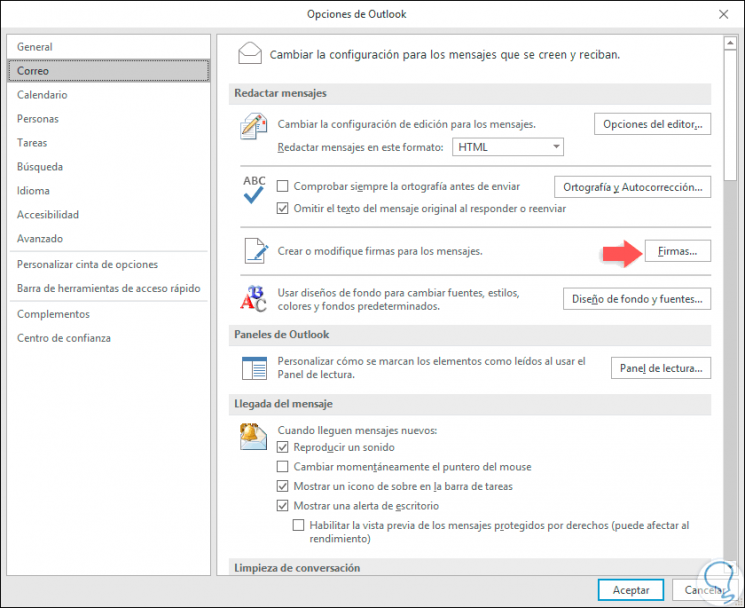
Step 2
In the window we will go to the "Mail" section and in the "Compose message" category we click on the "Signatures" button located on the "Create or modify signatures for messages" line:
Step 3
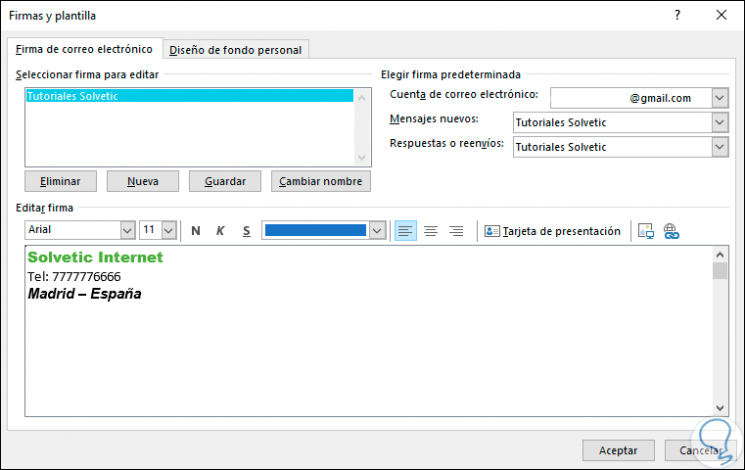
The following will be displayed. There we have two sections that are:
Email signature
There we must enter all the signature data that will be available in the Outlook 2019 emails.
Personal background design
Here it will be possible to edit variables such as sources, topics and others, both for new messages and for reply or forwarded messages
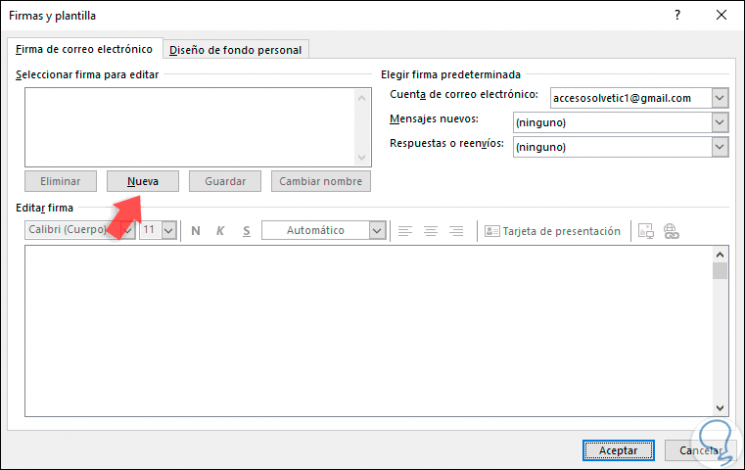
In the "Email signature" section we click on the "New" button..
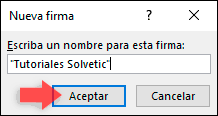
Step 4
In the displayed window we will assign the name of the signature. Click on "Accept" to save the changes.
Step 5
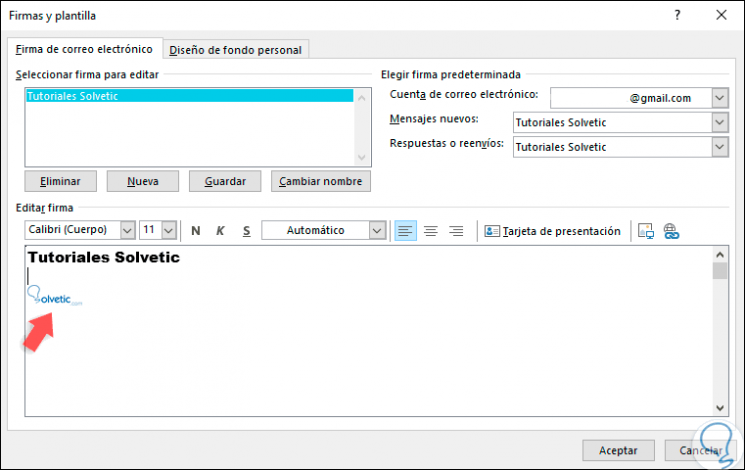
Now, we can enter the data that we consider relevant for the body of the signature in the mail. On the right side, we can select the name of the signature created both for new messages and for messages that are forwarded or that are reply.

Step 6
We have options to change the font, size or color of the signature text.

Step 7
If we wish, we can click on the image insertion icon to add an image to our mail signature in Outlook 2019. If you want to change the size of the image inserted in the signature, we must click on the image and then select the image tab size and there make use of the various options to change the size of the selected image. Once these changes have been defined, click on the "Accept" button
Step 8
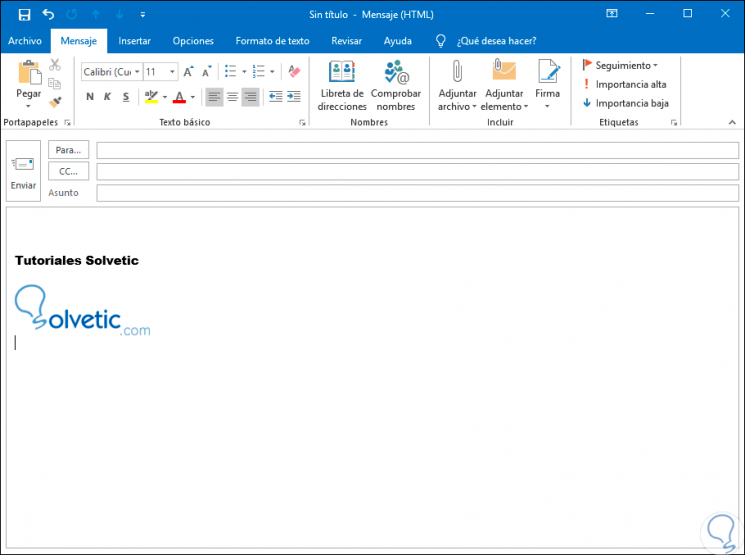
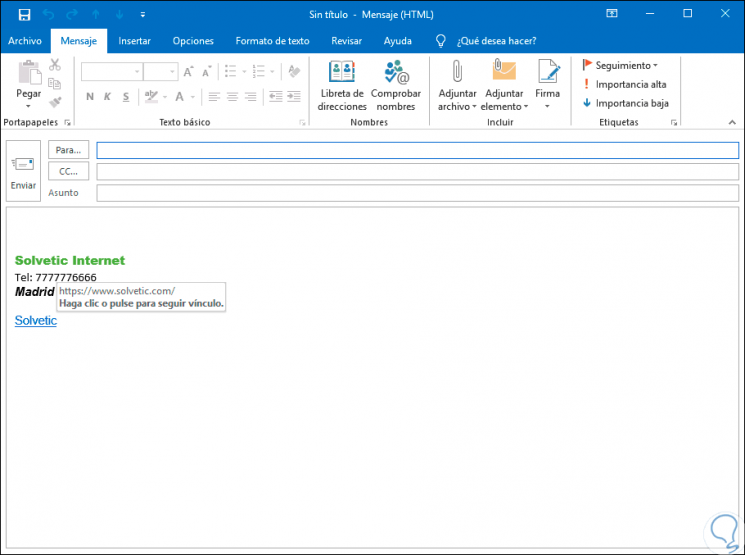
When we go to create a new email, by default we will see the signature we have created:
Step 9
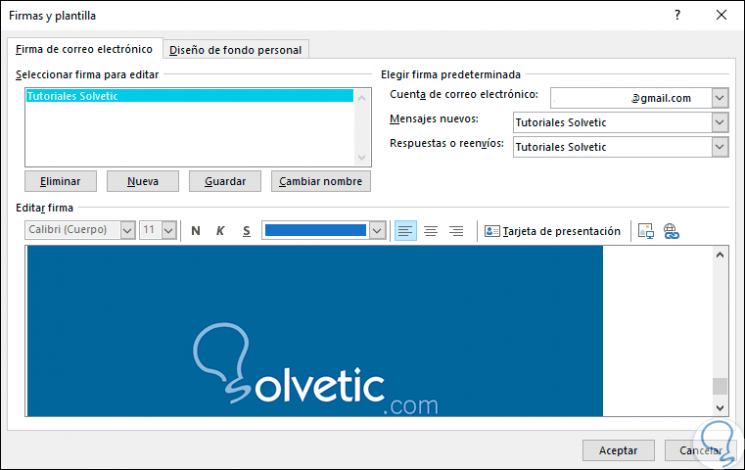
Now, if the goal is to establish a much more professional image for our firm, we can only add the image in the "Signature" field or some minimal text plus the image. To do this, click on the add images icon and select the image to be set only as a signature. Click on "Accept" to apply the changes.
Note
To edit the size of the entered image we must right click on the image, select Image and in the "Size" tab and make the respective changes.
Step 10
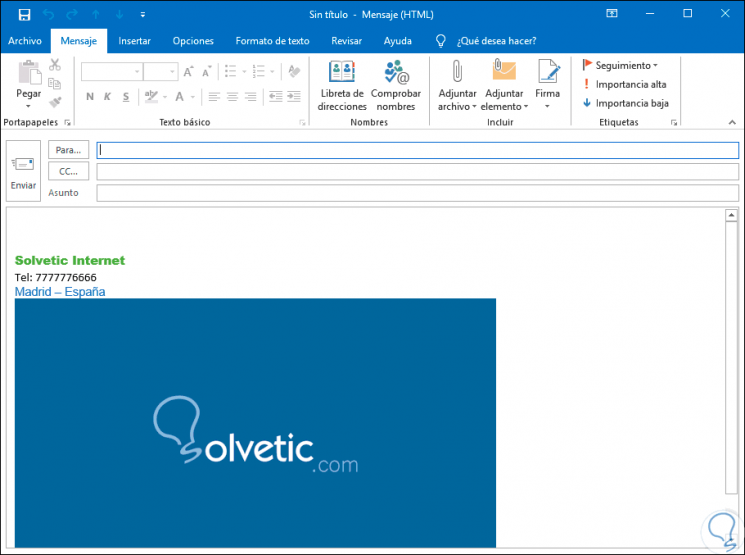
Now when we go to create a new email we can see our added image. As we see, this option allows our firm to look much more professional in Outlook 2019 and if we wish we can apply some formatting to the text entered in order to improve its style.
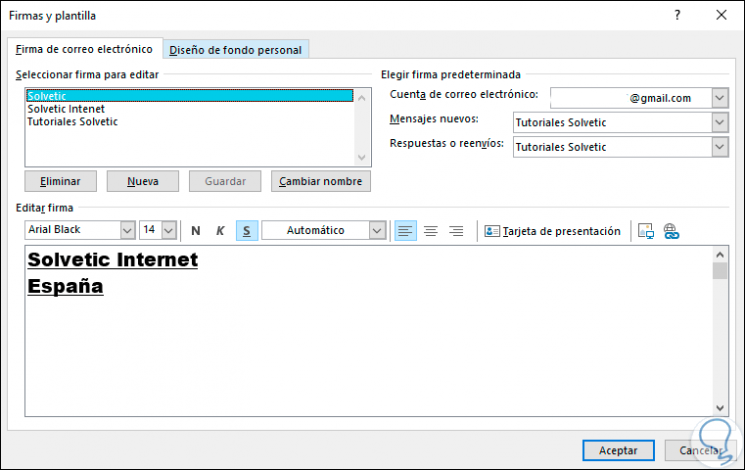
Step 11
In case we want to edit a signature parameter in Outlook 2019, we must go back to the "File" / "Options" path and in the "Mail" section we click again on "Signatures". In the displayed window we select the name of our firm and apply the desired changes:
Note
Outlook 2019 allows us to add links or images to the created signature, as well as edit the fonts, colors or justify the text using the "Edit signature" format bar.
Step 12
It will be possible to create all the desired signatures in Outlook 2019 each with the required format. There we can select the desired signature for editing or if it is not more necessary, we can select any of the signatures and click on the "Delete" button for deletion.
Step 13
In this case we will see the following. We confirm the action by clicking on the "Yes" button.

Step 14
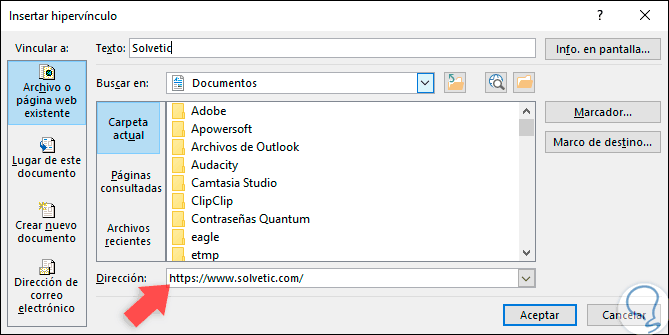
By creating a signature in Outlook 2019, we have the opportunity to create a link directly to a website. For this case, in the process of editing the signature, we click on the link icon and in the displayed window we will enter the desired URL, as well as the title of the link. Click on "Accept".
Step 15
After confirming the action in Signatures, when creating a new email we will see the available link:
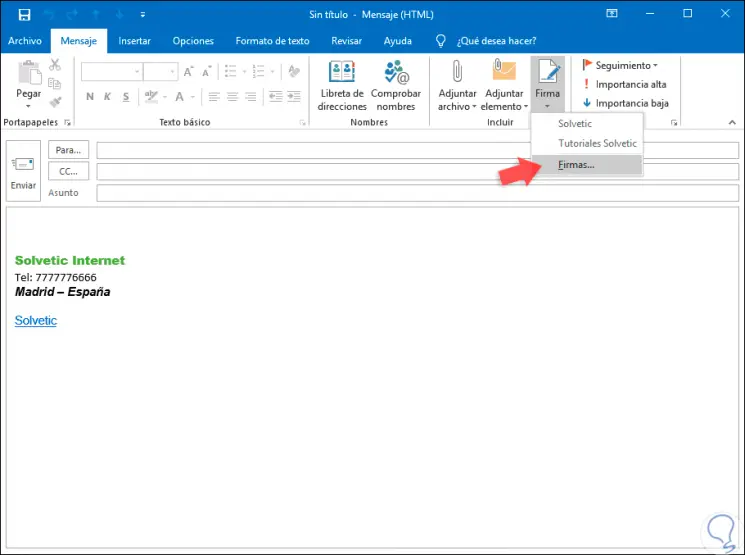
Step 16
Another way to access the creation and editing of signatures in Outlook 2019 is directly from the new mail window. To do this, when we click on the "New email" button, we will click on the "Signatures" icon and there we will have two options:
- Select any of the available signatures to add.
- Click on the "Signatures" line to access the creation or edition of the signatures as we have seen previously
In this way, we have the possibility of adding a much more personalized touch to our signatures in Outlook 2019 and thus create modern and functional emails.