The Microsoft Office Suite applications widely used by users, both in the workplace and in their daily lives, especially highlighting its Microsoft Word text editor, its Excel spreadsheet application or its presentation creation tool through of PowerPoint slides..
Among the tools we have mentioned, it is not something strange that Microsoft Word is one of the most used applications worldwide for the creation and editing of professional documents and corporate documents where one of the key elements in this type of files is the signature. For these cases we have the digital signature, which is one of the most advanced electronic signature types with the best security features . One of the advantages of digital signatures is that they allow them to comply with legal requirements with the highest levels of security on the identity of each user who enters their signature and the authenticity of the documents where it is applied.
Digital signatures make use of a digital ID which is based on a certificate issued by an accredited certification authority (CA) or also a trusted service provider (TSP). Thus, when a document is signed digitally, the identity will be linked only to us, this signature is associated to the document through encryption and this can be verified through the “public key infrastructure†(PKI) technology..
Advantages of using digital signatures
- Both the digital signature and the signed document are encrypted together and linked to a guarantee seal.
- Digital IDs based on valid certificates are developed by accredited suppliers.
For this reason, in this tutorial TechnoWikis will explain how we can create a digital signature in Microsoft Word 2016 or 2019.
Step 1
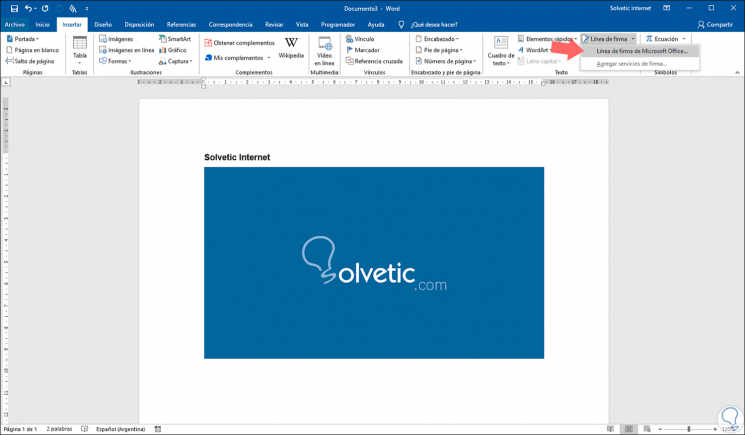
For this process, we open a new document and place the pointer on the line where the signature will appear. After this we go to the "Insert" menu and in the "Text" group we click on the "Signature line" option and there we select the "Microsoft Office signature line" option:
Step 2
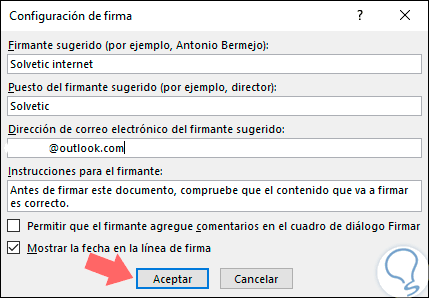
The following window will be displayed where we can configure aspects such as:
Suggested signer
There we must enter the full name of the signer.
Position of the suggested signer
We can enter the signer's job title.
Suggested signer email address
It is possible to enter the signer's email address.
Instructions for the signer
It is possible to add the necessary instructions for the signer.
Allow the signer to add comments in the Sign dialog box
We can check this box to allow the signer to write a goal for their signature.
Show the date on the signature line
If we check this box the signature date will appear with the signature.
Once these aspects have been defined, click on the "Accept" button..
Step 3
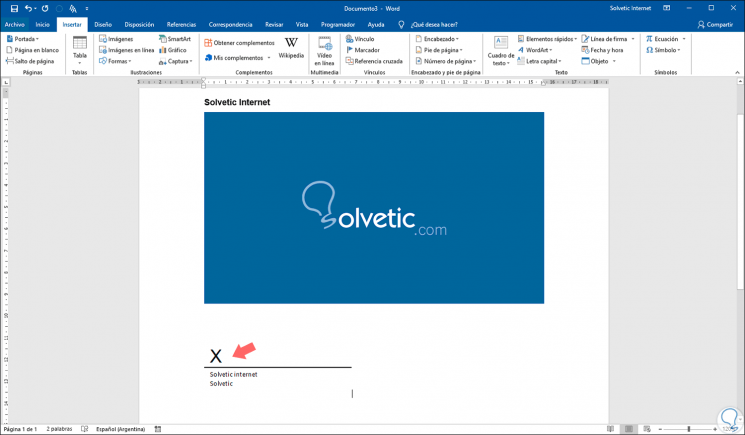
When doing this we will see the following: It will be possible to drag and drop the signature field to locate it where necessary within the document.
Step 4
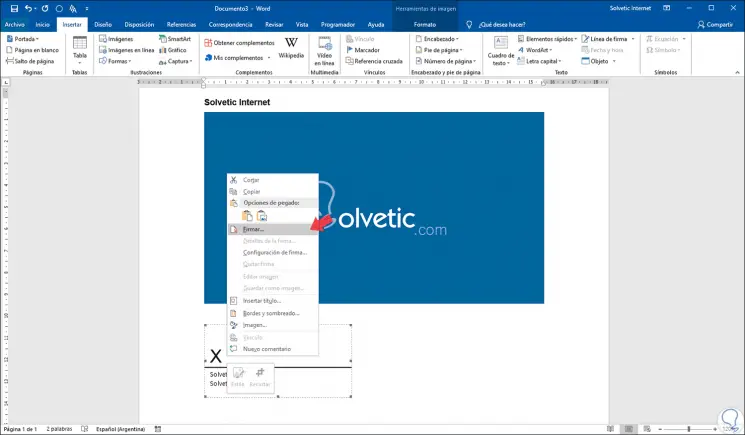
Now, to add the signature, we must right click on it and select the "Sign" option:
Step 5
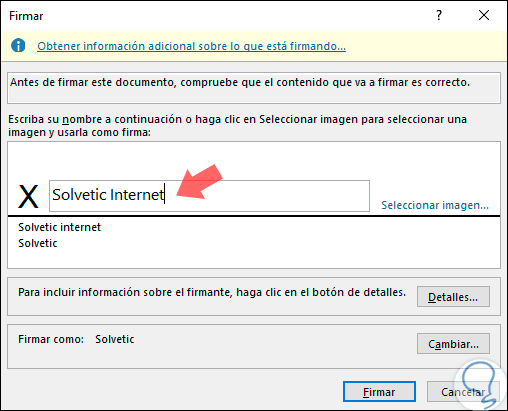
The following window will be displayed. There we can enter our signature in text or click on the Select image line if we have the signature in this format.
Step 6
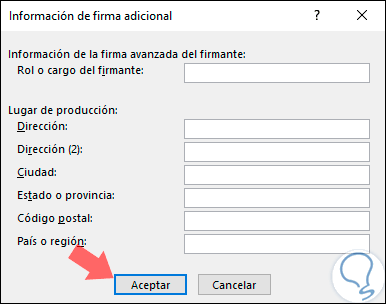
We can click on the "Details" button in order to add much more information, if we wish, to the signer. Once we enter the necessary data, click on "Accept".
Step 7
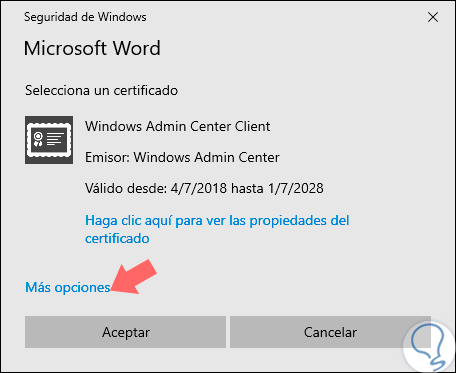
In the "Sign" section we can make use of digital certificates if we have this alternative, for this we click on Change and in the Windows security window we will see the following. There we click on the "More options" line to view all available certificates and sign with that certificate. Click on "Accept".
Step 8
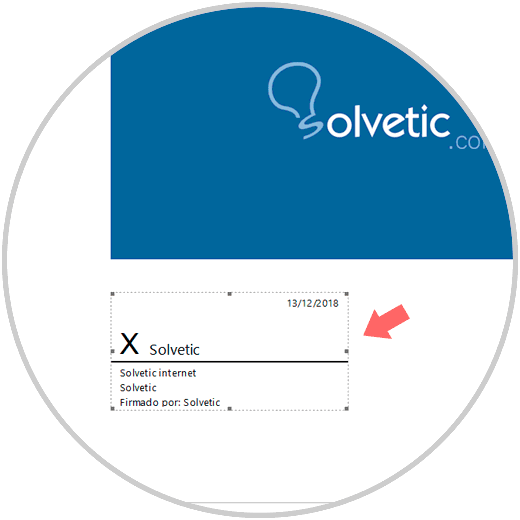
By clicking on "Accept" we will see that the signature has been added and the Word document automatically goes to the status Marked as final:
Step 9
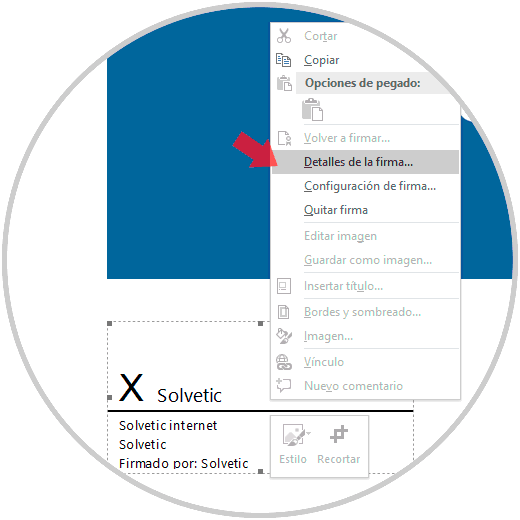
If you wish to edit the signature, we will right click on it and select the option "Signature details":
With this simple method that we have explained, it is easy to add the signatures to our documents in Word 2016 or 2019 and in this way offer documents not only more professional but with better security benefits since this is key based on the information that is managed in Microsoft Word.