Microsoft Word has always been characterized by offering the user the best functionalities and features for its millions of users focused on the realization of professional documents with simple but practical tools that allow various formats to be applied to text, titles, tables and other content of the file. But without a doubt, an excellent presentation of the file from its first sheet will have a high impact on all other content hosted in the document..
To ensure that our documents have a positive impact from the first glance, we can use the covers which allow us to establish a unique design level where everything we enter will be much more striking. Both Microsoft Word 2016 and 2019, soon to be launched, give us the opportunity to define dynamic, modern and uniquely designed covers to increase the strikingness of our Word file .
We will perform this process in Microsoft Word 2016 but the process is exactly the same in Microsoft Word 2019..
1. How to add a predefined cover page in Word
Microsoft Word includes several pre-defined cover templates which we can insert and then customize as necessary based on context, content and recipients.
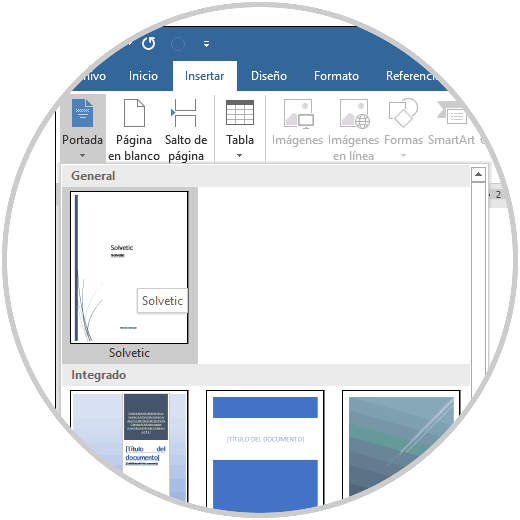
Step 1
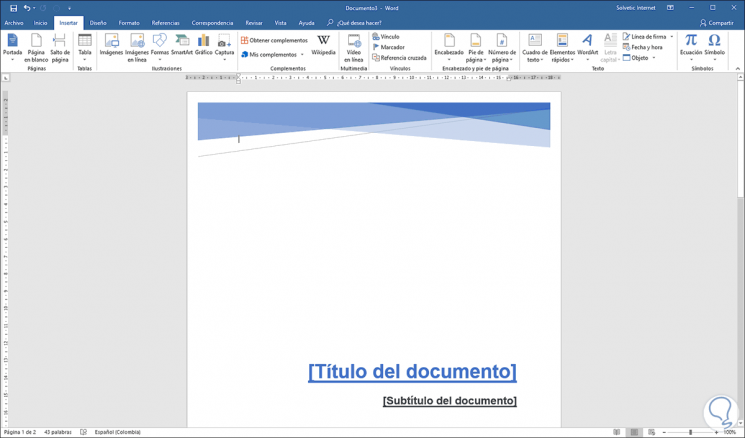
To access these covers in Microsoft Word, we will go to the Insert menu and in the Pages group we click on the Cover button and we will see the following:
Note
If we use Word 2019, in the same section Insert / Cover we will have the default options
Step 2
In the options that are displayed we will click on the cover that we want to use for the document and it will automatically be applied to the current document:
Step 3
There it will be possible to add the document title, subtitles, date and other information, if necessary, and we will also have the possibility to edit the design of this document if required.
So we can use the default covers of Microsoft Word.
2. How to create a custom cover page in Microsoft Word
Now, if we are not comfortable with the default options of Microsoft Word, we can create our own cover style in Microsoft Word with the parameters that are necessary and according to the needs of the moment.
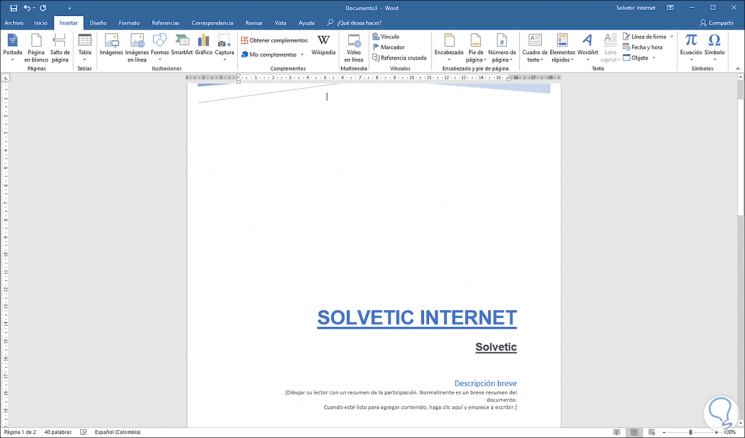
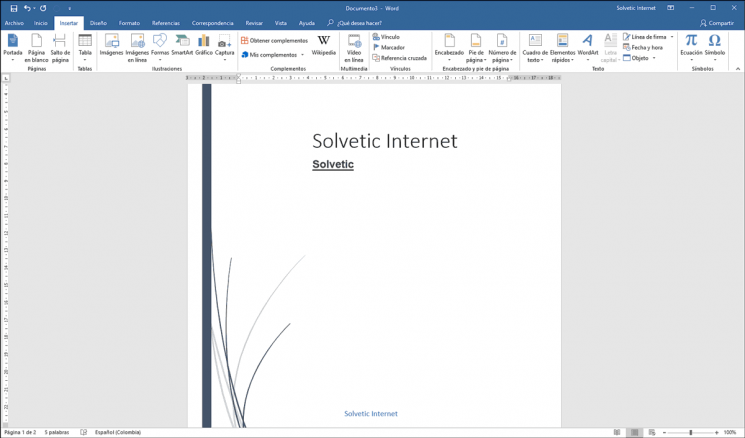
This new cover can be done in an existing document, but it is simpler to carry out the process in a blank document and then we can save the personalized cover page that we have created so that it can be inserted into an existing document without Repeat the entire process..
One of the advantages of using the custom cover option is that we have all the traditional Word formatting options such as adding a background color, an image or a texture and even adding WordArt shapes.
Step 1
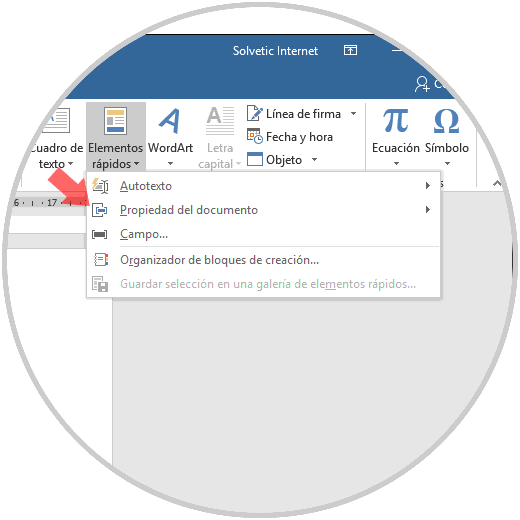
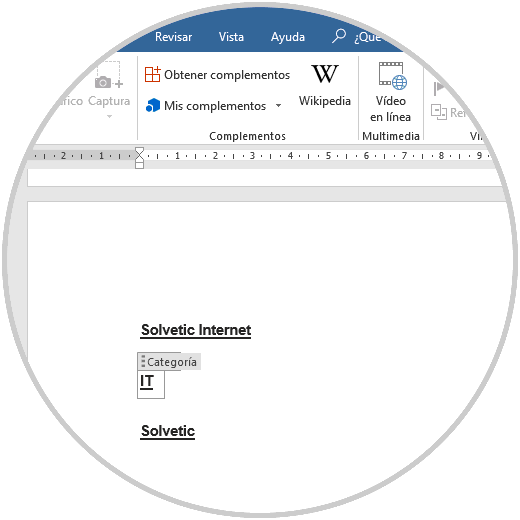
To achieve this, we will go to the Insert menu and in the Text group we click on the Quick Elements option where we will have the following options:
Step 2
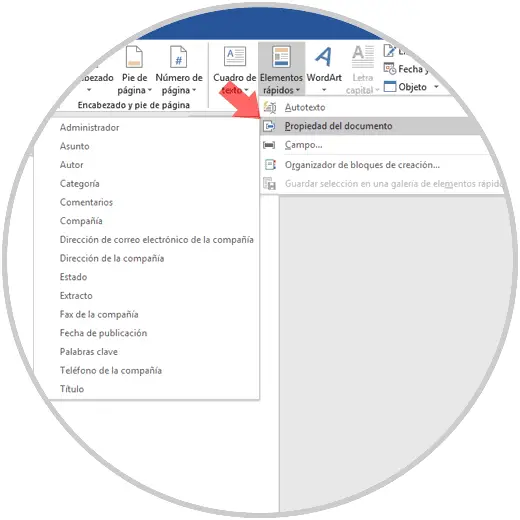
There we click on the Property line of the document and the following options will be displayed:
Step 2
There we find the properties that can be inserted in the document such as author, title, company, publication date, address and more, there we select the properties that we want to be added to the document:
Step 3
Automatically the selected fields are completed with Microsoft Word data, such as author or owner of the document, there we can leave the default values ​​or edit them in real time by clicking on them.
This text can be edited as necessary with variables such as color and font size, position, etc., and we can add shapes as required for the cover:
Step 4
This cover that we have created can be stored as a cover template to be used later in other documents, for this, we select the entire document using the key combination Ctrl + E and then we will go back to the Insert menu and then click on the Cover option:
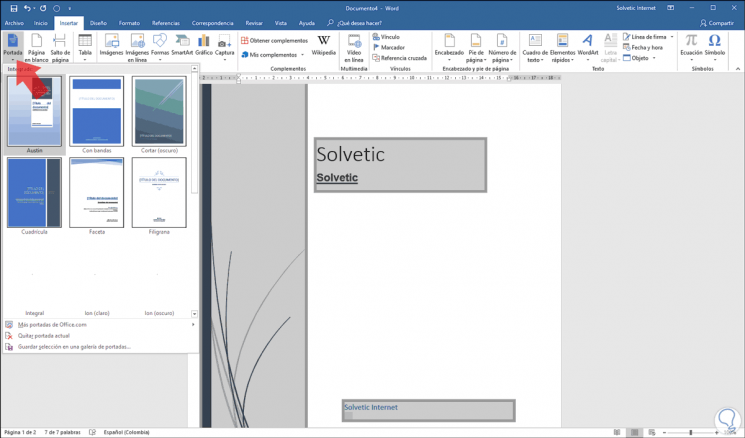
Step 5
There we click on the option Save selection in a cover gallery and the following window will be displayed where we configure values ​​such as:
- Location where the cover is to be saved
- Options to use with the cover
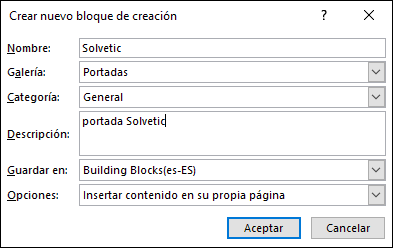
Once this is defined, click on the Save button to apply the changes.
Step 6
Now, when it is necessary to create a new cover in a document, the cover we have created in the Cover section will be available:
This will prevent us from having to make the desired changes and settings on the front page of the document again and so we will give a personal touch to this option integrated in Microsoft Word 2016 and 2019.