Microsoft Word is one of the most versatile applications for the creation of professional documents thanks to its integrated functions , although there are hundreds of actions that we can execute there, one of the most common is to create indexes to customize and order in a much more logical way the document content
An index allows us to list the terms and topics in a document , as well as the pages where they are located. In order to create an index, index entries must be marked by specifying the name of the main entry and the cross-reference in the document to thus give rise to the index in Word 2016 or 2019. The index allows us to group and Organize the content by theme or categories in a Word document. To do this, you have to link a main entry along with a cross of the document giving rise to that index. This appears as a quick guide where our entire document appears ordered by a hierarchy by pages. In long works it is essential to guide the reader..
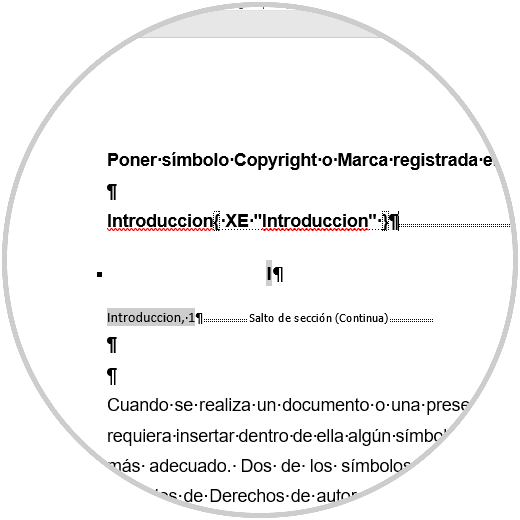
Microsoft Word allows us to create an index for a single word, phrase or symbol, so when the text is selected and marked as an index entry, Microsoft Word will add a special XE (index entry) field that contains the main entry marked and cross-reference information to include.
Once all index entries are marked, we can select an index design and generate the index..
To keep up, remember to subscribe to our YouTube channel! SUBSCRIBE
1. How to create an automatic index in Microsoft Word 2016 or 2019
Remember that you must mark the entries to be included in the index and then generate the index from the marked entries.
Step 1
First, we must identify the titles and assign their relevance, for example, select the title of the document and go to the "Start" menu and in the "Styles" group select the "Title 1" option. We can do the same with the subtitles by selecting Title 2 or the desired option.

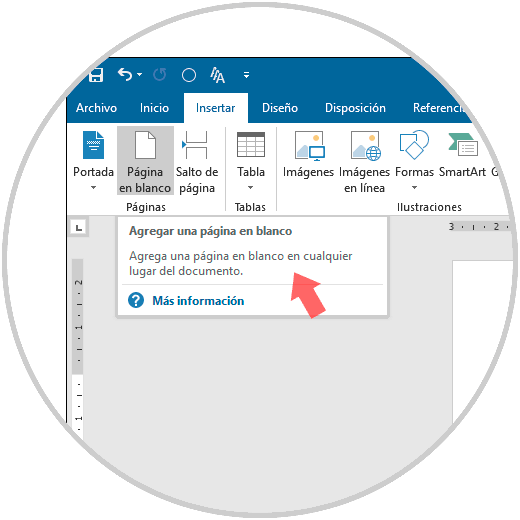
Step 2
Once this is done, we will go to the "Insert" menu and in the "Pages" group select "Blank Page", there the index will be created in Word:
Step 3
Once the blank sheet is inserted, we go to the “References†menu and there we go to the “Table of Contents†group where we click on the “Table of Contents†option:

Step 4
In this case, we select the first option and we can see that the values ​​are automatically entered according to the order of priority assigned:

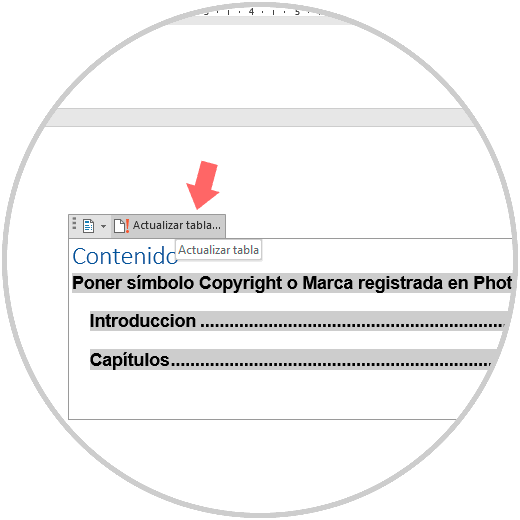
Step 5
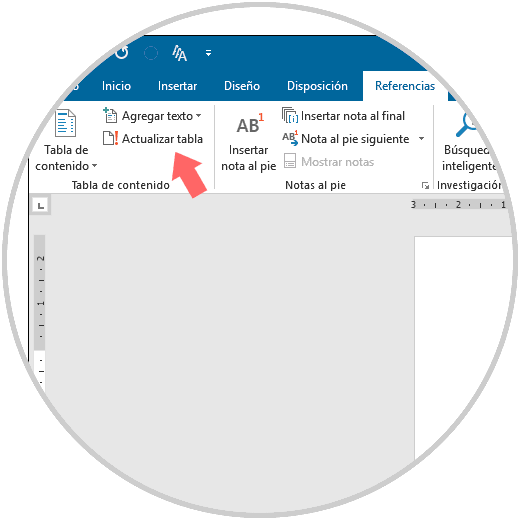
In case of any modification in the content, we must select the table of contents and click on the "Update table" option:
Step 6
We will see the following options:

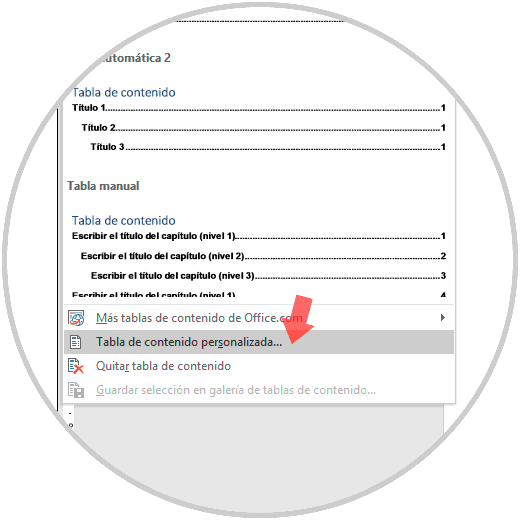
Step 7
There we define what type of update to run. We can customize the table by clicking on Table of contents and selecting the option "Table of personalized contents":
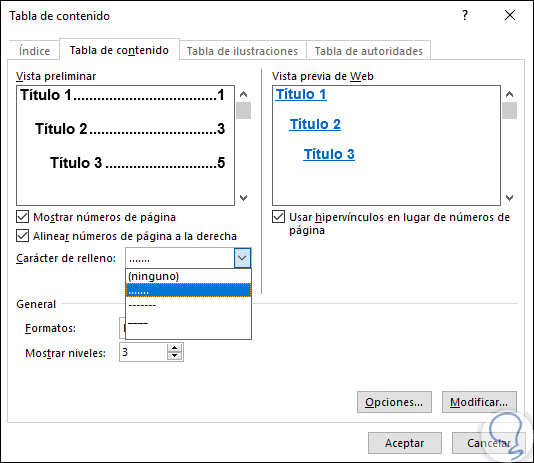
Step 8
The following window will be displayed where we can define what changes to make. Once this is done click on OK.
2. How to create a manual index in Microsoft Word 2016 or 2019
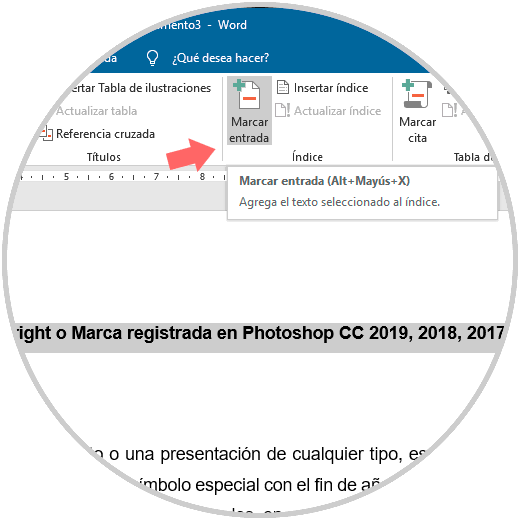
Step 1
The first step to take will be to select the text to use as an index entry or click where you want to insert the index, once selected, we go to the “Reference†menu and there we see, in the “Index†group, the option “Mark entry":
Step 2
The following will be displayed:
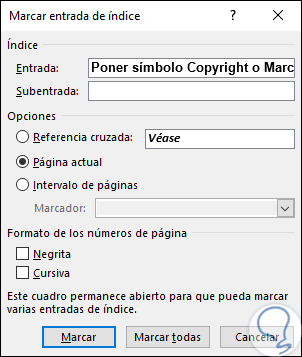
Step 3
There it will be possible:
- Add a second level in the "Subentry" field, if a third level is required, we will follow the subentry text with a semicolon.
- If we want to create a cross-reference to another entry, we click on "Cross-reference" in the "Options" section and then enter the text of the other entry.
- To format the page numbers that will be visible in the index, we activate the “Bold or Italic†box in the “Format of page numbers†section.
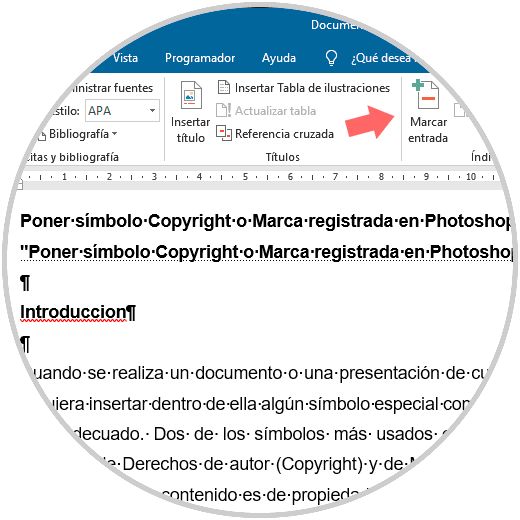
Step 4
We will click on "Mark" to mark the index entry, if you want to mark this text in any place where it is in the document, we must click on "Mark all". We will see the following:
3. How to insert an index in Microsoft Word 2016 or 2019
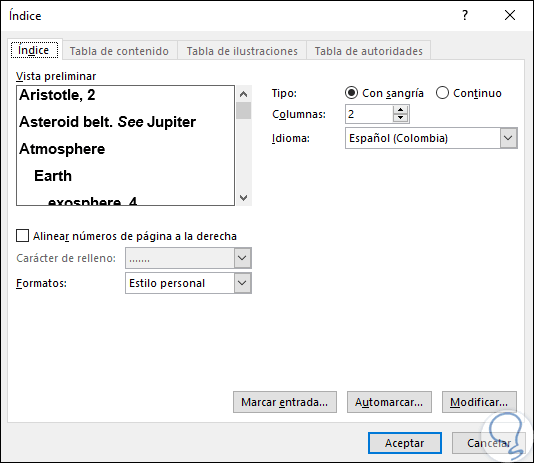
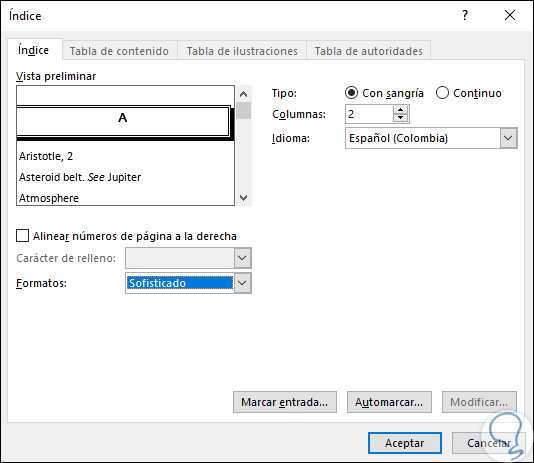
Step 1
For this process we will go to the “References†menu, and in the “Index†group we click on “Insert index†and the following will be displayed. There it will be possible to select the format of text entries, page numbers, tabs and fill characters.
Step 2
The general aspect of the index will be possible to edit through the "Formats" menu and in the upper left window we can see a preview:
Step 3
Clicking on Accept this will be the result:
Step 4
To update the index, in case of any changes, we must go to the "References" menu and click on "Update table":
Step 5
To remove an index we must select the entire index entry field, including the braces ({}) and press Delete.
Supr
In this way we can create custom indexes both manually and automatically from Word 2016 or 2019..