Microsoft Word has a wide range of functions, features and integrated tools for a centralized management of each task to be performed within it, thanks to each of these tools the content can be customized as appropriate and one of the most practical tasks For many users, especially at the organizational level, it is the creation of envelopes in Word 2016 or 2019..
These can be customized according to our needs and that is a very interesting aspect that Word offers us. Although many times we can send an envelope with the data written by hand, the truth is that at a corporate level or professional environments, the most common is to have a computer-based base template that allows to make a more correct and formal envelopes or letters corresponding. From the Word envelope manager we can add different data such as the sender and the recipient and then easily print it.
Therefore TechnoWikis will explain how we can create and print an envelope in Microsoft Word 2019 but the same process applies to Microsoft Word 2016..
1. How to create an envelope in Word 2016 or Word 2019
Step 1
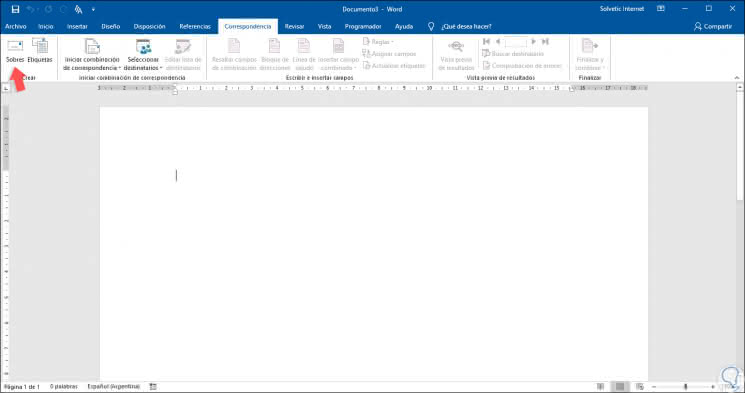
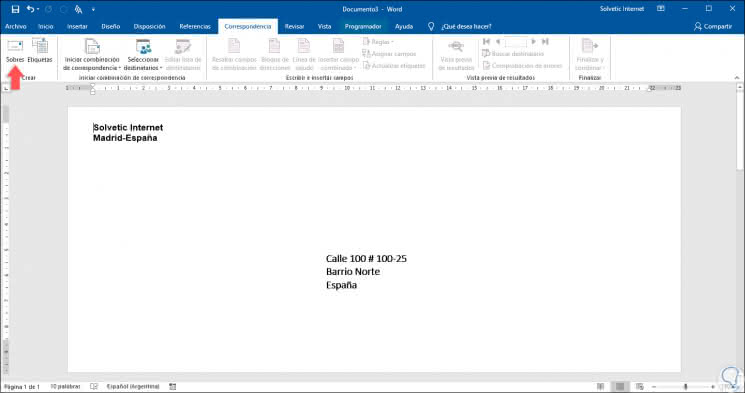
To start this process we open a new Word document and go to the Correspondence menu where we will see the following:
Step 2
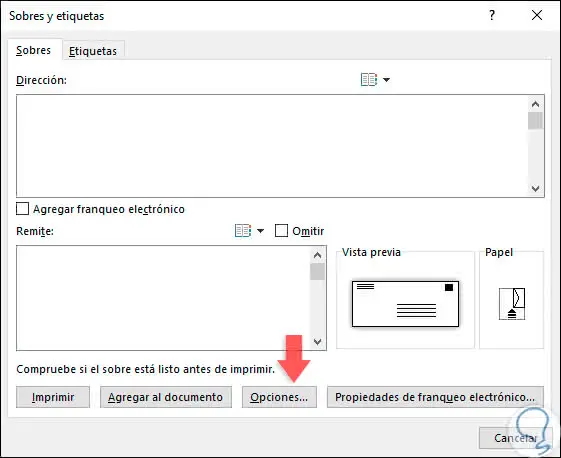
There we will go to the group "Create" and click on the option "Envelopes" and the following wizard will be displayed:
Step 3
There we will do the following:
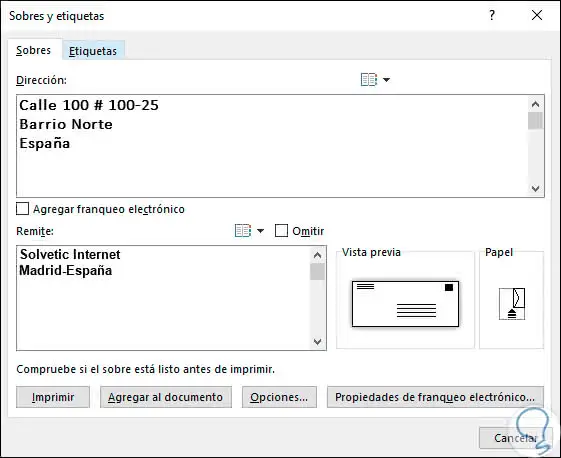
- In the Address field enter the address of the recipient.
- In the field Remit we enter our name and address, in case of not wanting to register this field we can activate the box Skip.
Step 4
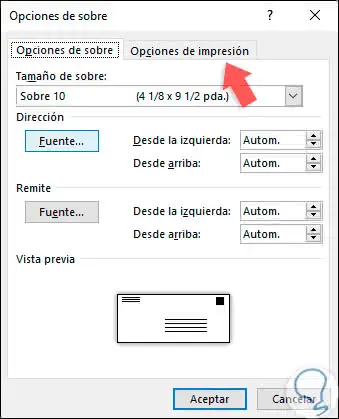
Once we enter this information we will click on the "Options" button located at the bottom and the following will be displayed:
Step 5
In the "Envelope options" tab it will be possible to define aspects such as:
- Size of the envelope to use.
- Change the default font of both the recipient and the sender.
- Set the alignment order of the text of the recipient and the sender.
Step 6
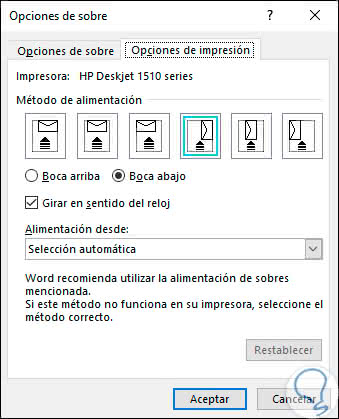
In the lower part we will see a preview to know the changes to apply. In the "Printing Options" tab we will see the following:
Step 7
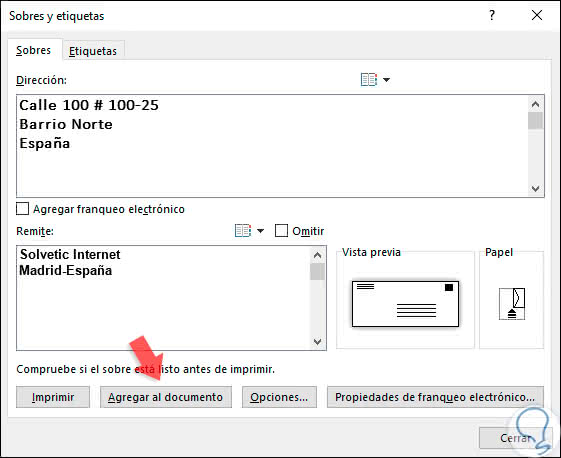
There we will define the type of power of the printer to use as well as define if the envelope will be printed face up or face down, define from which tray the paper will be fed. Once these aspects have been defined, we click on OK to return to the Envelope Wizard:
Step 8
There we will click on the "Add to document" button and the following message will be displayed:

Step 9
There it will be possible to define the text that we have registered as the default sender, this will help save time by not entering this field, it will only be necessary to register new recipients, by clicking Yes we will see in the Word document the outline of the created envelope:
2. How to print an envelope in Word 2016 or Word 2019
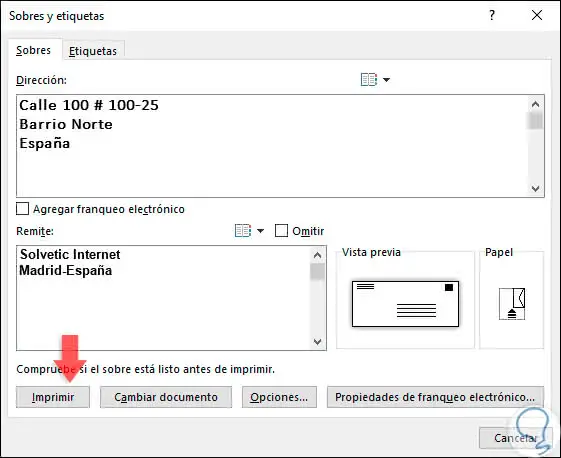
To print our envelope, we click again on the option "Envelopes" in the group "Create" of the menu "Correspondence" and in the wizard displayed we click on the "Print" button located in the lower left. Clicking there automatically will start printing the envelope as previously configured.
Thanks to this Microsoft Word 2016 or 2019 Envelopes function, we have a practical way to customize the creation of envelopes according to the current need.