To leave an automatic message when we are out of the office for any reason, it is recommended to use the Outlook 2019 tool , since from this it can be programmed during the time it will be out to inform the others and thus not completely unlink us from work..
The email manager of Microsoft Outlook 2019 offers a multitude of options that make it one of the best candidates when we work with an email manager, but without a doubt the "Out of Office" function is one of the most useful. For this reason TechnoWikis offers next the tutorial with which we can activate the option of automatic message step by step in Outlook.
For this you are going to have to follow the steps that we show you in the following video and that you can read in this tutorial:
To stay up to date, remember to subscribe to our YouTube channel! SUBSCRIBE
1. How to create automatic message using the automatic answer option of Outlook 2019
Step 1
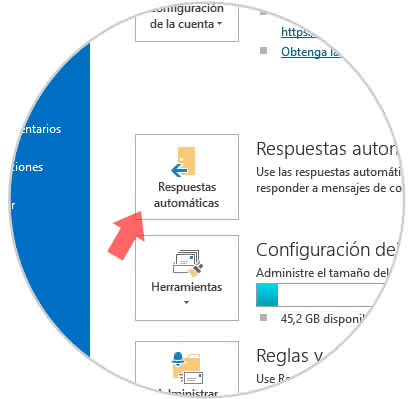
One of the simplest procedures offered by the Outlook 2019 tool is without the use of an automatic response, to start it, we enter the Archive section, choosing the alternative "Automatic response".
Step 2
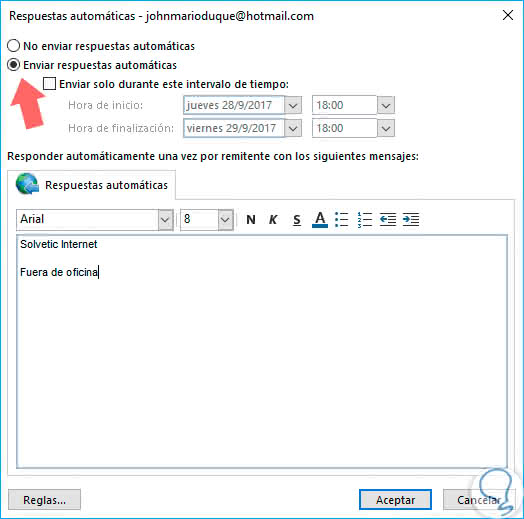
A pop-up window will open where we must do the following:
- You must start by enabling the "Send automatic responses" alternative.
- Next, a window will appear that has a field where we can write the message that we want to send automatically during our absence.
Step 3
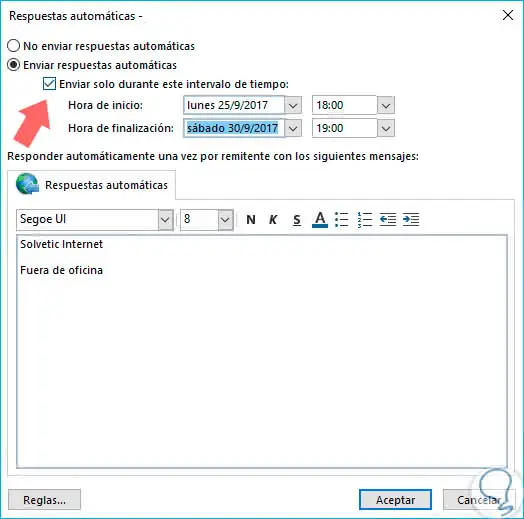
We can now place a specific time during which the message will be active. For this we only have to enable the section "Send only during this time interval". In the lower part of the section there are 4 rectangles where you can place the start time, and the end time, as well as the respective dates. In this way, the exact time and time in which you want to send the message will be programmed. This is done with the intention that the response is automatically deactivated at the time we resume our work activities.
Step 4
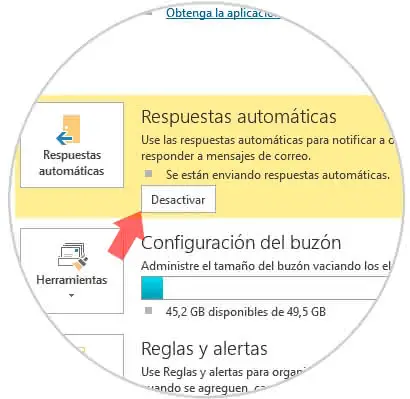
To conclude, click on the "Accept" button so that all the configurations made can be specified. Also you can see in a small rectangle the option "Deactivate" we can make use of this in case of returning before the scheduled date and time.
2. Create automatic message using POP and IMAP Outlook 2019
Step 1
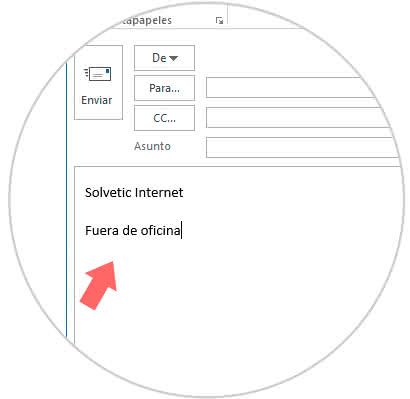
We go to the start menu and select the alternative "New email" where we can add the message you want to send.
Step 2
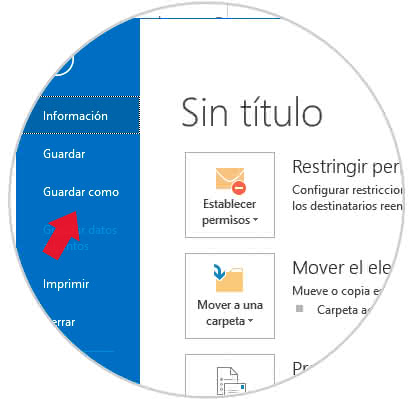
Next, we go to the File menu where we must press on the "Save as" option.
Step 3
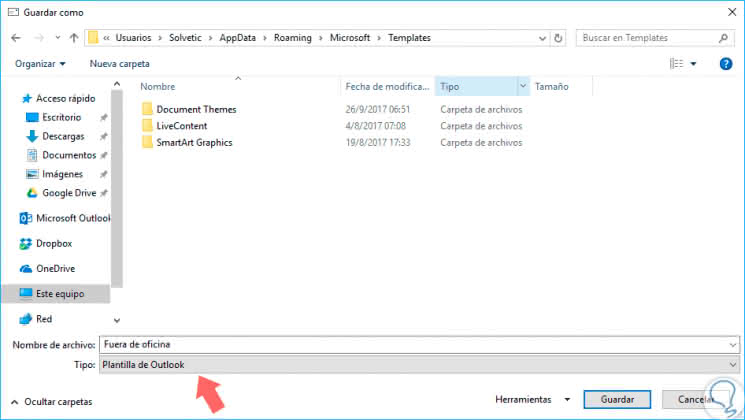
A tab will be opened that will allow us to place the desired name to the template, as well as a section that says TYPE. We must choose here "Outlook Template".
Step 4
The message will be stored in the route. Click on the "Save" option so that the template can be archived:
C: \ User \ AppData \ Roaming \ Microsoft \ Templates
Although if desired it is possible to store it elsewhere.
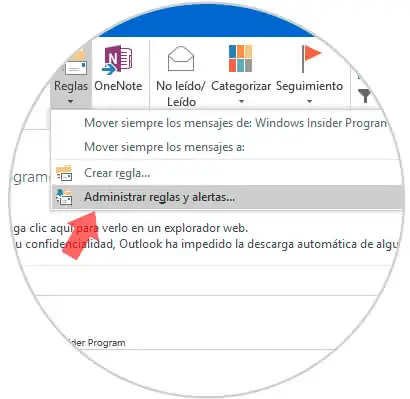
A new rule can be designed so that the function of automatically replicating this message is fulfilled. To do this we just have to enter the "Start" menu and choose the "Move" section, we hope that the alternatives are shown and we select "Rules", to later choose "Manage rules and alerts".
Step 5
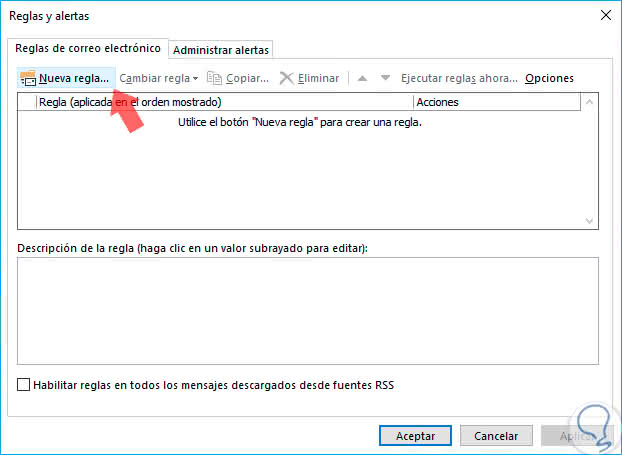
To complete the previous step, a tab will open where we should choose the "New rule" section that can be located in the upper left part of the screen.
Step 6
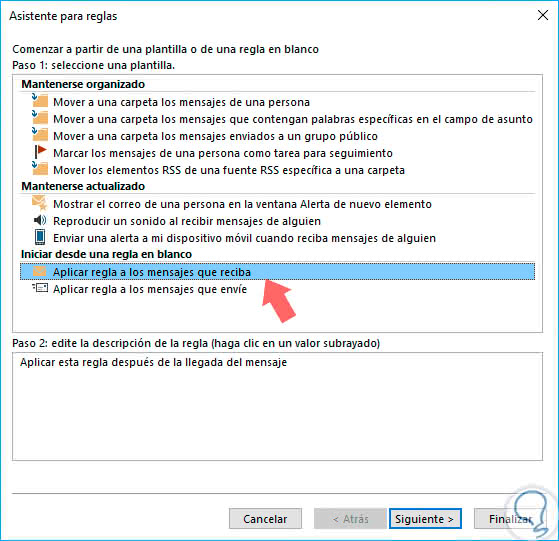
We will be sent to a new window where we proceed to locate and select the alternative "Start from a blank rule" to later choose "Apply rule to the messages you receive." It will be necessary to press on the lower right rectangle that says "Next".
Step 7
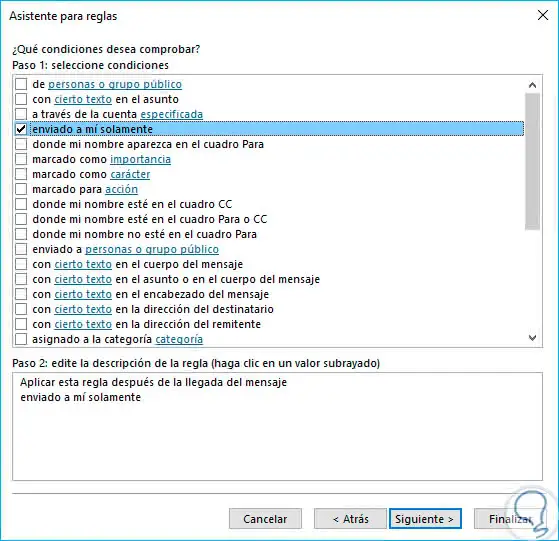
Next, we will press on another option that says "Next".
Step 8
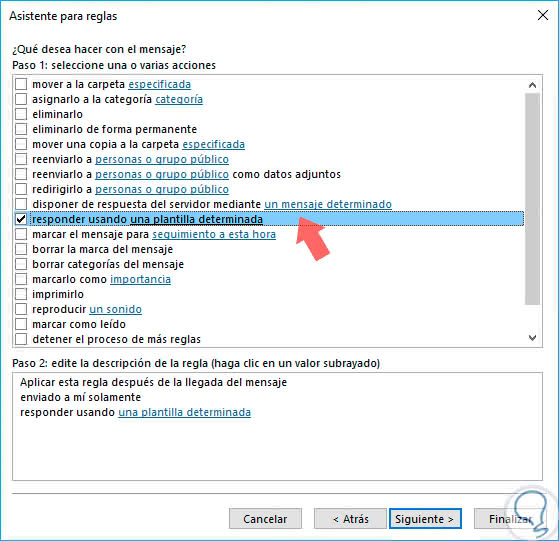
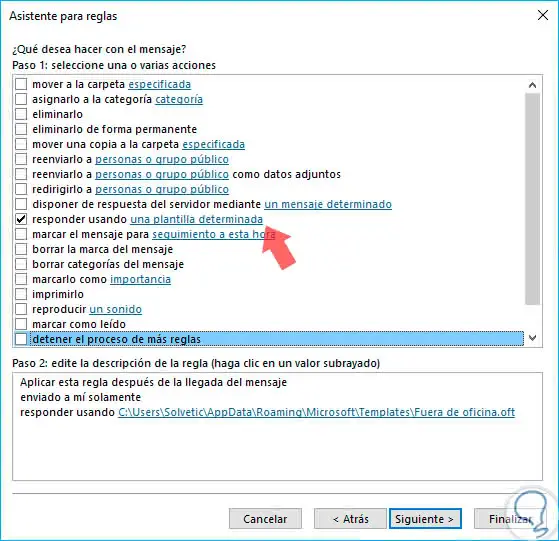
Afterwards, enable the "Reply using a certain template" alternative.
Step 9
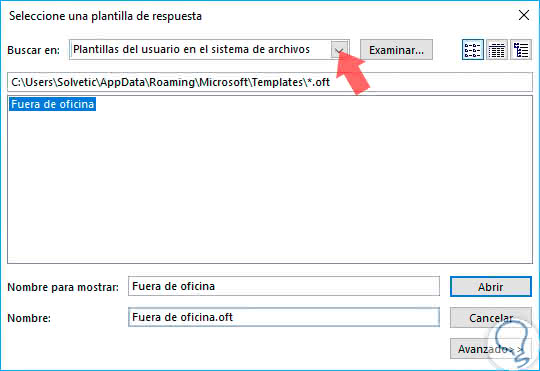
We only need to select "A certain template", option that is in the lower part of the screen, then we press the alternative "User template in the file system".
Step 10
Subsequently, we choose the template that was initially designed, we just click on "Open" in this way we will see that it has been added. Now we must press "Next".
Step 11
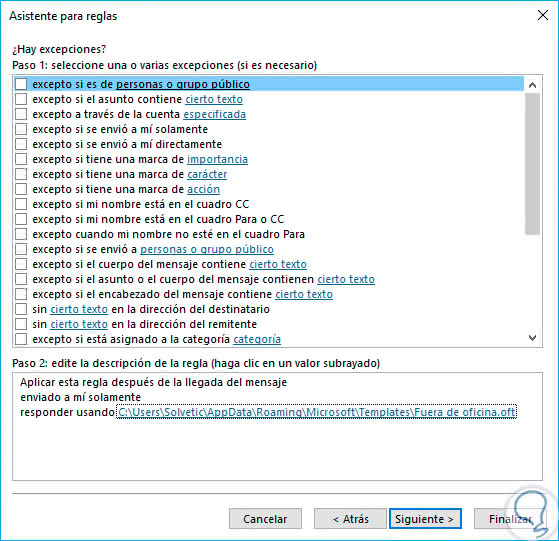
We will be allowed to add any type of section to the rule. Click on "Next" below.
Step 12
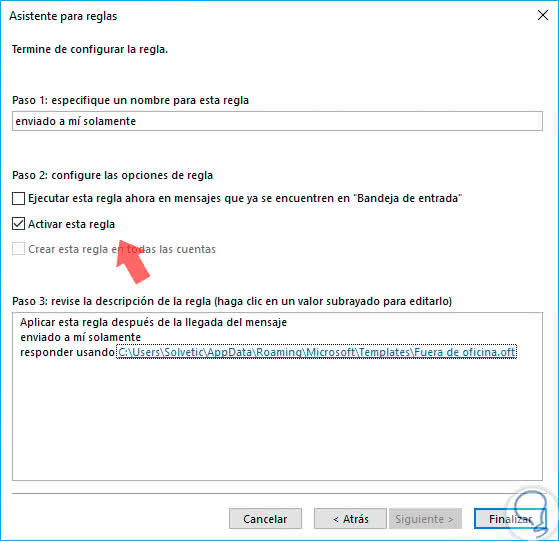
This will give us the option to choose a name for this rule, we can also from this moment apply it immediately to the messages that are in the inbox. Then we must press on the rectangle that says "Finish".
Step 13
In this way we manage to conclude the action, by doing so we will automatically receive the following message. We only have to press "Accept" to close it.

Step 14
To end when a message was sent using any of the above methods, we will receive a notification.
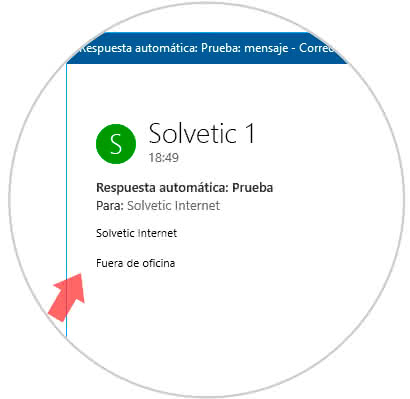
This way you can activate an automatic message for when you are out of the office in Outlook 2019..