Microsoft has integrated multiple applications within its office automation suite Office 2019 that aim to allow users to have the best tools for managing data , users and other elements. Within the Office 2019 suite we find Outlook, which is developed for the correct management and administration of not only incoming and outgoing emails but also other actions such as calendars and contacts ..
At the level of contacts, we have a simple function through which it will be possible to send the same message or issue to a group of users immediately without the need to send each email individually and this is achieved thanks to contact groups of Outlook which we will explain in detail. Creating these contact groups we can send an email quickly to a set of users that we want to inform at the same time without having to be adding individually.
Basically a group of contacts is composed of a set of email addresses through which we can send an email or any other activity to all those users at the same time which simplifies time and resources..
To stay up to date, remember to subscribe to our YouTube channel! SUBSCRIBE
1. How to create a group of contacts in Outlook 2019
Step 1
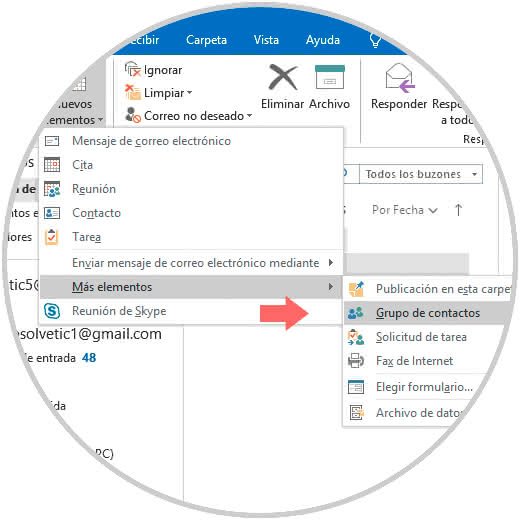
For this we access the Outlook 2019 application and go to the "Start" menu and in the "New" group click on "New elements / More elements" and there select "Group of contacts":
Step 2
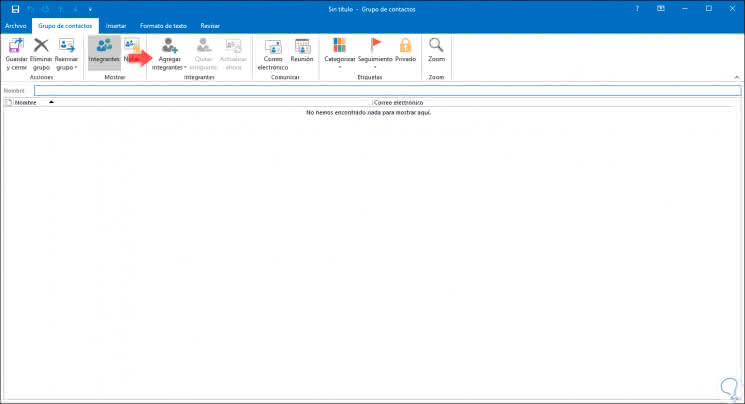
The following will be displayed. There, in the first place, we will enter a name for the group of contacts, when the name has been entered, an email address suggested by Outlook will be given, if we see the message "Not available" it means that the group currently exists and therefore it will be necessary to change the name, this name can not be modified later.
Step 3
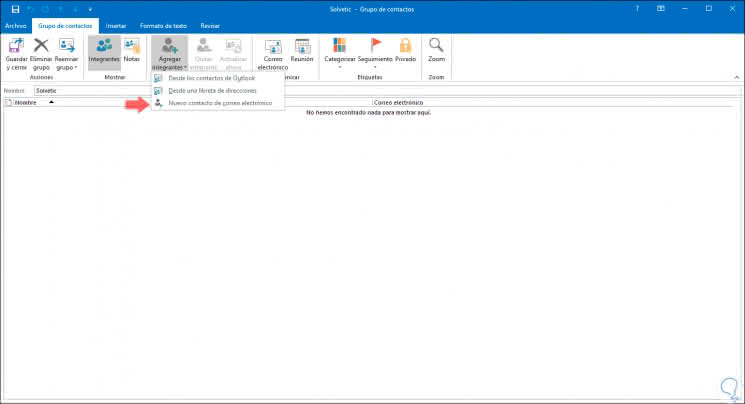
Now add the members of the group, for this we click on the option "Add members" located in the group "Members" and we can add members from options such as:
- Add members from an available address book
- Create a new email contact
Step 4
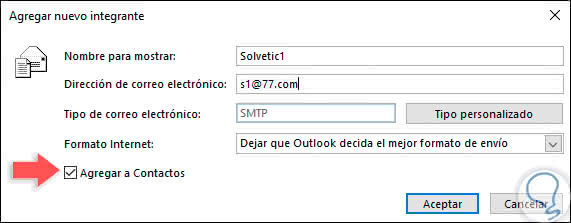
If we click on the option "New email contact" we must enter name, email and Internet format to use:
Step 5
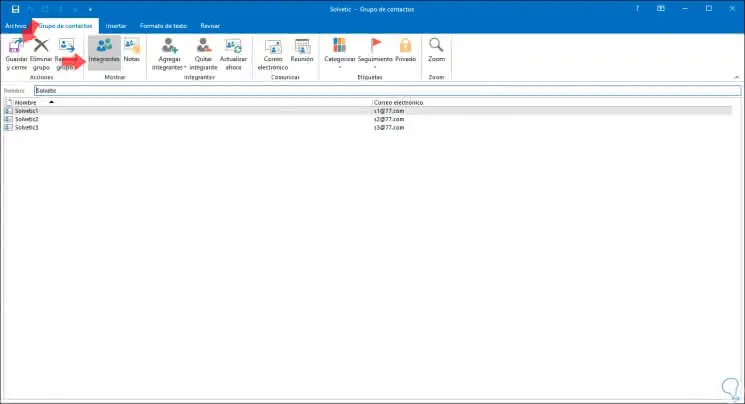
Click on OK to complete the action and if we want this contact to be in Outlook 2019 contacts, we must activate the "Add to Contacts" box. We will repeat this process with the contacts that we want to add to the group and we can see them in the central panel. To complete the process we click on the "Save and close" button.
Step 6
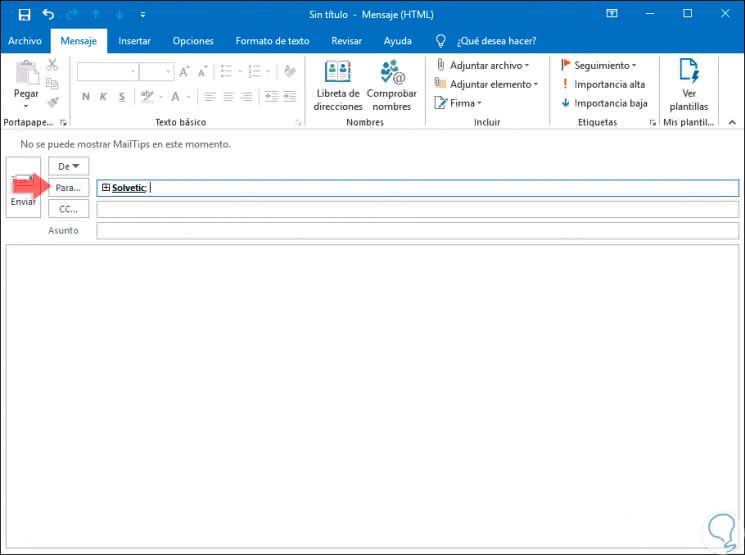
Now, when it is necessary to send a message to all contacts in the group, in the "To" field enter the name of the group and we will see the following:
Step 7
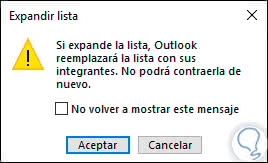
There we can click on the + sign to display all the contacts of that group, but before we will see the following message:
Step 8
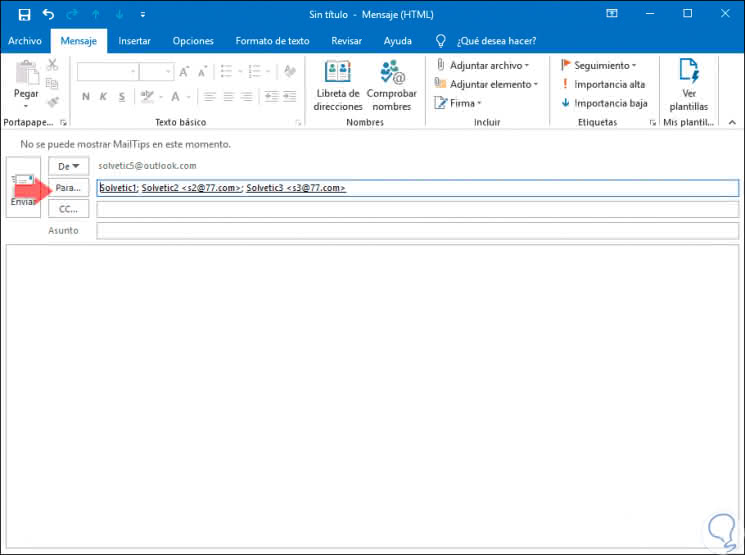
Click on OK and we will see the emails of the group:
2. Edit a group of contacts in Outlook 2019
Step 1
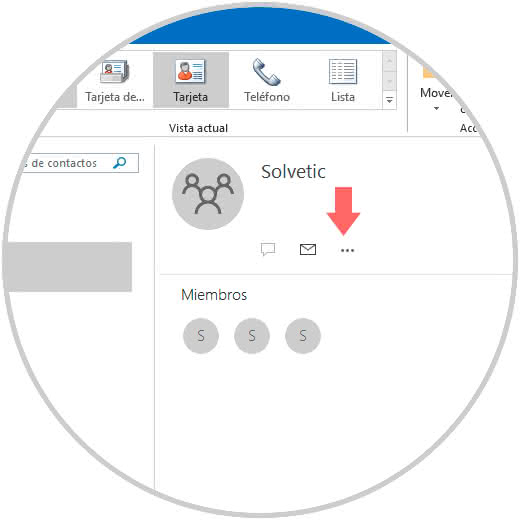
To carry out tasks of editing the contact group of Outlook 2019, we click on the contacts icon at the bottom and there we proceed to select the group to edit:
Step 2
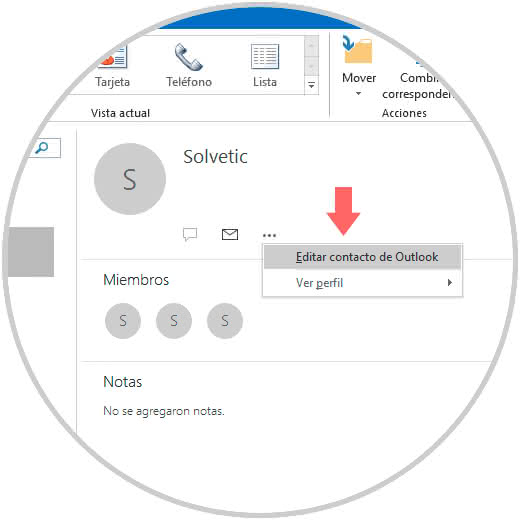
There we click on the menu icon on the right side and select the "Edit Outlook contact" option:
Step 3
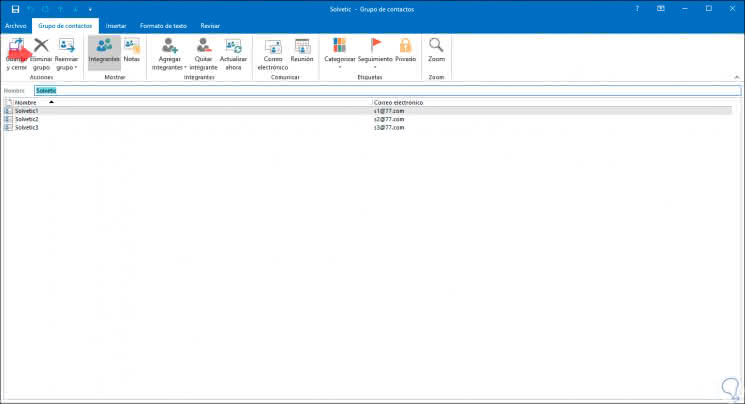
In the following window we can perform actions such as:
- Categorize and more available actions
Step 4
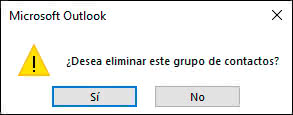
In case we do not want to use this group anymore we click on "Delete group" and the following message will be displayed. Click on Yes to complete the process.
In this way we have multiple options to create and edit our contact groups in Outlook 2019.