VPN networks (Virtual Private Network) are one of the current mechanisms available with secure access to a network, we know well that vulnerabilities in the network are increasing and more dangerous, hence the importance of implementing a VPN service. Using a VPN in Windows Server 2022 (the next edition of Windows Server) assumes a functional option so that all processes that require connectivity (which are sensitive) are much more available and secure..
VPN Features
when we talk about VPN networks we will have characteristics such as:
- Ease of accessing geo-blocked sites
- Offers protection of browsing data
- Avoid internet censorship
- Access to various networks even when we are not physically in the
If we decide to use a VPN network in Windows Server 2022, a much more complete administration of this network segment is possible and we can offer clients better accessibility alternatives.
Let's see how to create and configure a VPN network in Windows Server 2022..
To stay up to date, remember to subscribe to our YouTube channel! SUBSCRIBE
Configure VPN network in Windows Server 2022
Step 1
First, let's check the version of Windows Server with "winver":

Step 2
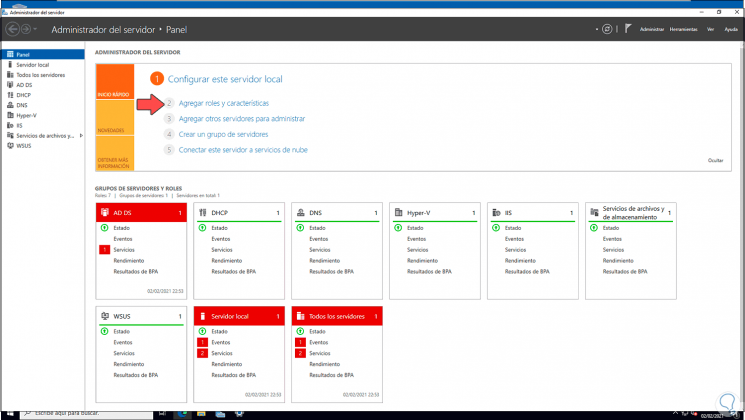
After this, we open the Server Manager and select "Add roles and features":
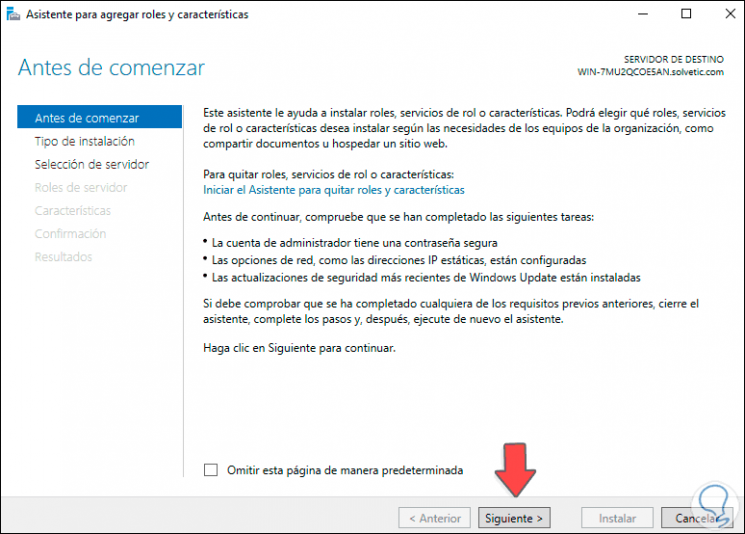
Step 3
The following window will be displayed:
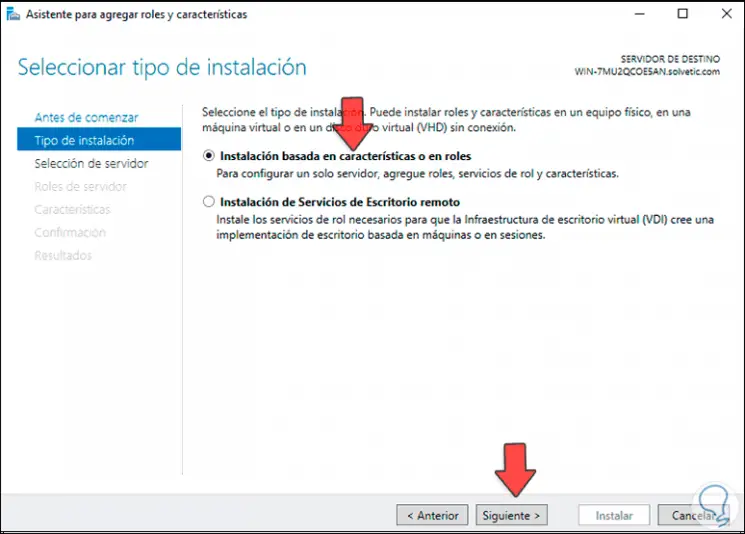
Step 4
In the next window we activate the box "Installation based on characteristics or roles":
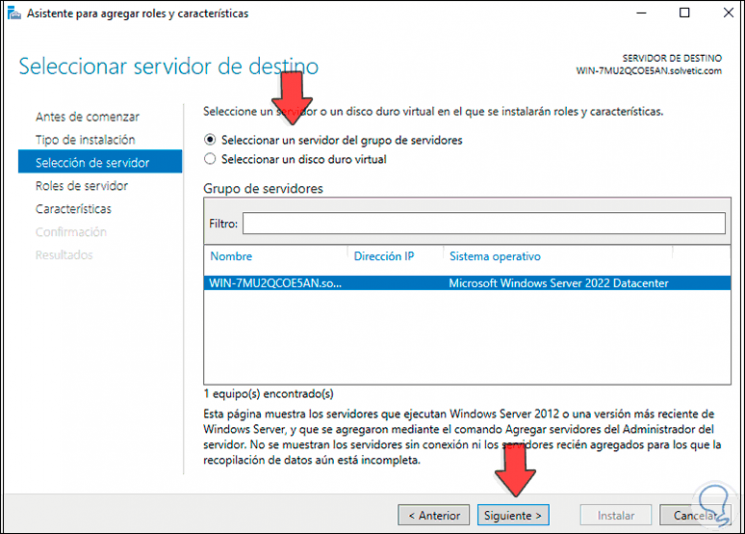
Step 5
Then we select the server:
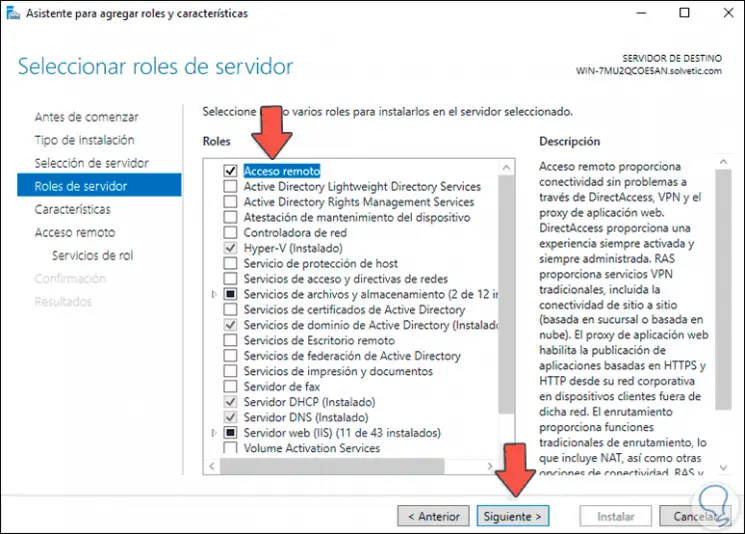
Step 6
In the Roles section we locate and activate the "Remote access" box:
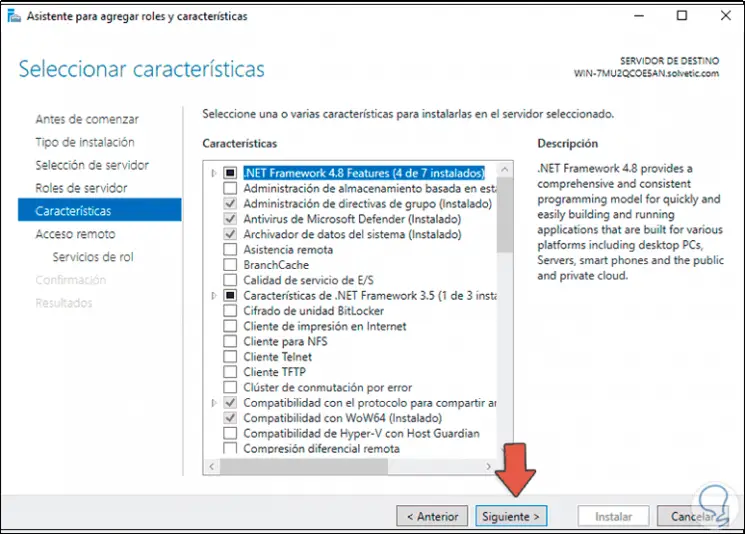
Step 7
Click Next and in the Features section we do not modify anything:
Step 8
In the next window we will see a summary of the role to install:
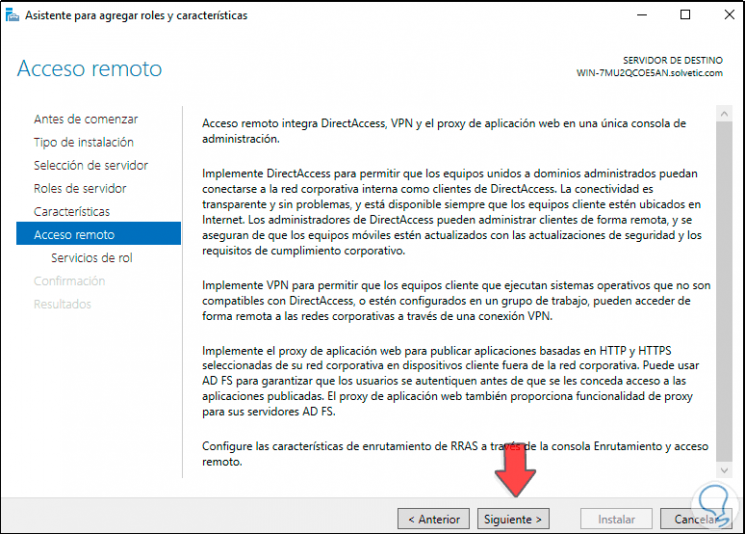
Step 9
We click Next and there we select the server roles to use:
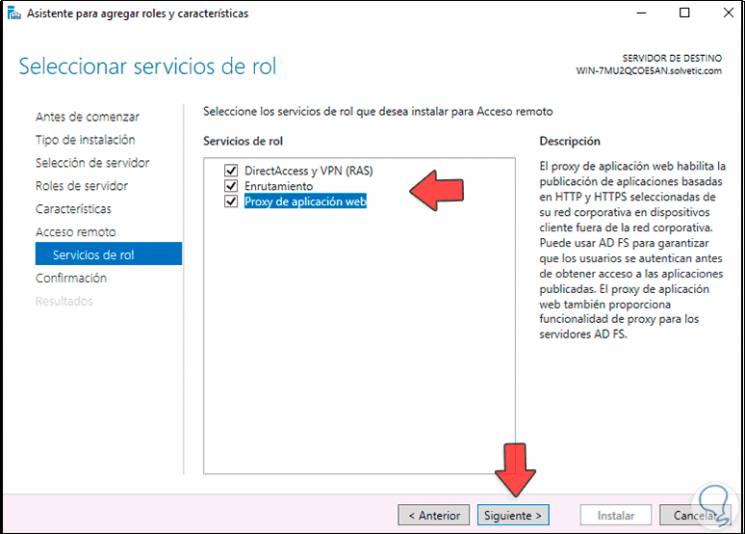
These are:
- DirectAccess and VPN (RAS): allows access from external networks through DirectAccess or VPN technology.
- Routing: this role gives the option for the server to fulfill the role of a router
- Web application proxy: this role gives us the option to publish web-based applications.
Step 10
We click Next to see a general summary of the role that we are going to install in Windows Server 2022:
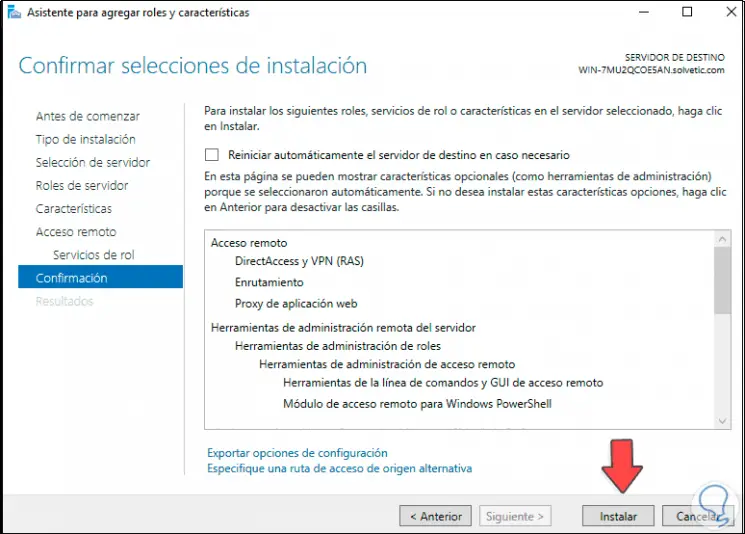
Step 11
We click Install to complete the process:
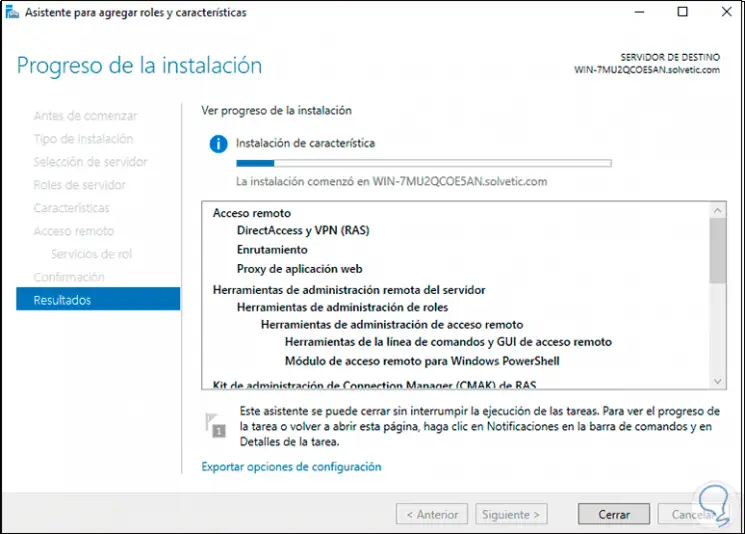
Step 12
At the end of this process we will see the following:
Note
We can also install this role from PowerShell with the following cmdlet:
Install-WindowsFeature DirectAccess-VPN -IncludeManagementTools
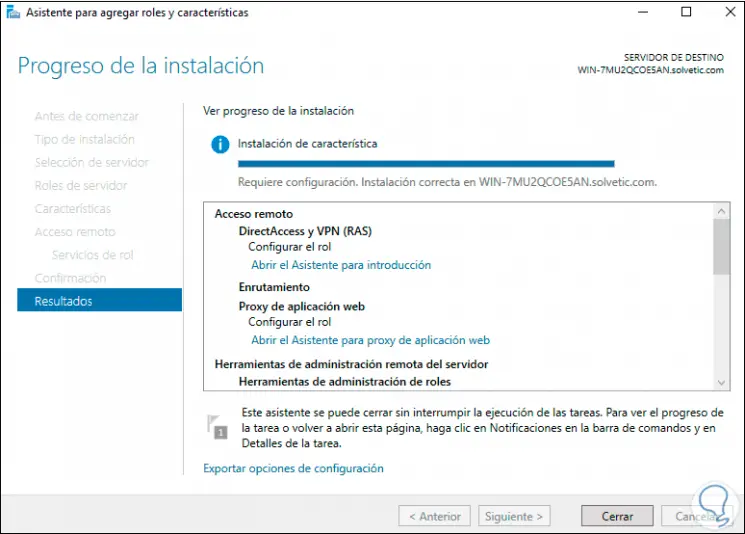
Step 13
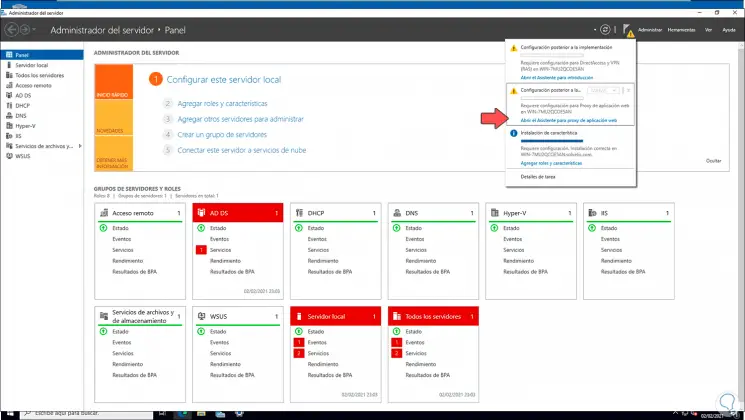
We click on Close and at the top we click on "Open the Introduction Wizard":
Step 14
The following wizard will be displayed:
Step 15
The available options are:
- Implement DirectAccess and VPN: with this option it is possible to define the parameters at both the DirectAccess and VPN levels on the Windows Server 2022 server
- Implement DirectAccess only - As the name suggests, this option allows you to configure local DirectAccess settings
- Implement VPN only: only allows you to configure the VPN role on the server
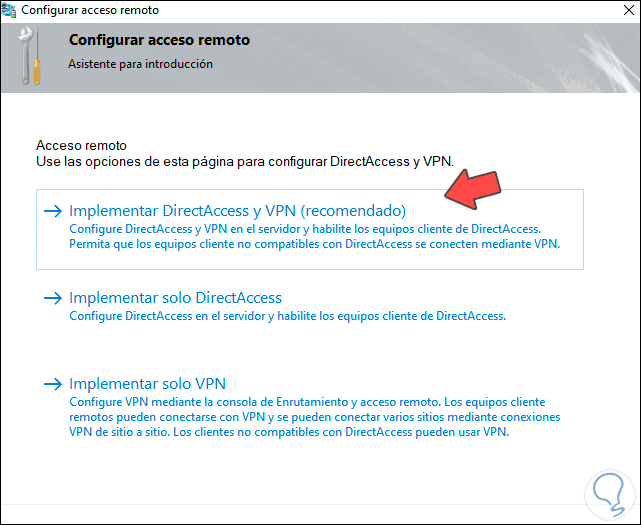
Step 16
We click on "Implement DirectAccess and VPN" to see the following:
Step 17
In this case we are going to choose the Windows Server 2022 topology, the options to use are:
- Edge: This option implies that the server must have two physical network cards, one for external connections and one for internal connections.
- Behind an edge device (with two network adapters): when selecting this option, one of the cards in the computer is required not to be connected to the public network but to a DMZ.
- After a perimeter device: this option requires that the server is managed by the Firewall.
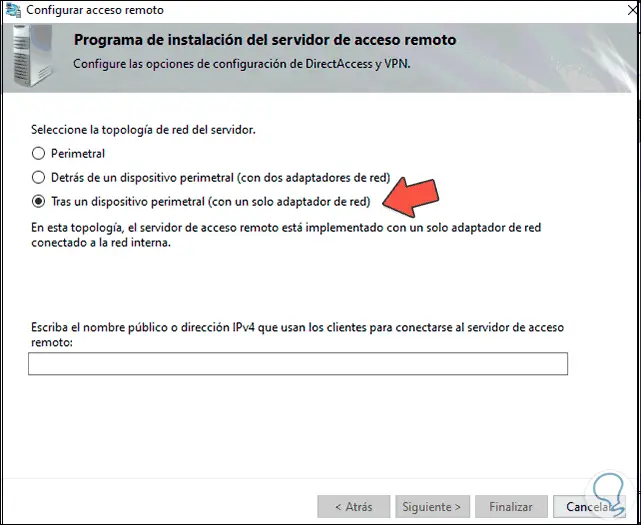
Step 18
Select "After a perimeter device" and we can use the local IP by accessing CMD and using the command "ipconfig":
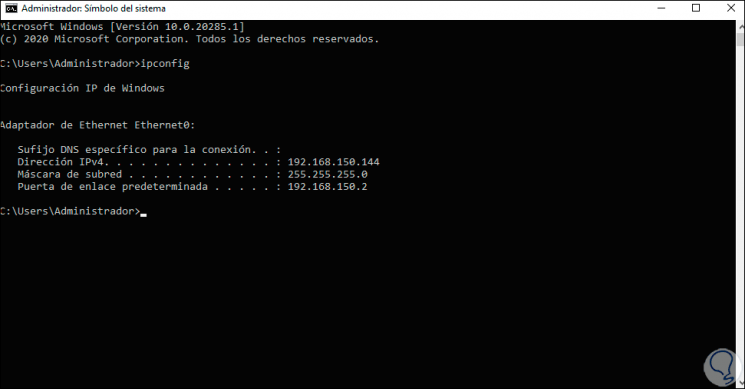
Step 19
We enter this IP address:
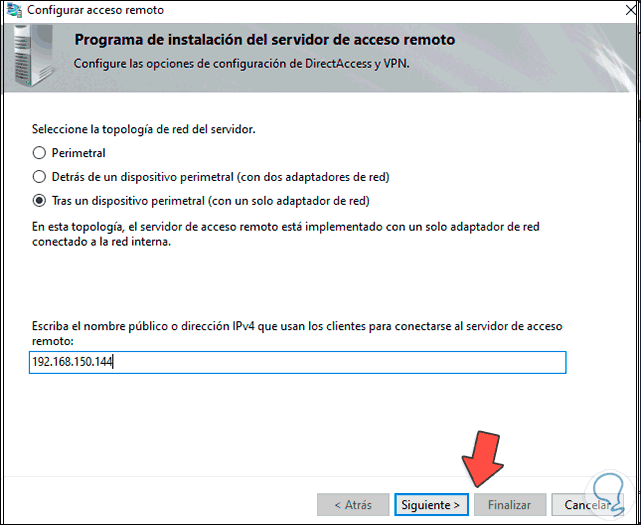
Step 20
When we click Next we will see the following error:
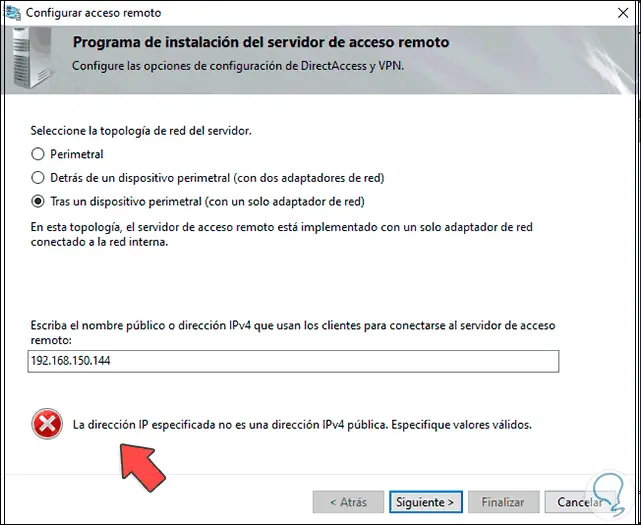
Step 21
For this case, the use of the public IP address of the server is required, to find out, we open a browser and we can detect it there:
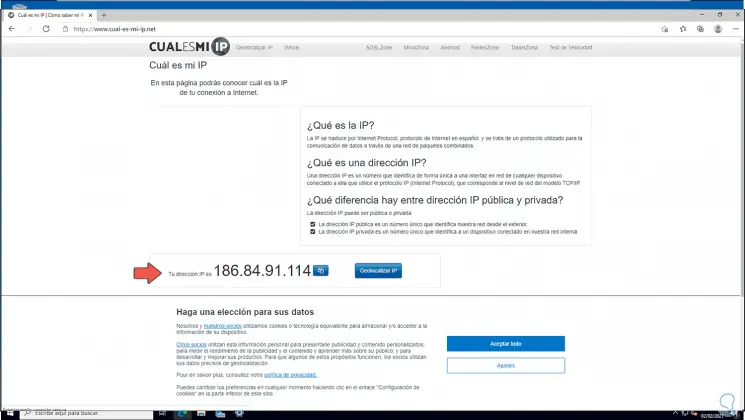
Step 22
We enter this public IP in the respective field:
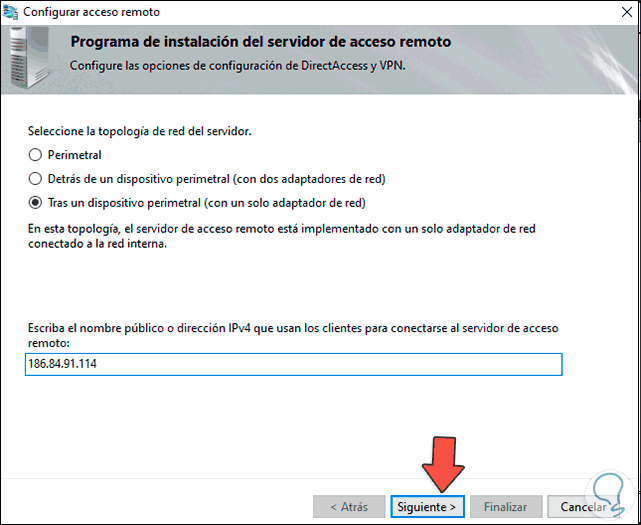
Step 23
We click Next and we will see the following:
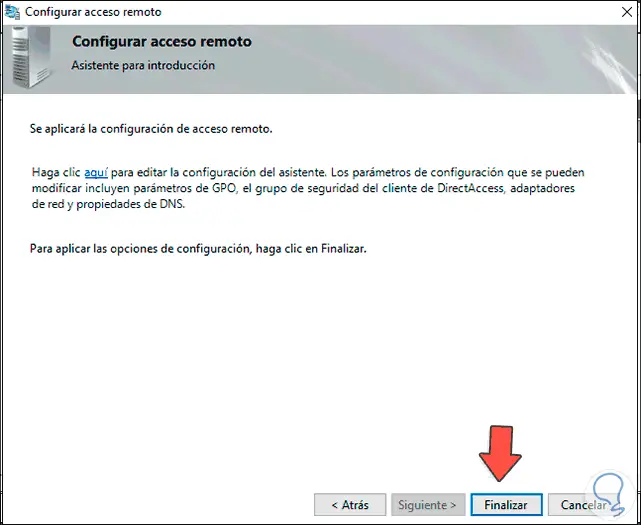
Step 24
We click on "Finish" to complete the process.
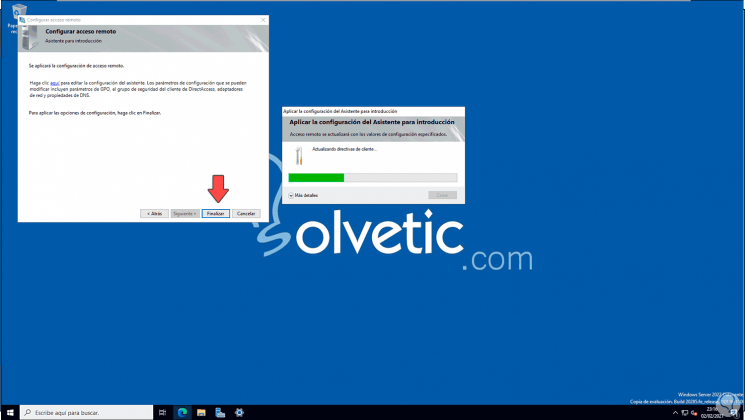
Step 25
When completed we will see the following. Click on "Close" to exit the wizard.
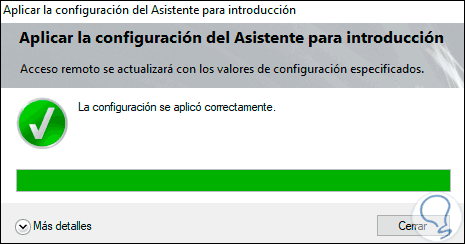
Step 26
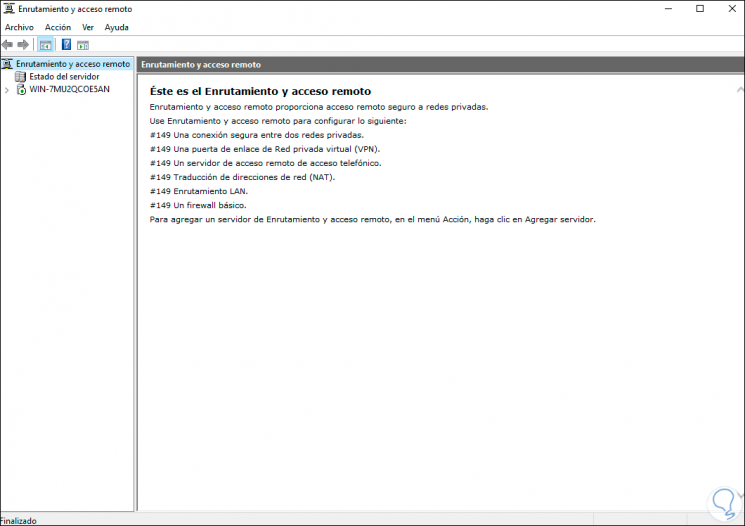
We access the Windows Server 2022 Remote Access console:
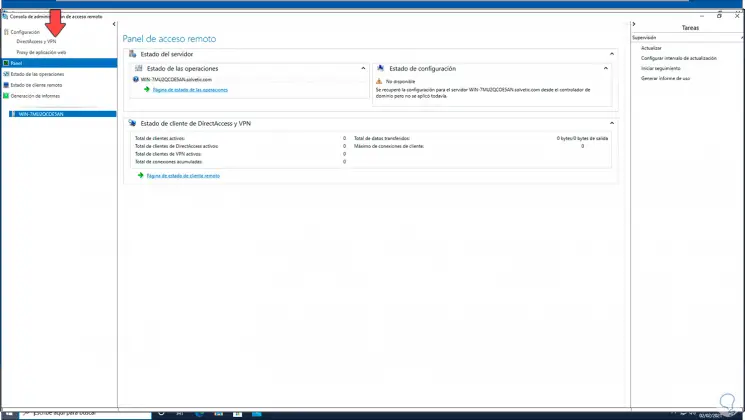
Step 27
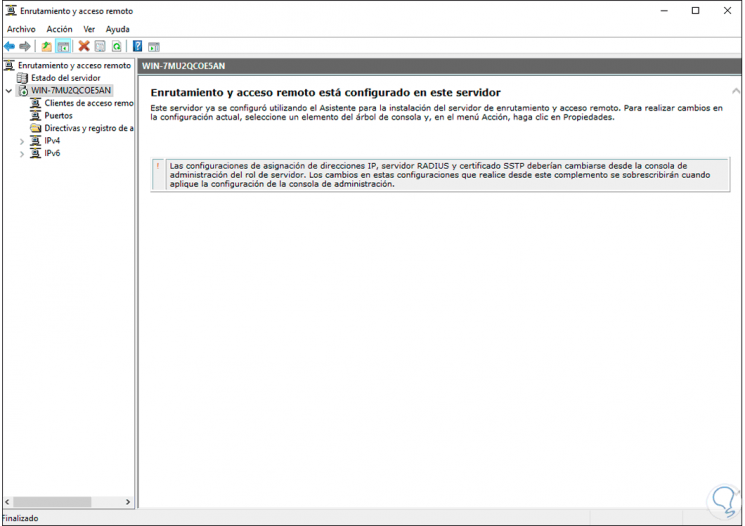
We go to the "DirectAccess and VPN" section and the following will be displayed:
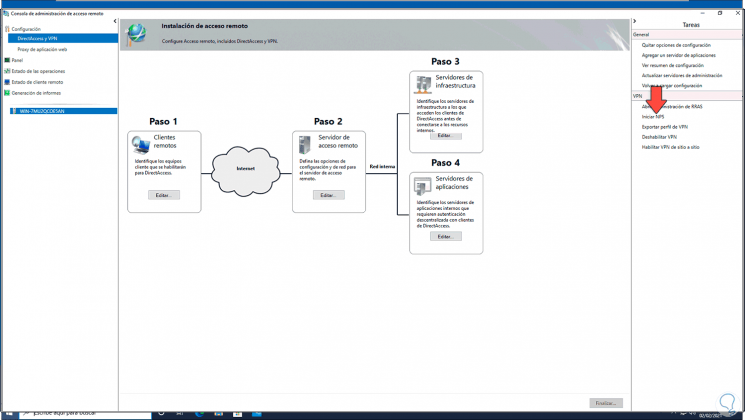
Step 28
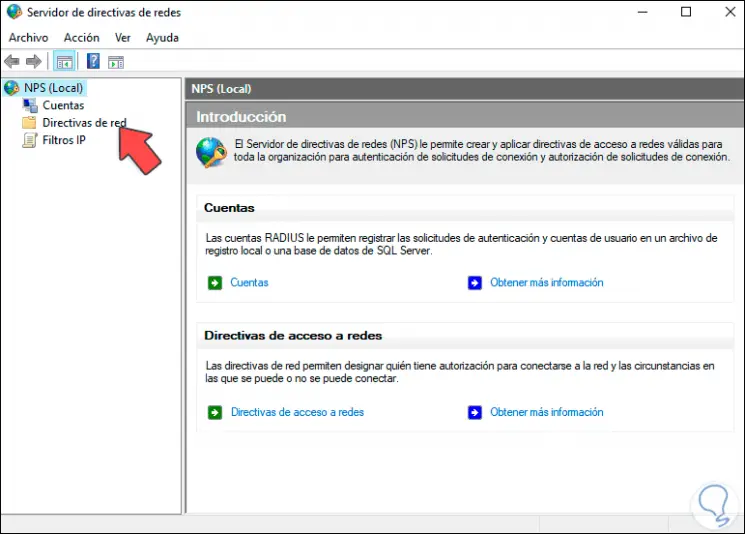
We click on "Start NPS" and a new window will open:
Step 29
We select the server to see the different options:
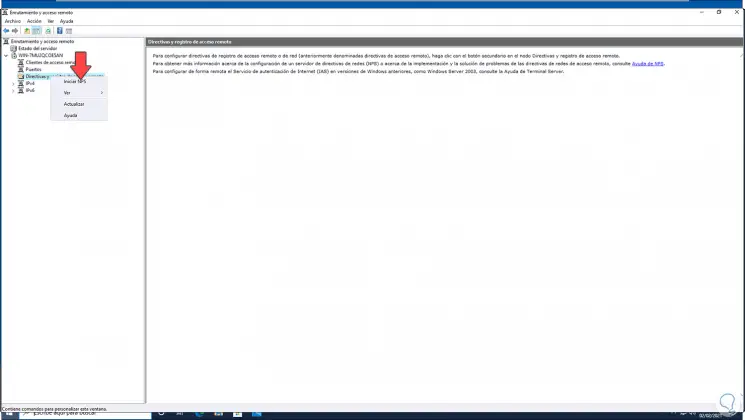
Step 30
Right click on "Policies and remote access registry" and select "Start NPS"
Step 31
We will see this:
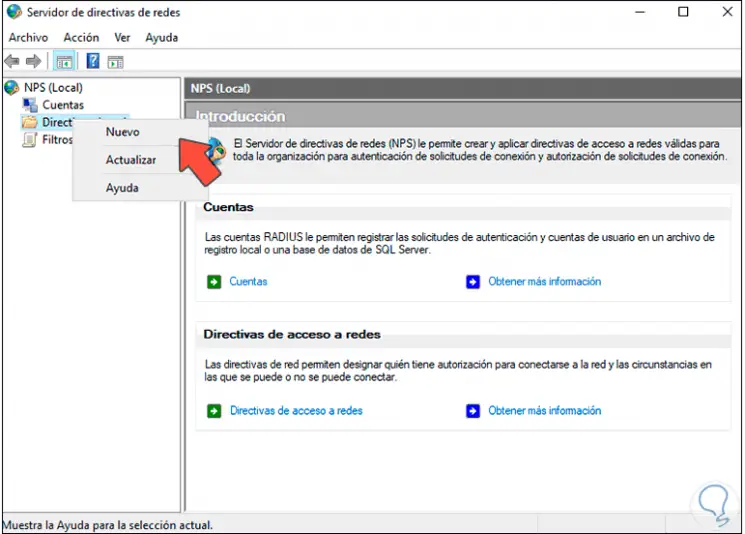
Step 32
Right click on "Network Policies" and select "New":
Step 33
In the pop-up window we enter the name of the directive:
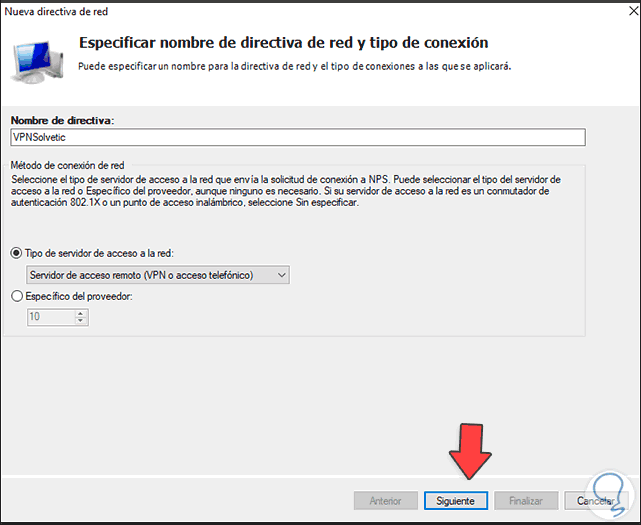
Step 34
We also choose the type of server, in this case "Remote access server (VPN or dial-up)", we click Next and the following will be displayed:
Step 35
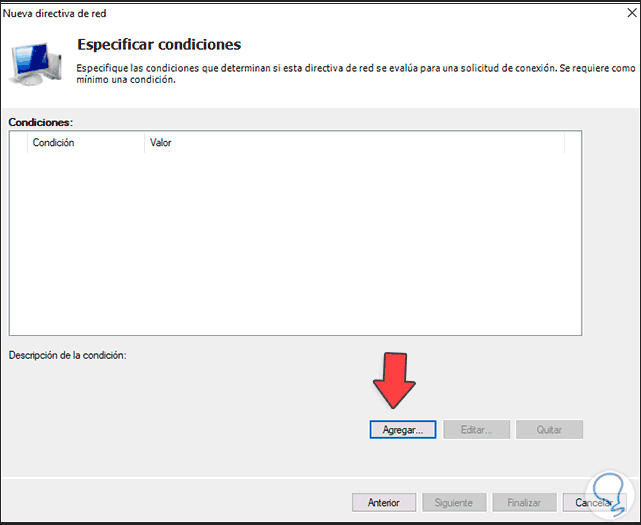
Click Add to see the following:

Step 36
Add the option "Windows Groups" and the following will be displayed:

Step 37
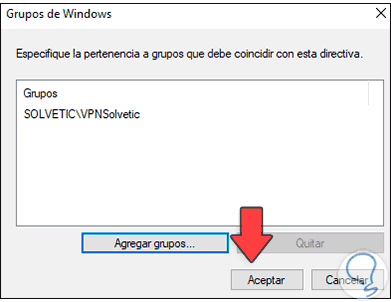
There we click on "Add groups" and select the group to use:
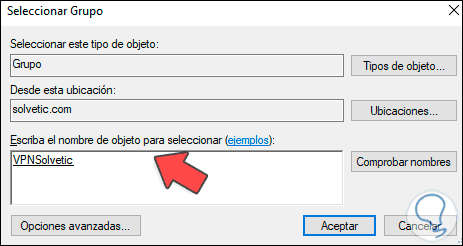
Step 38
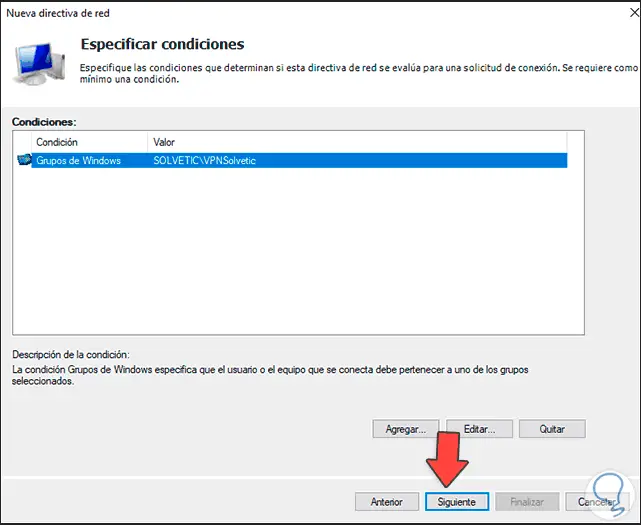
Click OK to see it added:
Step 39
We apply the changes:
Step 40
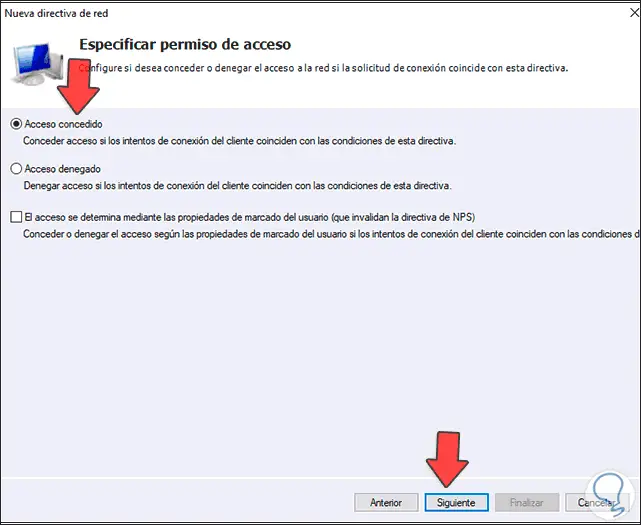
Click Next and now we define the permissions to use:
Step 41
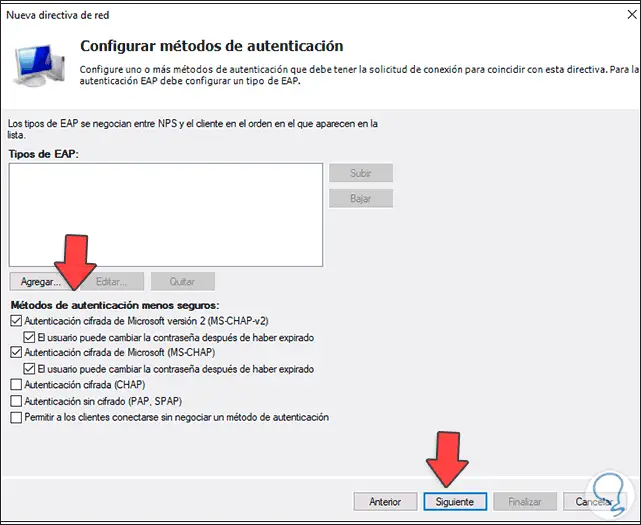
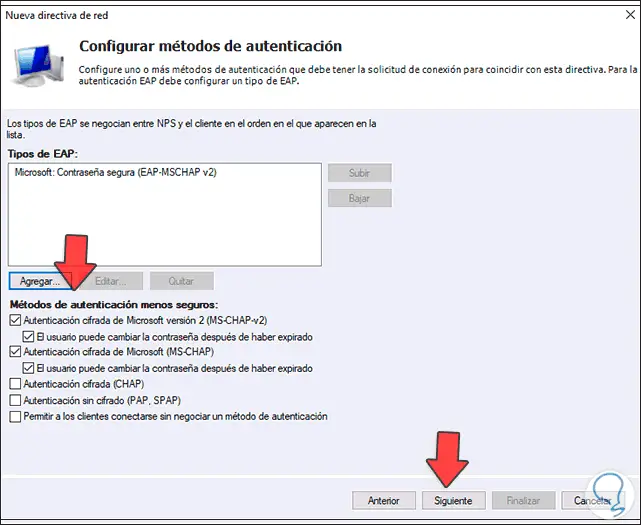
Click Next to define the authentication method to use:
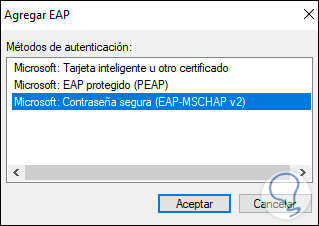
Step 42
We click on Add and there we select the Microsoft option: Secure password (EAP-MSCHAP v2):
Step 43
Click OK.
Step 44
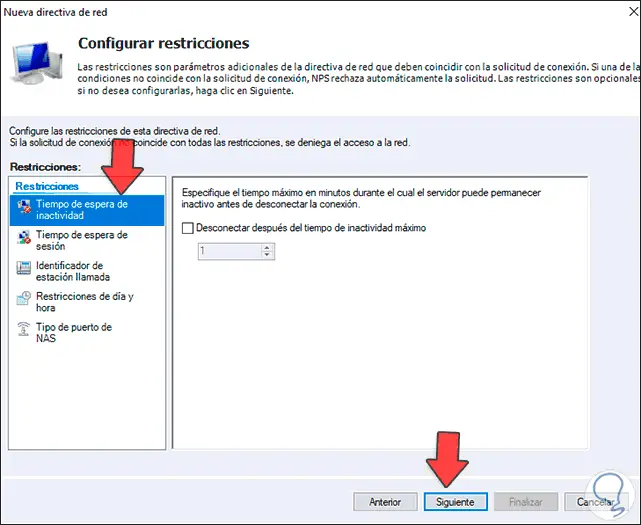
We click Next and now it is possible to add restrictions:
Step 45
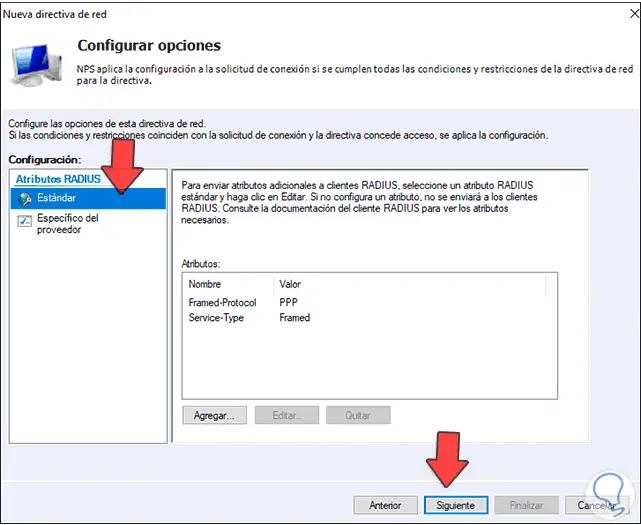
In the following window it is possible to configure additional options:
Step 46
Click Next again to see the configuration structure. Click Finish to complete the process.
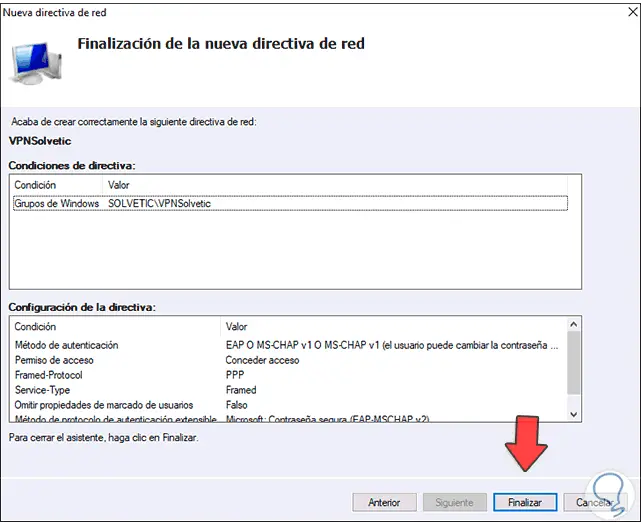
Step 47
We go to the client computer and go to "Configuration":

Step 48
Then we go to "Network and Internet":

Step 49
In the next window we go to the VPN section:
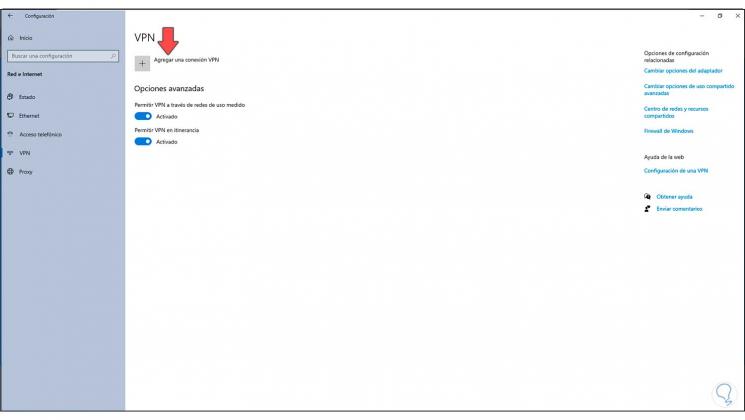
Step 50
We click on "Add a VPN connection" and in the pop-up window we enter the details of the Windows Server 2022 VPN name:
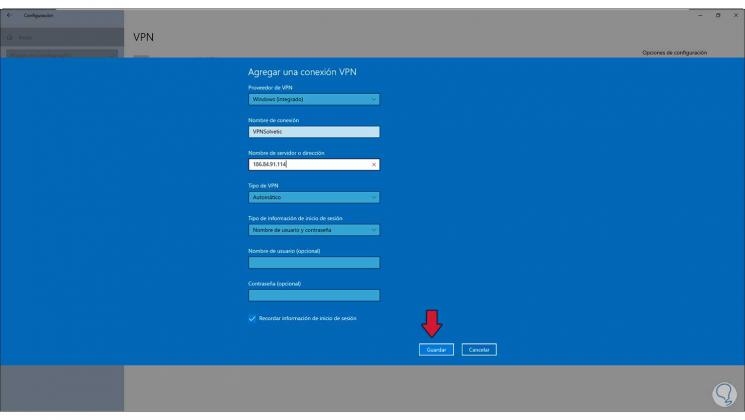
Step 51
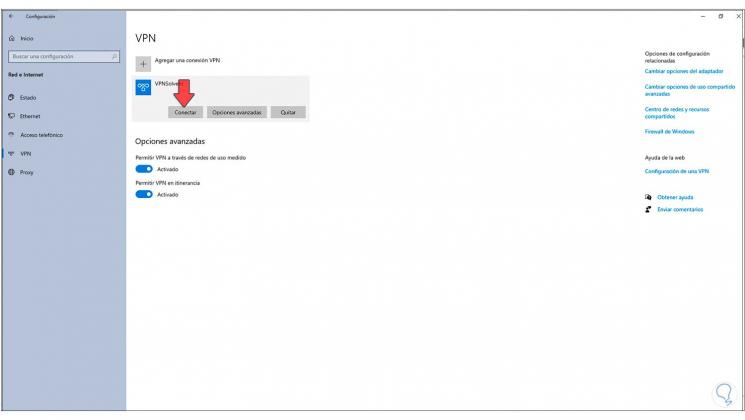
We click on Save to apply the changes and we will see the VPN network created:

Step 52
Click on the VPN and click on "Connect":
Step 53
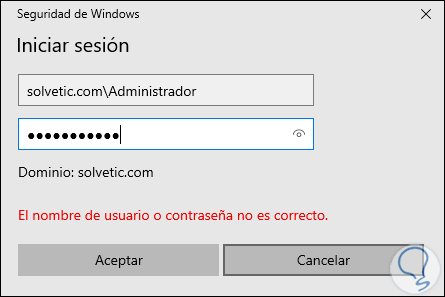
In the displayed pop-up window we must enter the domain credentials. This will establish VPN connectivity.
Step 54
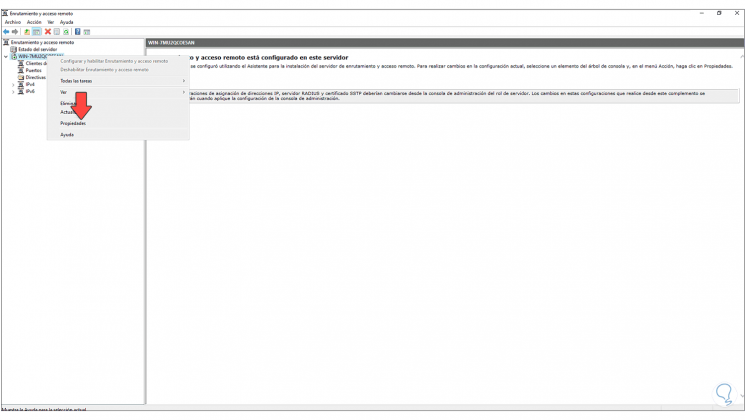
In Windows Server 2022 we right click on the server and select "Properties":
Step 55
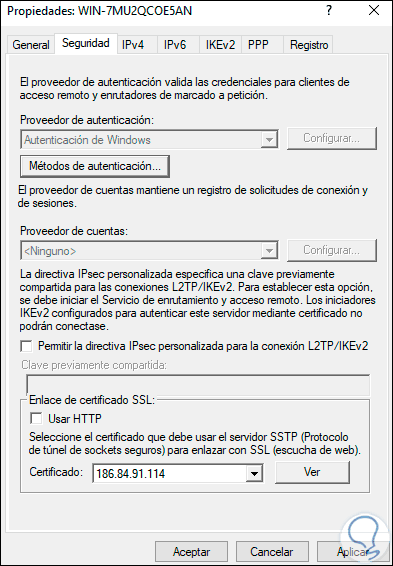
In the "Security" tab we can establish access mechanisms if necessary:
This is the process to configure a VPN on Windows Server 2022 and thereby offer network security enhancements.