With the launch of each new edition of Windows 10 , Microsoft seeks to improve the use and functionality of some integrated applications to allow the end user to have better alternatives when making use of them and thus increase their productivity and their experience of use ..
One of these applications is Sticky Notes or Quick Notes which allow us to have stickers or notes on our desktop with reminders of certain actions and thus not lose any of them and stay up to date and aware of these.
Since the 10th Anniversary edition of Windows 10, this quick notes application has been integrated with new features such as a new and improved design, ease of synchronization in the cloud, additional intelligence, pen support; all this to have the best context of notes in Windows 10.
But one of the most notable features is the possibility of reinstalling these applications in a safe and practical way in case you present some type of error, this facilitates the support task in this aspect.
TechnoWikis will explain how we can uninstall and reinstall Sticky Notes or Quick Notes in Windows 1 0 and thus enjoy its functions..
Quick Notes Features
In the new version we have features such as:
- Full support in dark mode.
- New channels in real time for synchronization tasks.
- Better accessibility options and bug fixes.
- Ability to create Cortana reminders.
- Sticky Notes can detect addresses, emails and mobile numbers.
What are Quick Notes
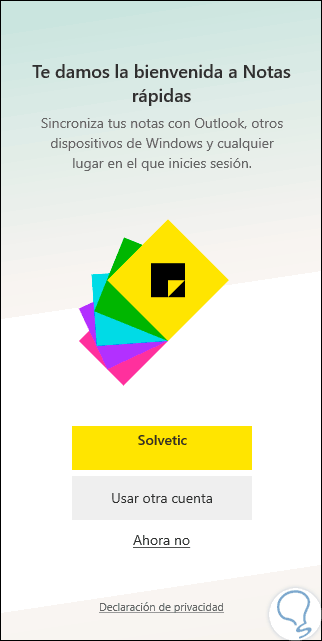
When we access this application for the first time, we will see the following window where we must select the account with which the session will begin and with which the notes will be synchronized:
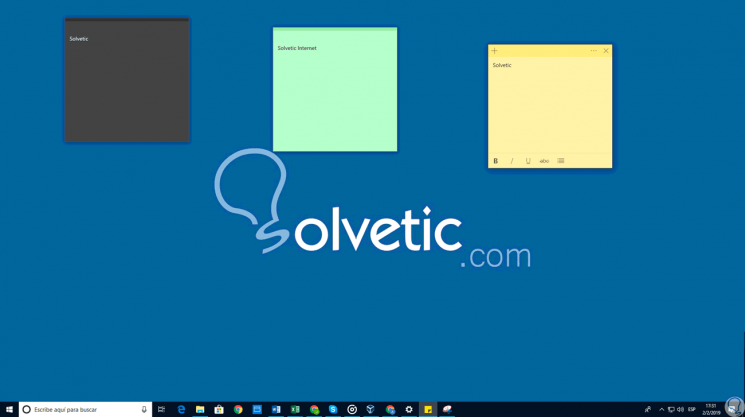
Once we perform this step, we can make use of these quick notes with various options such as defining fonts, sizes, setting colors and more:
Now we will see how to correct problems that arise with this application.
To keep up, remember to subscribe to our YouTube channel! SUBSCRIBE
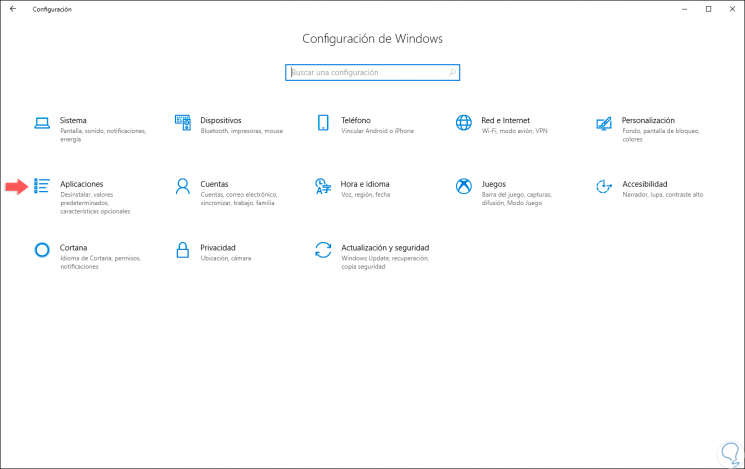
1. Reset Quick Notes using Settings in Windows 10
Step 1
The Configuration utility is a central point from where it will be possible to execute hundreds of administrative and support tasks in Windows 10. To use this method we will go to the Start menu and there we will select the Configuration utility, we will see the following:
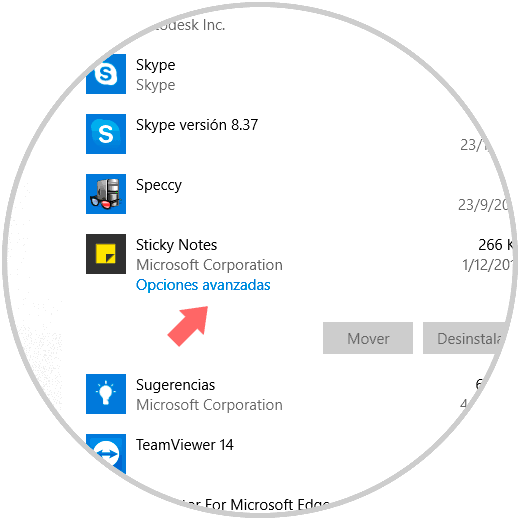
Step 2
There we go to the "Applications" section and then we will go to the "Applications and features" category and at the bottom we will look for the "Sticky Notes" application and by clicking on it we click on the "Advanced options" line:
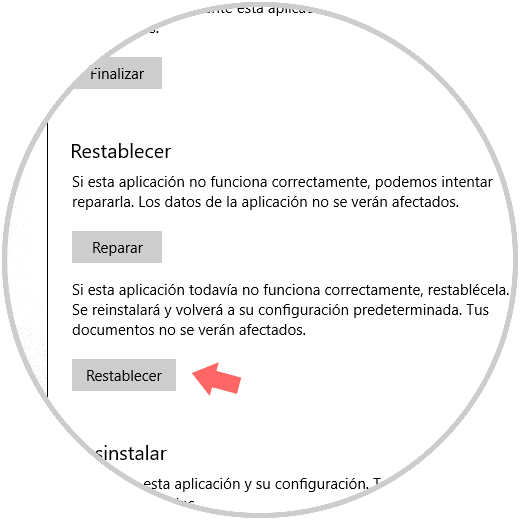
Step 3
In the window that will be displayed, click on the “Reset” button:
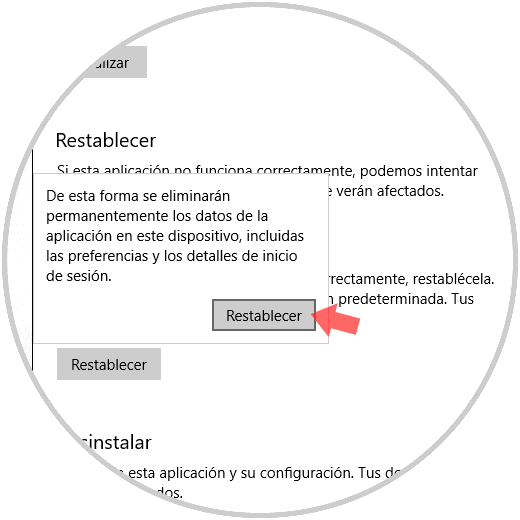
Step 4
Clicking there will display the following pop-up window where we confirm again by clicking on "Reset". Once this process is completed, the Sticky Notes or Quick Notes application will be restored to its original state.
2. Reset Quick Notes using Windows PowerShell in Windows 10
Windows PowerShell is a console utility developed with a series of cmdlets which will facilitate monitoring, management and control tasks in Windows 10..
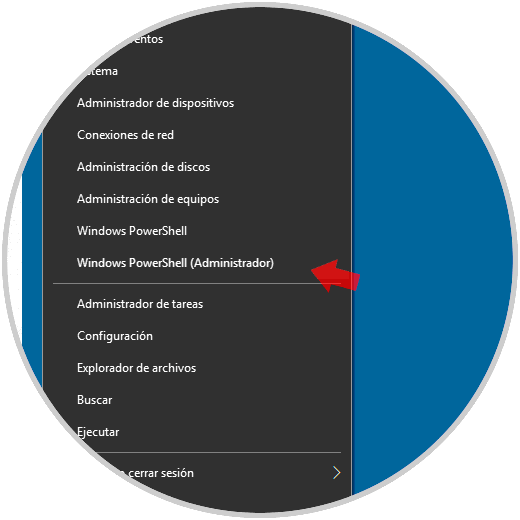
Step 1
This console gives us the opportunity to reinstall the Quick Notes application in a safe and complete way, for this purpose, we must access Windows PowerShell as administrators and for this we will right click on the Start menu or using the following keys and in the list displayed select "Windows PowerShell (Administrator)":
+ X
Step 2
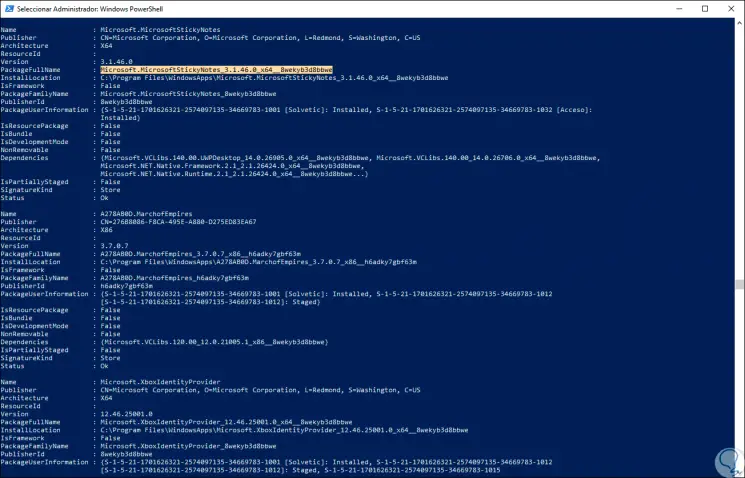
After accepting the control of user accounts, we must execute the following line with which all the applications installed by default in the system will be listed:
Get-AppxPackage —AllUsers
Step 3
In the results we must locate the Sticky Notes line, since they are multiple results, we can filter the search by right clicking on the Windows PowerShell title bar and selecting the “Edit / Search” option or using the following keys:
+ F Ctrl + F
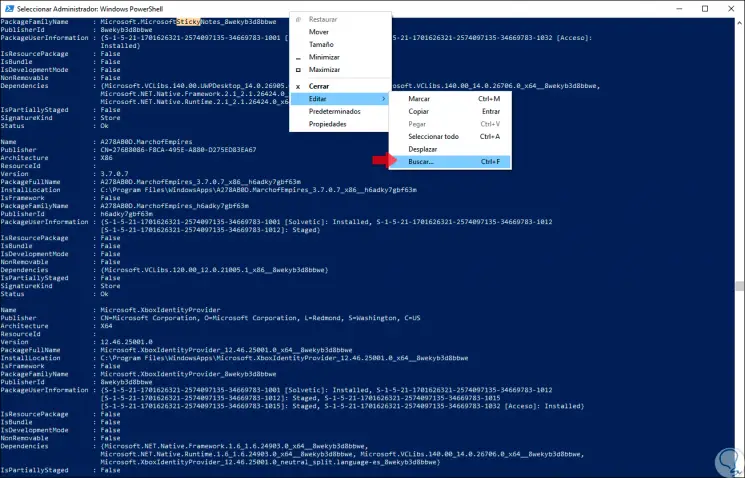
Step 4
Then, in the pop-up window, enter the word "sticky" to access the result quickly:

Step 5
Once we detect the line where Sticky Notes is located, we will select the “PackageFullName” line and use the following keys to copy its contents:
+ C Ctrl + C
PackageFullName
Step 6
Now we are going to uninstall Sticky Notes using the following syntax:
Remove-AppxPackage PackageFullName
Step 7
In this case it would be:
Remove-AppxPackage Microsoft.MicrosoftStickyNotes_3.1.46.0_x64__8wekyb3d8bbwe
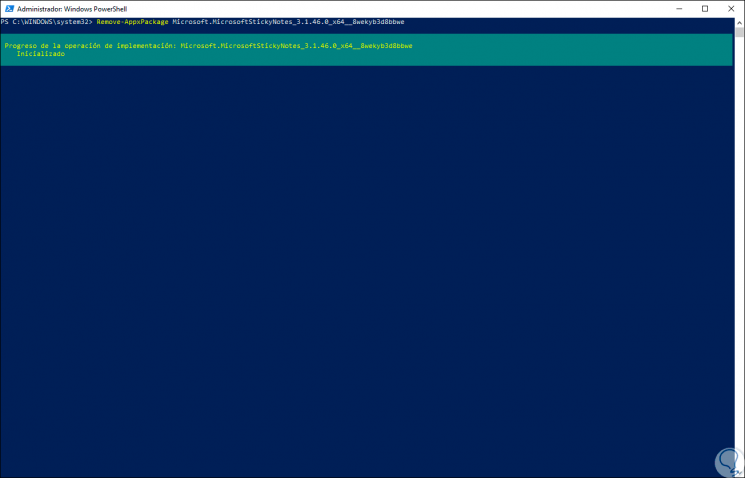
Step 8
Once completed we can close Windows PowerShell and now we will go to the following link to obtain it again:
Fast notes
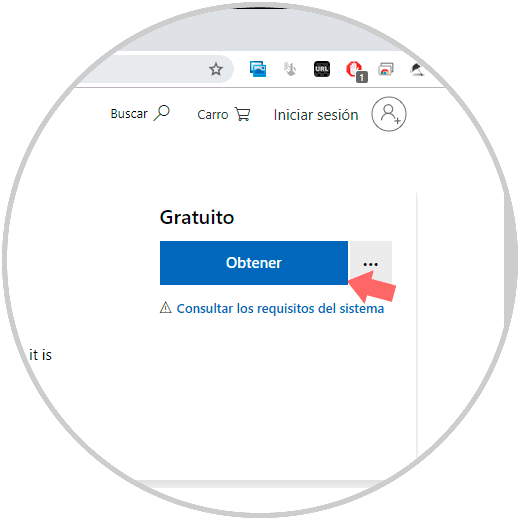
Step 9
There we click on the “Get” button and the following pop-up window will appear:

Step 10
There we click on the "Open Microsoft Store" button and this will redirect us to the Windows 10 store:

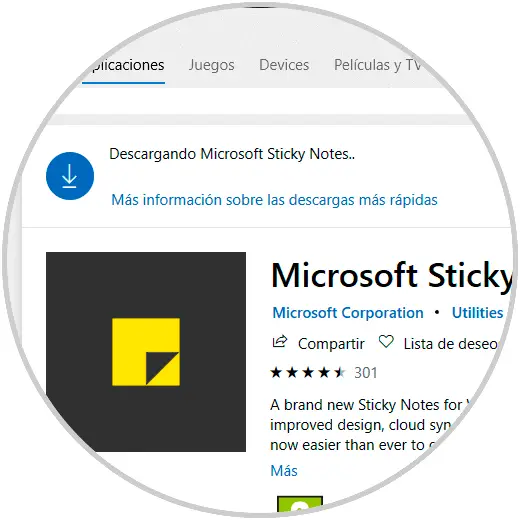
Step 11
There again we click on the "Get" button to start the process of downloading and installing the application Quick Notes in Windows 10. Once downloaded and installed we can enjoy its features.
3. Reinstall Quick Notes using CCleaner in Windows 10
Step 1
One of the most commonly used applications to run various support and administration tasks throughout the Windows 1 0 system and its components is CCleaner which is available for free at the following link:
CCleaner
Step 2
Some of the tasks we can perform with the free version of CCleaner are:
- Control which applications make use of the resources of our team.
- Delete the tracking files and browsing data from browsers.
- Uninstall programs and applications.
Step 3
Once downloaded, we access the application and go to the "Tools / Uninstall programs" section and in the central panel we locate the application "Microsoft Sticky Notes":
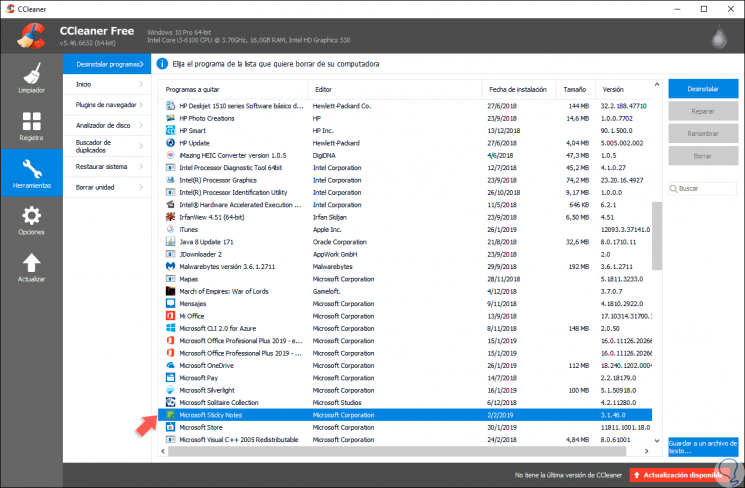
Step 4
Once selected, click on the "Uninstall" button located in the upper right and the following message will be displayed. There we click on OK to confirm the action.

Once the application is uninstalled, we must follow the process described in the previous point to reinstall the application from the Windows 10 store and thus have access to its functions.
Thus, with any of these methods, we can fully enjoy this practical Windows 10 application.