Windows 11 integrates numerous tools that allow us to manage in a much more comprehensive way each of the activities we carry out in the system and one of the most dynamic tools to work with are quick notes..
Quick notes in Windows 11, also applicable in Windows 10, are small elements anchored to the desktop, similar to the small pieces of paper where we save data, but in Windows it is possible to add not only notes but images, adjust text formats, move them within the desktop, as well as synchronize notes between devices and popular applications such as OneNote Mobile, Microsoft Selector for Android, and Outlook on Windows.
A failure that has currently occurred with quick notes is that they do not work in Windows, causing various problems for frequent users of them, which is why TechnoWikis has a series of solutions to correct this error and thus get the most out of it. to these quick notes..
To stay up to date, remember to subscribe to our YouTube channel!
SUBSCRIBE ON YOUTUBE
1 Fix Quick Notes by Disabling Conclusions
Step 1
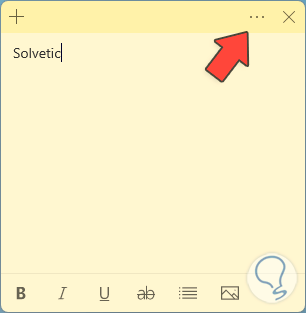
This is one of the features integrated into quick notes with which Cortana and Bing are allowed to read information from the notes and from there execute various actions such as converting phone numbers into call links and much more, but this function can affect the use of quick notes in Windows, to disable it, in the quick note we click on the three horizontal dots:
Step 2
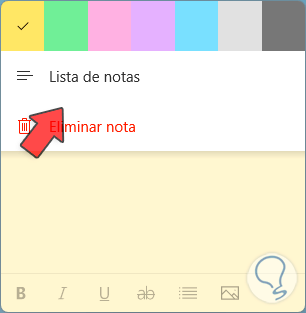
By clicking there, we must now click on “Notes List”:
Step 3
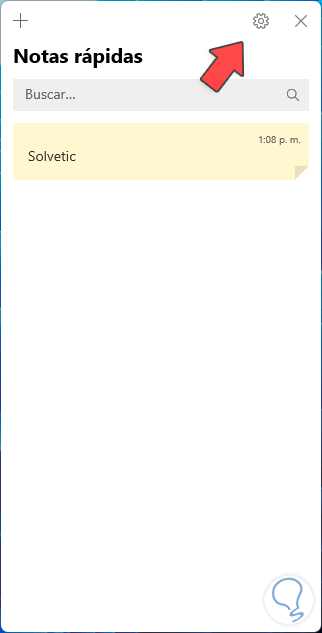
Then the following window will open. There we click on the pinion icon to access the settings:
Step 4
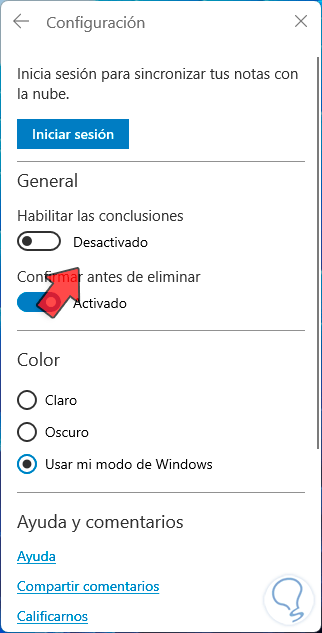
There we are going to confirm that the “Enable conclusions” switch is deactivated.
2 Fix Sticky Notes by Repairing the App
Step 1
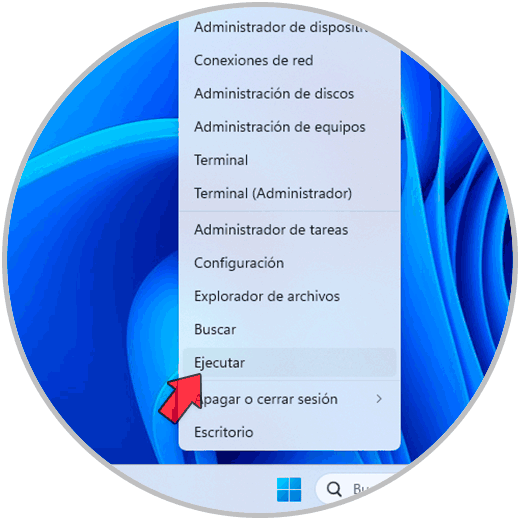
If the error persists, we can resort to repairing the application, this is a mechanism integrated within the operating system itself, first of all we are going to open Run from the start context menu:
Step 2
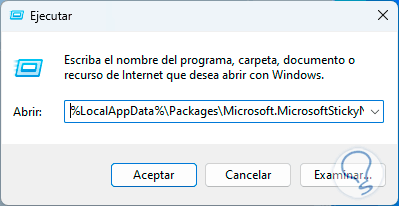
In the Run window we are going to enter the following command:
%LocalAppData%\Packages\Microsoft.MicrosoftStickyNotes_8wekyb3d8bbwe\LocalState
Step 3
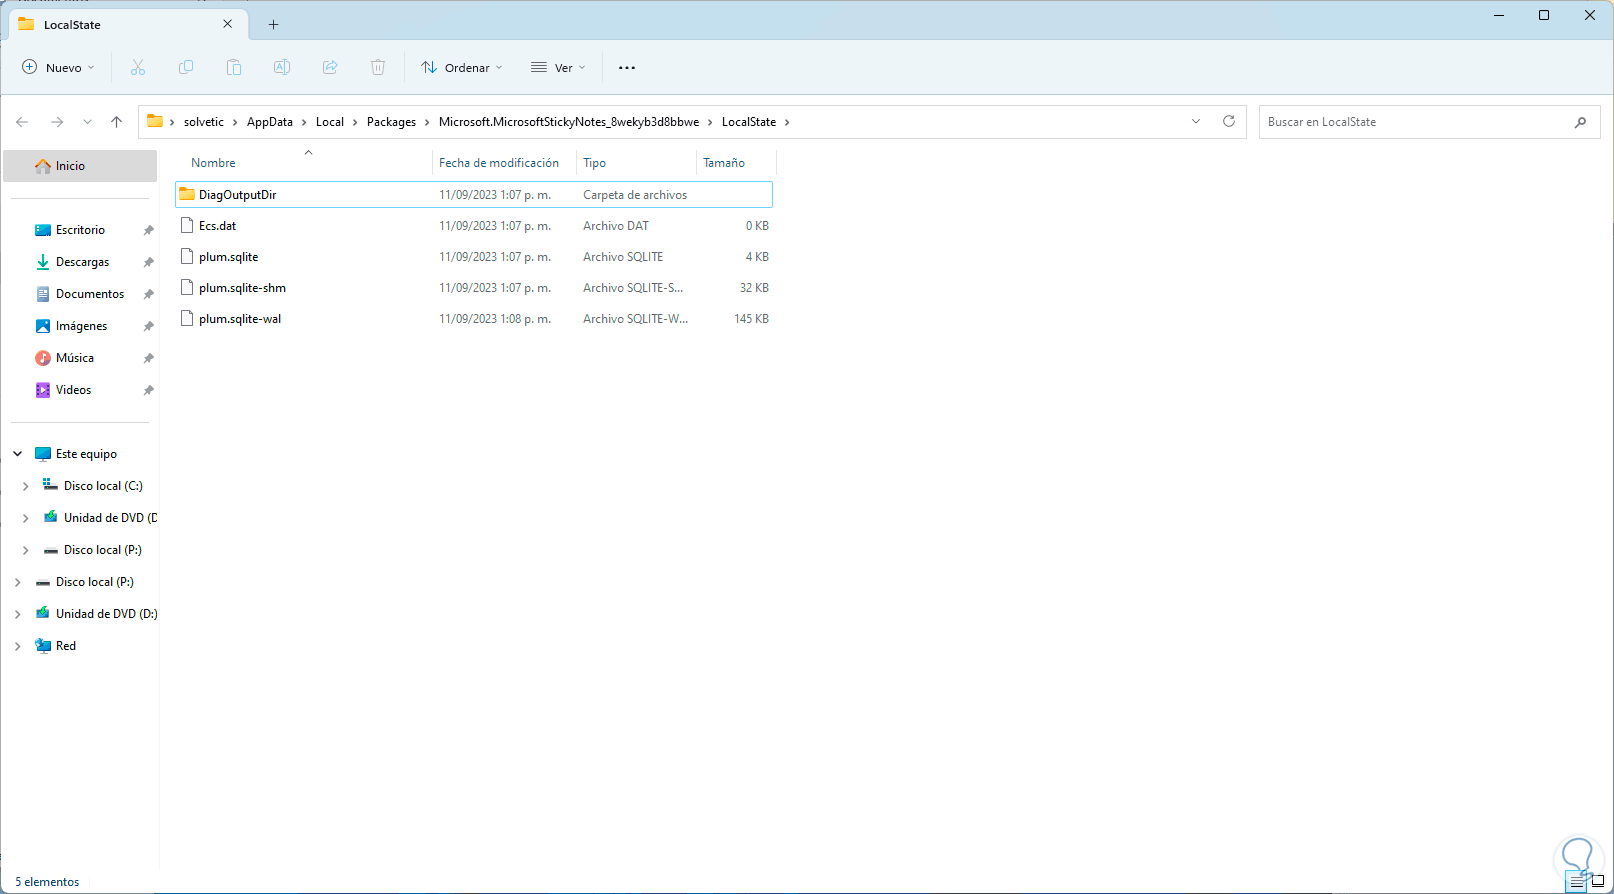
We click on “Accept” and the following window will open:
Step 4
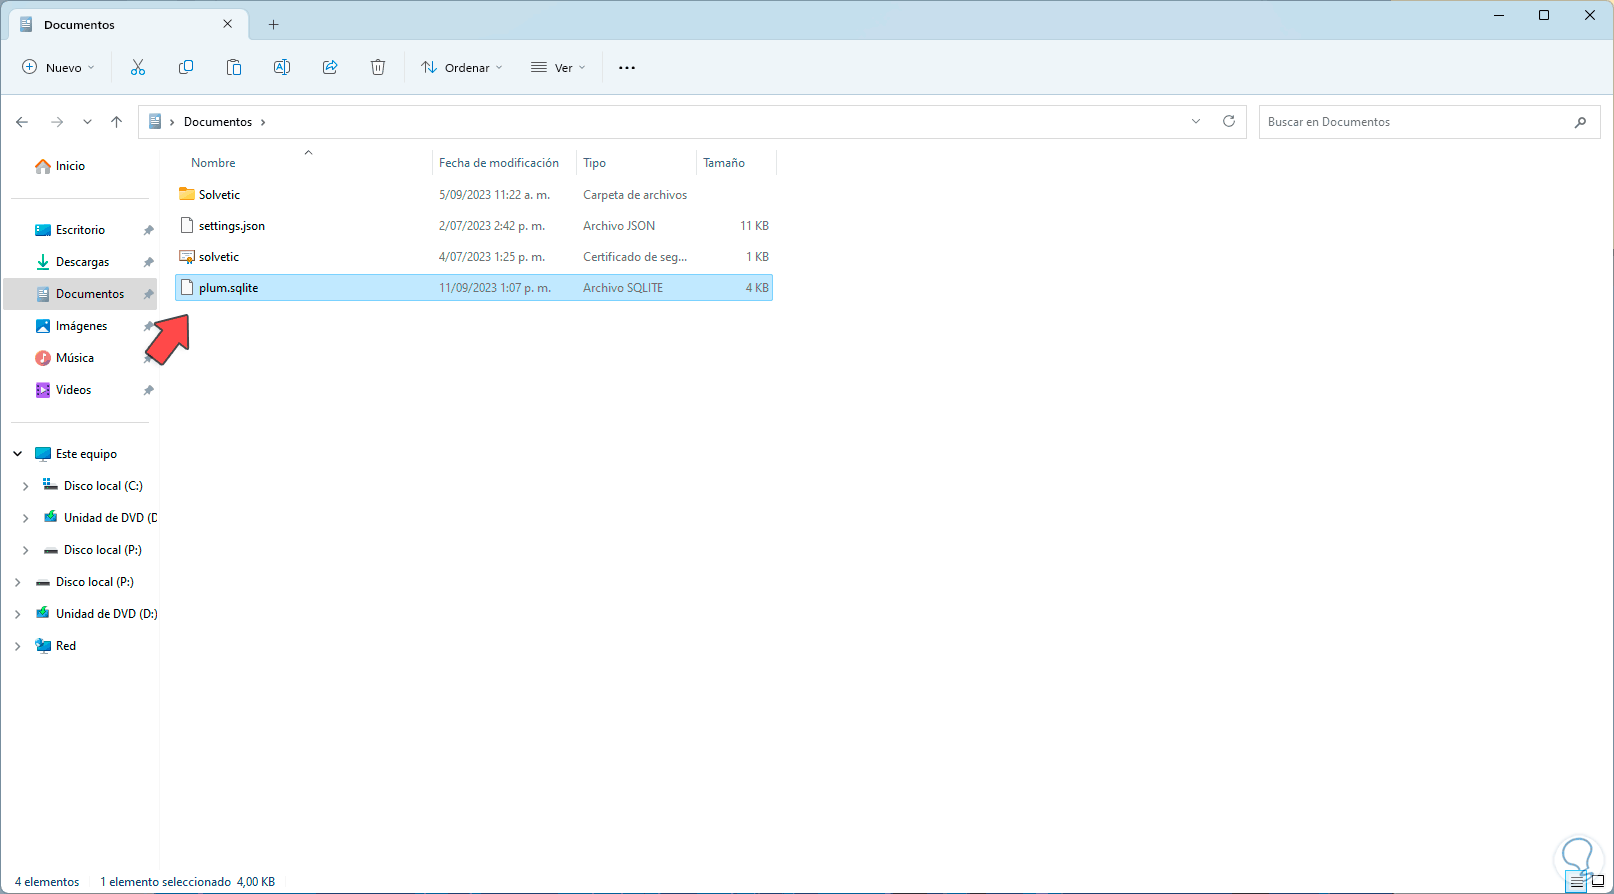
We copy and paste the file called “plum.sqlite” to some other location:
step 5
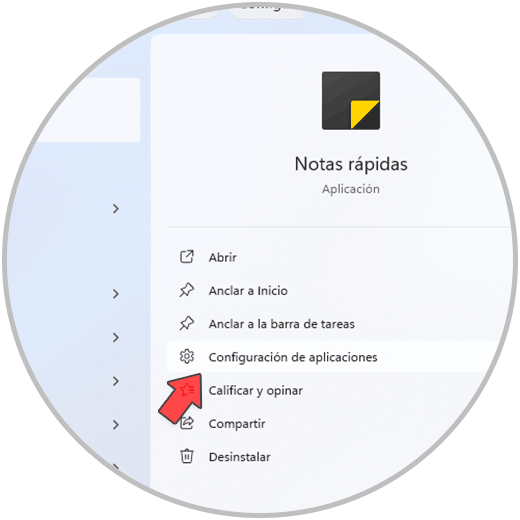
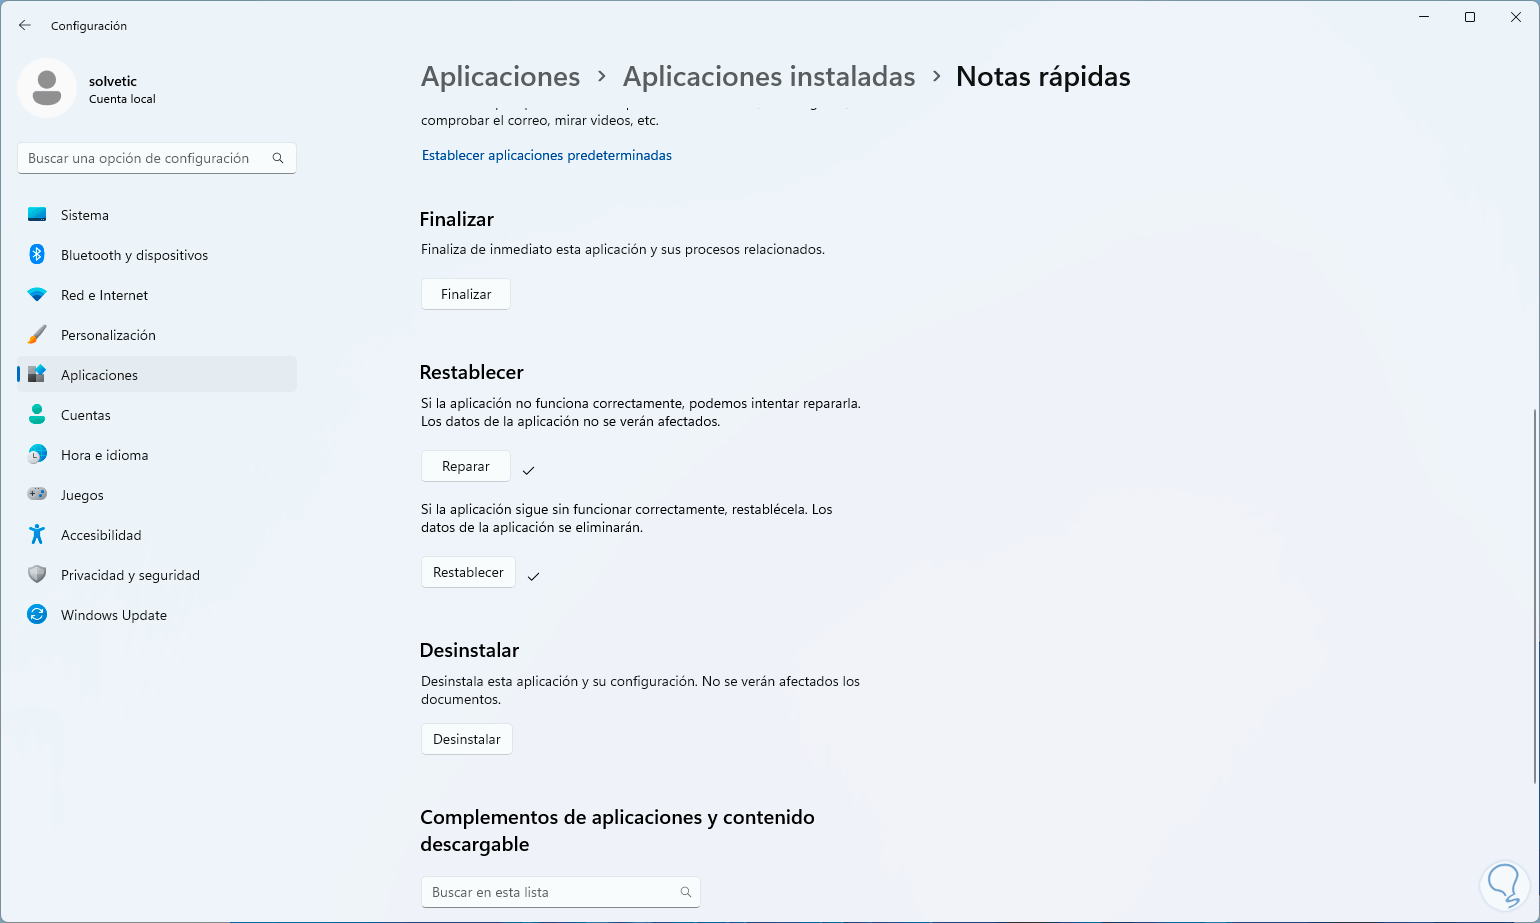
Now, from the Home search engine we enter the word “notes”, in Quick Notes we click on “Application Settings”:
step 6
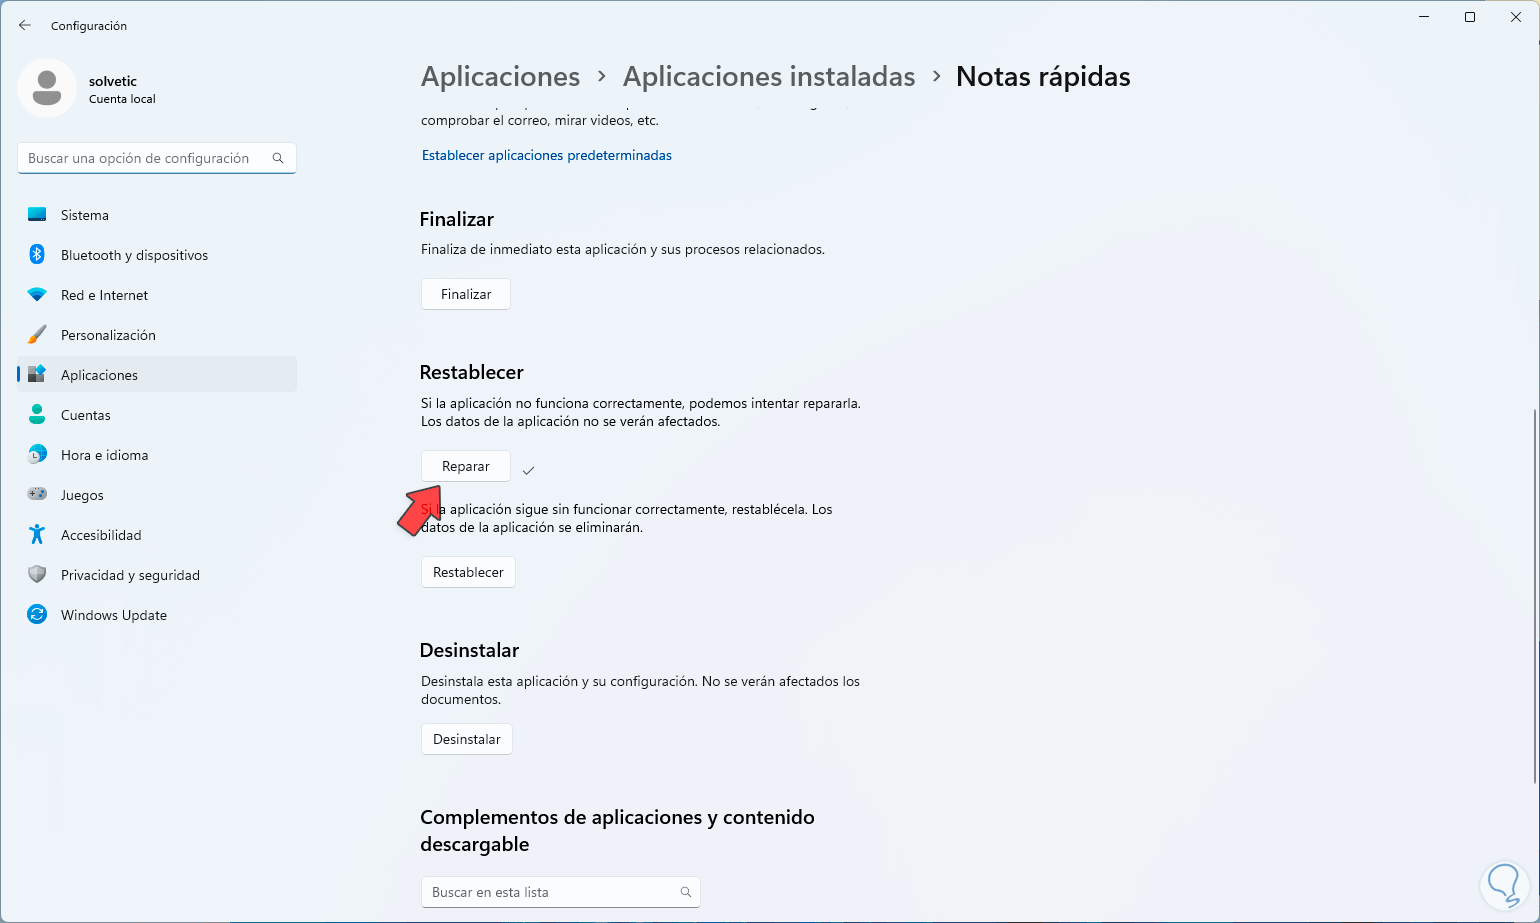
The following will open. We click on “Repair” and
Step 7
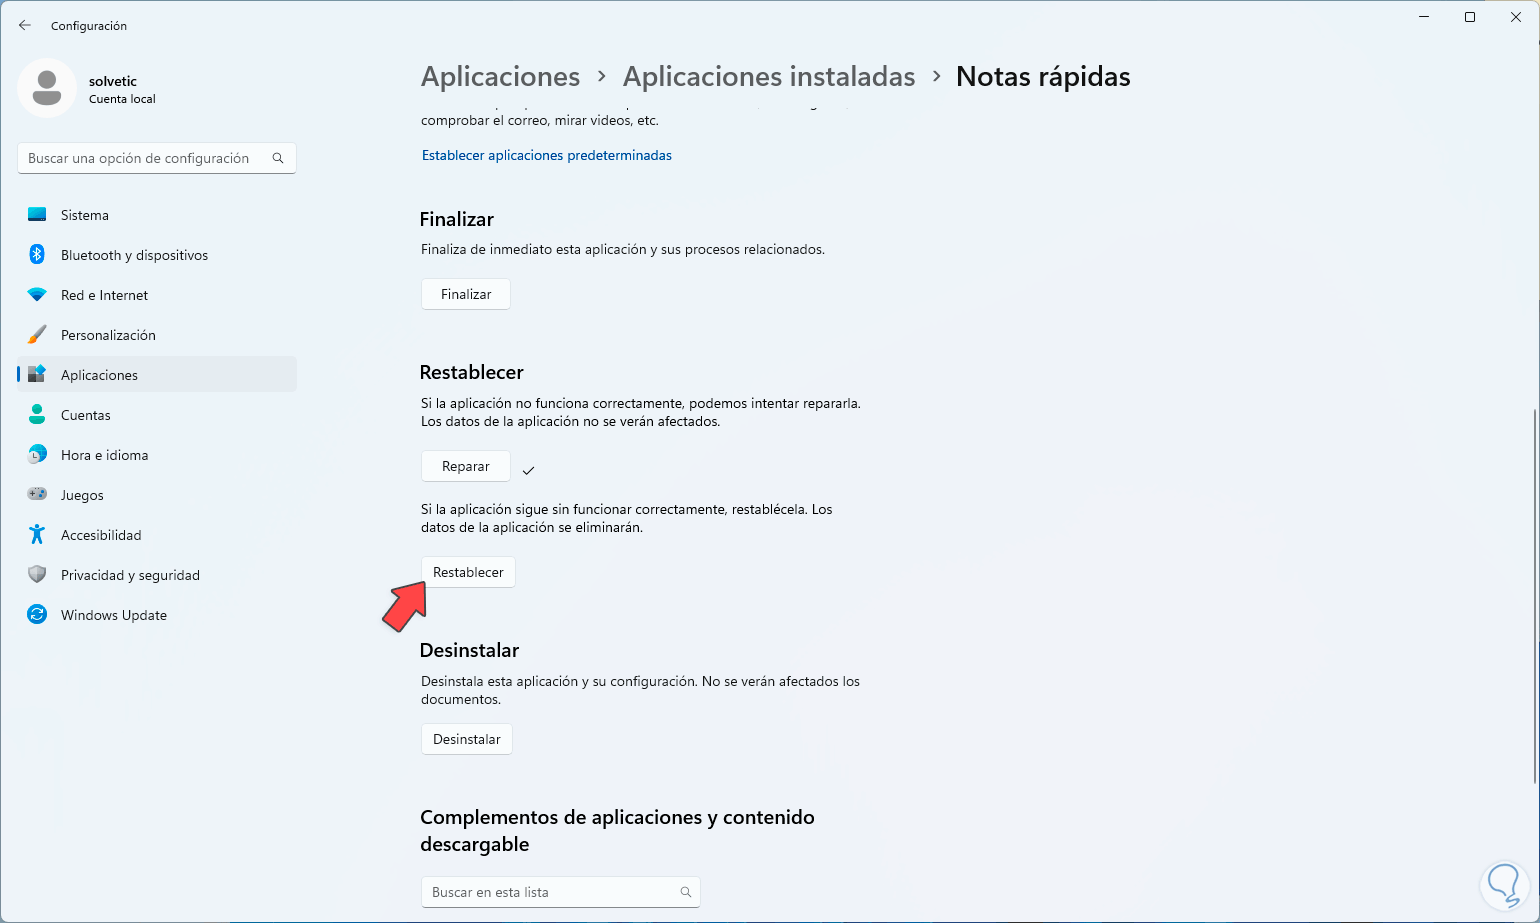
We hope that this process reaches its end:
Step 8
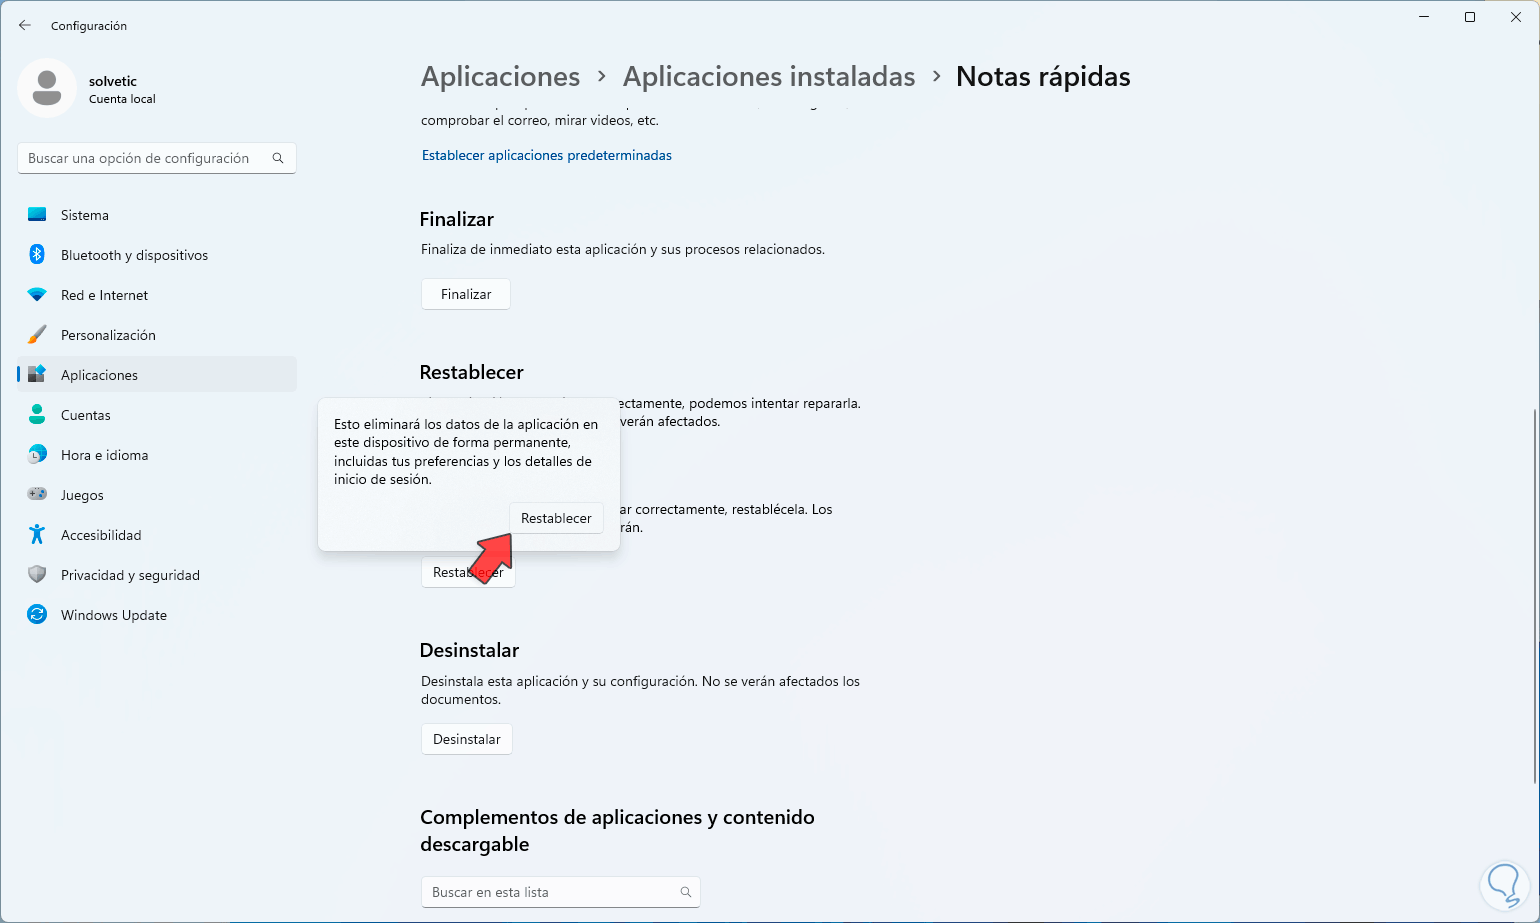
Now, we click on “Reset”, when clicking there it will be necessary to click on “Reset” again to confirm the process:
Step 9
We hope that this process reaches its end:
3 Fix Sticky Notes by Reinstalling the App
Step 1
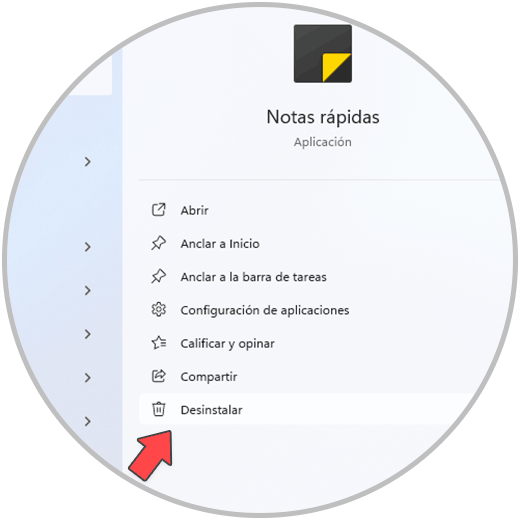
Another option to use is to reinstall Quick Notes, to do this, we are going to uninstall it by entering the word “notes” in the search engine, there in Quick Notes we click on “Uninstall”:
Step 2
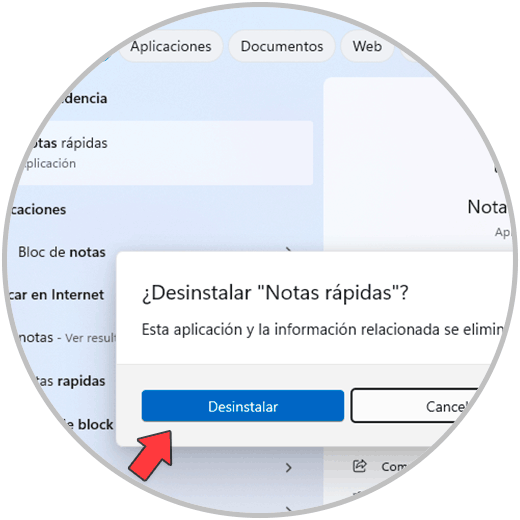
By clicking there we must click on “Uninstall” again to confirm this process:
Step 3
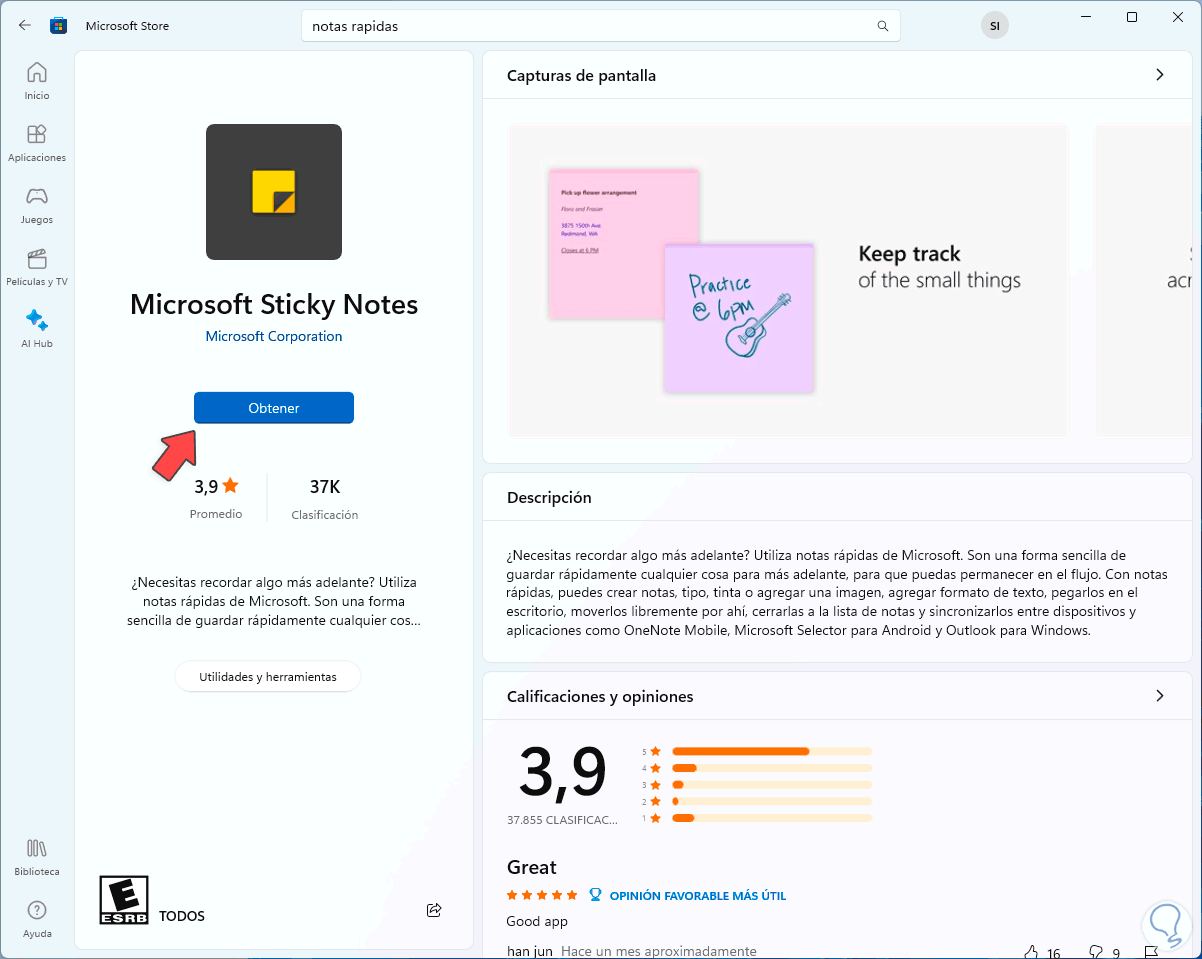
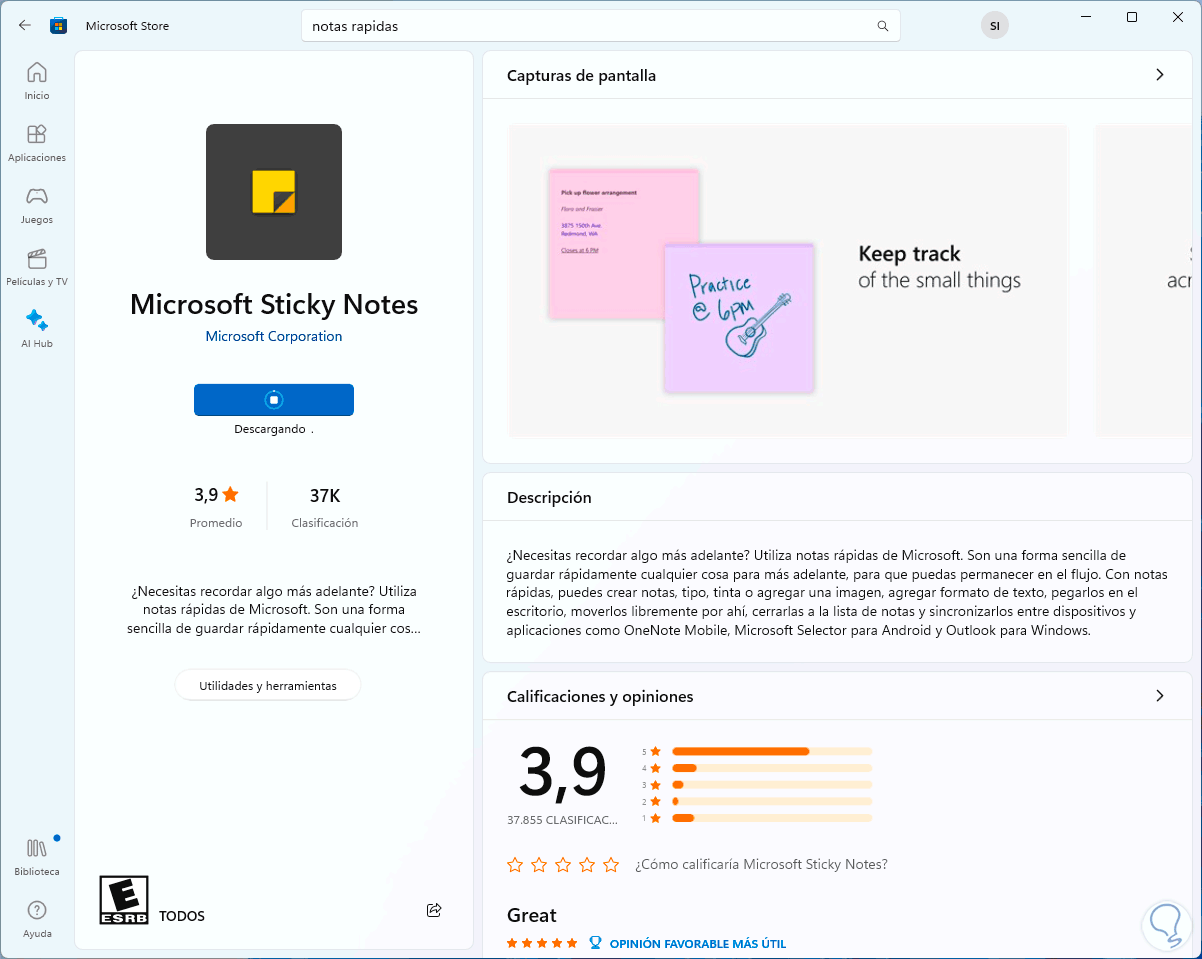
When the uninstallation process is finished, we are going to open the Windows Store, there we look for “sticky notes” and select “Microsoft Sticky Notes”:
Step 4
We click on “Get” so that it is downloaded and installed in Windows 11
4 Fix Sticky Notes from Windows Store
Step 1
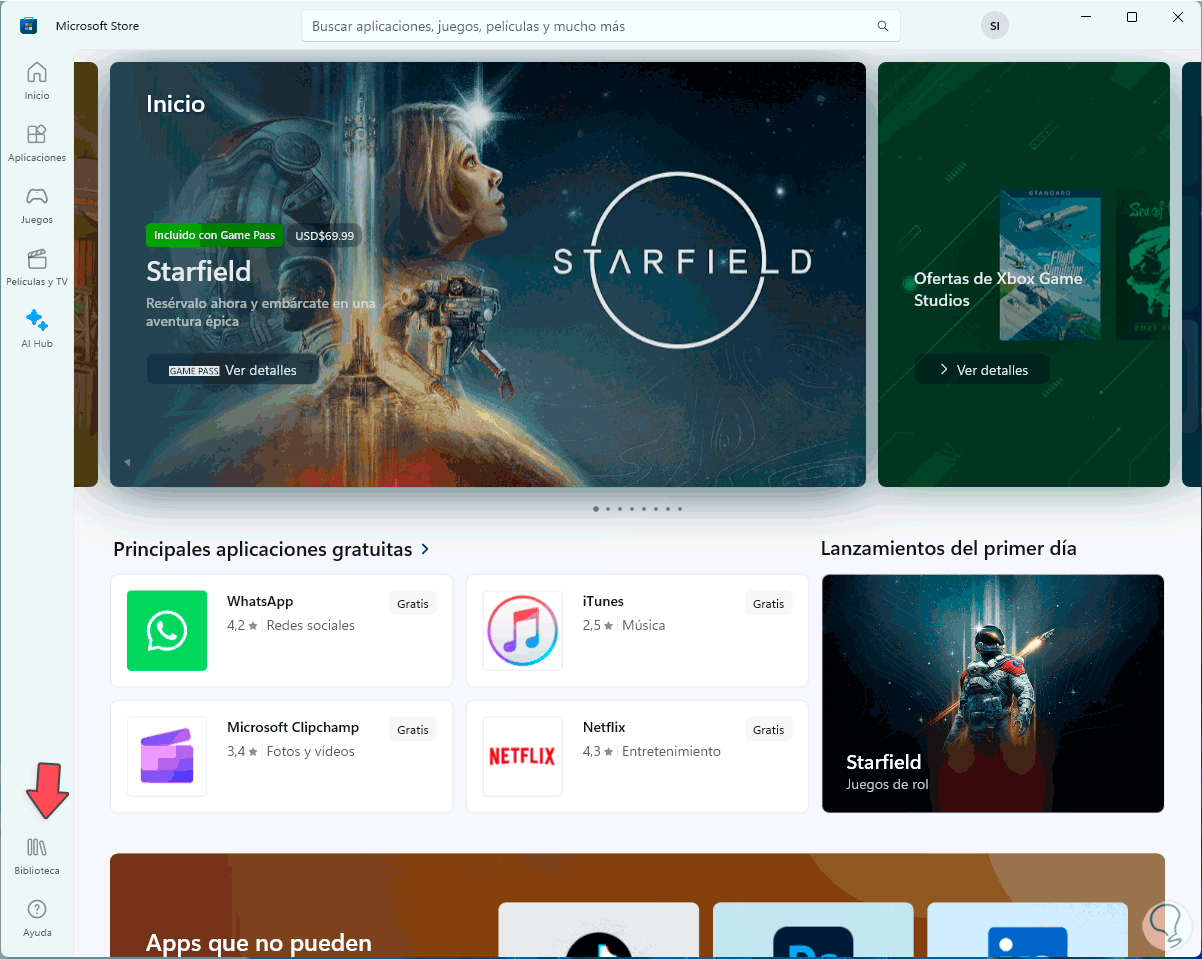
Because Sticky Notes is part of the Windows Store we can use it to correct this error, in this case we are going to open the Windows Store, at the bottom we click on “Library”:
Step 2
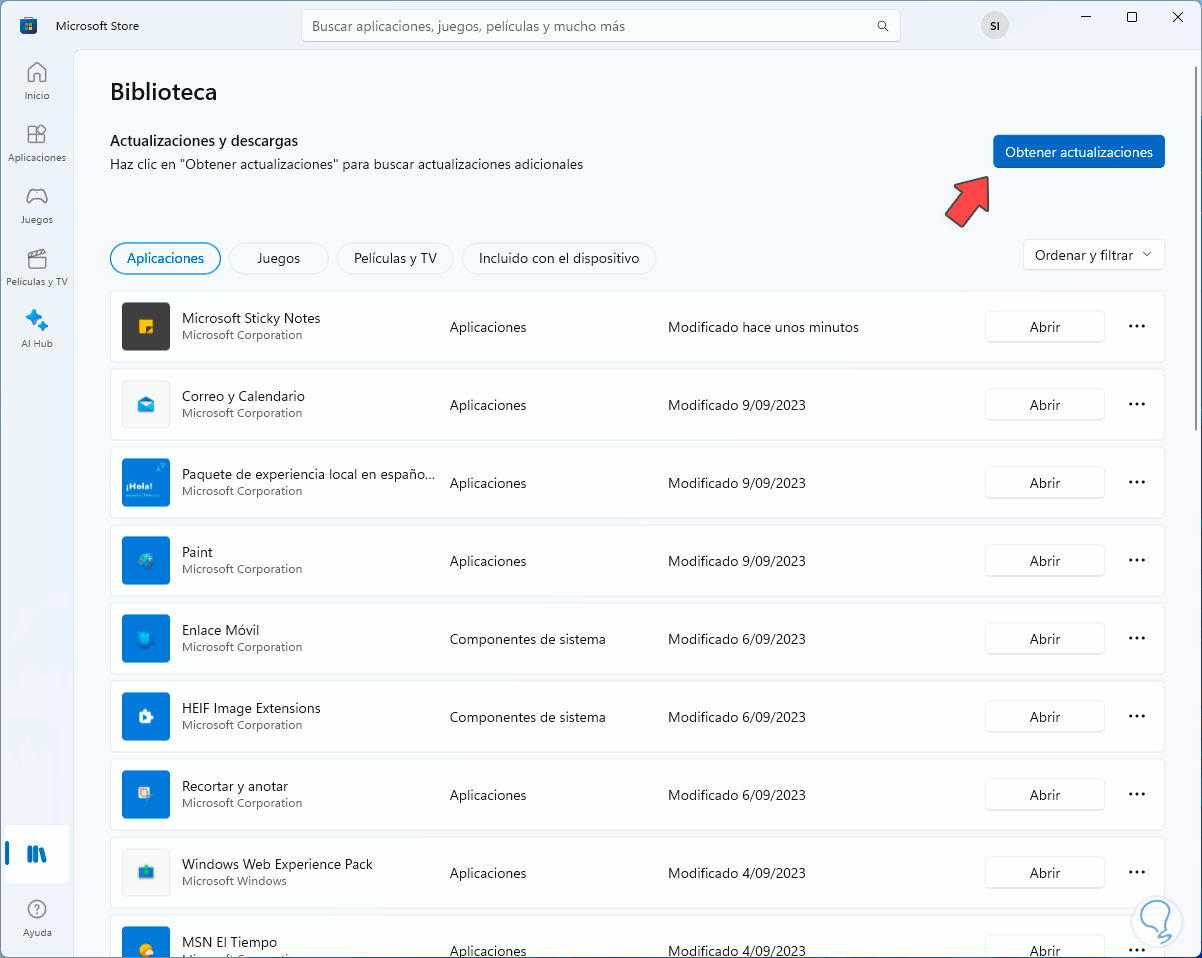
Then, in the next window, click on “Get updates”:
Step 3
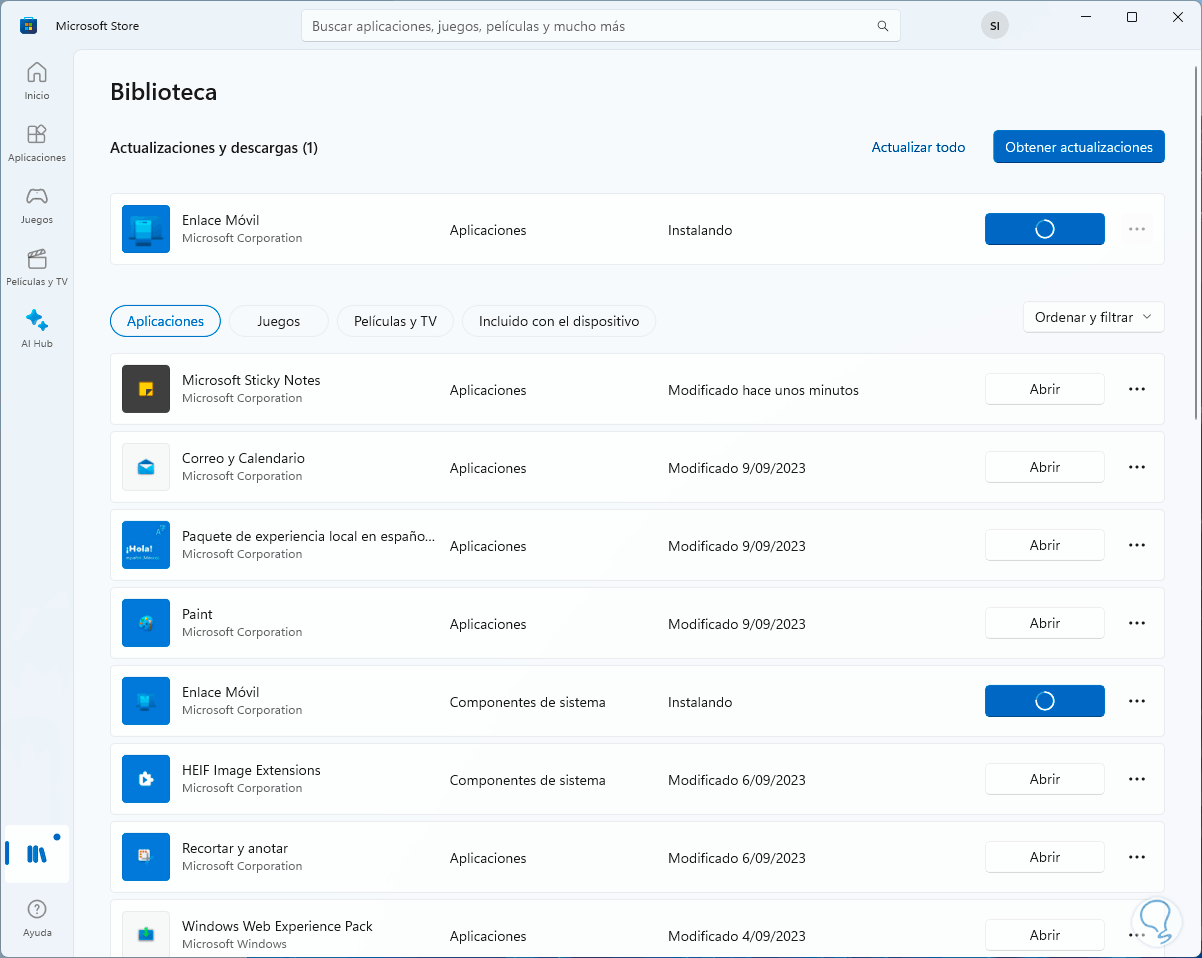
There we validate if any of these updates apply to Quick Notes:
5 Fix Quick Notes by Registering the App Again
Step 1
Finally it will be possible to register the Quick Notes again using the terminal, in this case we open the terminal as administrators:
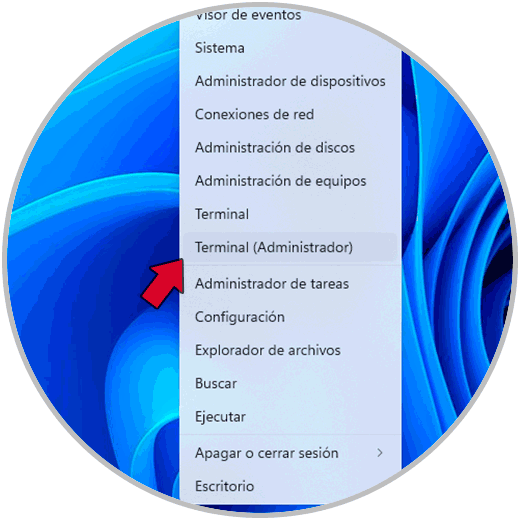
Step 2
In the terminal we execute the following command:
Get-AppXPackage -AllUsers -Name Microsoft.MicrosoftStickyNotes | Foreach {Add-AppxPackage -DisableDevelopmentMode -Register "$($_.InstallLocation)\AppXManifest.xml" -Verbose} 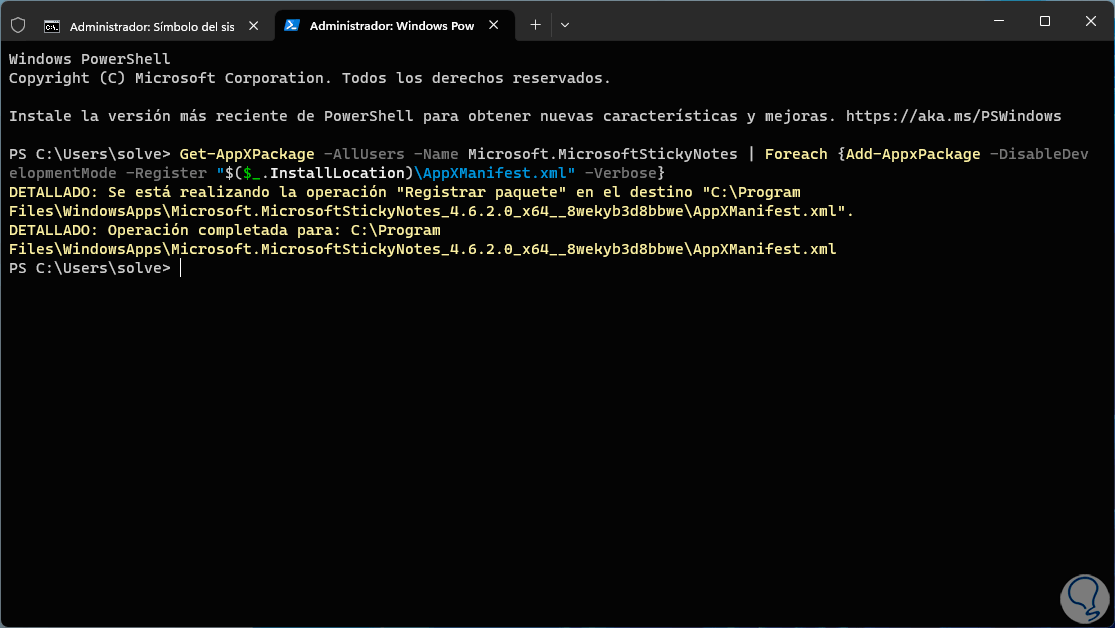
With each of these options we will be able to recover access to Quick Notes in Windows and thus have better control of our data.