The use of the mouse or mouse is key for millions of users in the day to day work in Windows since with it it is possible to perform various tasks such as selecting elements, moving or dragging objects to different locations, selecting to copy, cut or paste, open apps and many more tasks, a very popular current technology is the use of a wireless mouse or mouse connected by USB, which helps tidy up the workspace by not using a cable..
In Windows 10 or Windows 11 we can find some problems when using it, so if you present this error, TechnoWikis will explain the most effective way to correct the errors associated with the non-functioning of your wireless mouse. You have different options below to get a solution to my wireless mouse not working.
To stay up to date, remember to subscribe to our YouTube channel!
SUBSCRIBE ON YOUTUBE
1 How to Fix mouse when Disable Fast Launch
Fast startup is a function built into Windows with which it seeks to optimize power settings as well as power settings so that the system can boot much faster, this can influence the mouse by allowing the interaction between the signal USB and the system is more timely..
Step 1
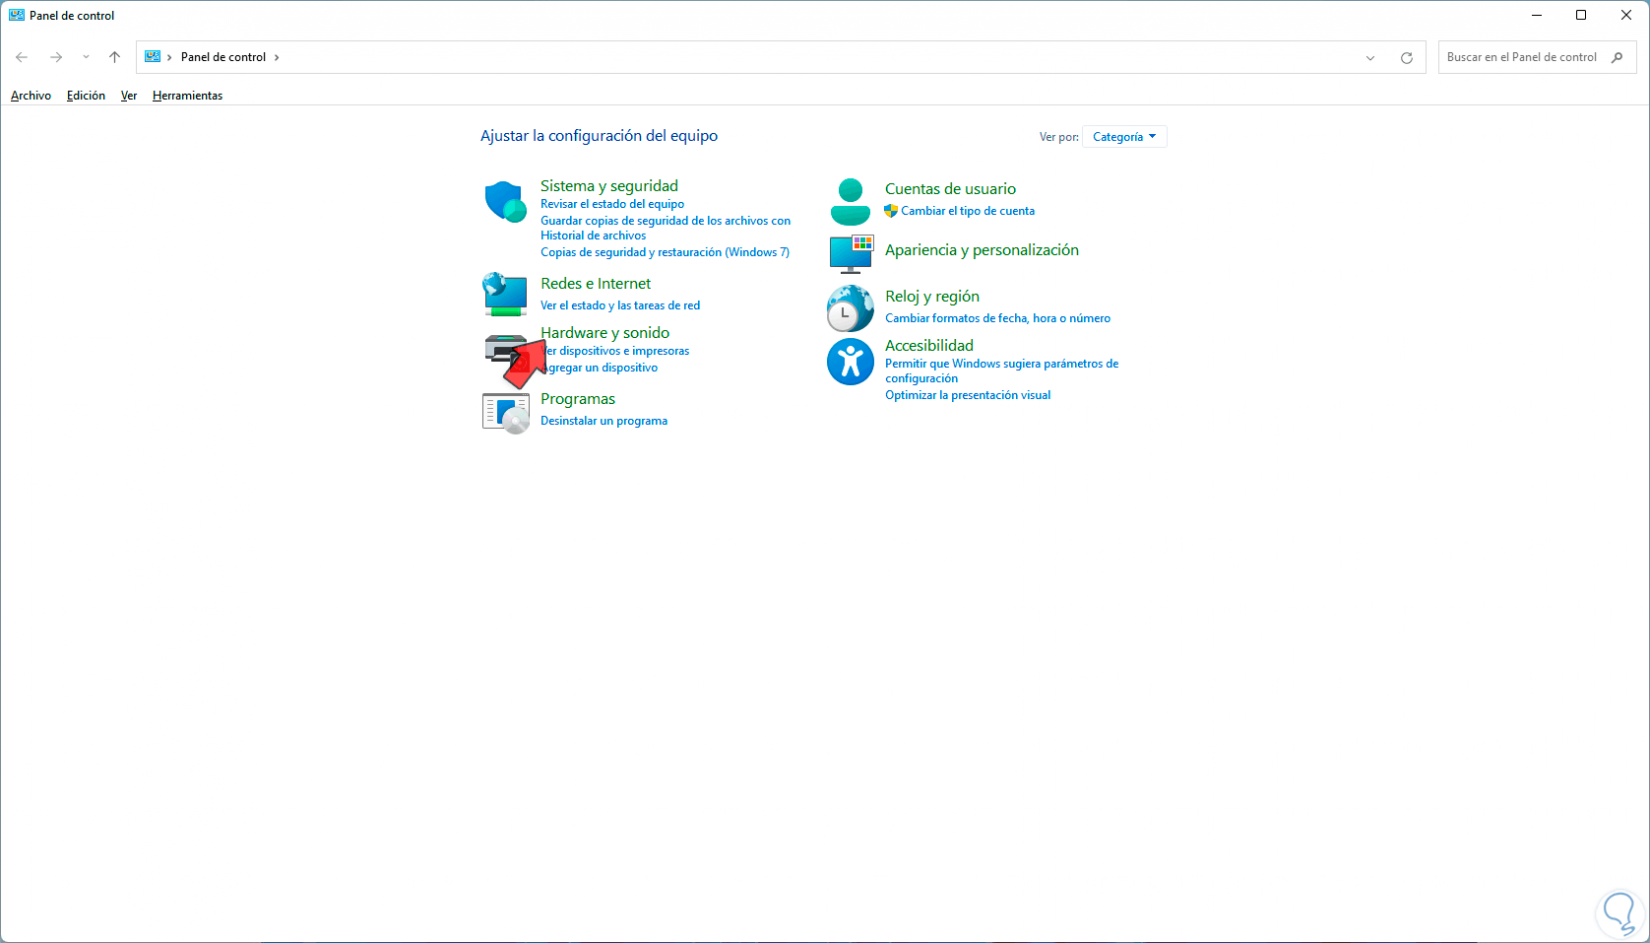
To activate this option we must open the Control Panel:
Step 2
We will click on the "Hardware and sound" line to then see the following:

Step 3
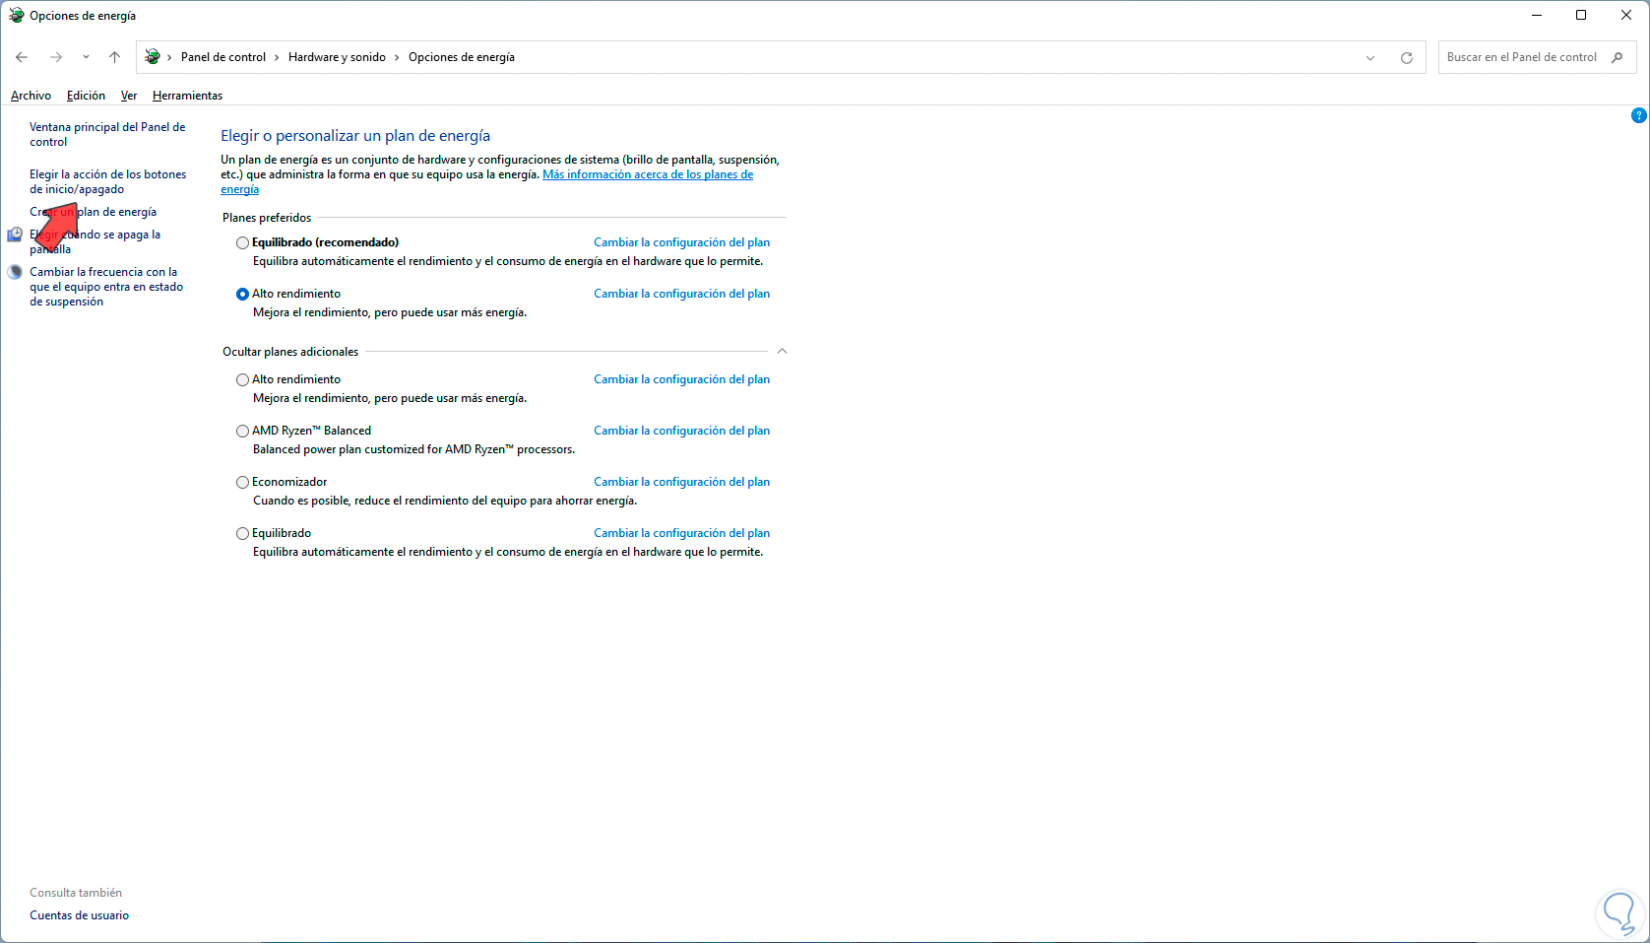
We click on "Power Options" to access the various options:
Step 4
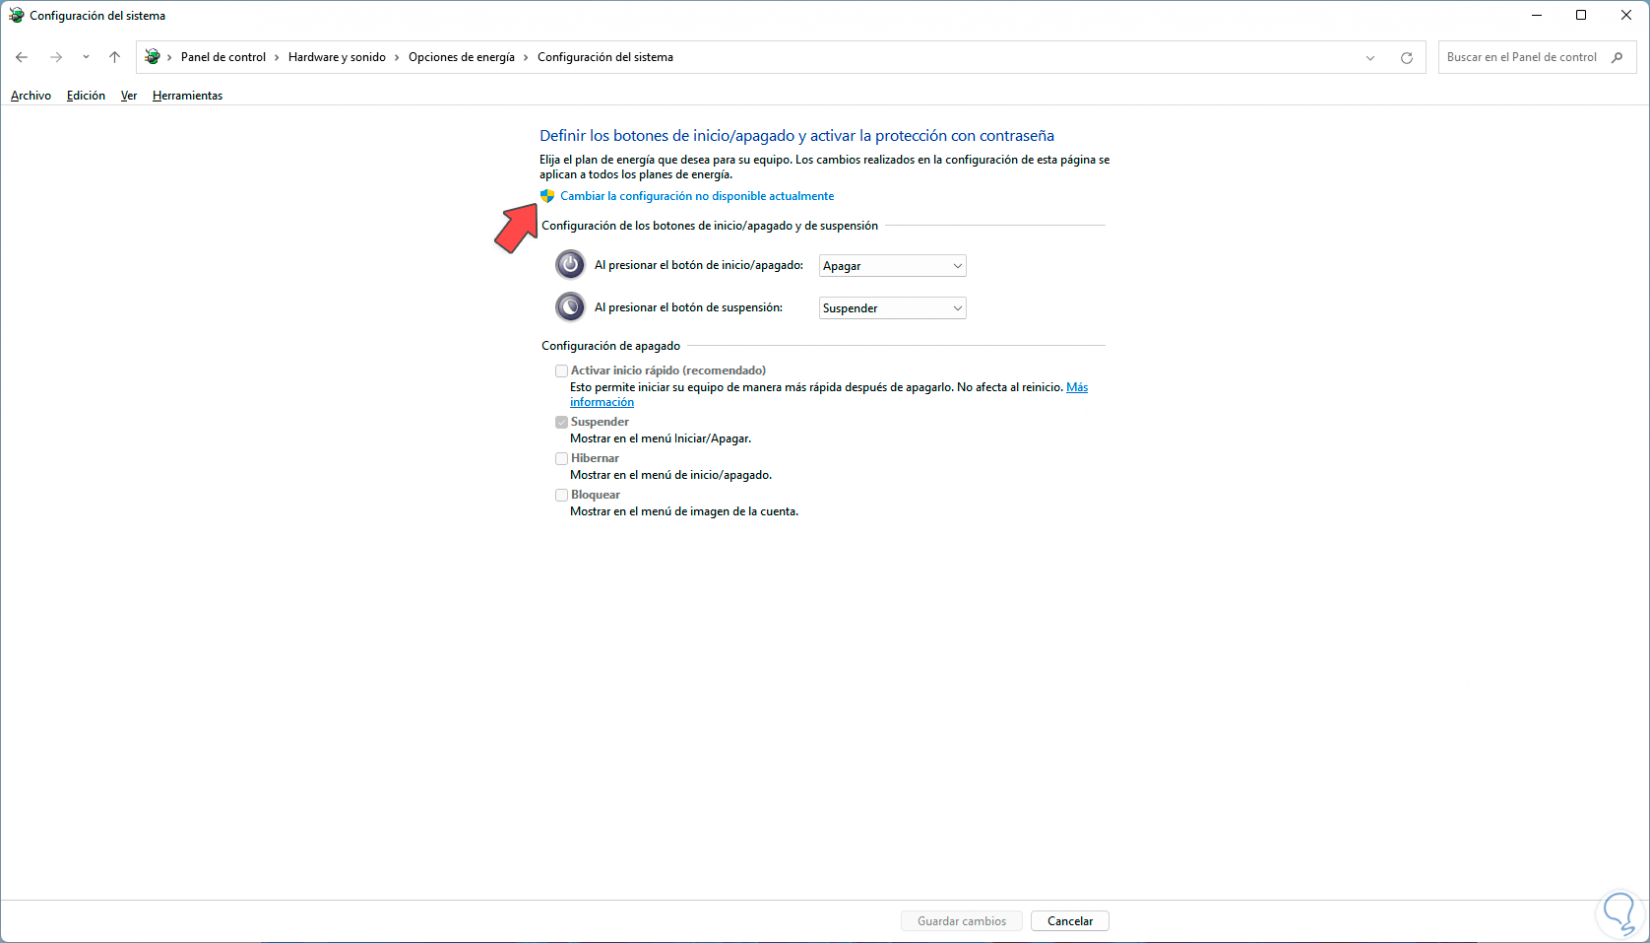
In this section we will click on the line "Choose the action of the start / shutdown buttons" and the following window will open:
step 5
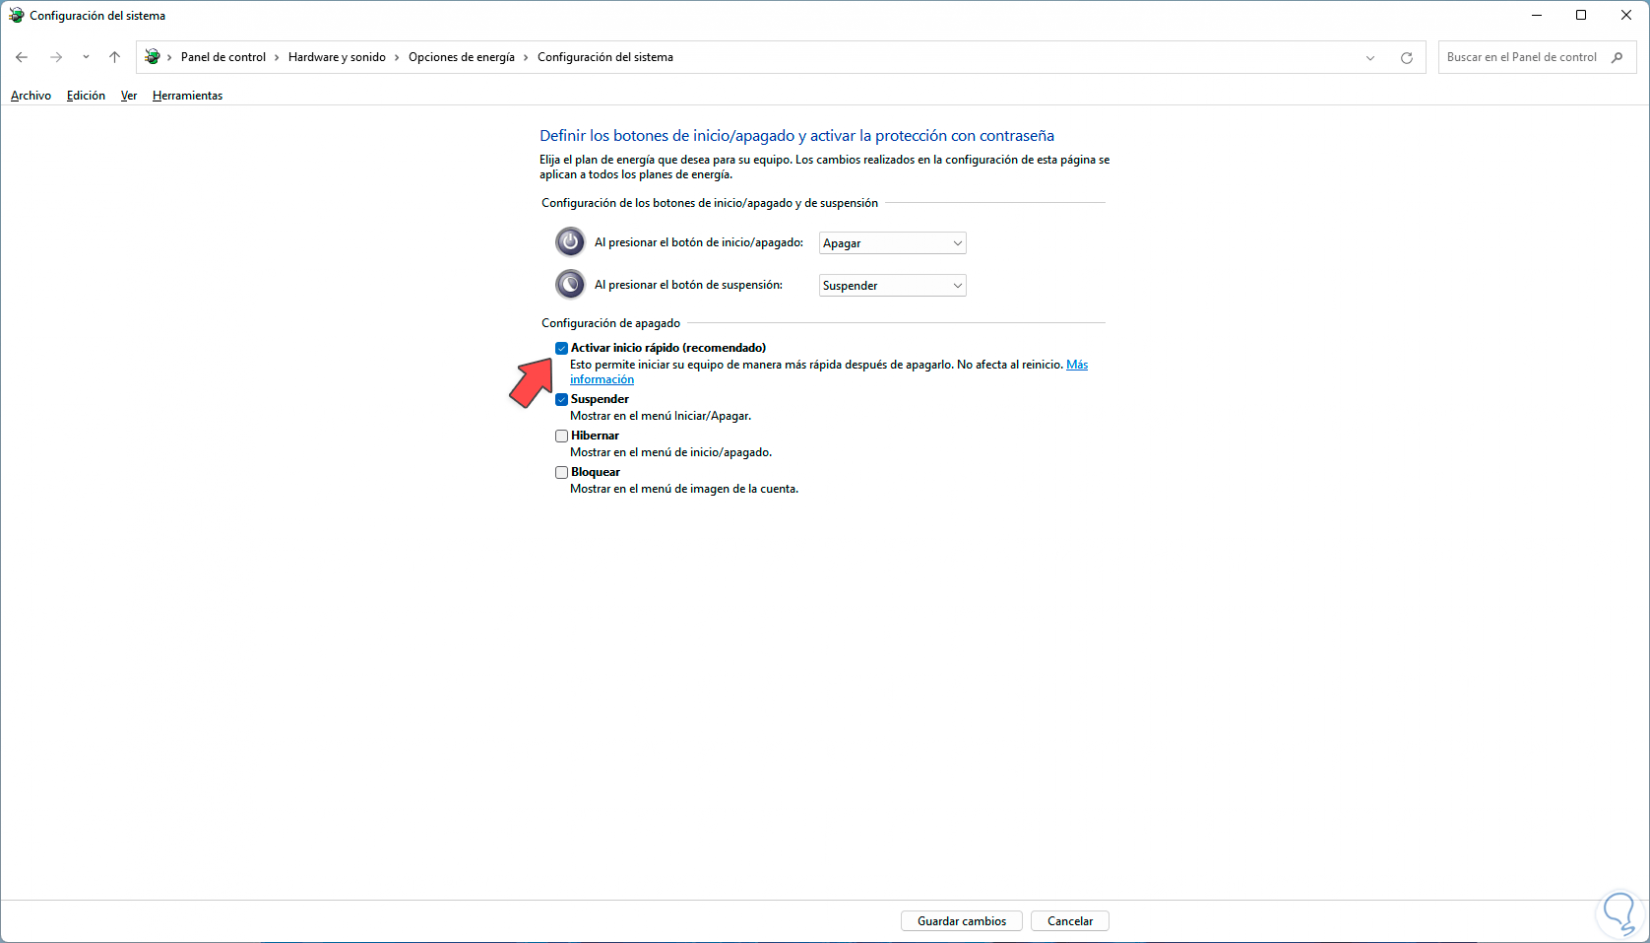
In order to make any changes, we must click on "Change currently unavailable settings" and then we will enable the "Activate fast startup" option so that the system loads faster and corrects the mouse error:
Click "Save changes" for the process to take effect.
2 How to Fix Mouse by Update Driver
Step 1
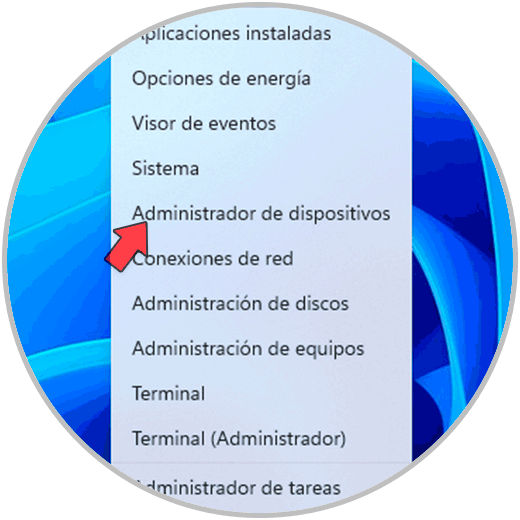
As we have mentioned many times, having an outdated driver is synonymous with multiple errors that affect the global use of the mouse, to update the mouse driver we are going to open the Device Manager:
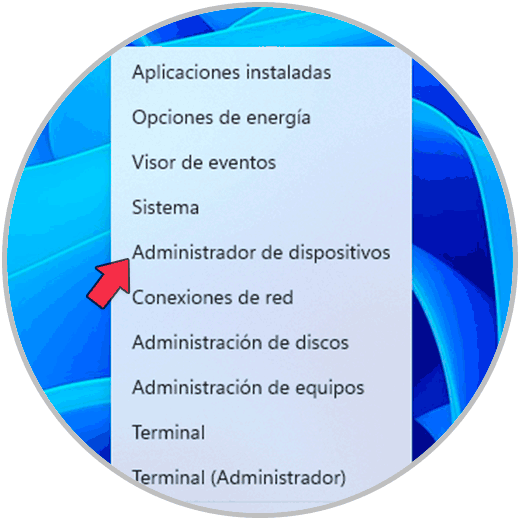
Step 2
We are going to locate the "Mouse and other pointing devices" section, there we will right-click on the mouse driver and then click on "Update driver":
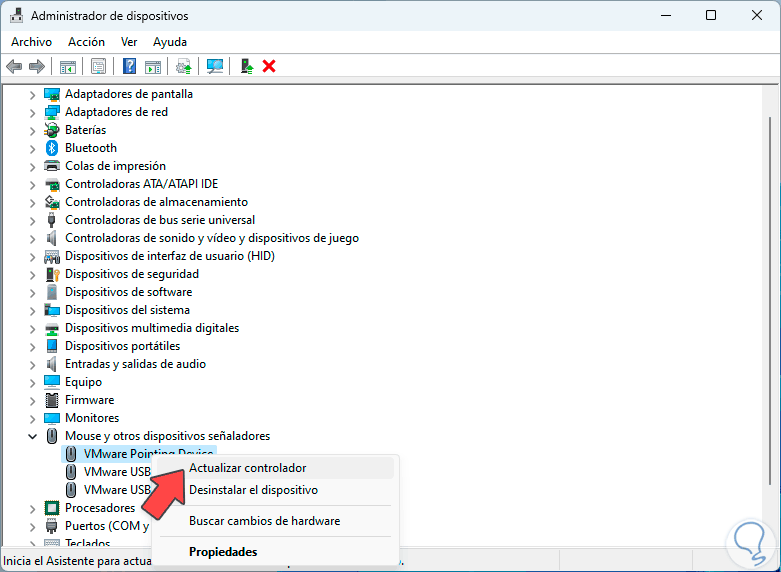
Step 3
You will see that two options are offered to use:
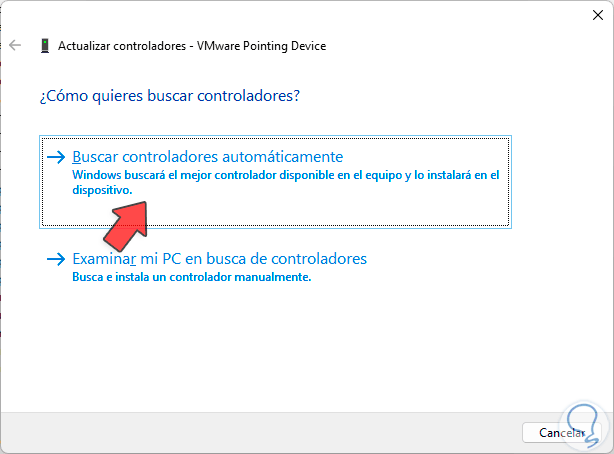
Step 4
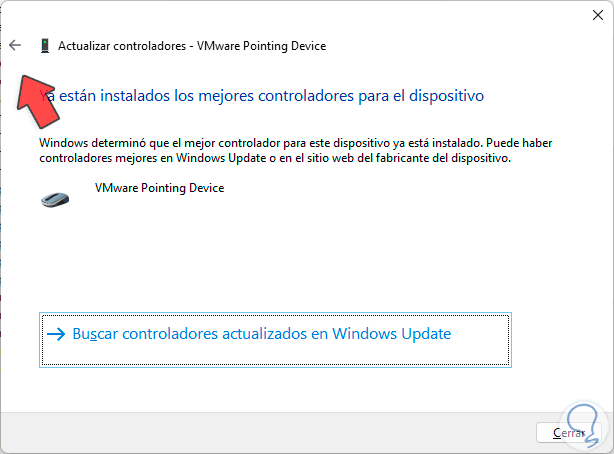
We will click on "Search for drivers automatically" and wait if there is an update:
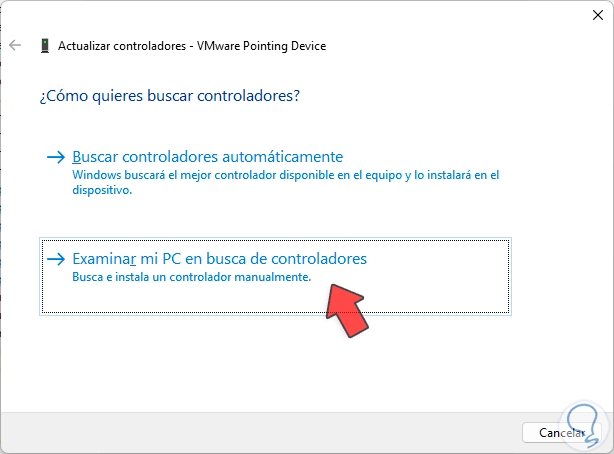
step 5
Now you are going to try the manual method, for this we must click on the back arrow and then click on the option "Browse my PC for drivers":
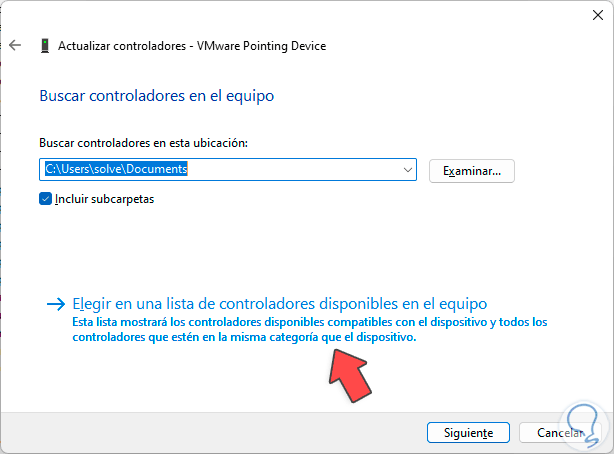
step 6
Then we click on "Choose from a list of drivers available on the computer" to search for a downloaded driver or those available by Microsoft:
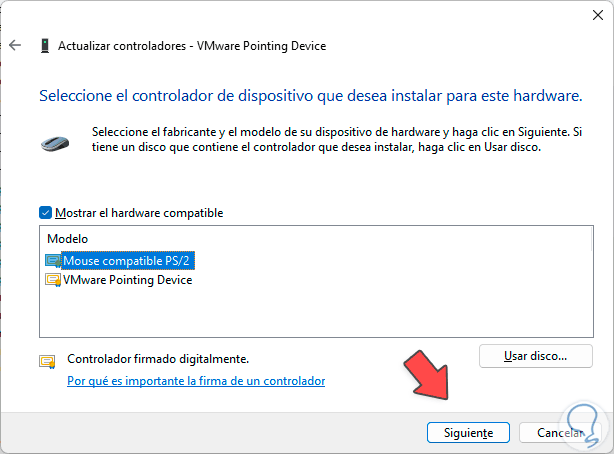
step 7
There we will select the controller that is considered suitable for the mouse:
step 8
Clicking on "Next" will perform the installation of this driver:
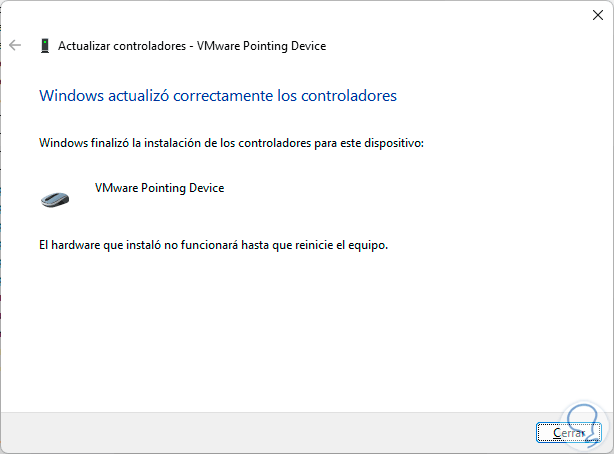
step 9
When we click "Close" we will see a message that Windows must be restarted for this change to take effect:
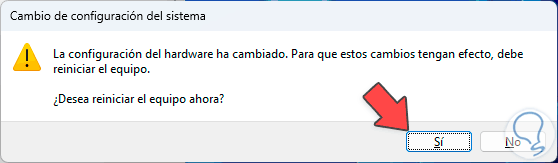
step 10
We click Yes to restart Windows:

3 How to Fix Mouse by Uninstall Driver
Step 1
The fact of uninstalling the mouse does not mean that we will be left without it, not at all, this is a natural process in Windows which allows us to automatically install the driver, we open the Device Manager:
Step 2
We will locate the "Mouse and other pointing devices" section, by clicking there we will right-click on the mouse driver and then click on "Uninstall the device":
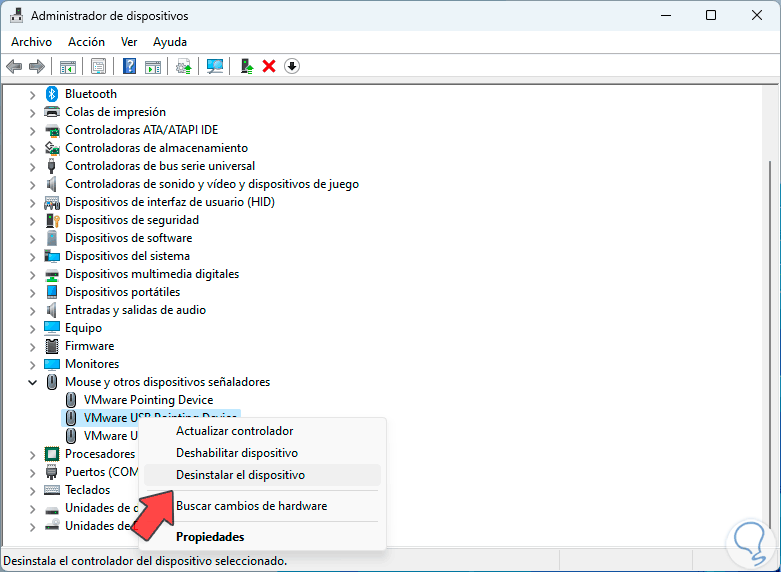
Step 3
A small window will open, in it we will click on "Uninstall":

Step 4
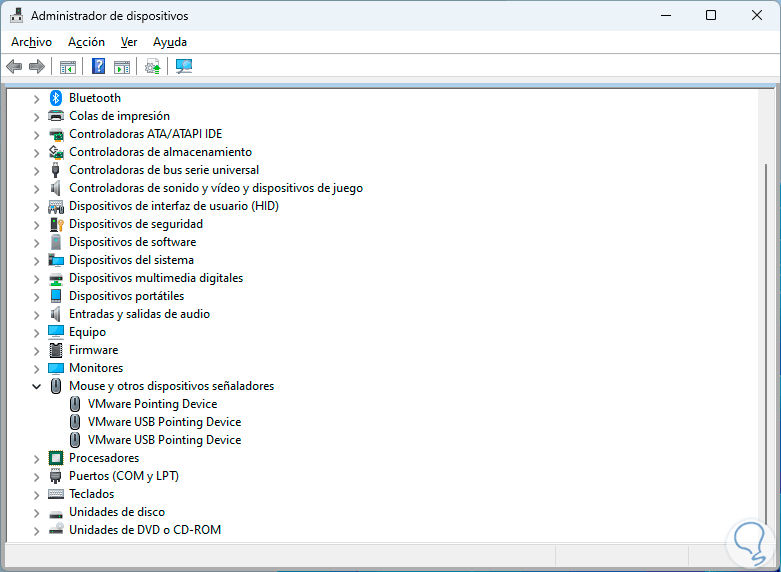
Wait for the driver uninstall process to be effective, now since we will not use the mouse, with the keyboard we will use the Control + Alt + Delete keys, in the displayed options we will use the arrow to select "Log out":
Ctrl + Alt + Delete

step 5
Press Enter to log out, the session will close and you must log in again:

step 6
When we log in we open the Device Manager again and in the "Mouse and other pointing devices" section we can see that the mouse driver has been installed automatically:
4 How to Fix mouse when configuring USB port
Step 1
In this case we are looking to configure the power of the general USB 3.0 port which controls all the ports of the PC, and this is because the wireless mouse is connected directly through a USB port, we open the Device Manager:

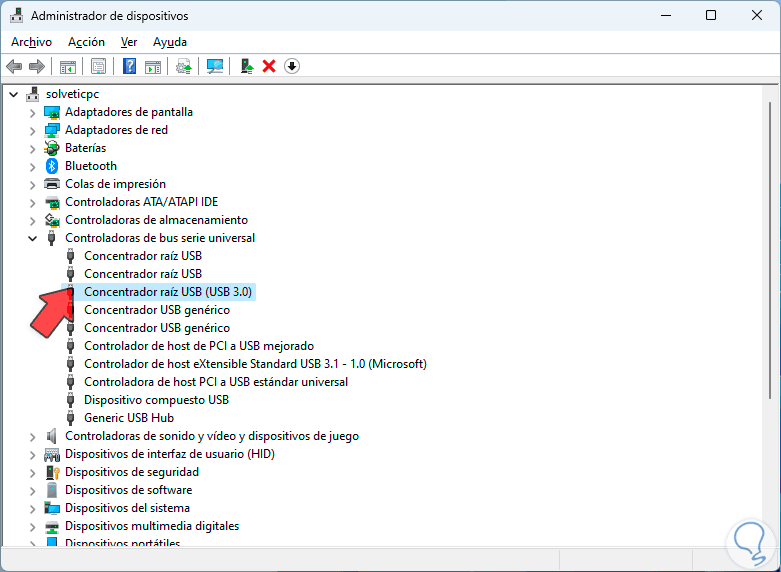
Step 2
In this window we will click on the "Universal serial bus controllers" section, there we will see multiple options, we double click on the "USB root hub (USB 3.0)" option to manage it:
Step 3
In the window that opens you must click on the "Power Management" tab:
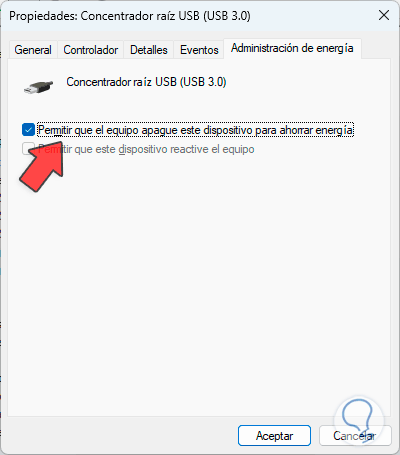
Step 4
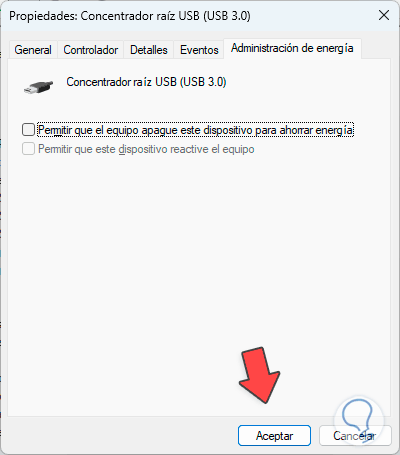
So that the mouse does not present faults, we deactivate the box called "Allow the computer to turn off this device to save energy":
There we will prevent the PC from turning off the USB connection to save energy, leaving the wireless mouse without activity.
5 How to Fix mouse when installing updates
Having an outdated operating system is a guarantee of various general errors, including mouse errors.
Step 1
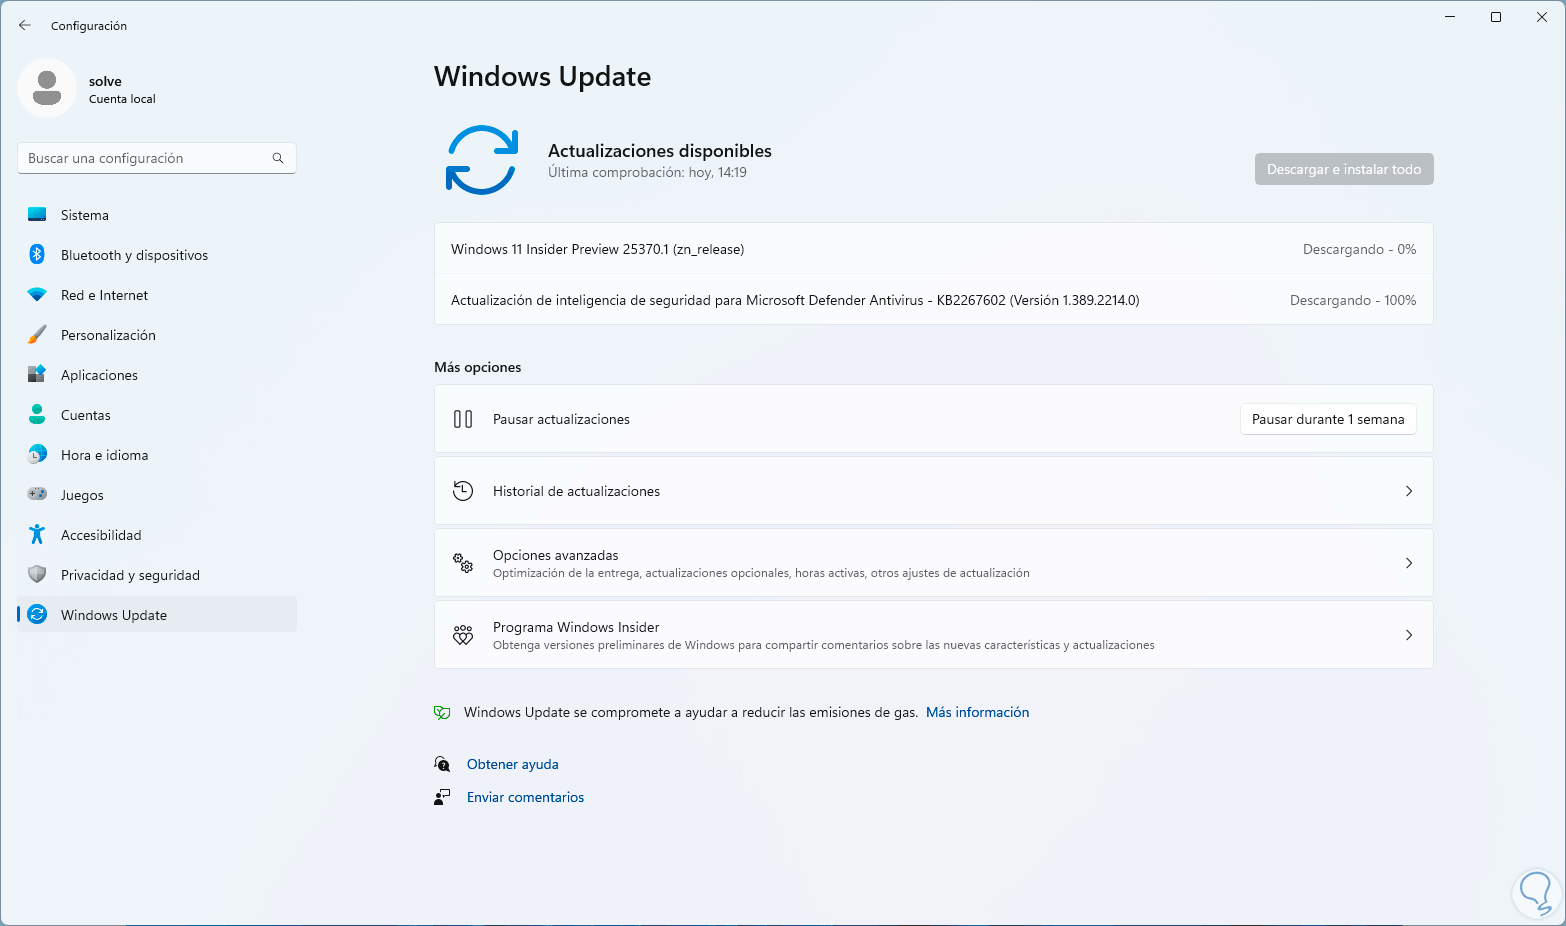
To update Windows 11 we will go to "Start - Settings - Windows Update:
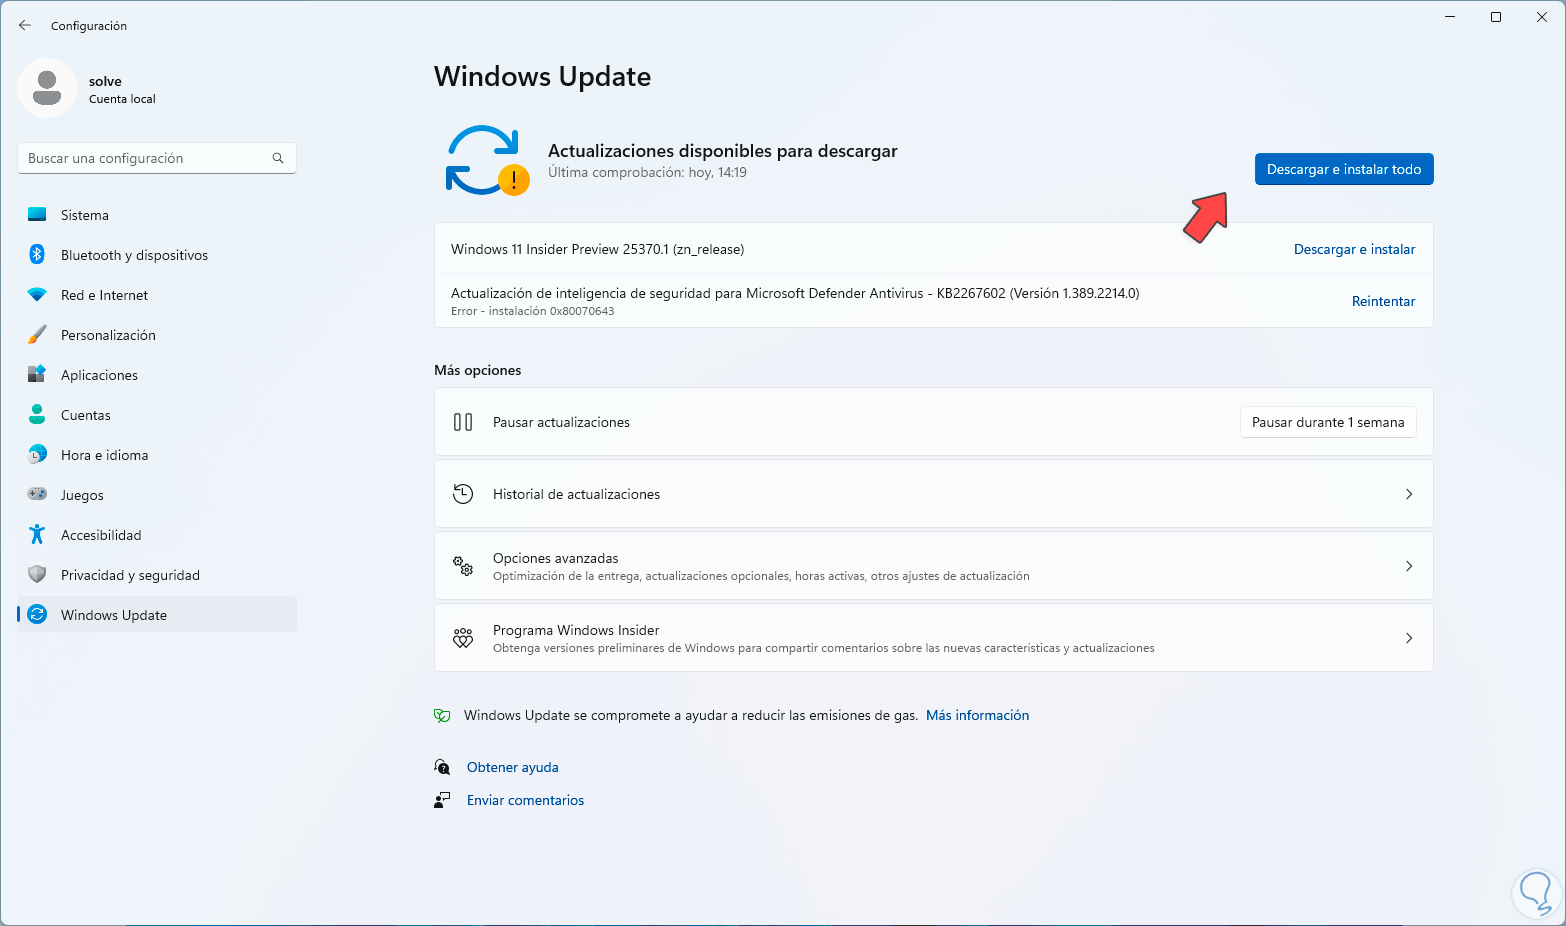
Step 2
There it is possible to see if any of the updates are directly related to the mouse:
6 How to Fix mouse when configuring services
Step 1
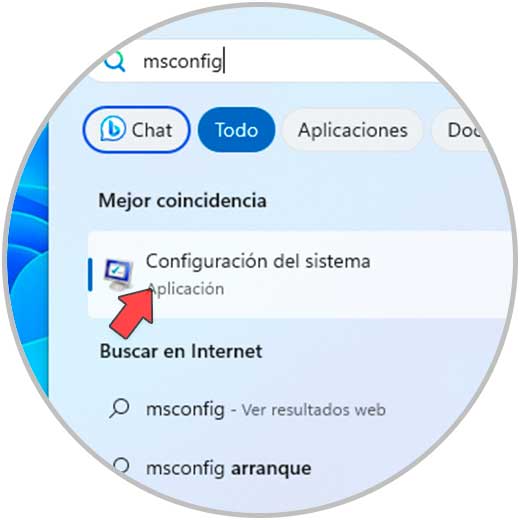
Finally, it is possible to check if the wireless mouse error is being generated by a background service of a third-party app or non-essential, to rule out this option in the Start menu we will look for the word "msconfig":
Step 2
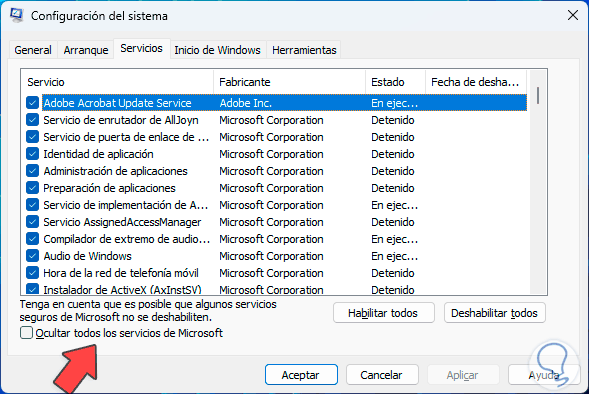
We open the utility, then we will go to the "Services" tab:
Step 3
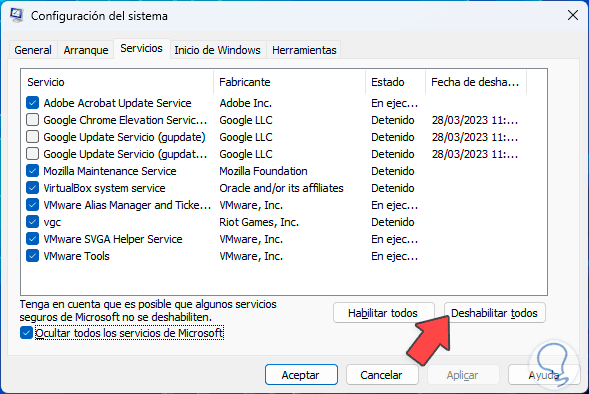
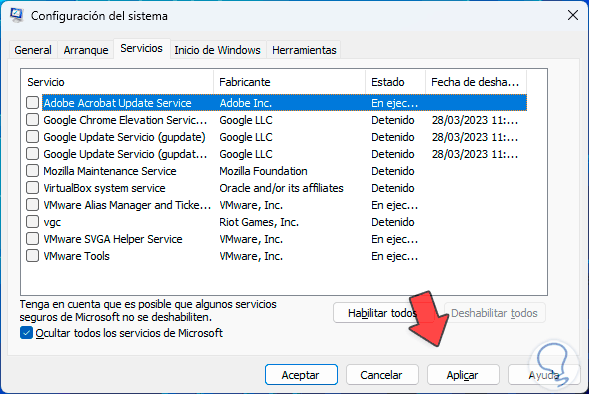
Activate the box "Hide all Microsoft services" to avoid affecting some essential Windows:
Step 4
After this we will click on "Disable all":
step 5
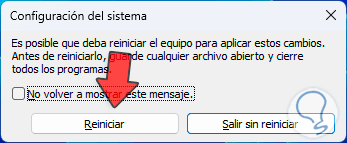
When we click "Apply" and "OK" we will see this message:
step 6
To save the changes it will be necessary to restart Windows:
With these steps, our mouse in Windows 11 or 10 will be working normally.