Most of us store a lot of information on the PC , since it has become the main storage space both on a personal and professional level for most users. Thanks to computers, we have the ability to centralize all this data, with easy access and the ability to share all of them whenever necessary..
For security, when we move away from the PC it is normal for us to block the system or to close the session to prevent other people from accessing the content and our files , to close the session (which requires entering the password again), generally We go to the start menu and there we close the session from the shutdown options.
But to simplify all this, TechnoWikis will explain how to create a shortcut to log out with a double click. Below you will see the steps you must follow to carry out this process on your Windows 10 PC in a detailed and simple way..
To stay up to date, remember to subscribe to our YouTube channel! SUBSCRIBE
How to create shortcut to log out of Windows 10
Step 1
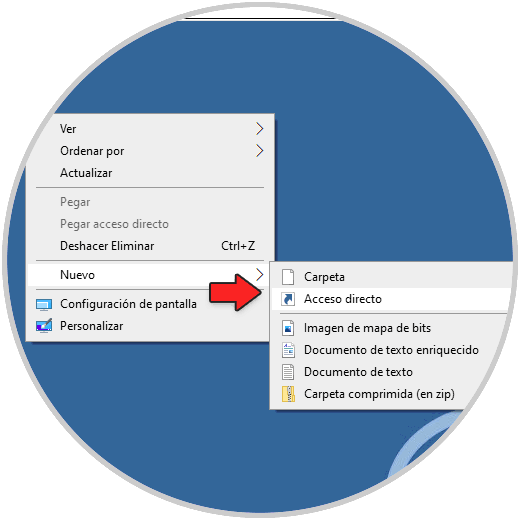
The first thing to do will be to right-click on the desktop and there select the option "New - Shortcut":
Step 2
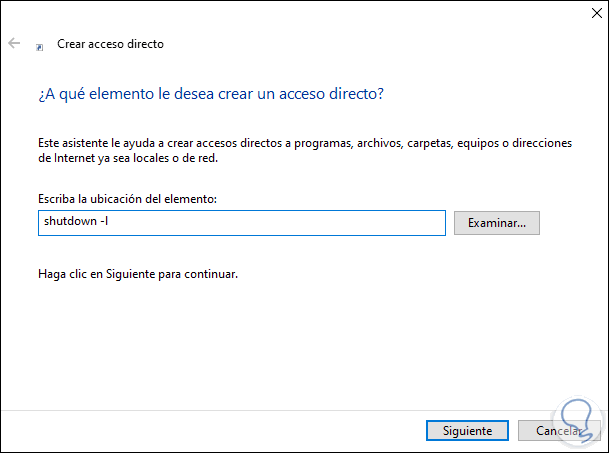
In the pop-up window we enter "shutdown -l":
Step 3
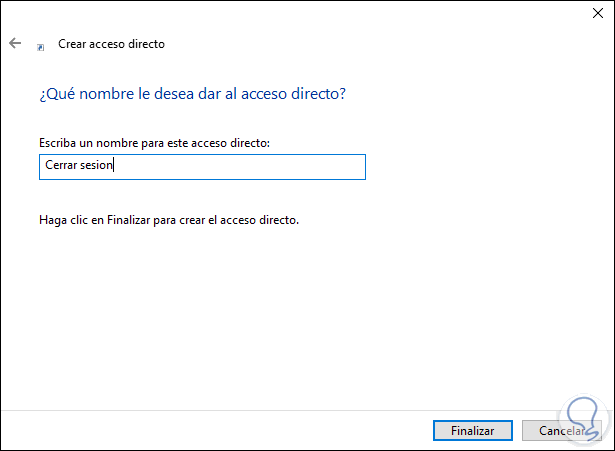
We click Next and assign a name and finally apply the changes:
Step 4
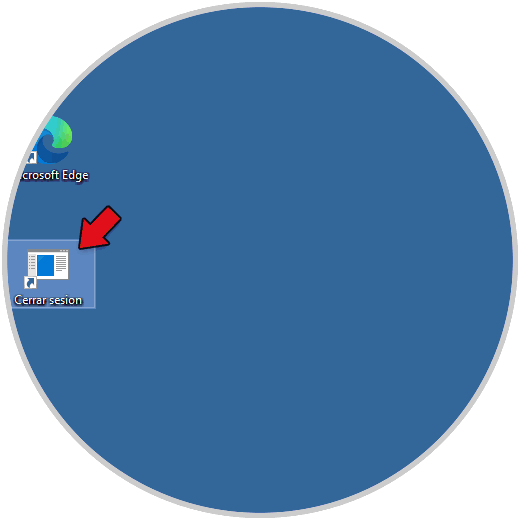
We will see the shortcut created on the desktop:
Step 5
We double click on it to execute the access to close the session in Windows 10:

Step 6
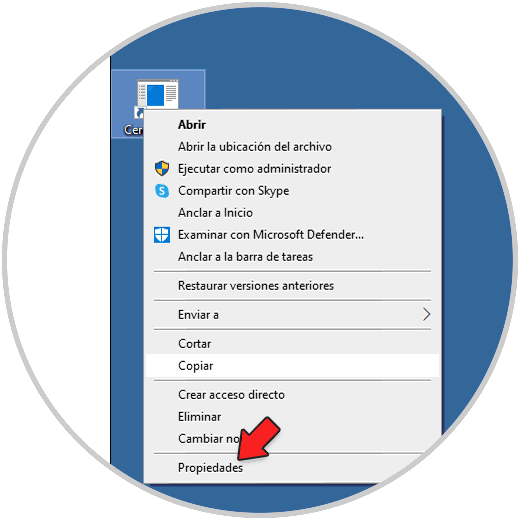
When logging in again, we right-click on the shortcut and select Properties:
Step 7
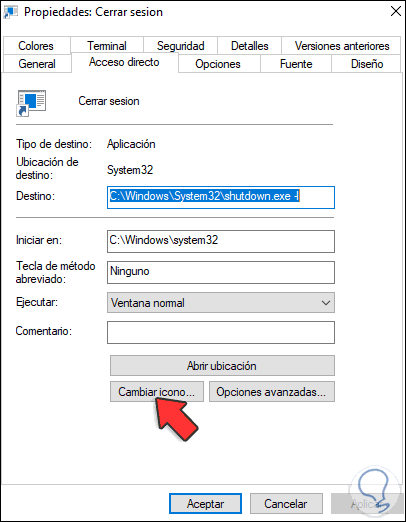
The following window will be displayed:
Step 8
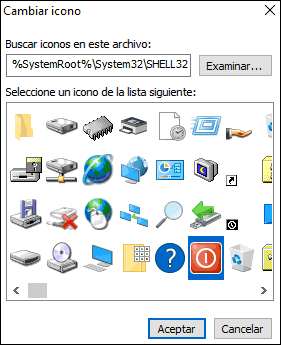
We click on "Change icon" and in the next window we select the new icon:
Step 9
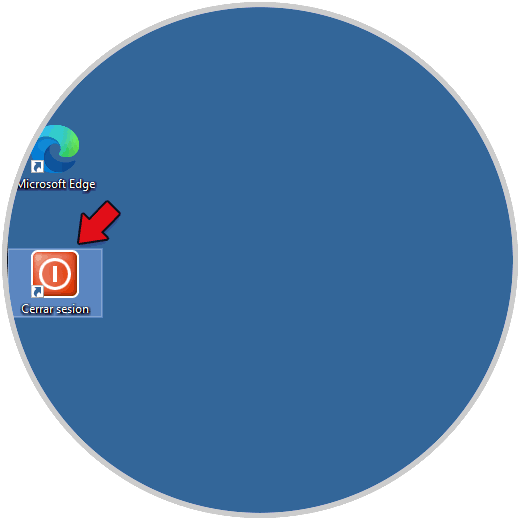
Apply the changes:
Step 10
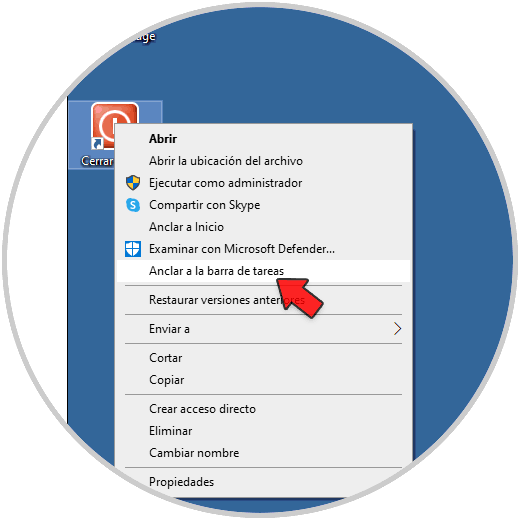
Now we right-click on the shortcut and select "Pin to taskbar":
Step 11
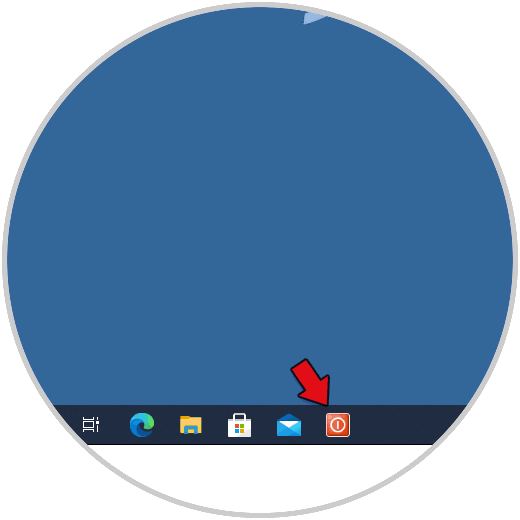
This will create the link in the taskbar for logging out:
It's that simple to create a shortcut to facilitate logging out of Windows 10. In this way you can turn off your computer directly whenever you need it, by clicking on this access.