One of the essential components in Windows 10 is the user since without it there would be no way to access the system, configure applications and carry out the routine tasks of the system worse something that we should know in detail is that Windows 10 provides us with different types of user , these are:
Default account
These are default local user accounts which are integrated into the system and are created at the time of the installation of Windows 10, these accounts cannot be deleted and do not offer access to network resources.
These default local user accounts have been integrated to facilitate the administration of access to local server resources based on the permissions assigned to the account and these accounts are hosted in the Users folder.
Administrator account
It is a default local administrator account which is created as a user account for the operating system administrator with special permissions, this is the first account created during the installation of Windows 10 and is of great responsibility and care since She has full control of the files, directories, services and other resources available locally on the computer and this is an account that cannot be deleted or blocked but does allow her name to be edited or disabled.
To take into account something key which is our approach today, in Windows 10 it has been established that the integrated administrator account be disabled allowing to create another local account that is part of the Administrators group, as part of this group, it will be possible to execute applications with high permissions through UAC..
Guest Account
The guest account will be disabled by default in the installation of Windows 10 and it is an account that allows you to temporarily log in to the computer with limited user rights, your password will be blank and it is not advisable to use it for security reasons.
Local account
Currently Windows 10 allows us to create an online account which synchronizes with our Outlook or Hotmail account allowing the mobility of it, this allows certain changes in the system, but with high permissions.
Administrator user benefits
The Administrator user in Windows 10 is able to:
- Obtain total control over the equipment.
- Create, edit or delete users
- Edit system values ​​as records and files
Today TechnoWikis will explain how to log in with the Administrator user which is disabled, this is checked because on the login screen you will not see the available Administrator user:
To keep up, remember to subscribe to our YouTube channel! SUBSCRIBE
1. Enable the Administrator user with the management tool in Windows 10
Step 1
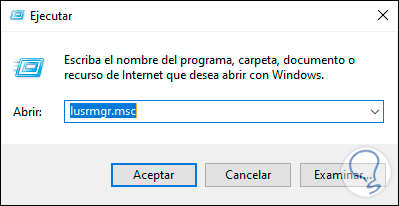
The first option to use is to access the administrator of users and local groups, for this we will use the following keys and execute the following line:
+ R
lusrmgr.msc
Step 2
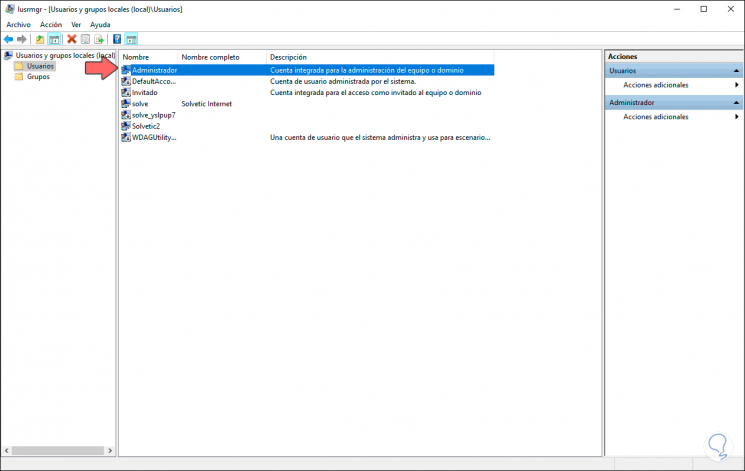
In the window that appears, we will go to the "Users" folder and place the "Administrator" user in the central panel:
Step 3
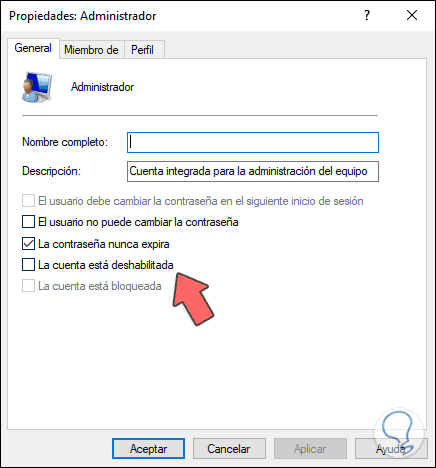
We double-click on this user and in the window displayed we must deactivate the “Account is disabled†box. Click on Apply and Accept to save the changes and there it is possible to prevent the password from expiring or the user cannot edit it.
2. Enable the Administrator user with Group Policies in Windows 10
Step 1
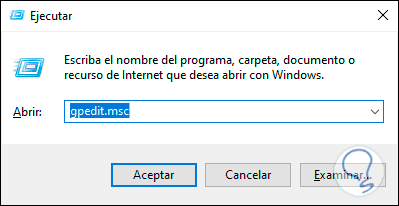
This is an option that applies in the Pro and Enterprise editions of Windows 10 and for its use we must combine the following keys and execute the gpedit.msc command:
+ R
Gpedit.msc
Step 2
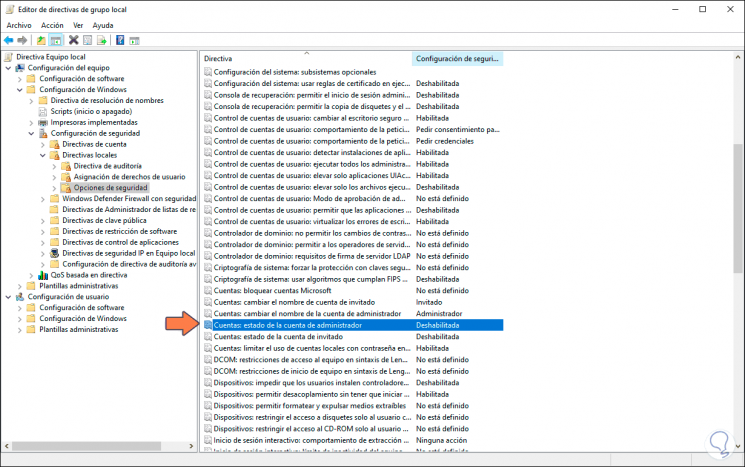
Press Enter and in the window we will go to the following route:
Step 3
In the central panel we will locate the policy called “Accounts: administrator account statusâ€:
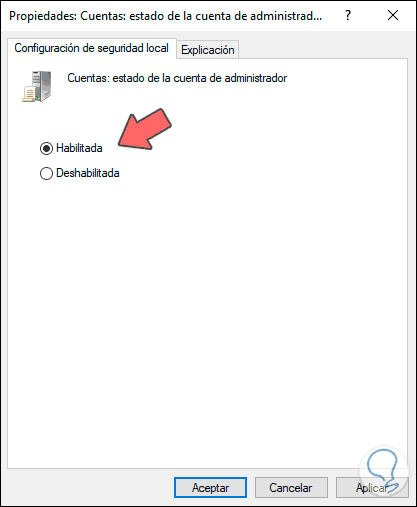
Step 4
We double click on it or right click / Properties and in the displayed window we activate the “Enabled†box:
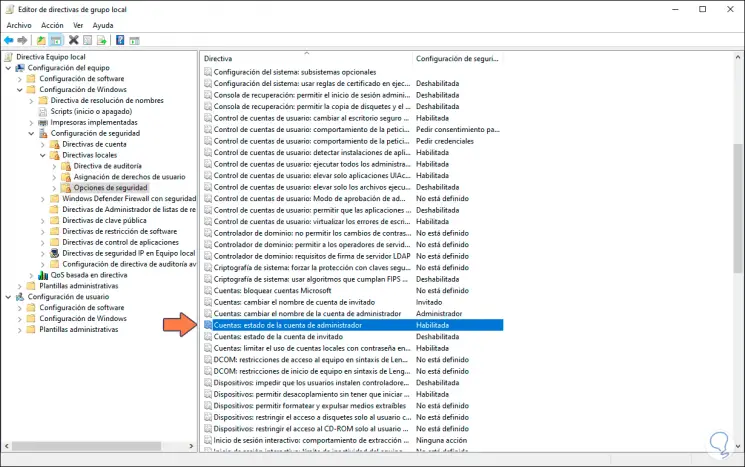
Step 5
Click on Apply and Accept to save the changes and we will notice that the Administrator account has become active:
3. Enable the Administrator user with CMD commands in Windows 10
CMD or the command prompt is another of the options with which we can activate or not the user Administrator integrated in Windows 10, for this case we must access the command prompt as administrators and there execute the following:
Step 1
If we want to enable the Administrator user, we execute the following:
net user administrator / active: yes

Step 2
If we want to disable it, we execute:
net user administrator / active: no
Note
In case your system is in English you must execute the following:
net user administrator / active: yes net user administrator / active: no
Step 3
After this we can assign a password to the administrator user by executing the following:
net user administrator *
4. Create a local account with Administrator permissions in Windows 10
Step 1
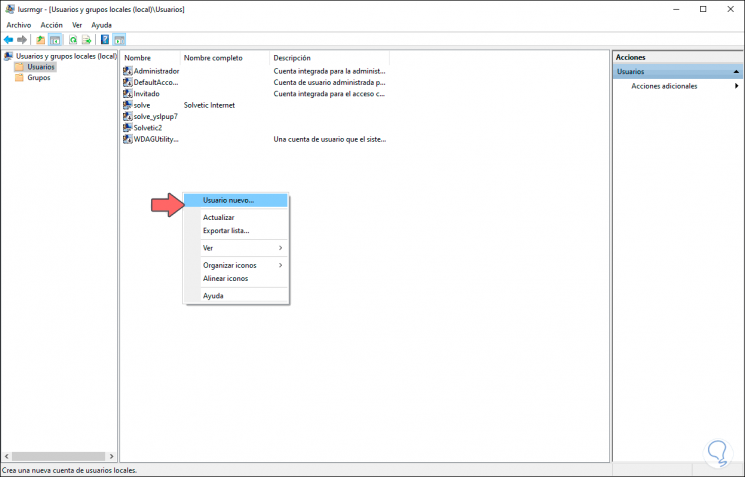
This allows us to create a local account by assigning the Administrators group for permission issues, for this we again execute the lusrmgr.msc command and in the window we will go to “Users†and there we right click somewhere free and select “User new":
one
Step 2
We proceed to enter account details such as names and password:
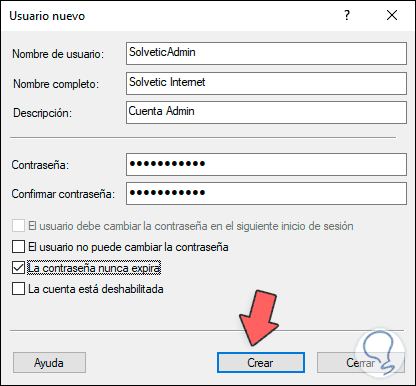
Step 3
We click on “Create†and then we will right click on the new user and select “Propertiesâ€:
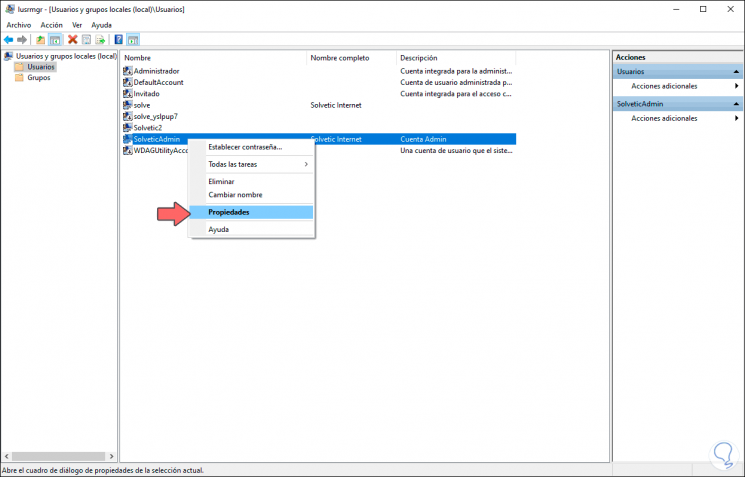
Step 4
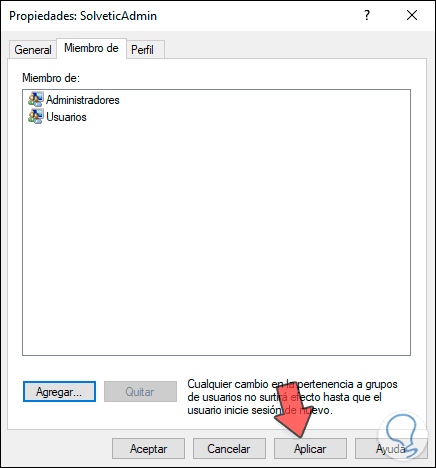
In the displayed window we will go to the “Member of†tab where we will see the following:
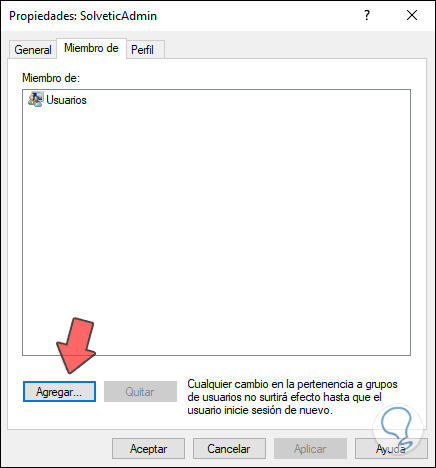
Step 5
We click on "Add" and in the pop-up window enter "administrators" and click on "Check names" to associate the group "Administrators":
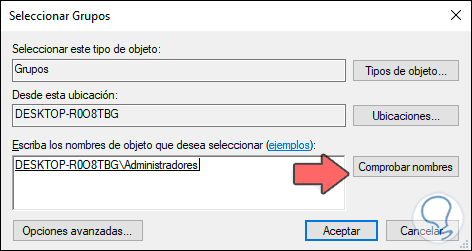
Step 6
Click on Accept and we will see that the group has been integrated. We click Apply and Accept to save the changes.
Note
With this same method we can change a local account in administrator.
5. Create or change a local account to administrator from Settings in Windows 10
Step 1
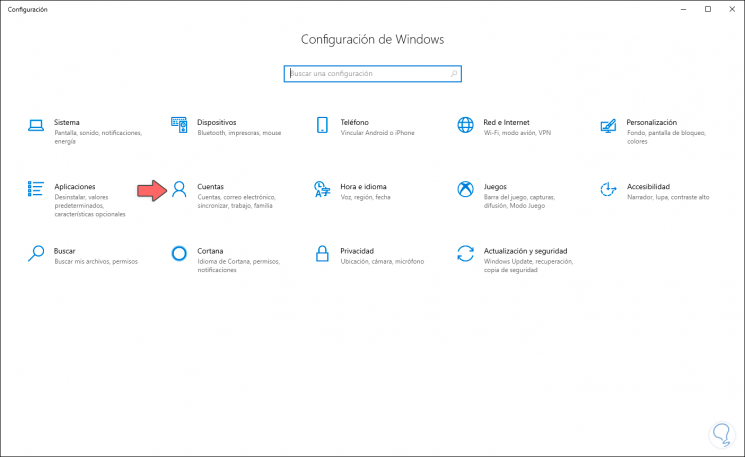
The Configuration utility provides us with the option to create an administrator account or modify the permissions of a local account, for this we will go to the Start / Configuration menu:
Step 2
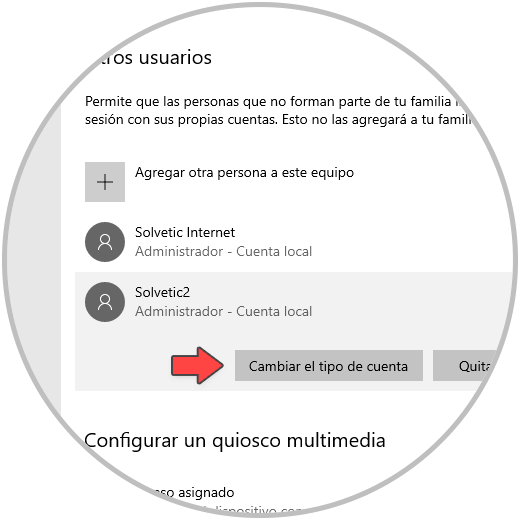
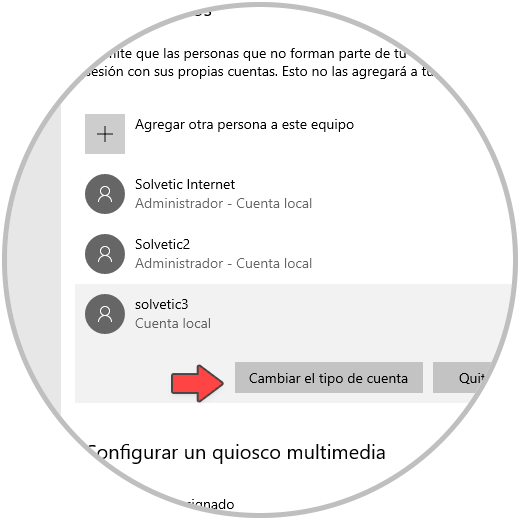
There we select the “Accounts†category and in the open window we will go to the “Family and other users†section:

Step 3
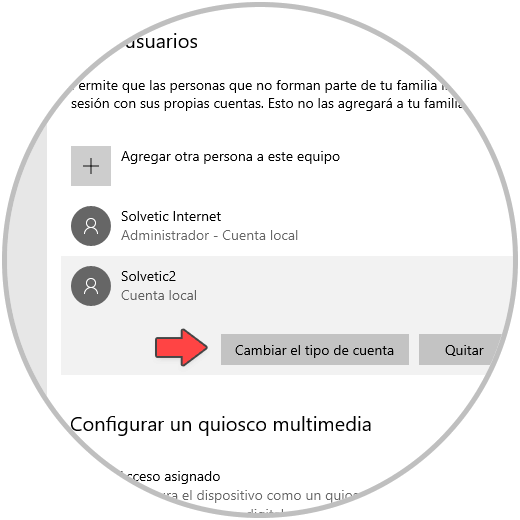
To change a local account to administrator select the account and click on "Change the type of account":
Step 4
In the pop-up window we select "Administrator":
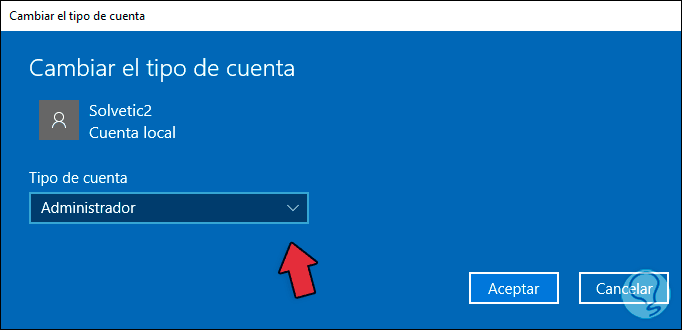
Step 5
We click on Accept and we will see that this account has been updated:
Step 6
Now, to create a new account we click on “Add another person to this team†and in the wizard we select “I don't have the login data of this personâ€:
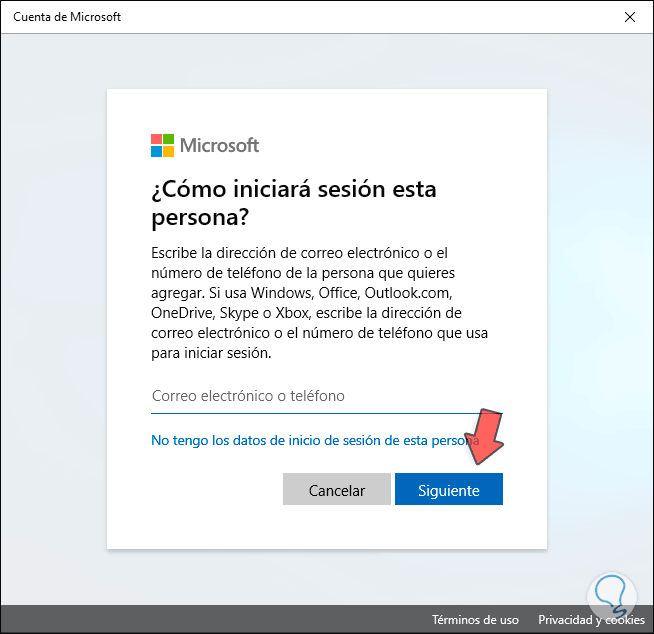
Step 7
Then we select “Add a user without a Microsoft accountâ€:
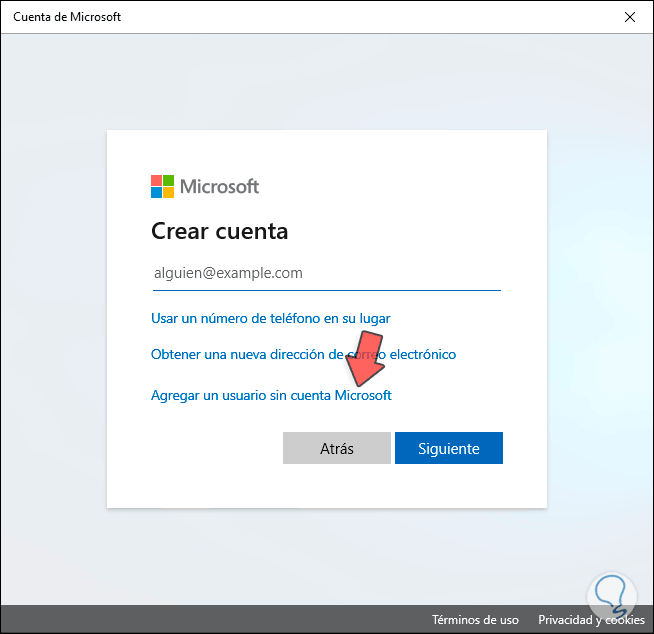
Step 8
We proceed to enter account name, password and security questions:
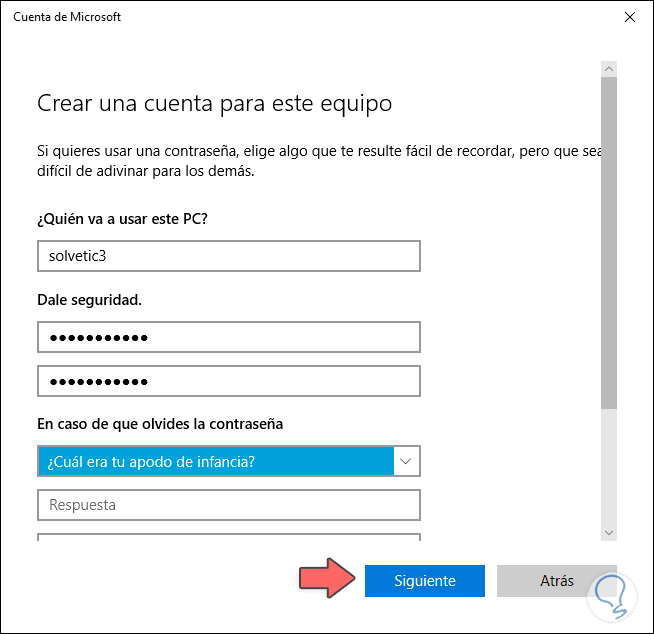
Step 9
Click Next and this account will be created by default as a local account. There we must select the account and change the type of it as we have seen.
Step 10
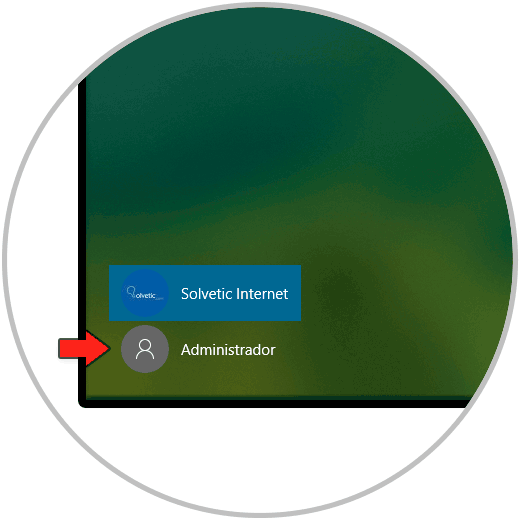
The objective of each of these steps is that when we are on the login screen we can access with this user Administrator:
Step 11
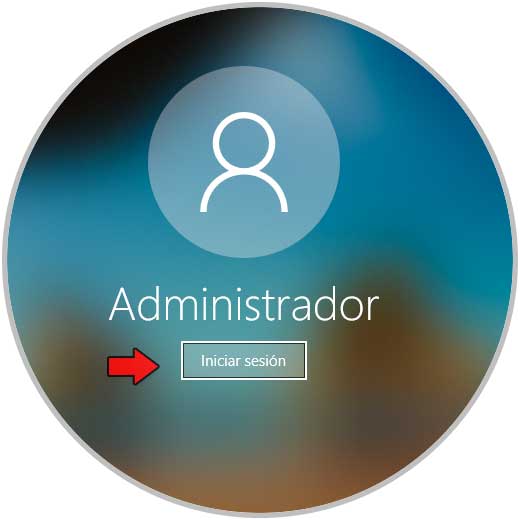
By selecting it we can log in automatically or with a password if we have assigned it:
Step 12
Profile loading starts:
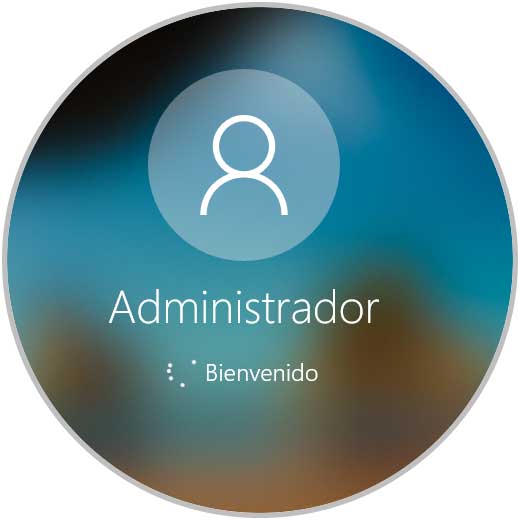
Step 13
Being the first use of this user Windows 10 must complete the entire configuration process:

Step 14
Once this is finished we have accessed as admin users:
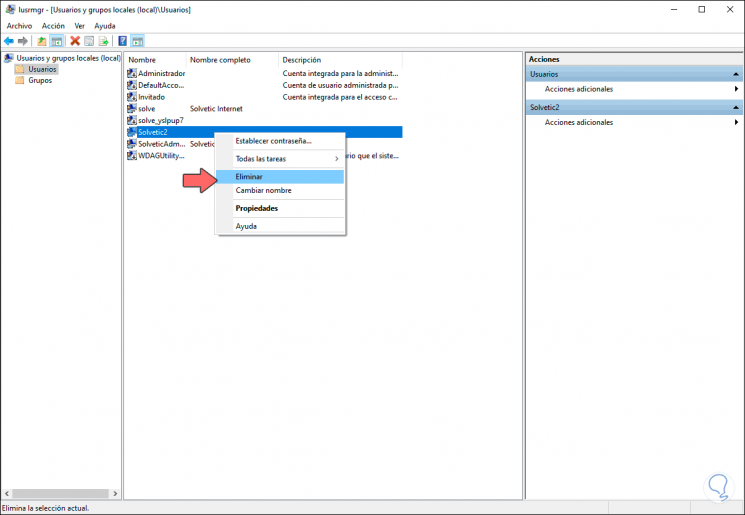
6. Delete an Administrator account in Windows 10
Step 1
We have mentioned at the beginning that the integrated Administrator account cannot be deleted from the system, but if we can remove the local accounts that have been defined as administrators, for this we execute the lusrmgr.msc command again and in the Users section we right click on the desired user and select "Delete":
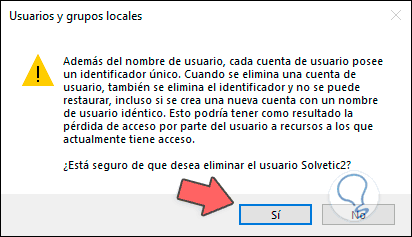
Step 2
The following message will be displayed. We click Yes to complete the process.
You have seen the different ways that Windows 10 offers to activate the Administrator user and log in with him always with the responsibility that this merits.