Security in Windows 10 is one of the most important pillars and on which we work every day since both user information and system configuration are at constant risk, for this reason Windows 10 has added the Windows Security function with which integrates updated antivirus protection to preserve privacy at all times..
The device with Windows 10 and with the active function, will be actively protected from the moment the Windows 10 system starts as this protection is in charge of constantly looking for malware, viruses and security threats that put everything on the computer at risk. Additionally, updates are downloaded automatically so that you are always one step ahead of threats.
Real time protection
Real-time protection covers aspects such as
- Protection against threats and viruses which monitors device threats, performs analysis and accesses updates to detect the latest threats.
- Network and firewall protection which manages the firewall settings to validate and analyze what happens with networks and Internet connections in Windows 10.
- Account protection which has access to the login and account configuration options.
- Browser and application control which is tasked with updating Microsoft Defender SmartScreen settings to protect the computer from potentially dangerous applications, files, sites and downloads.
- Device Security which analyzes built-in security options to protect the device against malicious software attacks.
- Family Options which has been created to track the activity of family members online and the devices in our home.
- Performance and device status with which it is possible to view the status information of the device performance.
At times it may happen that due to administration issues we want to disable real-time protection, especially when you want to install some software that is detected as malicious even though it is not. TechnoWikis will explain how to disable this real-time protection in Windows 10..
How to disable Real-time Protection in Windows 10
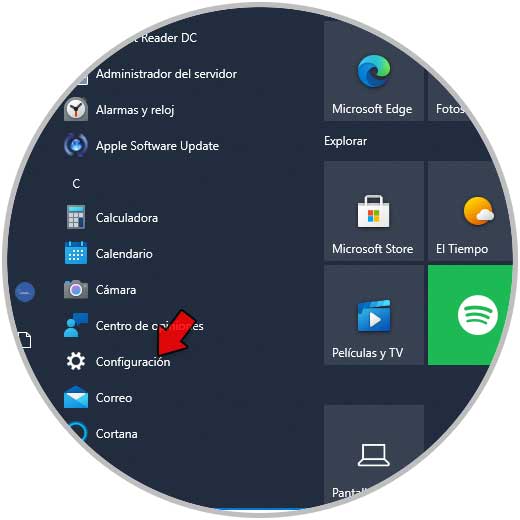
Step 1
Let's go to "Start - Settings":
Step 2
Then we go to "Update and security - Windows Security"
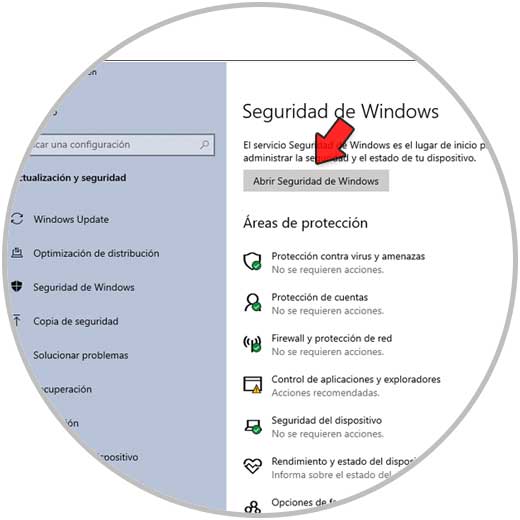
Step 3
We click on "Open Windows Security" and then we go to the "Virus and threat protection" section, we will see this:
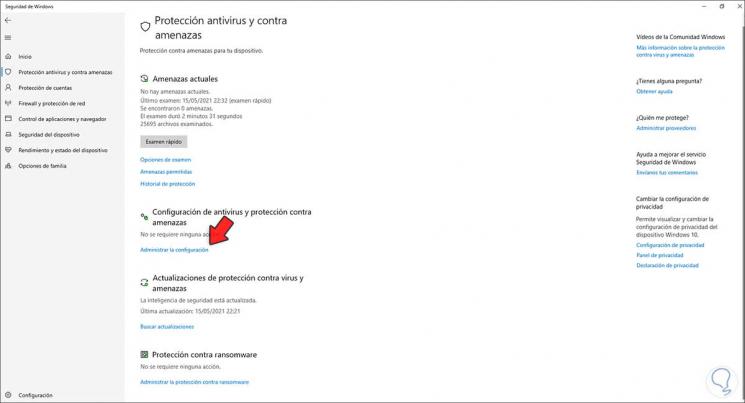
Step 4
We click on "Manage settings":
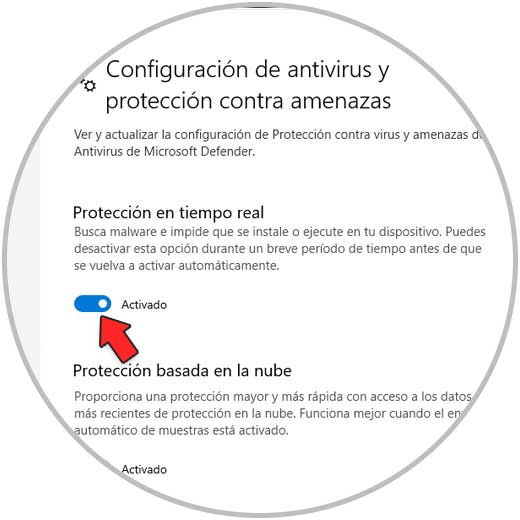
Step 5
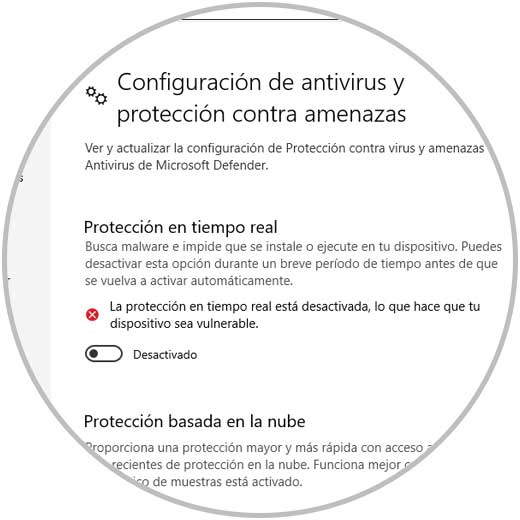
We deactivate the "Real-time protection" switch:
Step 6
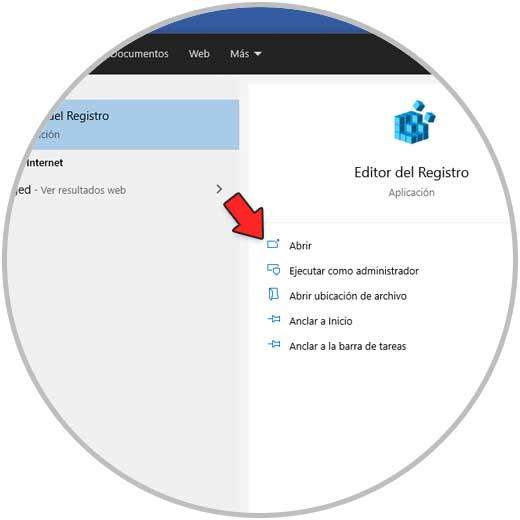
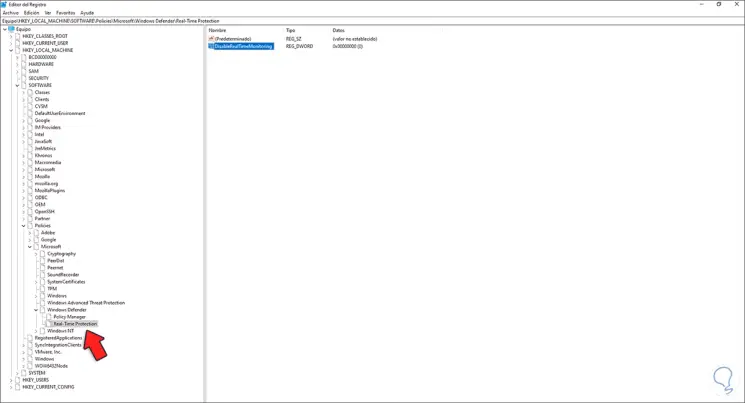
Now, to make the real-time protection deactivation permanent, we access the Registry Editor from Start:
Step 7
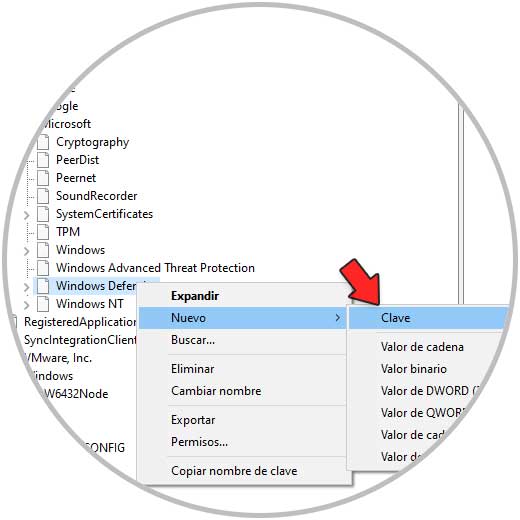
There we go to the route:
HKEY_LOCAL_MACHINE \ SOFTWARE \ Policies \ Microsoft \ Windows Defender
We right click on Windows Defender and select "New - Key":
Step 8
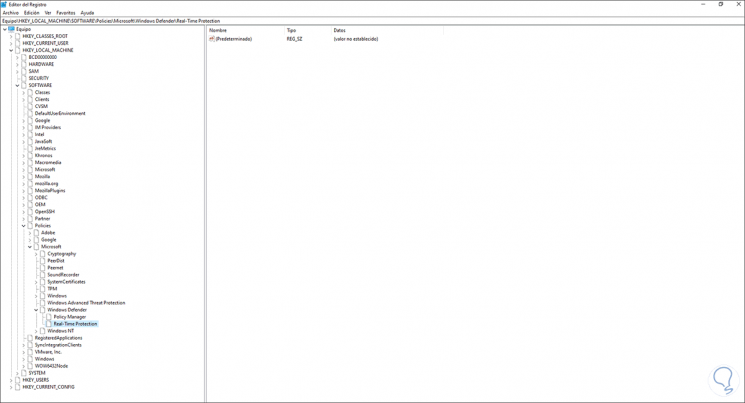
We assign this key the name "Real-Time Protection":
Step 9
Right click somewhere free and select the option "New - DWORD Value (32 bits)":
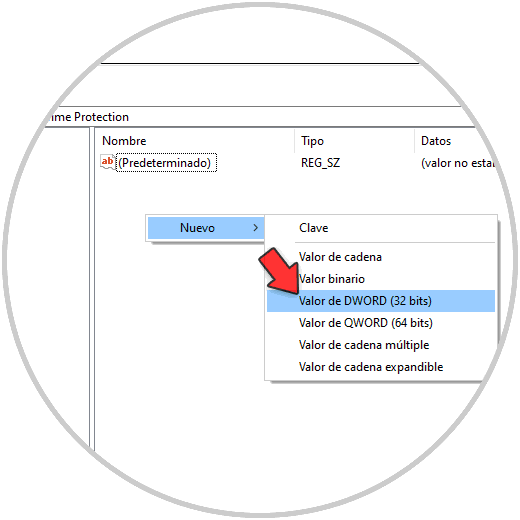
Step 10
We assign the name "DisableRealTimeMonitoring":
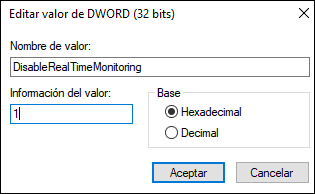
Step 11
We double click on this value and assign the value 1. Apply the changes.
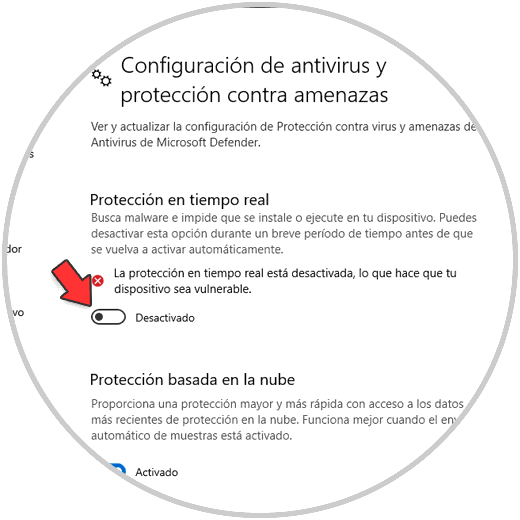
Step 12
We check that real-time protection is disabled from Windows Security:
Let us remember the importance of having protection in the system. Real-time protection can be temporarily disabled for some support tasks or if you have to use other antivirus and protection software but never leave the computer unprotected.