Thanks to the tools and utilities integrated in Microsoft Word for macOS, we have a large number of options to manage each element in a precise and practical way, this is useful if we want to create presentations or professional files..
One of the elements of Microsoft Word, whether 2016 or 2019 , for macOS systems, is the rule that although it seems that its function is simple, it goes well beyond simply orienting the text. When the rule is active in Microsoft Word, we have the following usage options:
French sangria
Through this option it will be possible to adjust the values ​​of the French indentation of the selected paragraph or text in the Word document in macOS, the French indentation has been created to keep the first line without any modification and then move through the following Document lines
Frontline Sangria
By using this indentation, we can move the first line of the text, but without affecting the position of the other lines of the selected text
Top margin
With this option of the rule, we can work on the upper margin of the text, paragraph or image in the document and where the rule will allow us to increase or decrease its original size.
Left indent
By accessing the options in the left indent, it will be possible to edit the values ​​associated with this type of indent in the text selected in Word for macOS.
Right indent
By using this option, we have the opportunity to adjust changes in the right indent of the selected paragraph or text in the Word for macOS document.
Now we will learn to visualize the rule, in case it is not active, as well as to make some basic changes in it.
To keep up, remember to subscribe to our YouTube channel! SUBSCRIBE
1. How to view the rule in Microsoft Word 2016, 2019 for macOS
Recall that in Word 2016 and 2019 we have two types of rules for editing texts, graphics and other elements, these are the horizontal and vertical rules.
Step 1
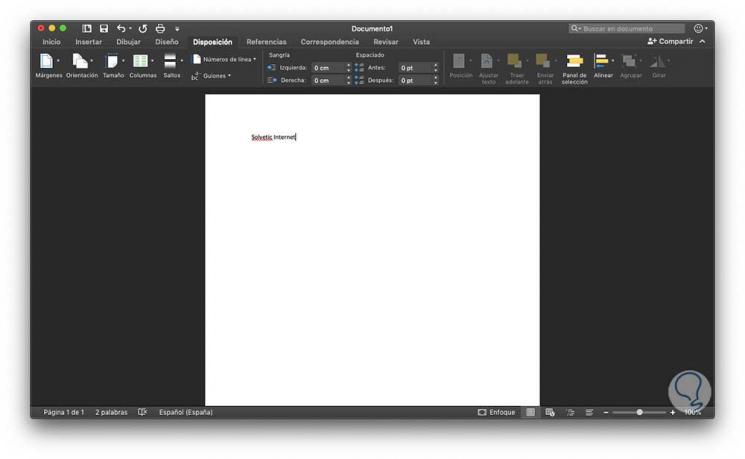
When we access a document that does not have these rules active we will see the following:
Step 2
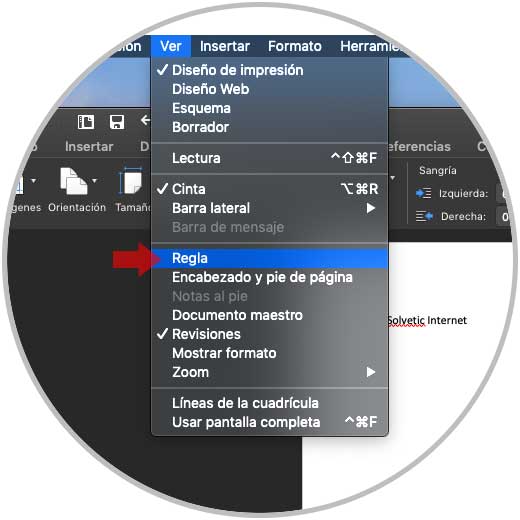
To see the vertical and horizontal rules, we go to the top menu "View" and there we locate the line "Rule"
Step 3
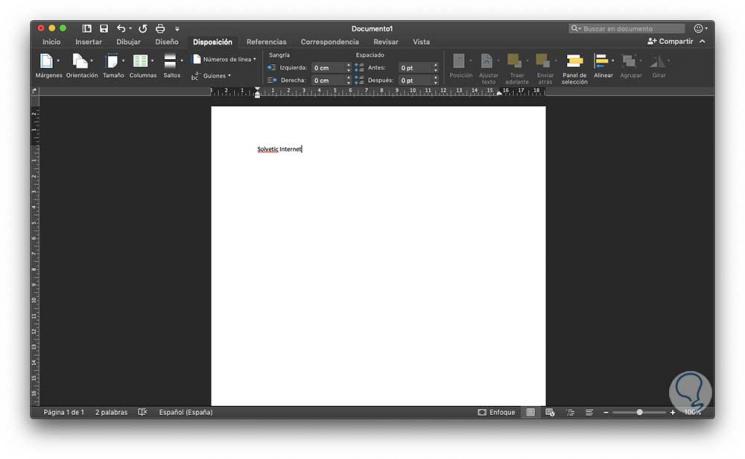
Once it is activated, it will be possible to view and use the rule as necessary in the Word 2019 document in macOS:
Note
The horizontal ruler will only be visible from the Print Design and Draft views while the vertical ruler can only be seen in the Print Design view.
2. How to activate the rule in Microsoft Word 2016, 2019 for macOS
Step 1
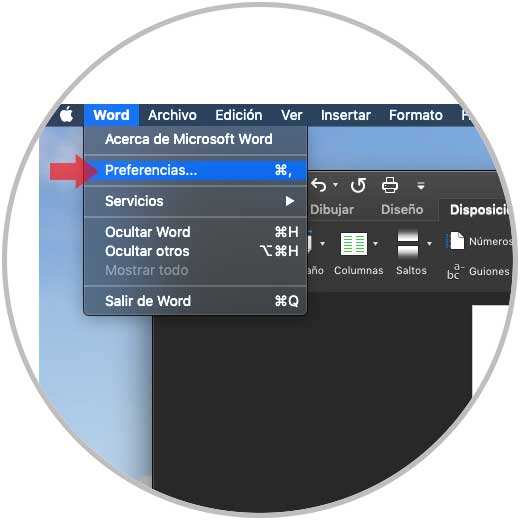
In case we carry out this process, but the rule is still not visible, it means that it is deactivated. For activation, we go to the "Word - Preferences" menu
Step 2
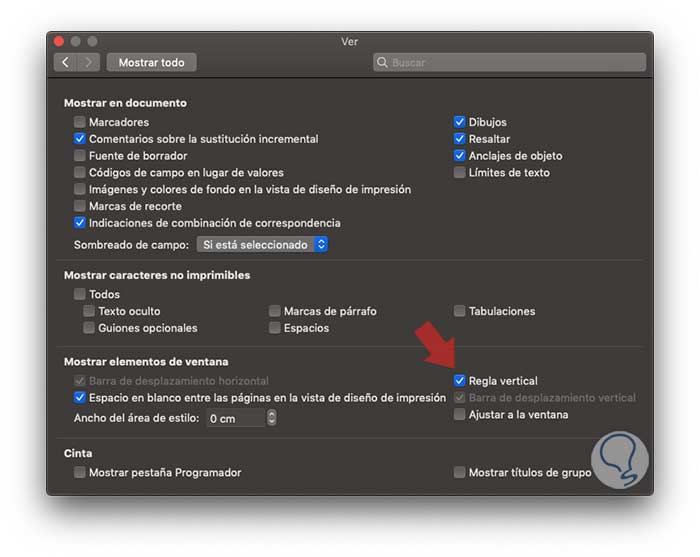
In the displayed window we go to the "View" category and there we will activate the "Vertical ruler" box located in the Show window elements section:
Step 3
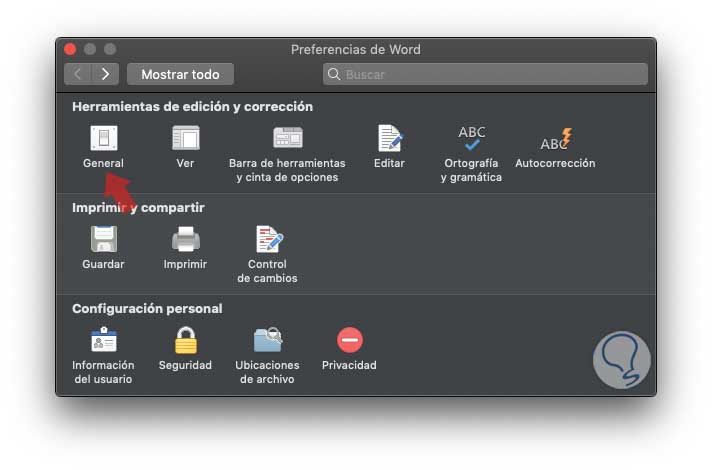
Now, if we want to edit the default units, which is in centimeters, of the Word 2019 rule, we go back to the "Word - Preferences" path
Step 4
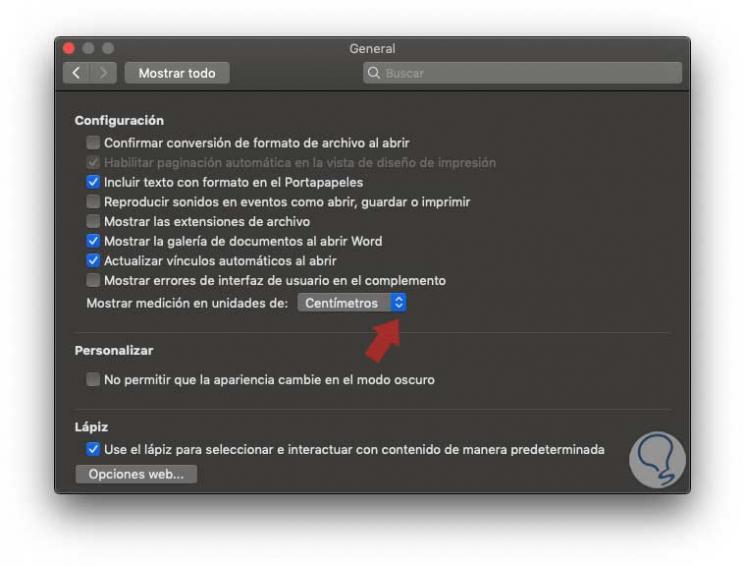
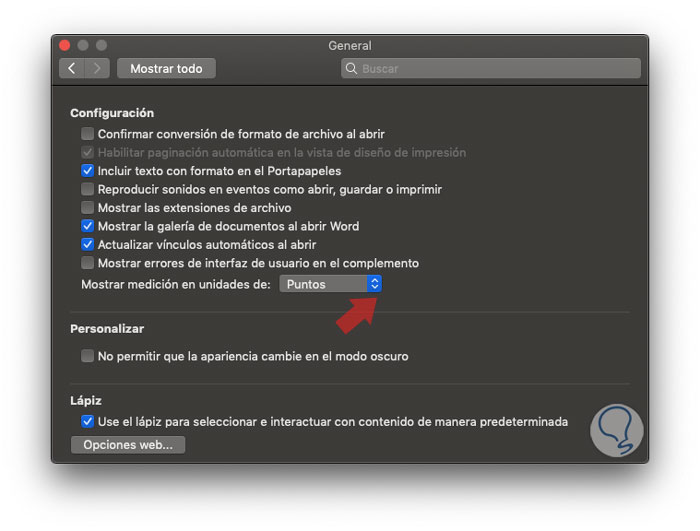
There we will go to the General category where we will see the following:
Step 5
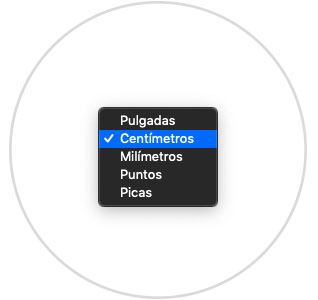
In the "Show measurement" line in units it will be possible to define new options such as:
Step 6
We select the desired option, in this case Points:
Step 7
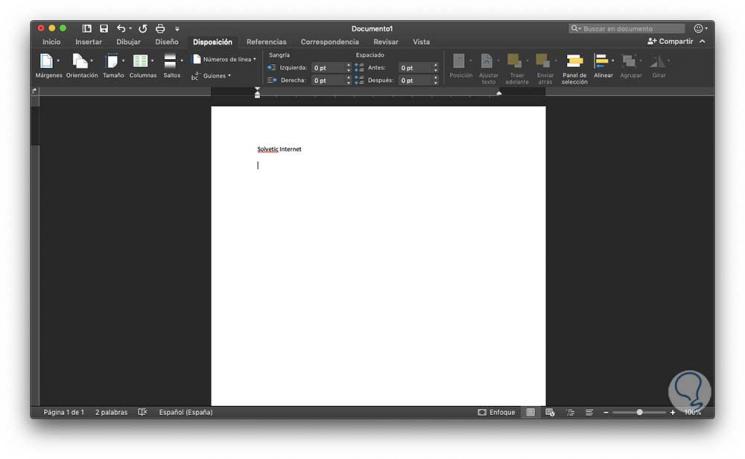
We close the wizard and we can see the changes applied in the Word rule in macOS:
That simple we can not only see but edit the properties of the rule as necessary in macOS..