Installing Windows on the Mac is no longer a problem since the Intel switch in 2006: Every Mac is automatically also a Windows PC with the necessary hardware. Since both PCs and Macs run on Intel's 64-bit processor basis, they are largely identical. This means that Windows can be operated in two variants: using the Boot Camp software supplied with the Mac as a second operating system alongside macOS, and within macOS as a so-called virtual machine.
Boot Camp or Virtual Machine?
However, if you want to use Windows on the Mac, you should first consider which of the two variants you want to use:
Windows via Boot Camp directly on the Mac
| Windows as a virtual machine |
The full performance of the system is used.
| Windows and MacOS share system performance.
|
Much faster.
| Much more comfortable.
|
The Mac must be restarted to use Windows.
| Windows starts like an app in the window within MacOS.
|
The hardware of the Mac can be addressed directly, which enables firmware updates, for example.
| MacOS partially passes the hardware on to Windows or virtualizes it. Direct access to the graphics card or hard drive is not possible.
|
| Ideal for games and other software that requires a lot of power. | Ideal for office applications, simple games and all application programs in general.
|
Risk of data loss due to incorrect operation.
| No risk of data loss.
|
Removal may be problematic.
| Removal like deleting an app.
|
Either macOS or Windows.
| MacOS, Windows, Linux and many other systems can be used in parallel.
|
Only current Windows versions possible.
| Any Windows version (e.g. XP) possible.
|
Data exchange Win <-> Mac cumbersome.
| Data exchange via drag & drop. |
| Backup must be set up separately. | Is saved with TimeMachine. |
| Possible without additional software. | Requires extra software such as Parallels (paid) or VirtualBox (free). |
Windows via Boot Camp directly on the Mac
| Windows as a virtual machine |
The full performance of the system is used.
| Windows and MacOS share system performance.
|
Much faster.
| Much more comfortable.
|
The Mac must be restarted to use Windows.
| Windows starts like an app in the window within MacOS.
|
The hardware of the Mac can be addressed directly, which enables firmware updates, for example.
| MacOS gibt die Hardware teilweise an Windows weiter oder virtualisiert sie. Ein direkter Zugriff auf Grafikkarte oder Festplatte ist nicht möglich.
|
| Ideal für Spiele und andere Software, die viel Leistung benötigt. | Ideal für Office-Anwendungen, einfache Spiele und generell alle Anwendungsprogramme.
|
Risiko von Datenverlust durch falsche Bedienung.
| Kein Datenverlustrisiko.
|
Entfernung gegebenenfalls problematisch.
| Entfernung wie das Löschen einer App.
|
Entweder MacOS oder Windows.
| MacOS, Windows, Linux und viele andere Systeme können parallel verwendet werden.
|
Nur aktuelle Windows-Versionen möglich.
| Beliebige Windows-Versionen (etwa: XP) möglich.
|
Datenaustausch Win <-> Mac umständlich.
| Datenaustausch per Drag & Drop. |
| Backup muss separat eingerichtet werden. | Wird mit TimeMachine gesichert. |
| Ohne zusätzliche Software möglich. | Benötigt Extra-Software wie Parallels (kostenpflichtig) oder VirtualBox (kostenlos). |
Basically: For Windows on the Mac, the variant with the virtual machine within a virtualization tool such as VirtualBox is preferable. After installing the software, Windows only needs to be set up within VirtualBox. The "Windows in the window" can then be used directly in macOS.
The Apple tool Boot Camp, on the other hand, works differently: It divides the Mac hard drive into a Mac and a Windows partition. Windows is then installed in this. Windows and macOS are then two systems on one computer. To switch from macOS to Windows, the Mac must be restarted. And vice versa. For this, Windows is installed here directly on the Mac, so it does not have to share the performance with macOS, which is important for games, for example..
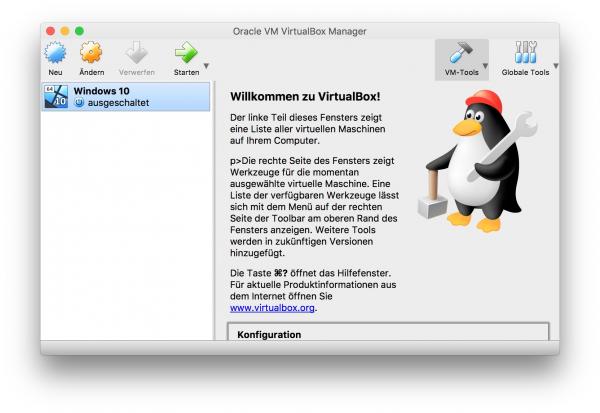
Install Windows as a virtual machine: Here's how
2nd step:
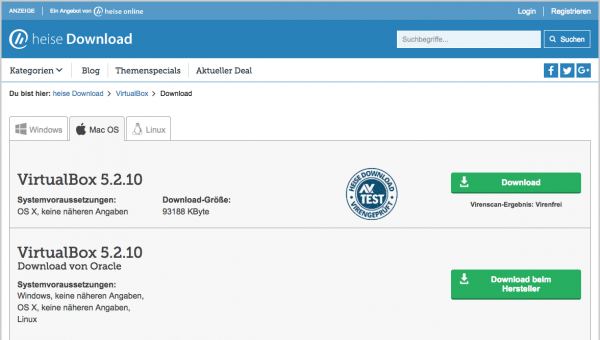 Then download VirtualBox for macOS, e.g. from heise download: https://www.heise.de/download/product/virtualbox-40385 and install the program. There are also alternatives: Parallels Desktop for Mac is much more convenient, but requires a fee. There is also VMWare, which is also available for a fee .
 3rd step:
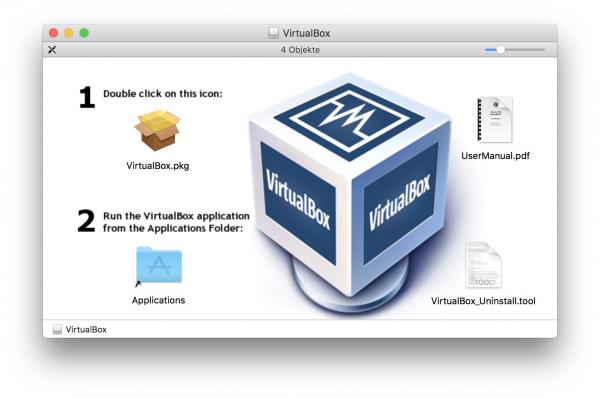 Install VirtualBox on your Mac by double- clicking the disk image and then double-clicking the VirtualBox.pkg file .
 4th step:
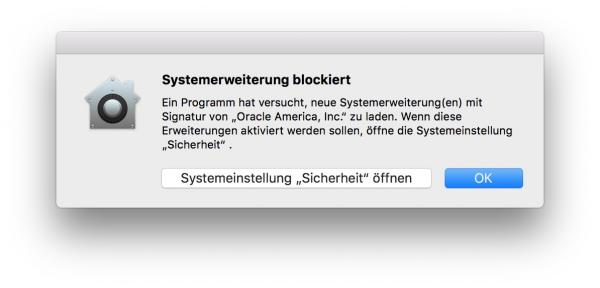 macOS now warns that a system extension is blocked. Click on "Open " System Preferences "Security" ".
 5th step:
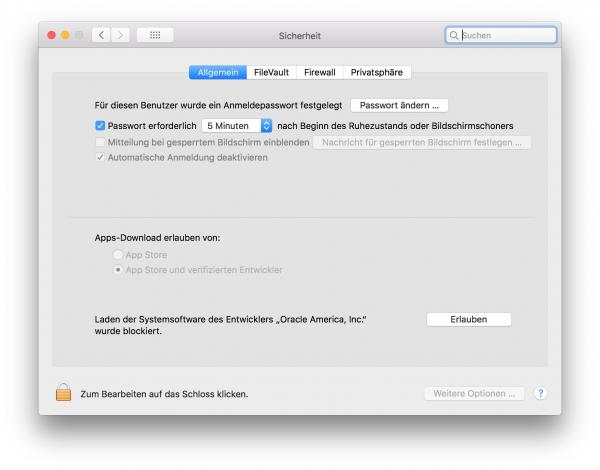 Click on “ Allow ”. This is a Mac security technology that protects you from being changed by software. But with VirtualBox, you don't have to worry.
 6th step:
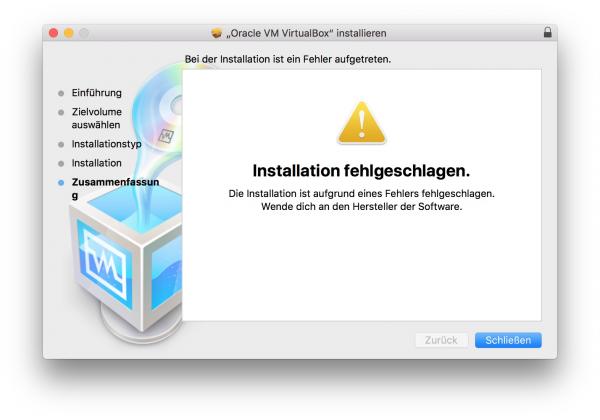 The installation of VirtualBox is now canceled once. Click on “ Close ”.
 7th step:
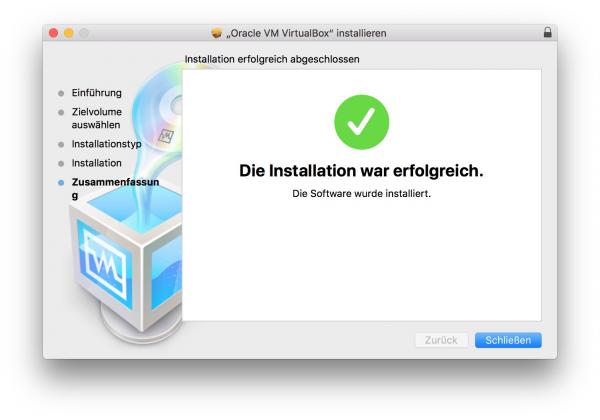 Restart the installation by double-clicking VirtualBox.pkg again. The installation is now running.
 8th step:
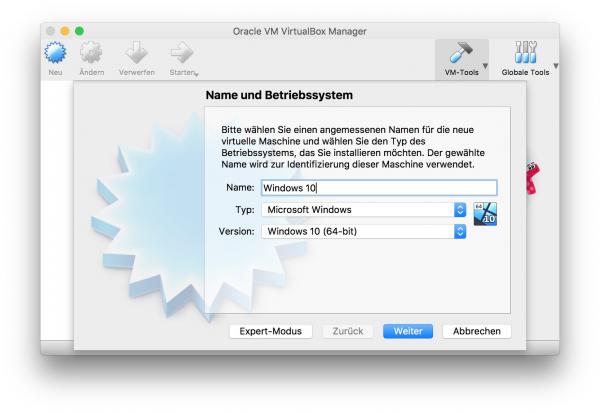 Start VirtualBox from the Applications folder and select " New ". Then enter a name for the virtual machine , such as "Windows 10". Click on “ Next ”.
 9th step:
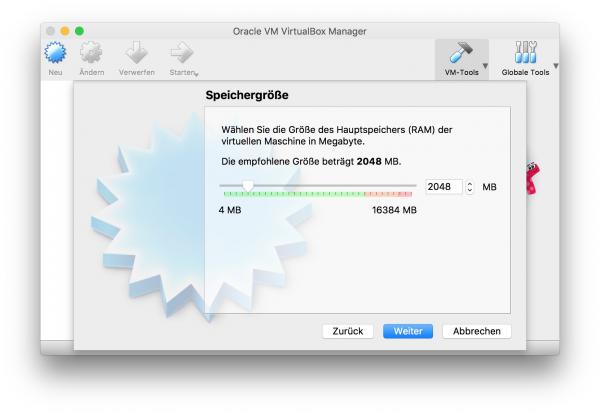 Set the memory for the virtual machine . This is pinched off by the Mac memory. As a rule of thumb, Windows in the window should have at least 2 gigabytes of RAM , but not more than 50 percent of the Mac RAM , otherwise the whole system will be slow.
 10th step:
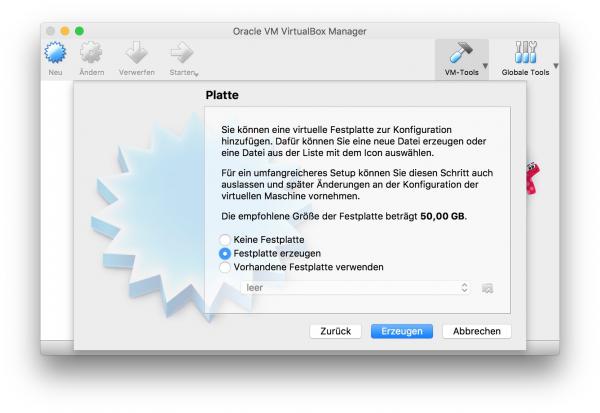 Select “ Create Hard Disk ” and click on “ Create ”.
 11th step:
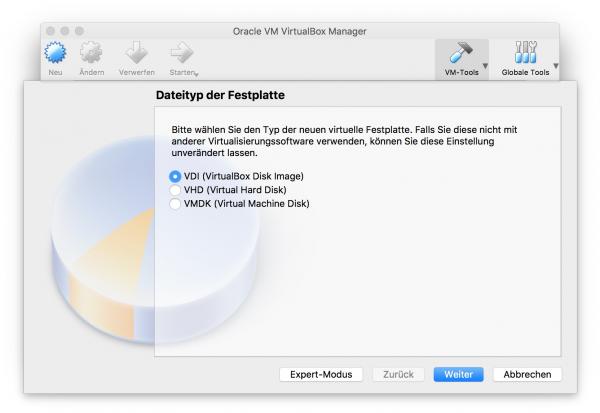 Select “ VDI ” as the file type for the virtual hard disk and click “ Next ”.
 12th step:
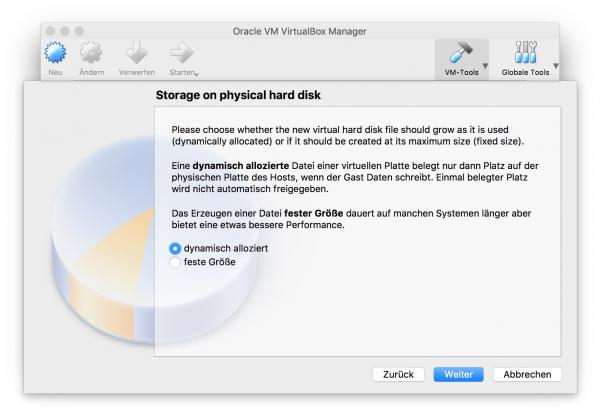 Select " dynamically allocated ". In this way, the virtual hard disk does not directly occupy all of the memory. Click on “ Next ”.
 13th step:
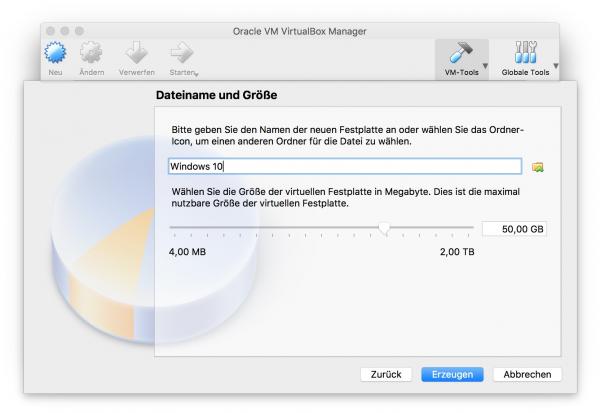 Last but not least, you need to select the maximum size of the hard drive. Limit it to something you can live with - around 50 gigabytes - and hit " Create ".
 14th step:
 The virtual PC has now been created. Now all you have to do is install Windows here . To do this, click on “ Start ”.
 15th step:
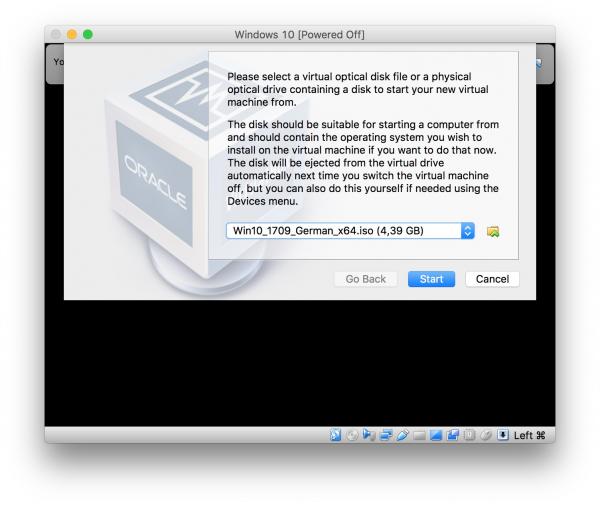 Now the Windows ISO file comes into play: VirtualBox asks you which medium should Windows boot from. Click the yellow folder icon and select the Windows 10 ISO file you downloaded in step 1 . Then click on “ Start ”.
 16th step:
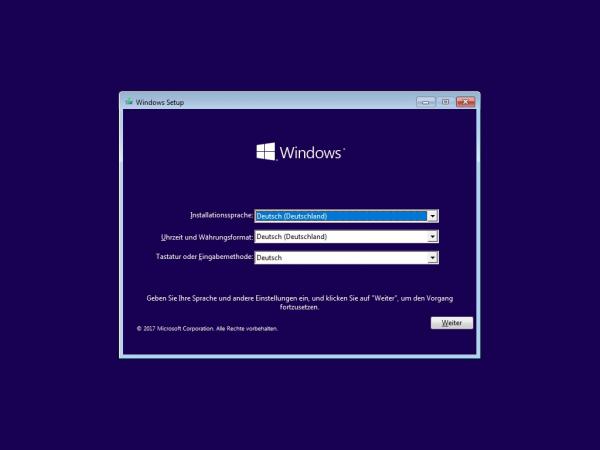
 The virtual PC now boots like a real PC. You can do the Windows installation just like you would on a real PC. The virtual PC is then ready for use in VirtualBox and can be used in the window like a real Windows PC. In this way, you can also install other systems - such as Linux - in a virtual PC.
 Install Windows via Boot Camp: Here's how
If you need the full hardware power of the Mac under Windows, you have to set up Windows 10 as a boot camp partition on the Mac. This can be done in a few simple steps, all you need is a USB stick with at least 8 gigabytes of storage.
Attention: Boot Camp is only suitable for users who are familiar with Windows installations!
Note: Boot Camp does not appear to work reliably with the AFPS file system at the moment.
2nd step:
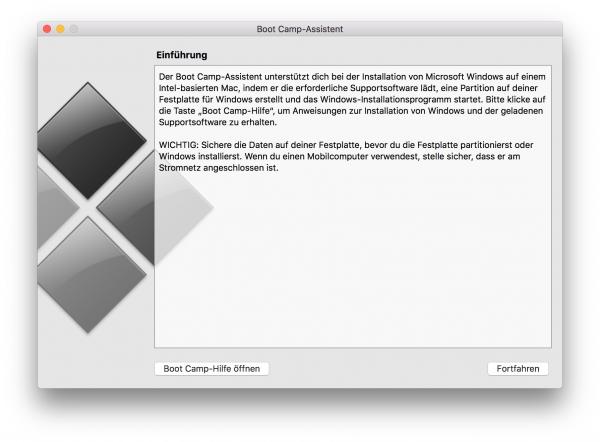 Start the Boot Camp Assistant from the folder / Applications / Utilities / and click on " Continue ".
 3rd step:
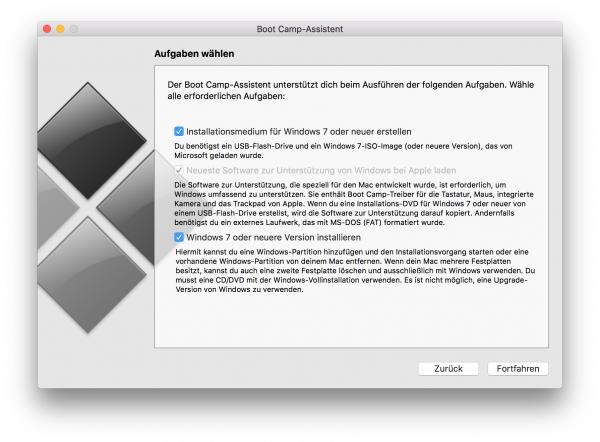 Plug the USB stick into your Mac and leave the preferences as Boot Camp suggests. Click on “ Continue ”.
 4th step:
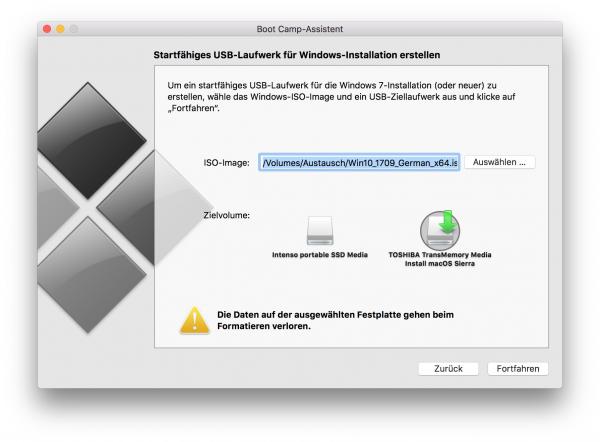 Now select the Windows ISO file from step 1 via " Select " . Also select a target drive , the USB stick. Attention: This will be completely overwritten during the action! Then click on “ Continue ”.
 5th step:
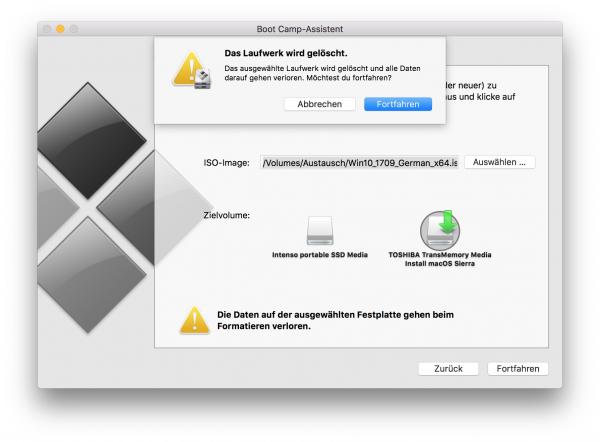 Bootcamp now warns that the USB drive will be deleted . Confirm with “ Continue ”. If you have a Macbook, you should now connect it to the power supply.
 6th step:
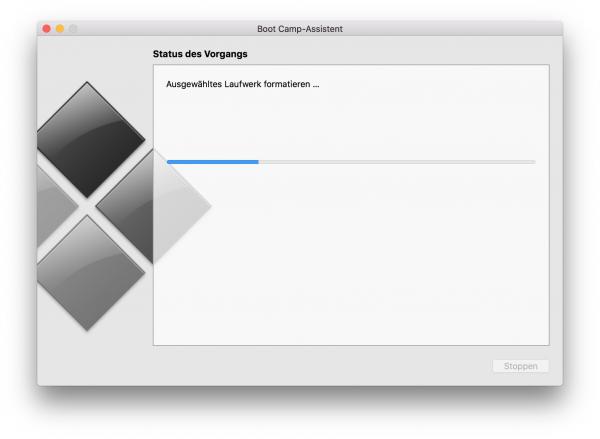 The USB stick is formatted and then written to with the Windows installation files and the Windows support software from Apple. This could take a while. Then leave the stick plugged into the Mac .
 7th step:
 Boot Camp then asks how you want to share the Mac hard drive . Windows 10 should get at least 40 gigabytes, 48 gigabytes is a good value. Click on “ Install ”.
 8th step:
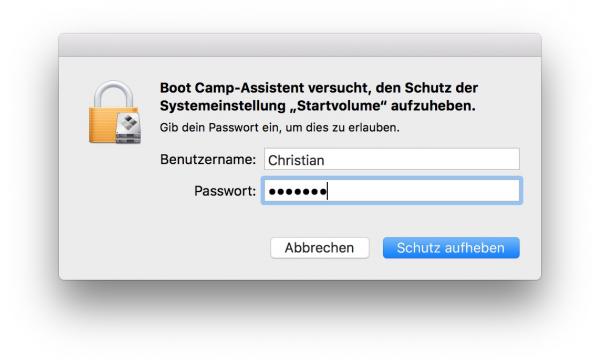 Now you have to enter your administrator password . The hard drive is then partitioned and the Mac restarts from the USB stick.
 9th step:
 You are now ready to install Windows . Make sure you put it in the correct partition , otherwise you can erase macOS. You can then start the Mac while holding down the [Alt] key and choose between the systems .