Although many people do not know it, the truth is that depending on the version of Windows 10 on our team, we can work with domains. Indeed, these networks that we join or configure as users can be extremely useful in more than one case. But how to set up or join a domain in Windows 10?
Well, as we said before, these networks facilitate the administration of the systems, the implementation of software, the administration of updates and many other tasks that are basic in every computer..
The treatment that we can make of them in Windows 10 will depend on which version our computer runs, considering that Windows 10 Pro is the edition of Windows that allows us to use the operating system as domain users, although with the other editions we will to be able to join them , so that no one is left out of enjoying their advantages, whenever someone else invites them.
How to join a domain in Windows 10?
To join a domain, you will have to configure it manually, and that means that you will have to know all its details. Fortunately, there are several ways to join a domain in Windows 10, and the first thing to keep in mind is to stay connected to a network accessible to it, be it an Internet network or a local network ..
Depending on the version of Windows 10 on your PC, something that we will analyze below, you can join the domain you want in one way or another. So try your luck with these tricks if you are still not clear about your version of Windows, or directly go to
Join the domain from Settings
- Open your PC Settings with the Win + I keyboard shortcut
- Go to the Accounts section or section, and there to the Access to work and school tab
- Click on the connect button, and enter the data of the domain that its creator will have previously given you
Join the domain from the Control Panel
- Open File Explorer
- In the location bar, paste this: explorer shell ::: {BB06C0E4-D293-4f75-8A90-CB05B6477EEE} and hit Enter
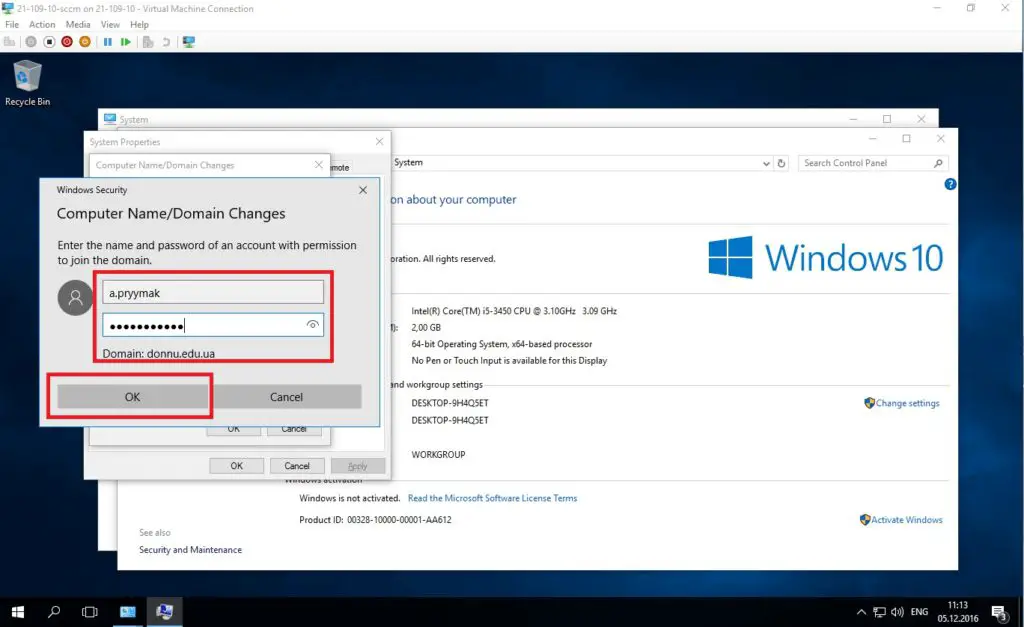
- Click Change settings next to Computer name
- In the new window that has just opened go to Computer name, Network ID and enter the domain data
- Follow all the instructions that appear on the screen, until you have connected to the domain
Join domain from Command Prompt
- Open Command Prompt with Administrator rights
- Run the command: netdom / domain: DomainName / user: Username / password: YourPassword member / joindomain, replacing the domain name and password when necessary
- Your PC will automatically connect you to the domain
Conclusions
Although Windows 10 Home and Windows 10 S do not support the union of domains, with the first of them you will be able to join a work or school network , as long as you do it from Settings.
That's because the Control Panel option to join a network is disabled in Windows 10 Home ..
As for the Command Prompt method, it will work in Windows 10 Home and Pro, but unfortunately none of the methods taught here will work in Windows S , so you will have to switch to Home or Pro. Of course, the problem is that this change does not It is free, but you must buy the version that you are going to use.
This summary can be helpful in case you have upgraded Windows to the next version of Microsoft's OS. If not, you have to install Windows 11 first and then follow these steps.