You can sort your photos on the iPhone directly in Apple's Photos app, without any additional apps. In addition to various views, a number of functions are available with which you can arrange images according to your requirements. Here you can find out exactly what these are and how you can best use them!
These photo views are available on the iPhone
In the pre-installed photos app on the iPhone, your photos are automatically collected in various albums. For this, iOS analyzes and curates the photos locally directly on the device in order to show you the most beautiful and relevant images.
Media library tab
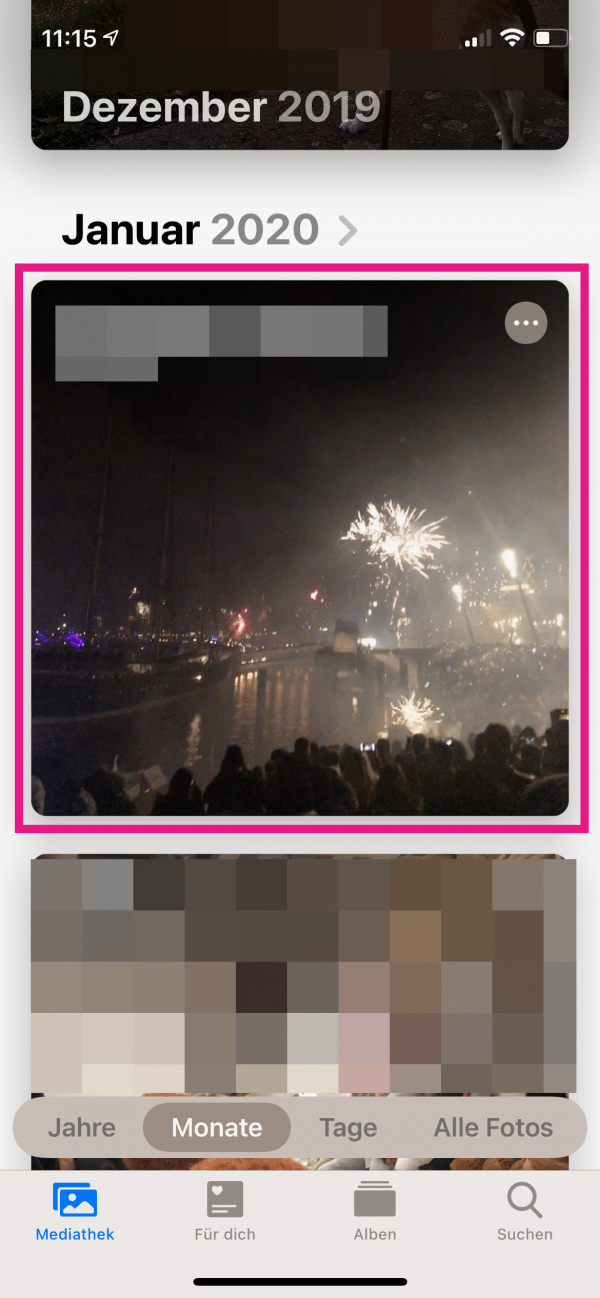
In the first tab of the Photos app, pictures are displayed over time . You can specify below whether the images should be sorted according to years , months or days , or whether you want to view all photos. Depending on the time period, you will then see the most beautiful photos in a grid or in tiles ..
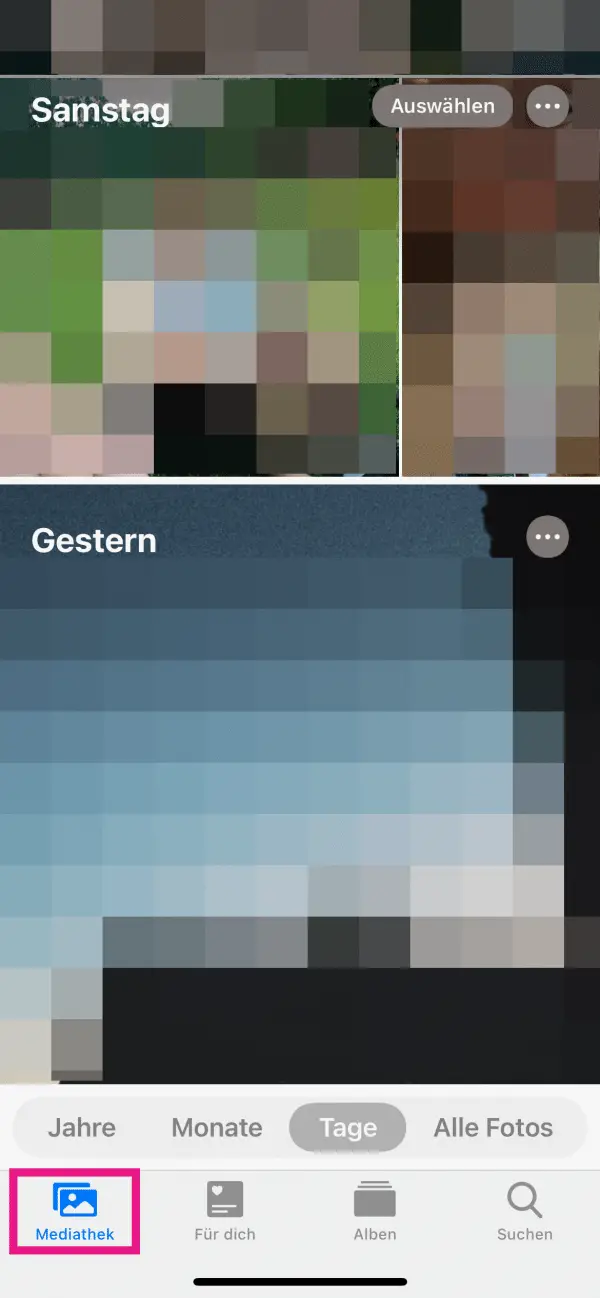
In the grid view, you can tap directly on a photo to view it in large size. And for the larger time periods, you can tap on one of the tiles to go directly to the photos from this time period.
For you tab
Under the For you tab, the iPhone automatically sorts pictures for you to look back on . These are basically albums on certain days, trips and vacations, people or the like..
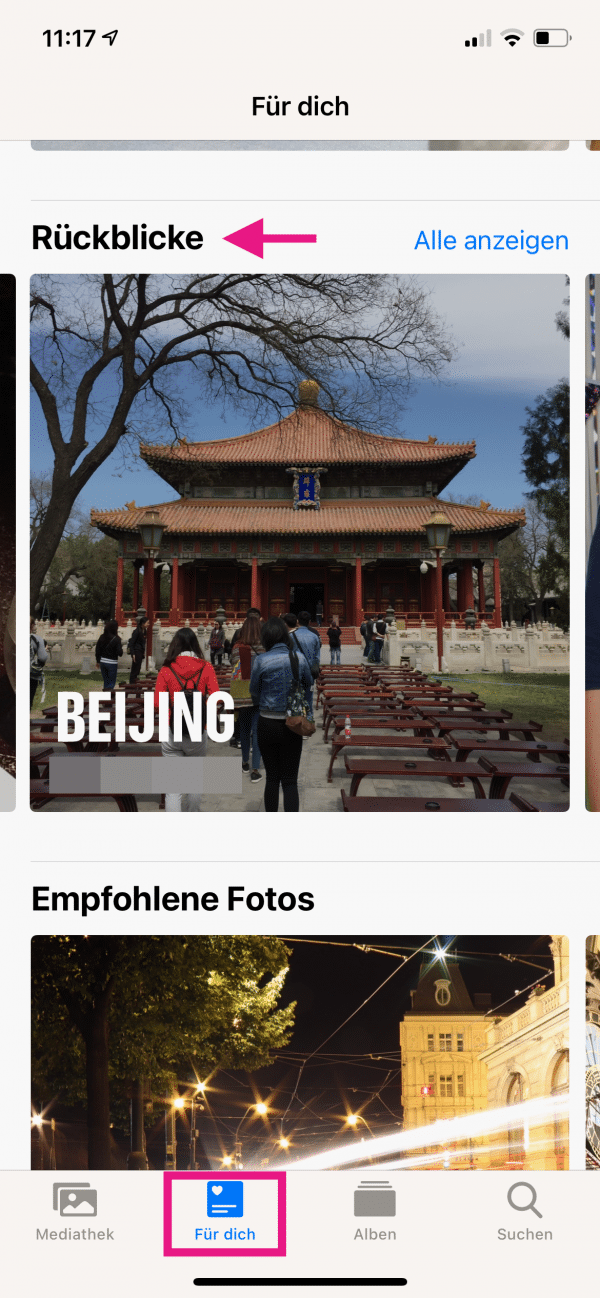
If you open one of the flashbacks, you can not only see all the photos below, but also a short slide show with the pictures. To do this, simply click on the play symbol .

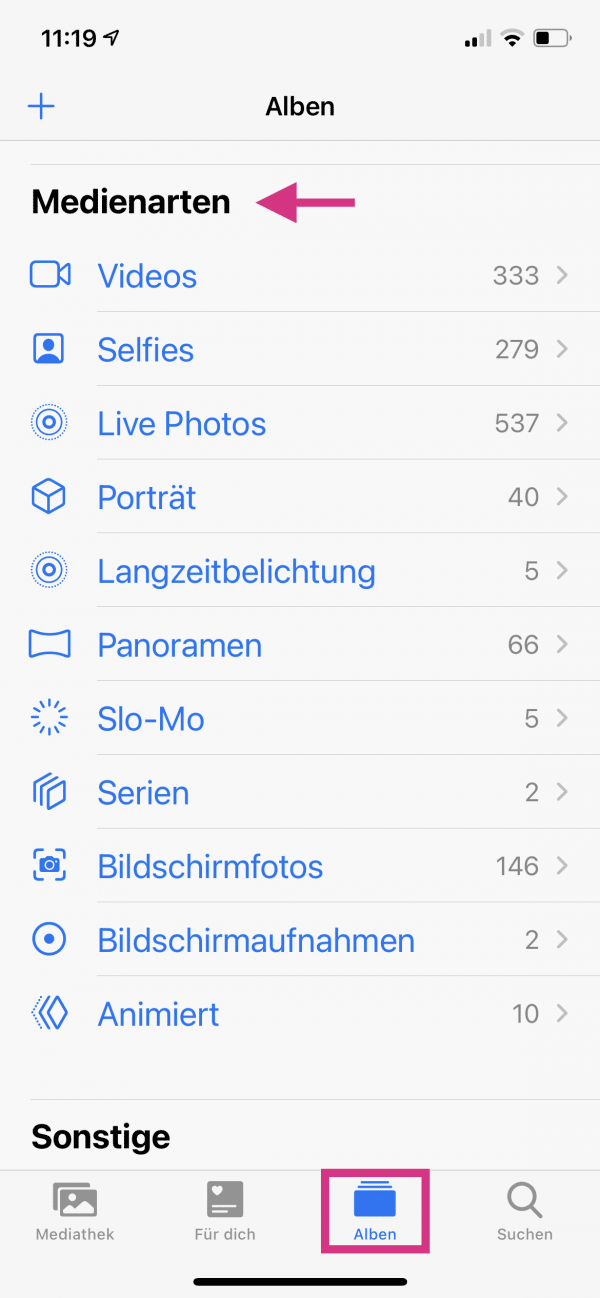
Album tab
In the app, your recordings are also automatically sorted according to their type . If you scroll down a bit in the albums tab, you can directly access all videos, selfies, panoramas, etc. under " Media types ".
Search tab
Photos are also automatically pre-sorted for you in the Search view. Right below the search bar you will find moments that summarize recordings from specific time periods or activities. Below that, pictures are sorted according to people and places .
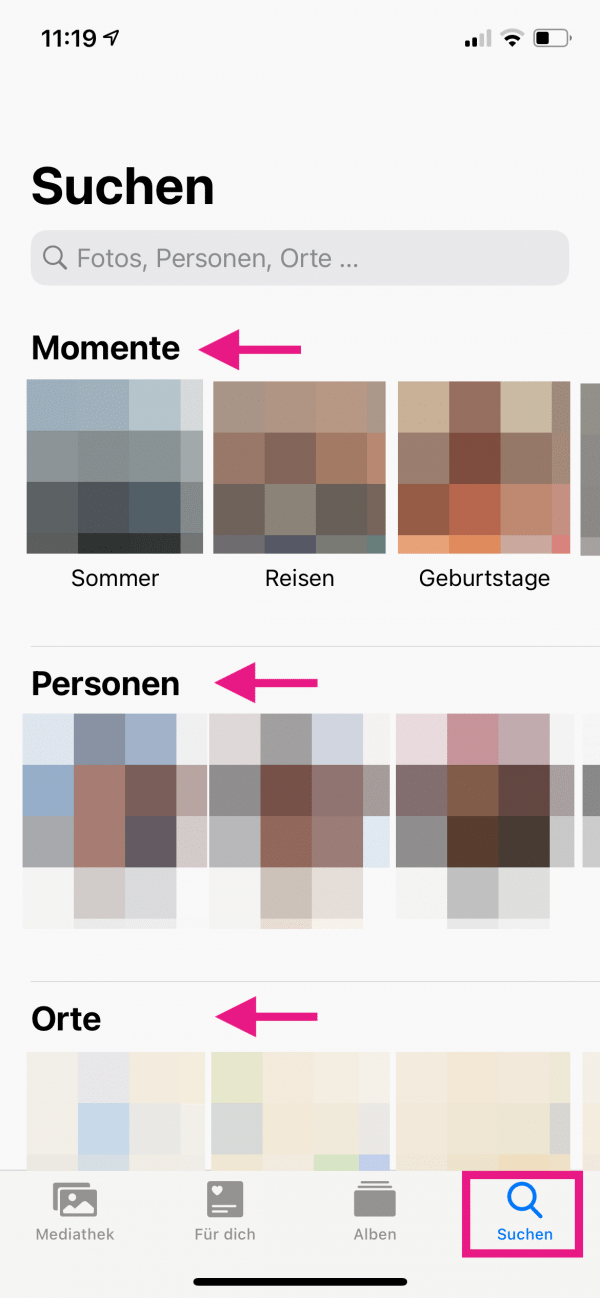
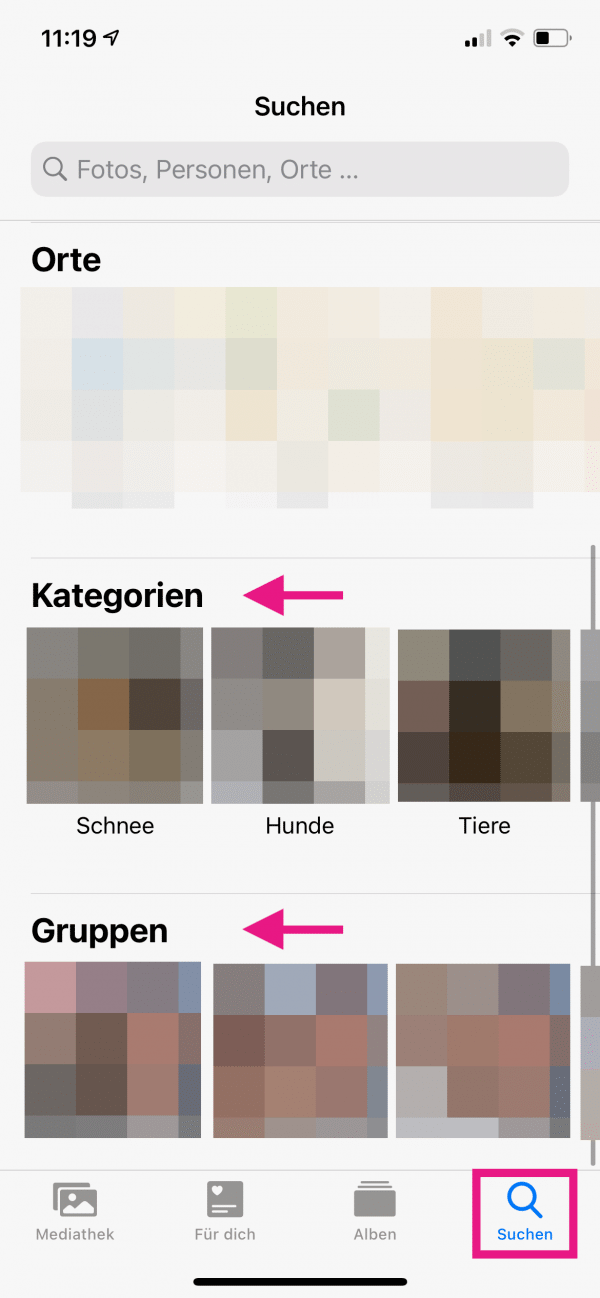
At the bottom you will find categories of photos sorted by content, as well as folders with pictures of groups of people who often appear together in your recordings.
How to sort photos in iPhone albums
In addition to automatic sorting, you can also sort photos manually into albums . In this way you can not only determine the selection of the images, but also the exact order . We'll show you first how to create a new album and fill it with photos, and then how to customize the sorting to your liking. To do this, follow our step-by-step instructions or take a look at the brief instructions .
1st step:
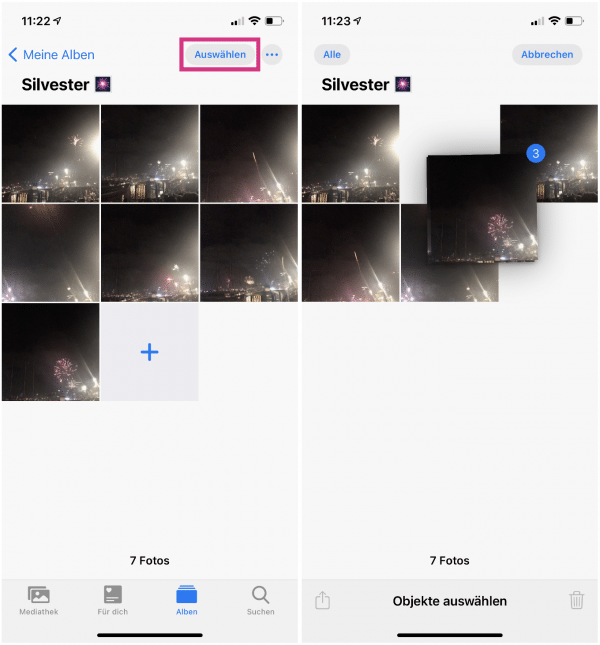
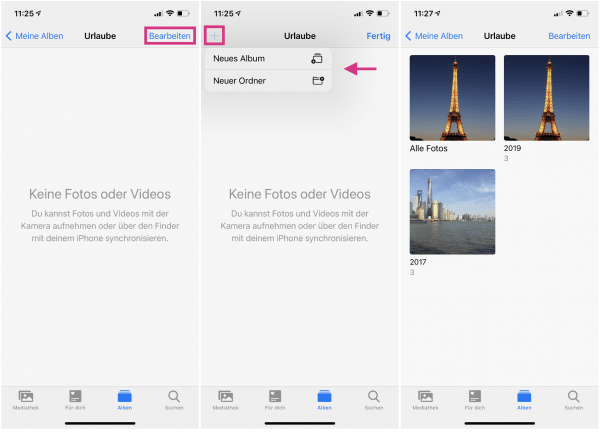
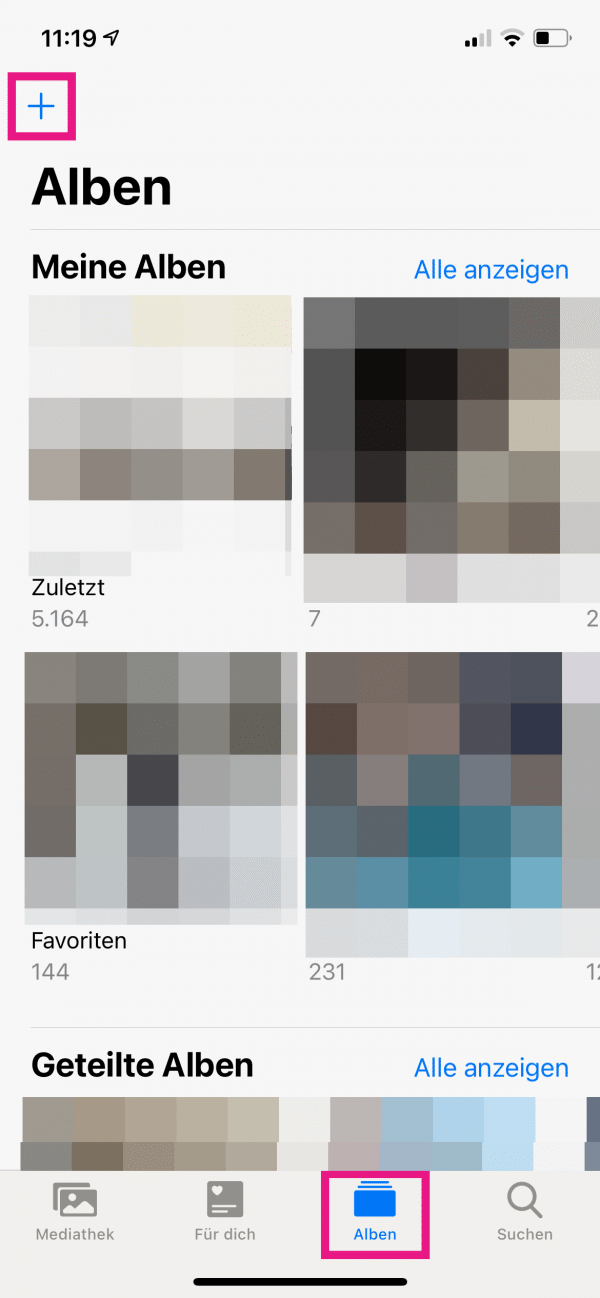 Switch to the Albums tab in the Photos app and tap the " + " symbol in the top left.
 2nd step:
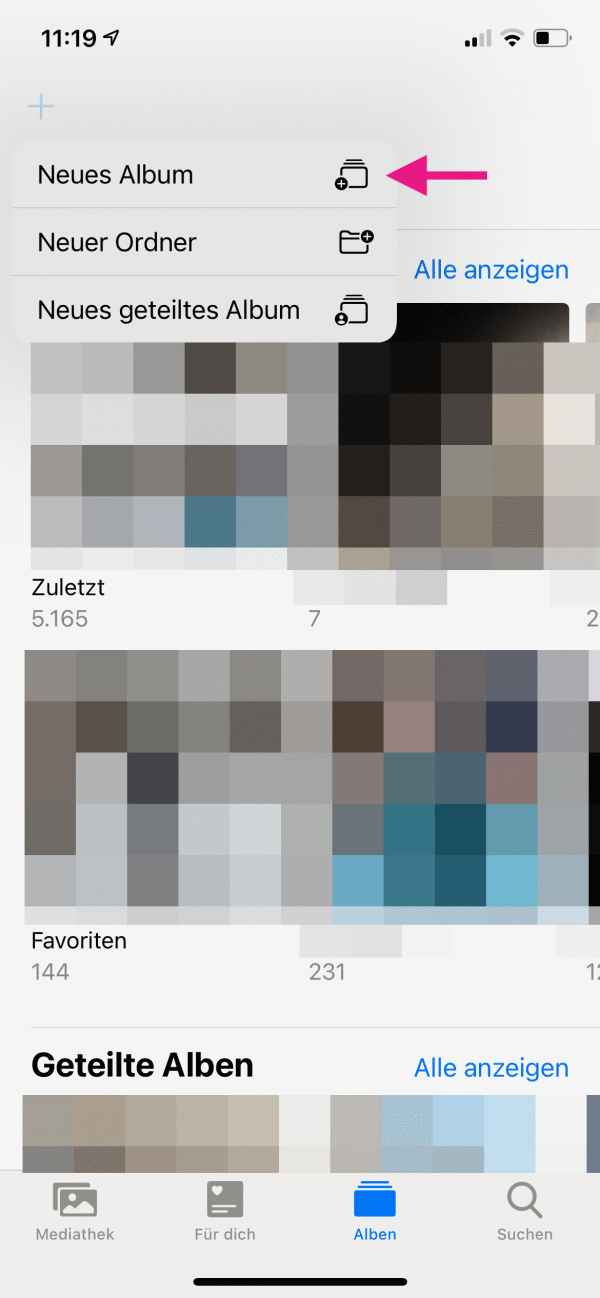 Select “ New Album ”, give it a name and then tap on “ Save ”.
 3rd step:
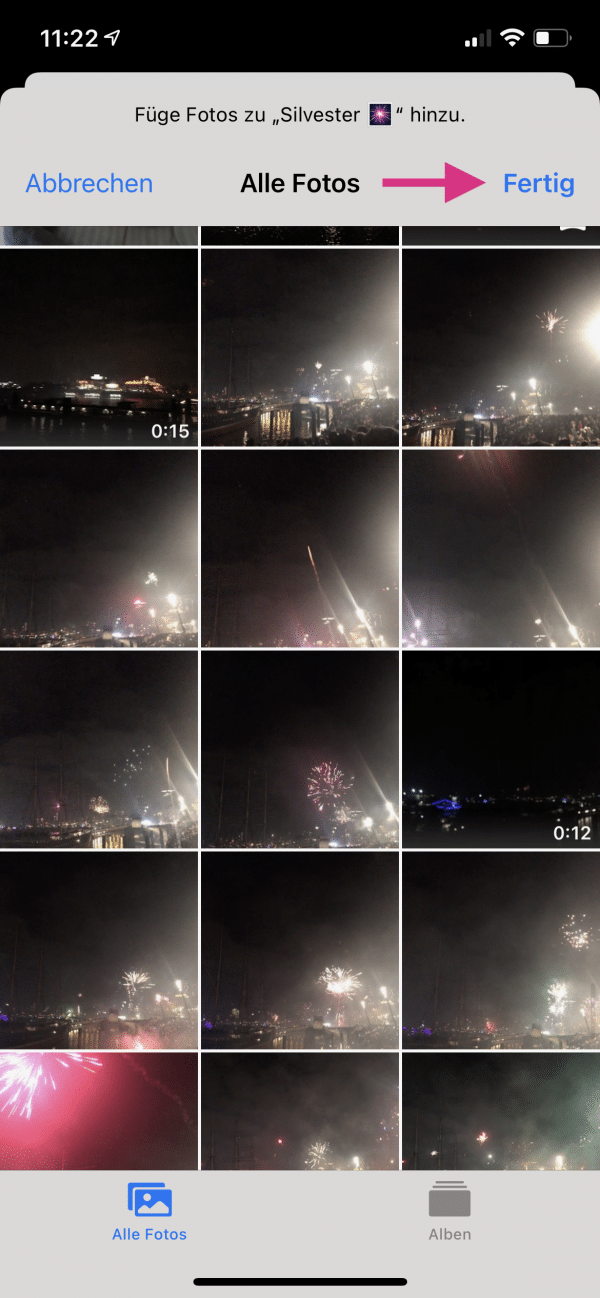 A window will now open in which you can select the photos that should be in the album. Once you have made a selection, tap on “ Done ” in the upper right corner .
 4th step:
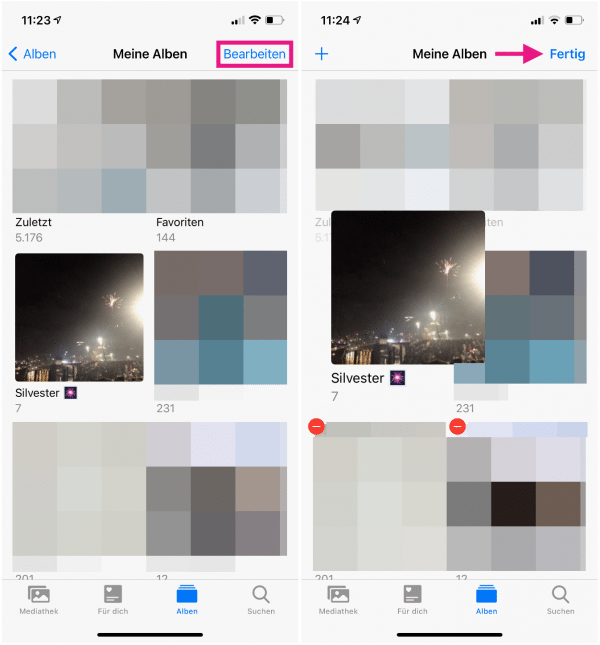
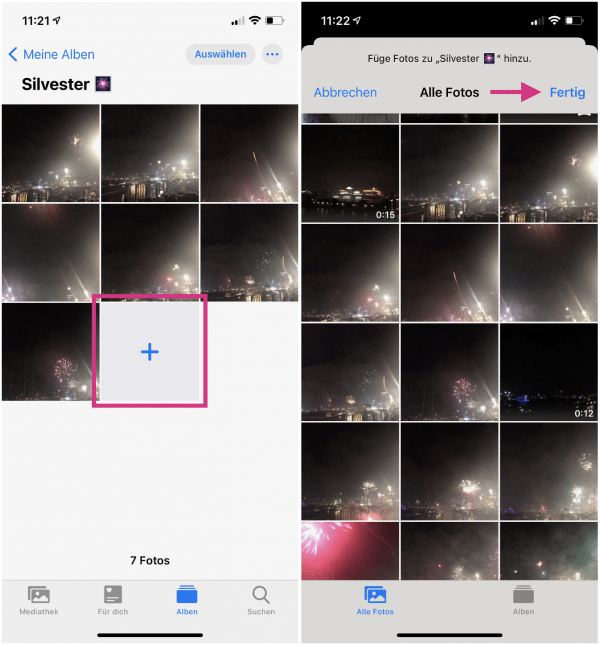 You can now open the new album at any time via the albums tab. To add more photos, just tap the large “ + ” symbol at the end of the album. Then, as in step 3, select the images you want and then click on " Done ".
 5th step:
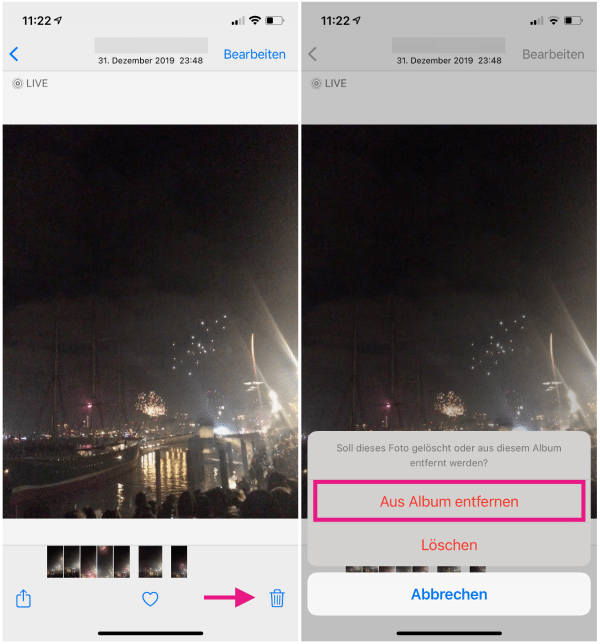 If you want to remove a photo from the album , tap on it to open it in the large view and then on the trash in the lower right corner . Tap Remove From Album .
 6th step:
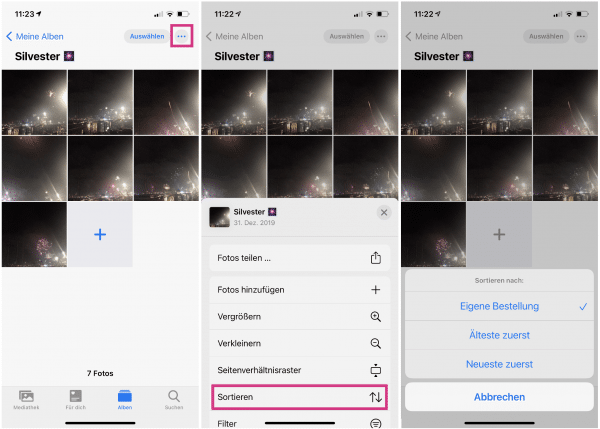 If you tap on the three dots in the album overview , you can also change the sorting of the images. Under " Sort " you can choose whether the images should be sorted according to their own order or with the oldest or newest image first .
 7th step:
 To manually adjust the order of the images, tap Select in the upper right corner . Briefly press and hold an image , then drag it to the location you want. You can also select multiple images and then move many of them at once. To exit the view, simply tap on " Cancel ", your changes will still be saved.
 How to sort your iPhone albums
If you have created a large number of albums, they will all be displayed side by side. This can quickly become confusing, but you can sort albums according to your needs and put them into folders . This means that you always have quick access to your most important collections. Follow our step-by-step instructions or take a look at the quick start guide .
1st step:
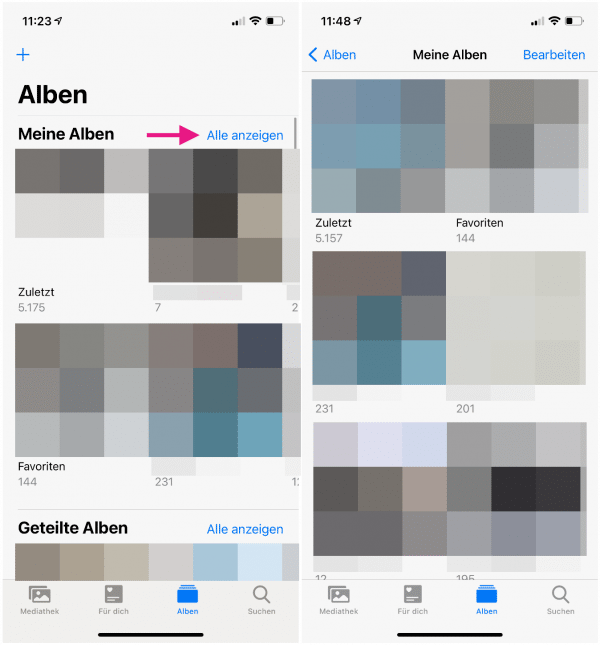 In the albums tab, tap on “ Show all ” to display your albums in a list. This view is already a bit clearer.
 2nd step:
 To adjust the order of the albums, select " Edit " in the upper right corner , press and hold an album and drag it to the desired position. Tap Done to save your changes.
 3rd step:
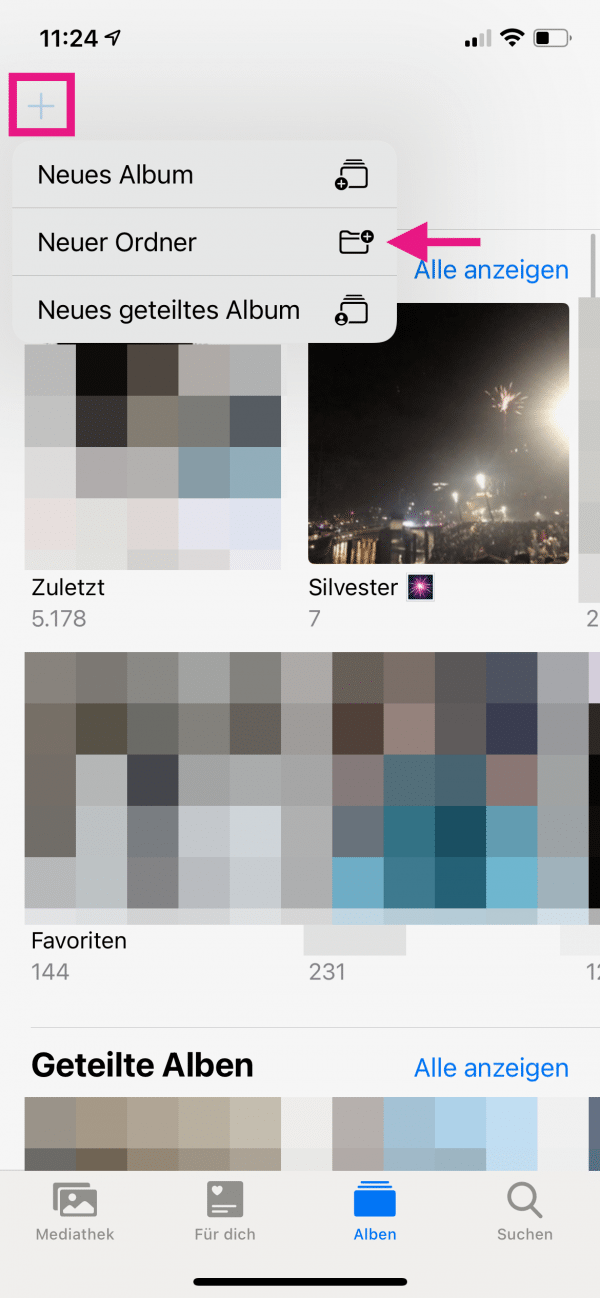 If you have a particularly large number of albums, you can group them together in folders . To do this, go back to the main page of the albums tab and tap the " + " symbol in the upper left corner . Select “ New Folder ”, assign a title and tap on “ Save ”.
 4th step:
 Then open the folder, first tap on " Edit " in the upper right corner and then on the " + " symbol on the left . Now you can either create a new folder or a new album . You can find out how exactly you create a new album and adapt it to your requirements above . Unfortunately, you cannot add an existing album to the folder.
 Quick start guide: Sort photos into albums
- In the Photos app's album tab , tap the “ + ” symbol and select “ New album ”. Assign a name and tap on “ Save ”.
- Select all of the photos that you want to add to the album. Then tap on “ Done ”.
- To add a photo later , tap the large “ + ” symbol in the album overview , select the recordings and tap “ Done ” again.
- To remove photos again , open them in the large detail view , tap on the trash can and select " Remove from album ".
- Tap the three dots in the upper right corner and select “ Sort ” to choose whether the images should be sorted in your own order or with the oldest or newest image first .
- To manually adjust the order , tap Select and move an image as you wish. Alternatively, select multiple images and drag them to the desired location. Tap on " Cancel " to exit the view again.
Quick start guide: Sort albums
- In the albums tab under “ My albums ” tap on “ Show all ” to view all collections one below the other.
- To change the order of the albums, tap on " Edit " and drag albums to the desired position. Then tap on “ Done ”.
- Switch back to the main page of the Albums tab to create a folder . There tap on the " + " symbol and select " New folder ". Assign a title and tap on “ Save ”.
- Open the folder and tap first on " Edit " and then on the " + " symbol. Here you can create a new album or another folder . Unfortunately you cannot insert an existing album.