Snapchat has exploded in popularity in recent years. One of the reasons for this is the large number of filters. Filters and lenses are preset by Snapchat and change regularly. Geofilters are tied to a specific location. Both types of filters allow some degree of customization. If you want to know how to make your own Snapchat filter, learn more here.
Types of Snapchat Filters
Snapchat filters can be divided into two types: "normal" filters and geofilters.
"Normal" filters are those that are preset by Snapchat and rotate regularly. They typically range from effects that change the face to colorful backgrounds and effects that change the voice. Snapchat further divides these "normal" filters into two categories: filters and lenses. Snapchat views features like frames and sticker-like artwork as filters and "reality-enhancing" features like changing faces as lenses..
 Snapchat offers various filters, from simple overlays for your captured images to augmented reality.
 Geofilters are tied to a specific geographic location and can be used for both business and personal events. Again, Snapchat divides geofilters into two types: community filters and personal filters. Community filters are tied to a specific city, university, or local landmark and can be created and used by any user for free. Personal filters are those that relate to events such as birthdays, weddings, or business openings. However, these are chargeable. Personal geofilters are also limited in time and space. They can be active from 24 hours to 30 days and cover a geographic area between 20,000 and 5,000,000 square feet. The price increases according to these settings.
Create a Snapchat filter with Lens Studio
With Lens Studio, Snapchat has introduced a desktop app for Mac and Windows that can be used to create AR lenses and filters for snaps. Use a simple 3D tool like Vectary to create your 3D design, upload it to Lens Studio, and share it with the world via Snapchat. Follow our step-by-step instructions or take a look at the brief instructions ..
1st step:
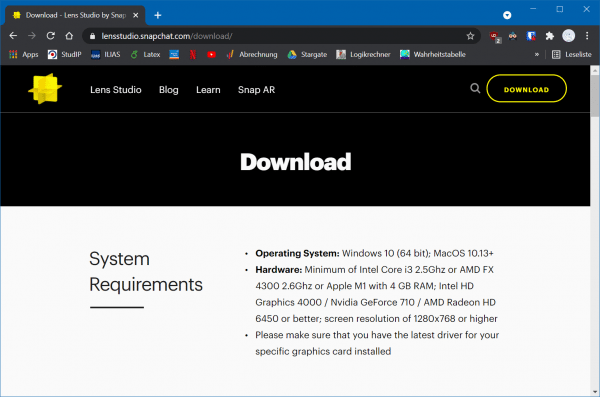 Download the Lens Studio from Snapchat on your computer and also sign up for Vectary . With this setup, you are now ready to create your own 3D design for your Snapchat lens.
 2nd step:
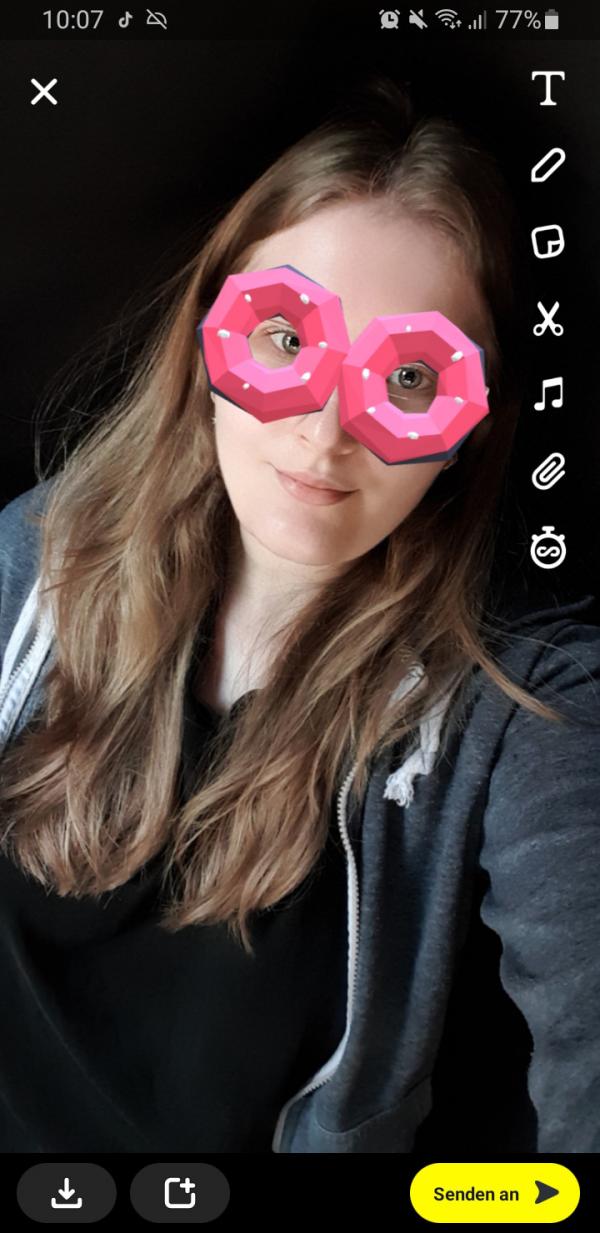
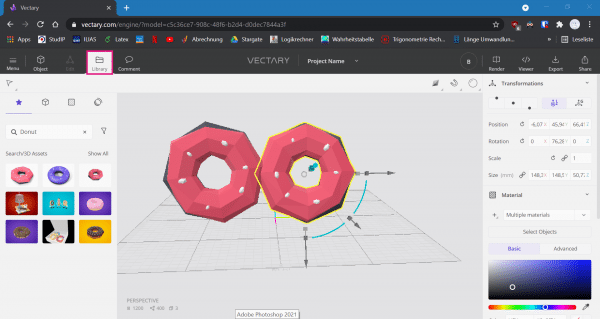 Then open Vectary in your browser and create your object there. For example, we're creating donut glasses here. The 3D object library in Vectary is full of objects that you can use to create your idea. Simply click on " Library " in the upper left corner and then search for the object you want. Then create the glasses by dragging and dropping the 3D donuts from the library and changing the colors and materials to your liking.
 3rd step:
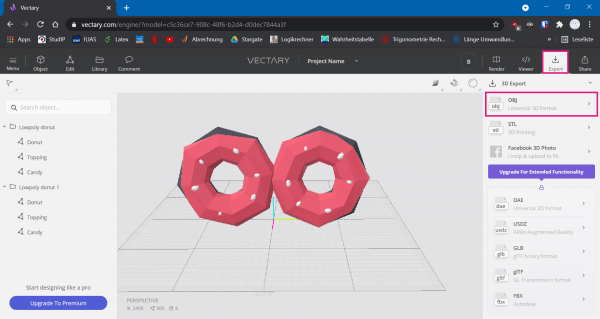 Then export your object as an OBJ file . This file type ensures a high level of import compatibility. To do this, click on " Export " at the top right and then select " OBJ ".
 4th step:
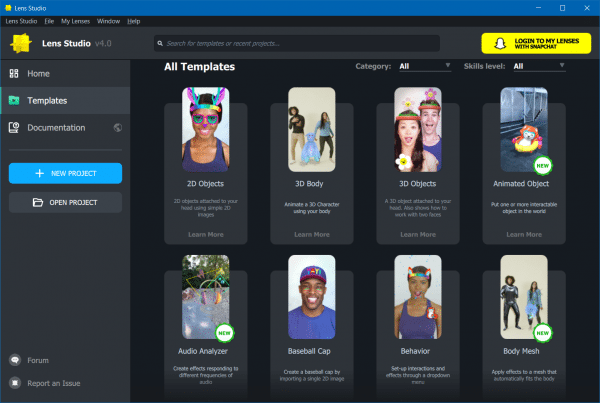 Now open Lens Studio and select a lens template - we choose the " Sunglasses " template here , as the mesh for sunglasses is exactly what we need for our Donut glasses.
 5th step:
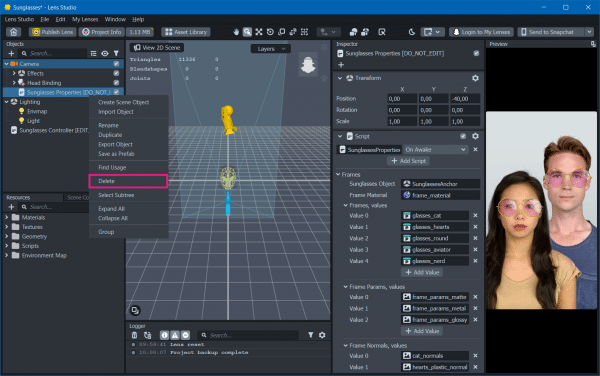 After the project opens, delete the original layer of the glasses. To do this, right-click on the desired level and then select " Delete ".
 6th step:
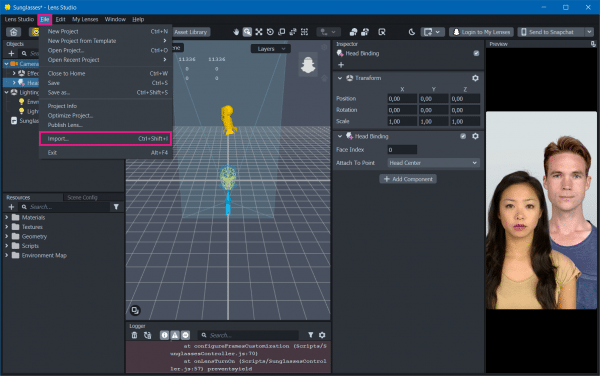 Now import your 3D object. To do this, click on " File " at the top and then on " Import " in the menu . Then select your OBJ file .
 7th step:
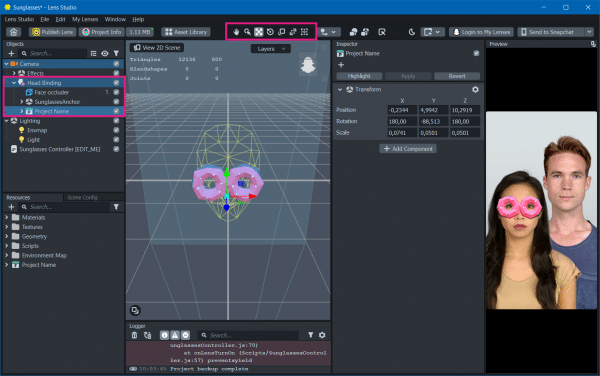 Now make sure that your object is on the correct plane . For sunglasses like the one in our example, this would be the " Head Binding " level. Then adjust the position and size of your object using the various buttons in the top center. You can see the exact placement in the preview on the right.
 8th step:
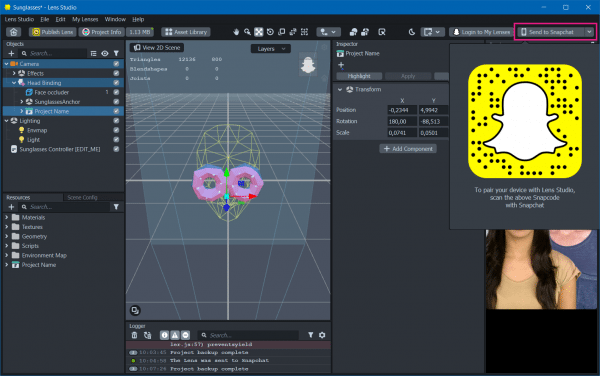 To test the lens now, pair your smartphone with Lens Studio. Simply click on the " Send to Snapchat " button in the upper right corner . A window with a snapcode opens .
 9th step:
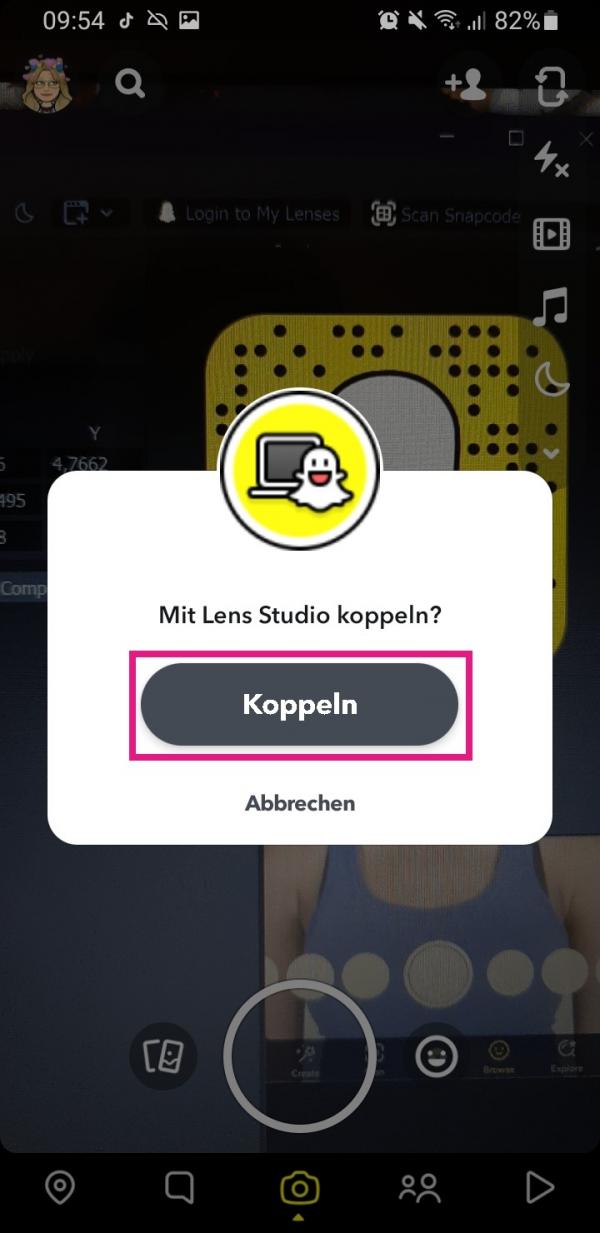 Now take your smartphone to hand and scan the code in Snapchat. Then tap on " Pair ".
 10th step:
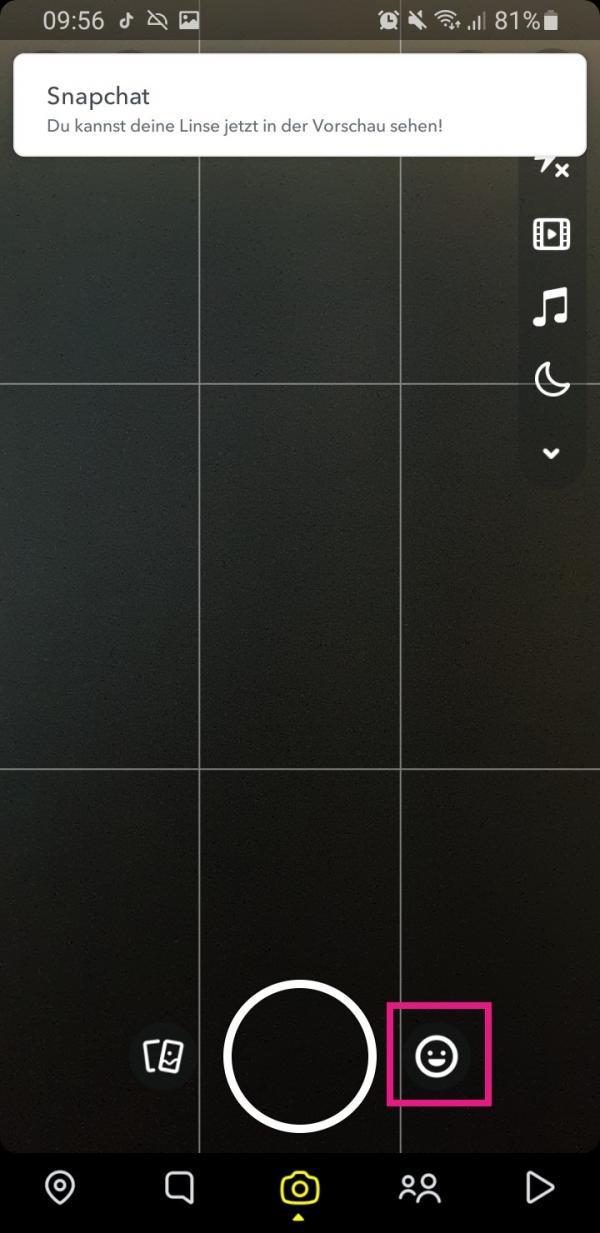 When the lens has been sent to your smartphone, you will receive a notification in Snapchat. Then just tap the smiley face next to the shutter button in the lower right corner.
 11th step:
 There you can now select your filter and use it.
 12th step:
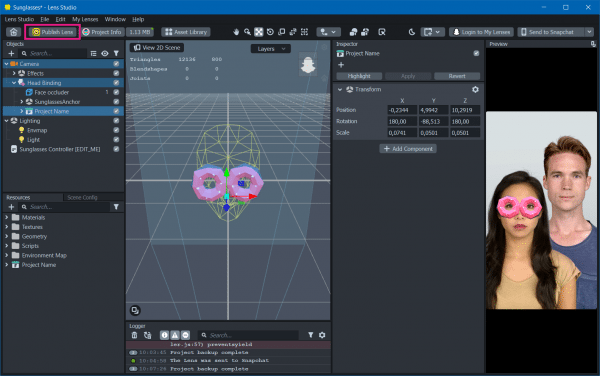 If you are satisfied and everything works, you can publish your filter and make it accessible to other users. To do this, click on " Publish Lens " in the upper left corner of Lens Studio . You will then need to sign in with your Snapchat account.
 13th step:
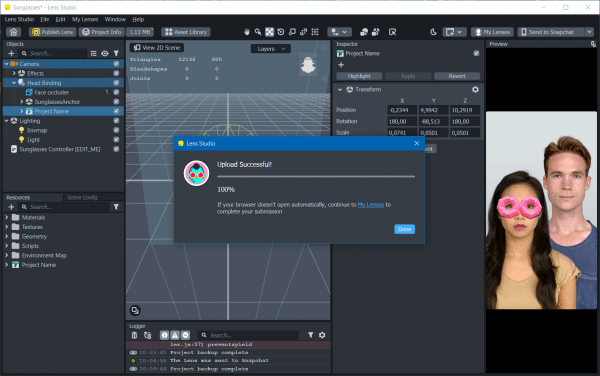 The filter is then exported and uploaded . The submission process is pretty straightforward, but it will take a day or two for the Snapchat team to review and approve your lens.
 quick start Guide
- Download and install Lens Studio: https://lensstudio.snapchat.com/download/
- Also, log into Vectary: https://www.vectary.com
- Then open Vectary in your browser. Now start a new project here and create your object. If you click on " Library " in the top left , you can search for the objects you want to use for your filter.
- By dragging and dropping the 3D objects you are using, you can customize and modify your desired object.
- Then export your object as an OBJ file when you're done. To do this, click on " Export " at the top right and then select " OBJ ".
- Then open Lens Studio.
- Now select a lens template . Depending on the object you created and the function, you need to choose the right template. For example, if you want to create glasses, you should also select the glasses template here.
- After the project opens, delete the object's original layer. To do this, right-click on the desired level and then select " Delete ".
- Then import your 3D object. Click on " File " at the top and select " Import ". Then browse for your OBJ file and select it.
- Then move your object to the correct layer , ideally this is the layer from which you previously deleted the original object .
- Then adjust the position and size of your object using the various buttons in the top center. The preview on the right will help you to set the correct position.
- When you're done, you can test your filter in Snapchat . Simply pair your smartphone with Lens Studio by clicking on " Send to Snapchat " in the upper right corner and then using your smartphone to scan the code in Snapchat.
- Then tap on " Pair ".
- You can now see the lens you created by simply tapping the smiley face next to the shutter button in the lower right corner.
- Then select your filter.
- If everything works, you can publish your filter to Lens Studio by clicking " Publish Lens ". It may take a few days to review and approve your filter.