Gmail is the email platform developed by Google in which we find numerous functions and configuration options thanks to which it will be possible to customize both the environment and the features of Gmail according to our taste . This email platform allows us to send and receive emails although in this process we can find more or less complex features..
One of the tasks that Gmail allows us to do which has the mission of creating a more active interaction between the user and some object to which to add hyperlinks. We know that a hyperlink is an internal link that can redirect us, when we click on it, to a website, another place in the document or an email address.
In addition, to add more professionalism to our emails generated in Gmail, we can insert a hyperlink in some image that we add within the mail field. This allows us to click on the image to go to the desired website . TechnoWikis will explain through this tutorial how we can insert a hyperlink into an image in Gmail. The first step we must take is to go to the following link and log in with our Gmail account:
Gmail
To perform this task we have some options that we will analyze in detail..
To keep up, remember to subscribe to our YouTube channel! SUBSCRIBE
1. Insert hyperlink in image with drag and drop in Gmail
Step 1
For this option, we proceed to create a new email by clicking on the “Compose†button and then add recipient, subject and body of the message, after this, we click on the “Insert photo†button located at the bottom of the email to be written :

Step 2
The following window will be displayed:
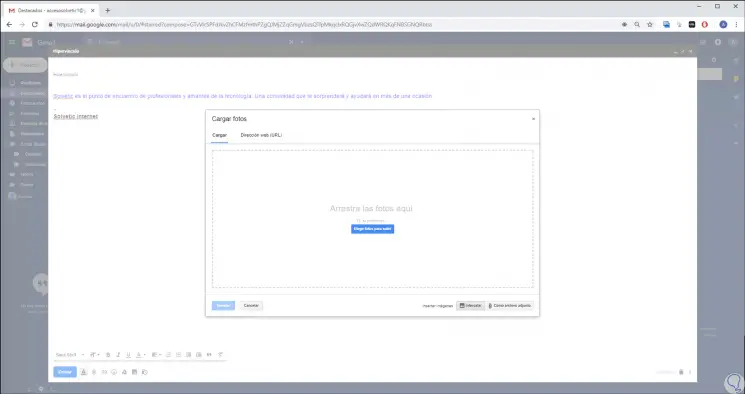
Step 3
There we can directly drag the image or click on the "Choose photos to upload" button which allows us to search the image manually. Once we use the desired method, the image will automatically be inserted into the body of the written message:
Step 4
If we click on the image, a series of options will be displayed regarding the appearance of the image:
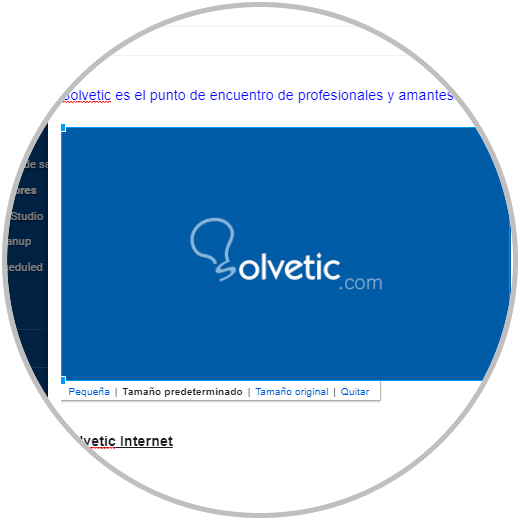
Step 5
We proceed to select the image by clicking on the right side of the image and using the Shift key and the arrow keypad select the image until it looks blue:
.
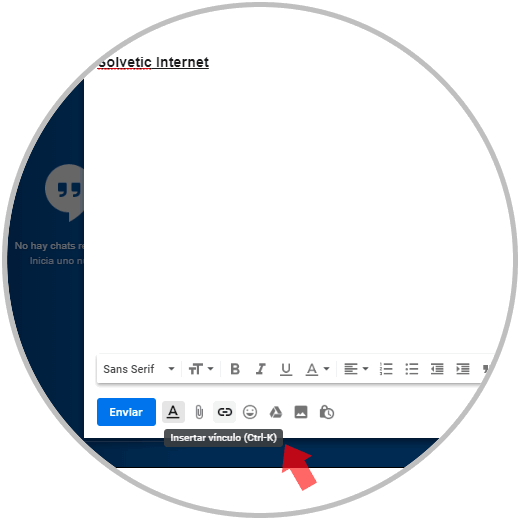
Step 6
Once the image is selected, we will click on the “Insert hyperlink†icon, or we can use the following keys, located at the bottom:
+ K Ctrl + K
Step 7
By clicking on this button we will configure the following:
- First, we can customize the text that will be displayed when you hover over the selected image.
- We can define whether the hyperlink will be to a website or to an email address.
- We add the desired URL or email address as appropriate.
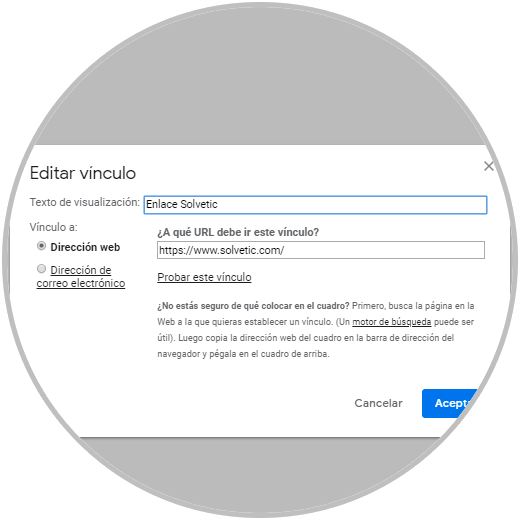
Note
We can click on the “Test this link†line to validate that the link works correctly.
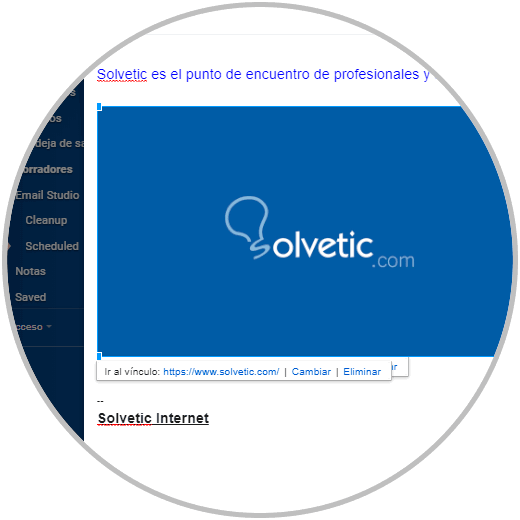
Step 8
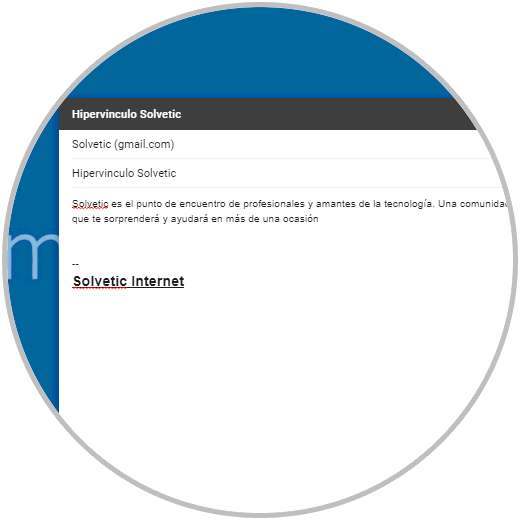
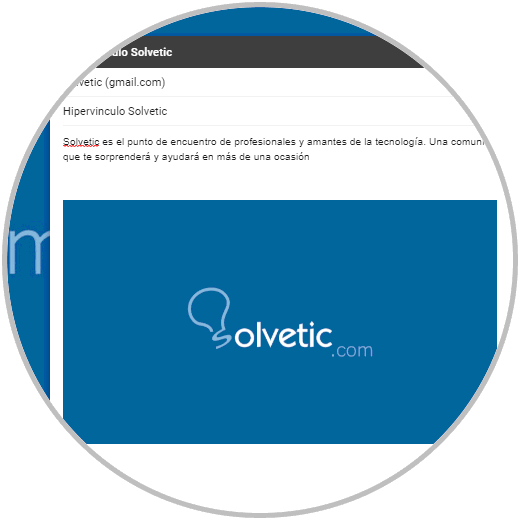
Click on "Accept" to save the changes, if we click on the image we can see at the bottom of this the respective link that we have defined:
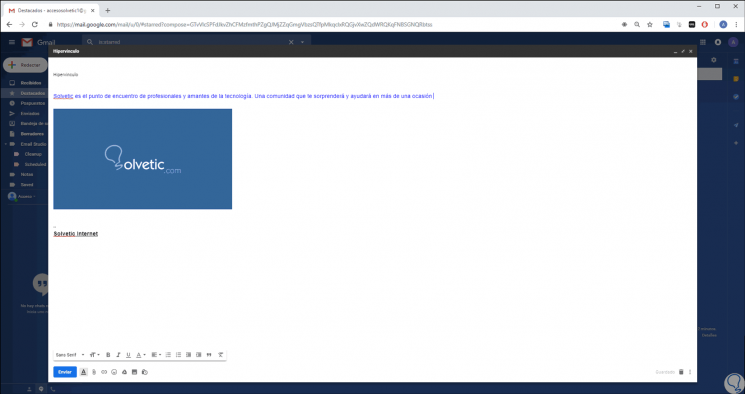
Step 9
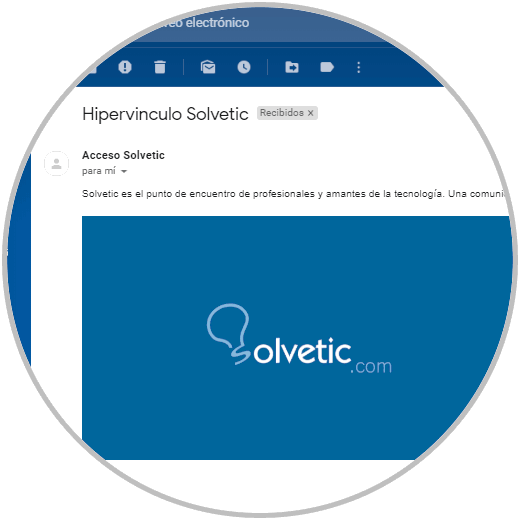
We proceed to send the email to the recipient. Now, when the recipient receives the mail you will see the following:
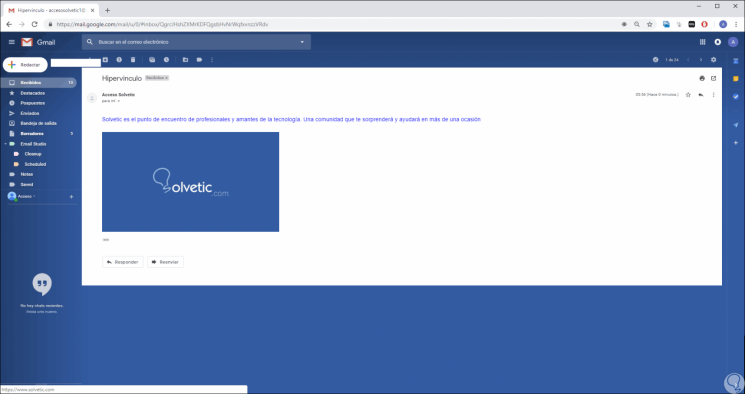
Step 10
There you must simply click on the image to be redirected to the link specified above:
2. Insert hyperlink into an image using Drive from Gmail
Step 1
This method applies when it is not possible to insert an image using the previous method, first, we proceed to write the email indicating the recipient, subject and body of the message:
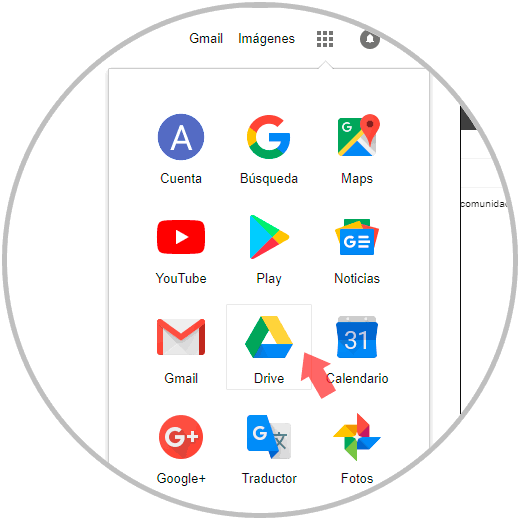
Step 2
The next step is to configure the link to an image publicly, for this we click on the general Google menu and select Drive:
Step 3
In the displayed window we click on the "New" button and select the "Folder" option:

Step 4
We assign a name to the new folder:
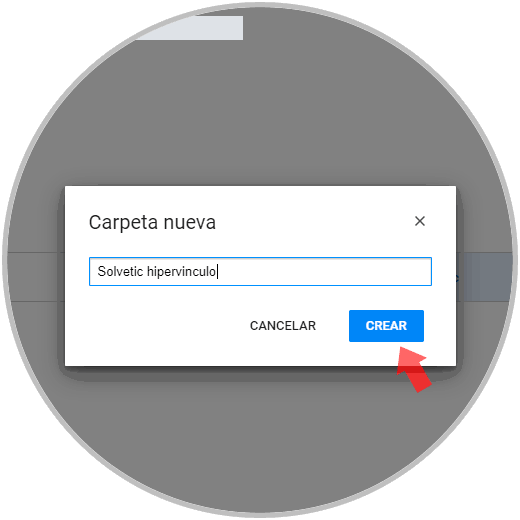
Step 5
Click on "Create" to continue the process, and now we will right click on the new folder and select the "Share" option:

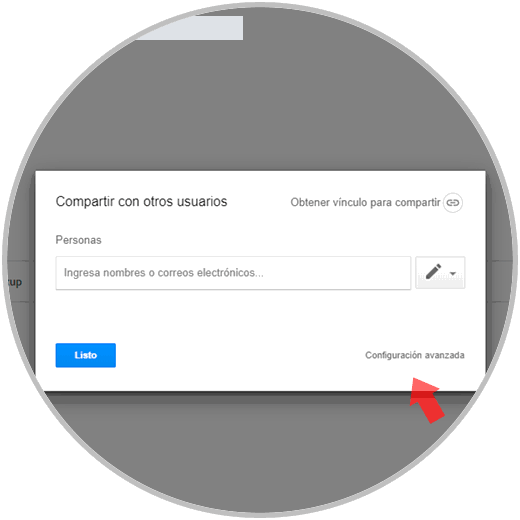
Step 6
In the displayed window we click on the “Advanced configuration†line:
Step 7
There we will see the following:
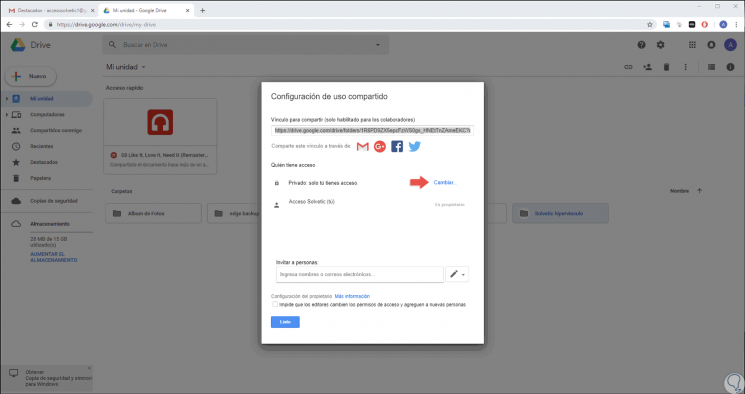
Step 8
As we see, only our account has the permissions of that folder. There we click on the “Change†line and in the new options displayed we select the option “Activated: any user with the linkâ€:

Step 9
Click on "Save" to apply the changes and check that they have been applied:
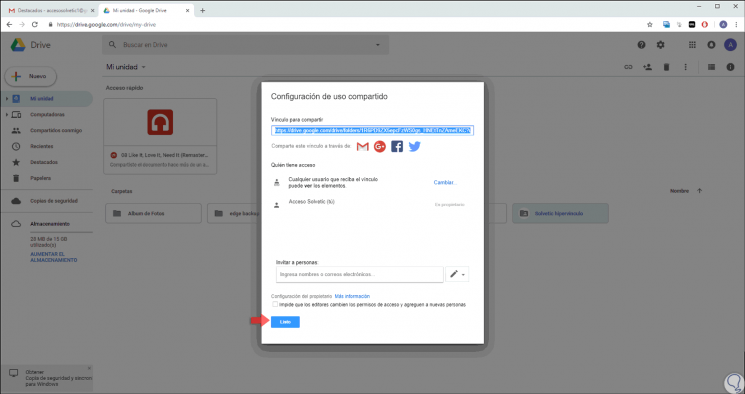
Step 10
We click on the "Ready" button to exit the wizard. Next, we access the folder, right click somewhere free and select the option “Upload filesâ€:
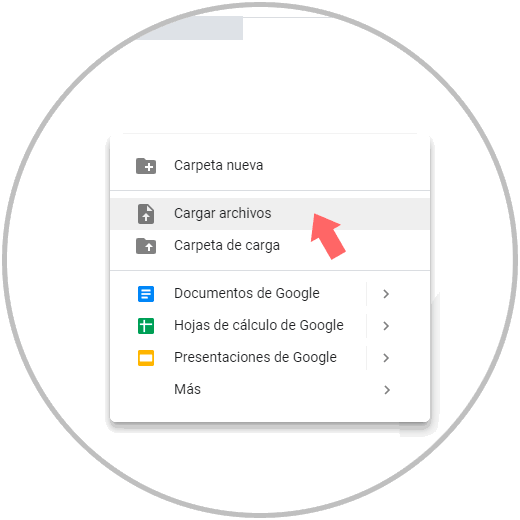
Step 11
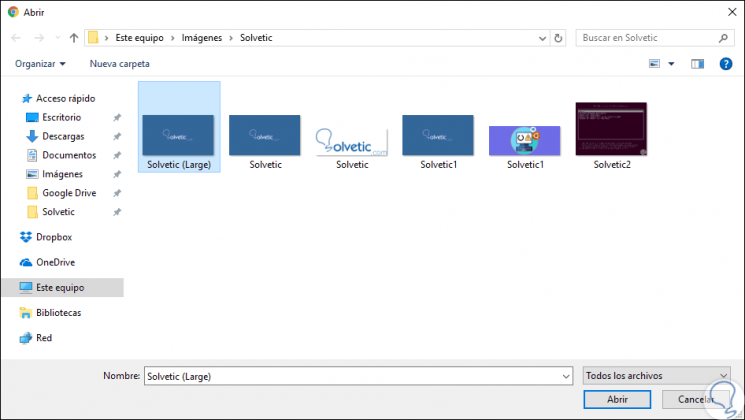
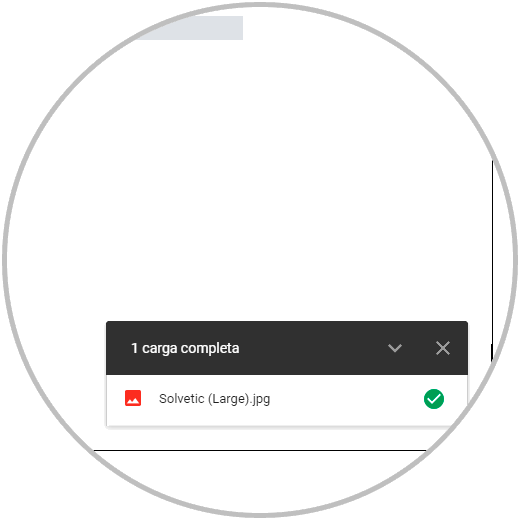
In the displayed window we select the image to upload. Click on "Open" to complete the process and load this image into Drive:
Step 12
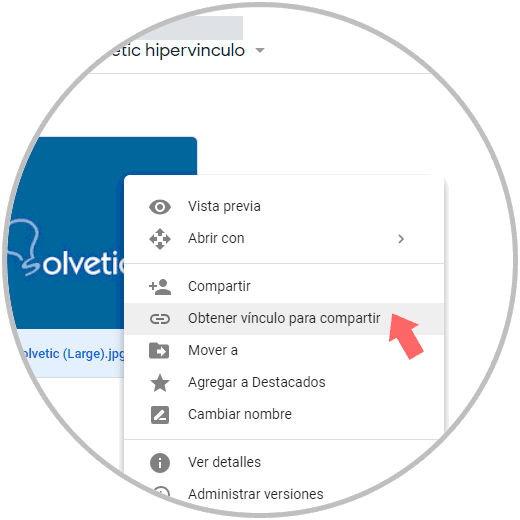
Now we will right click on the image to share and select the option "Get link to share":
Step 13
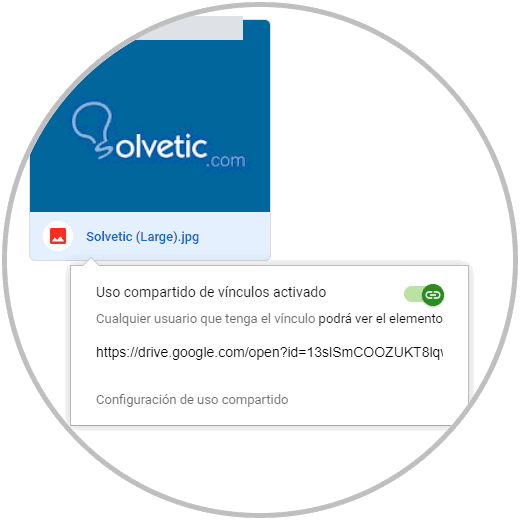
When doing this we will see the link created by Drive:
Step 14
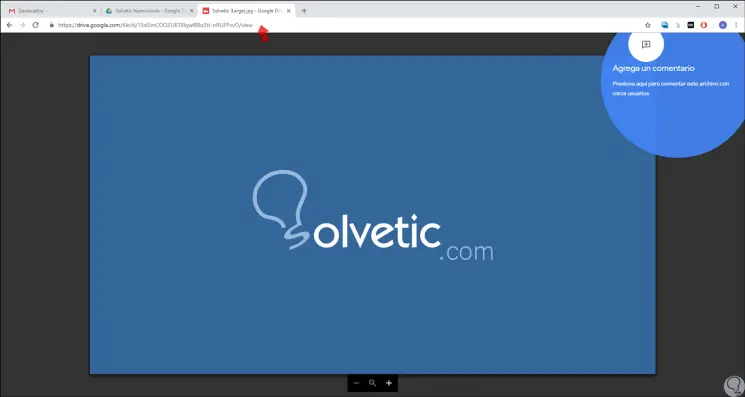
The link is automatically copied to the clipboard and we can paste it into a new window to validate that it really associates the selected image:
Step 15
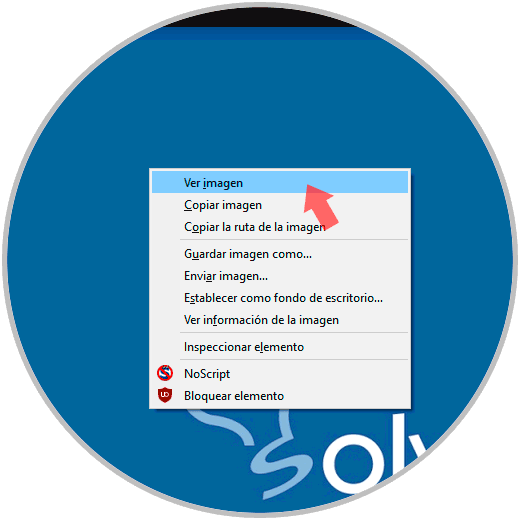
It is recommended to open this link in Firefox to see the image URL, for this we right click on it and select “View imageâ€:
Step 15
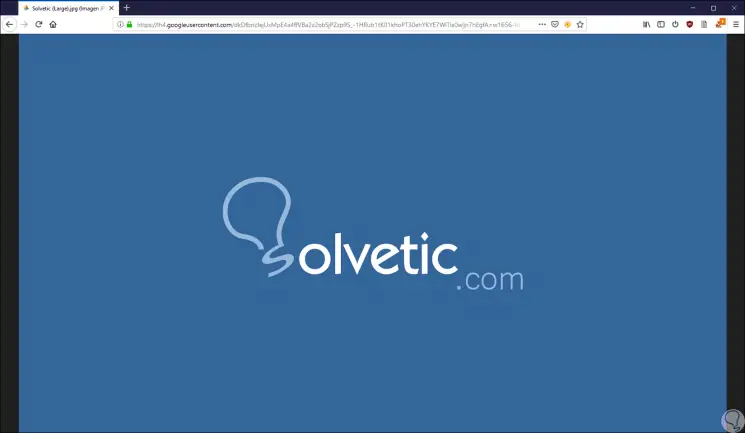
When doing this we will see that a new URL associated with the image is created:
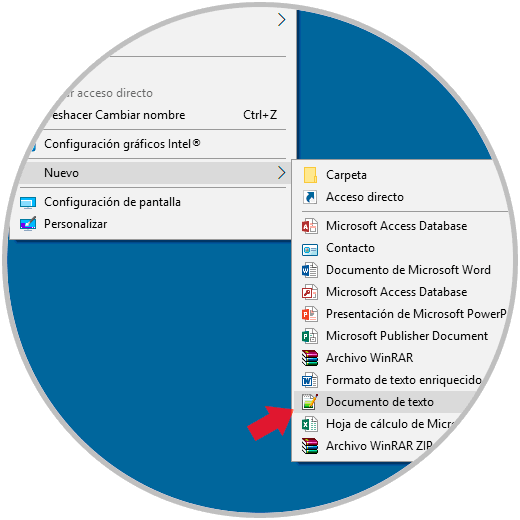
Step 16
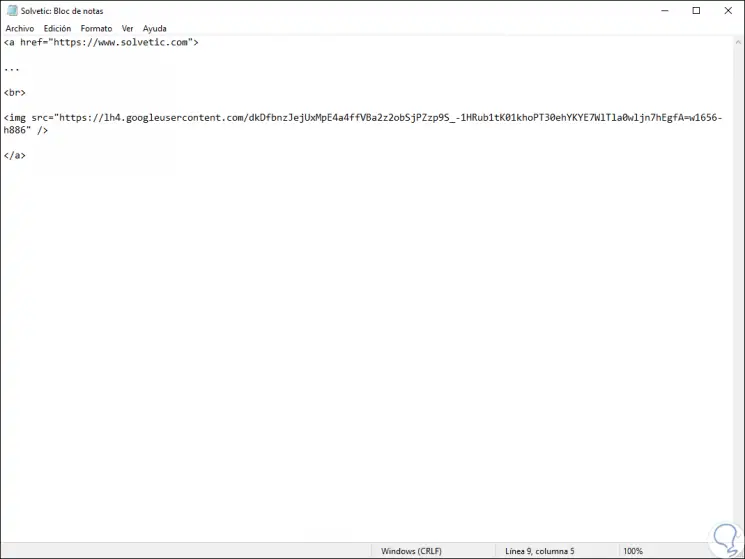
We copy the URL of this image and now we are going to create a simple HTML page, for this we go to the desktop and select the option “New / Text documentâ€:
Step 17
There we assign a name to this file and proceed to its opening, in the document we enter the following:
<a href="https://www.solvetic.com"> ... <br> <img src = "https://lh4.googleusercontent.com/dkDfbnzJejUxMpE4a4ffVBa2z2obSjPZzp9S_-1HRub1tK01khoPT30ehYKYE7WlTla0wljn7hEgfA=w1656-h886" / </a>
Step 18
There the following has been specified:
- URL to which the hyperlink will redirect
- Link of the image created in Drive
Step 19
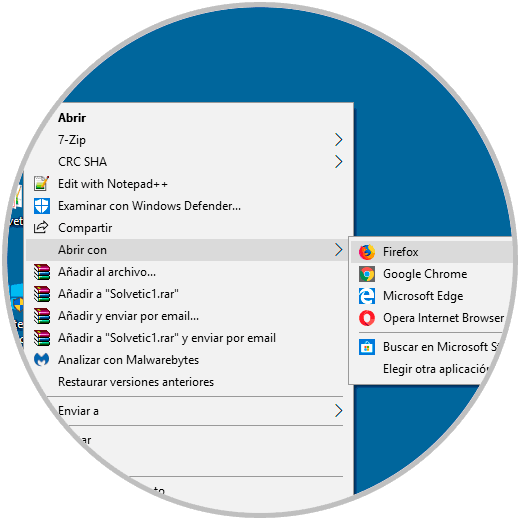
We proceed to save the changes and we must remember that the extension of this file should be.html, then we will close the notebook. Next, we will copy and paste the HTML file into the email to be created, for this we right click on the HTML file on the desktop and select the option “Open with†and select the browser to use:
Step 20
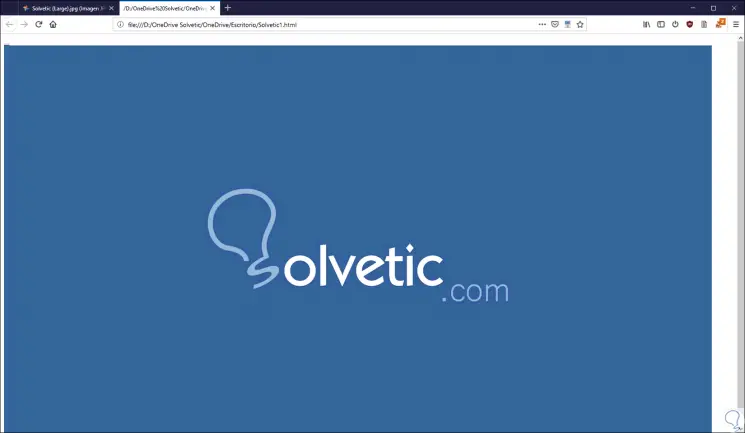
We can see that the image is displayed correctly:
Step 21
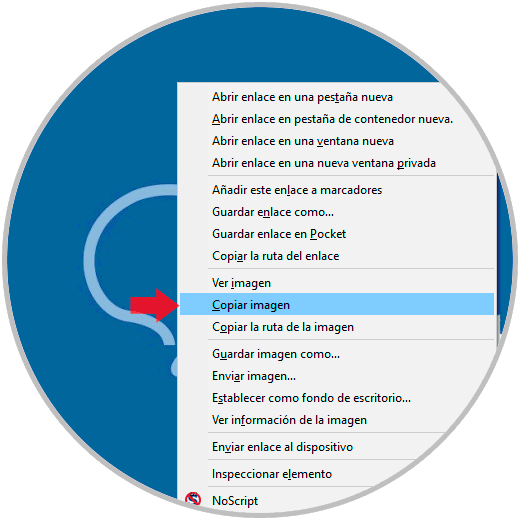
We right click on the image and select the “Copy image†option:
Step 22
With the copied image we go to the mail and there we paste it:
Step 23
We proceed to send the email and the recipient will receive the following:
Step 24
There you can click on the image to be redirected to the website specified in the HTML file:
In this way we have learned to insert a hyperlink in an image for all emails in Gmail.