Microsoft Office is one of the most used office suites around the world for its various features of both editing tools and integrated functions and data management. When we buy an Office license , in this case we talk about the 2016 or 2019 version, this is set to a default language, but we must know that Office is available in multiple different languages, and even many regional languages ​​of some countries are also found available for Microsoft Office..
The interface language does not always have to be related to the corrective language of our text editor since we can speak in one language, but write in a different one. When working with text, it is advisable to rely on the proofreader to minimize possible errors and that is why having a well-configured language is vital for a good analysis.
We will learn through this tutorial how to change the language of Microsoft Office. This process applies to both the 2016 and 2019 editions..
To keep up, remember to subscribe to our YouTube channel! SUBSCRIBE
1. How to change the interface language in Word 2016 or 2019
Step 1
Microsoft Office has three different areas where the language can be modified manually to another language, these three areas are:
Step 2
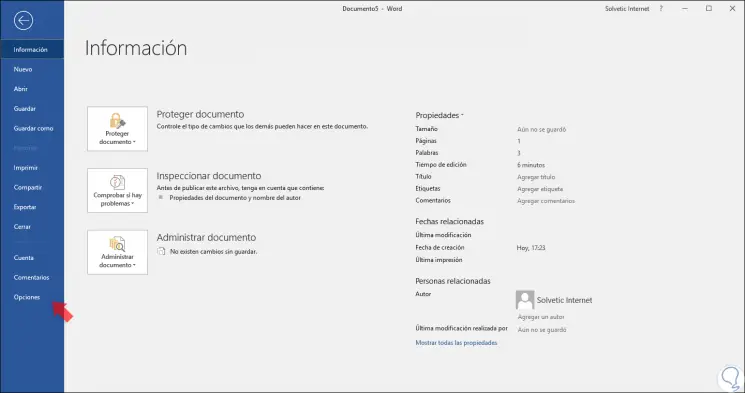
The natural thing is that both the user interface and the editing area are with the same language, but some users can use different languages ​​according to the needs of each one. To verify this, we go to the File menu and there we see the Options line at the bottom:
Step 3
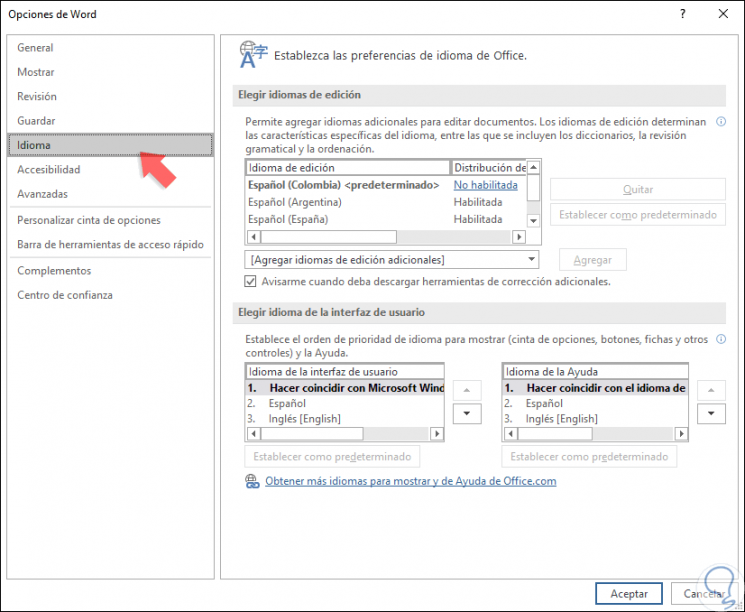
Clicking there will display a pop-up window and there, in the "Language" section, we can see one or more available languages ​​to be configured in Microsoft Word:
Step 4
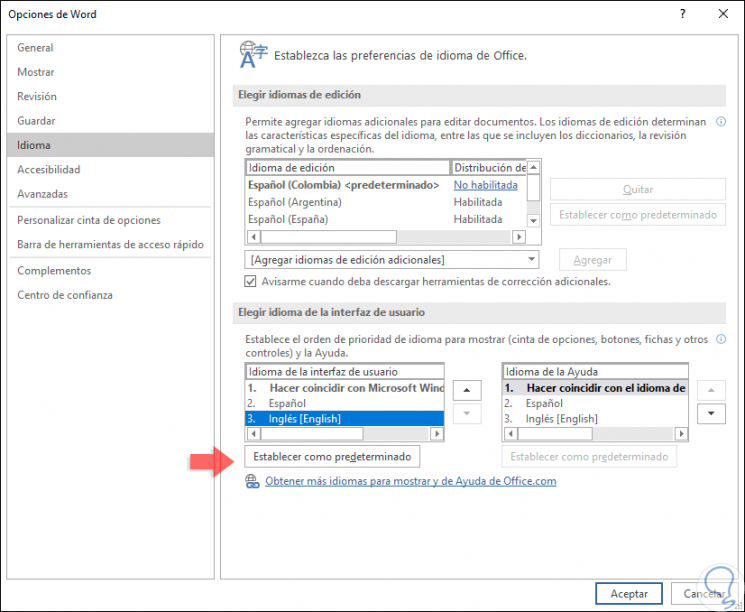
In the "Choose user interface language" section we can change the language level and leave the language to use at the top or we can also click on the "Get more languages ​​to display" line to select new languages.
At the top we find the section “Choose editing languages†where we can also select one of the available ones or click on the “Add†button to add new languages ​​if necessary. In case we want to edit our language in one of these two sections, Edit or Interface, just select the new language and click on the “Set as default†button:
Step 5
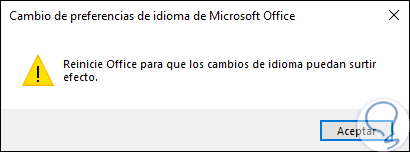
Click on OK to apply the changes and the following will be displayed:
Step 6
Click on the Accept button and we must restart Word to apply the changes and once we access Microsoft Word 2016 or 2019 we can see the new language selected. In this case we have changed our Word from Spanish to English.
2. How to change the correction language in Word 2016 or 2019
Another option to change the language in Word 2016 or 2019 is directly from the menu, in this case we will leave Word in the English language.
Step 1
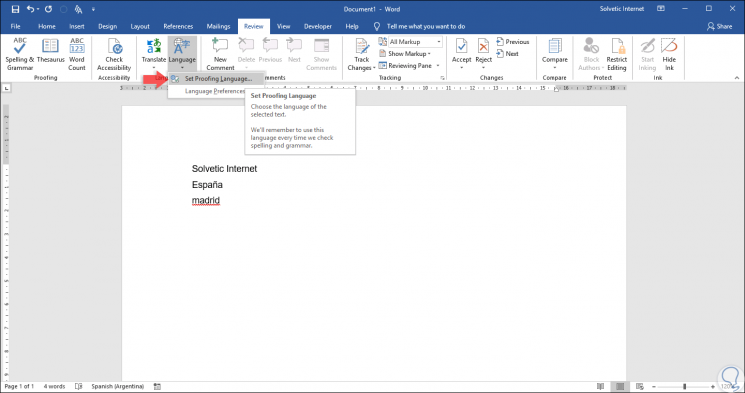
To use the menu in Word in order to set the correction language, we will go to the Review menu and in the “Comments†group click on “Language†and select the “Set Proofing Language†line:
Step 2
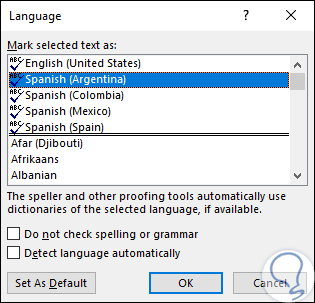
The following pop-up window will be displayed:
Step 3
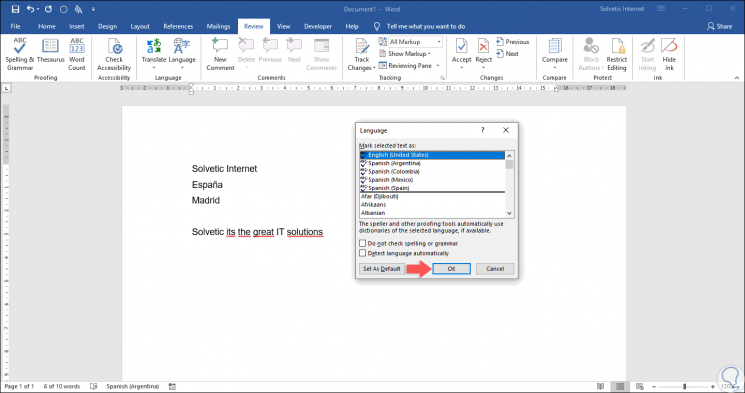
There we can define the language in which the text is selected in the Word document. As an example, the default is Spanish, we enter a text in English and we can see that the sign that it is a spelling error appears. Then we go to the option indicated above and there we will select the English language:
Step 4
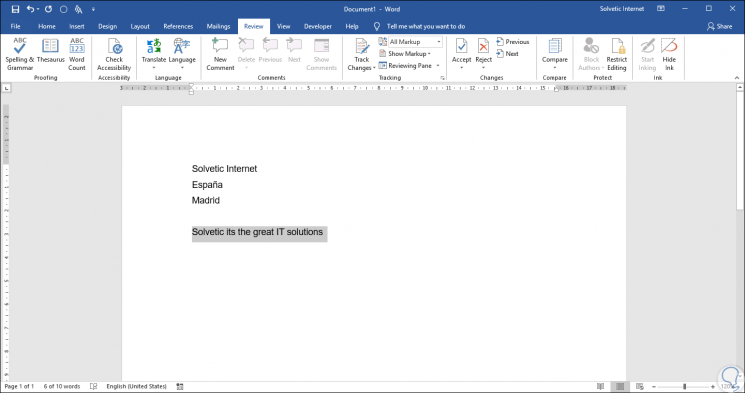
By clicking on the Ok button, we can see that the changes are applied automatically and the error in the English words disappears:
Step 5
Something to keep in mind are the options available from this language option such as:
- Detect the language automatically which analyzes each word and corrects it based on the written language.
- Do not check grammar or spelling which omits all errors that may be present.
With this simple method, we can edit the language of Word 2016 or 2019 as well as its correction options as necessary. This way we can configure in a personalized way which language will appear in the interface and which one in the proofreader in Word 2016 or 2019.